
Transcript: Social media would be pretty boring if no one knew how to create social media graphics. But since we live in a world full of graphics, it’s very important that your business uses them in your social media posts. Social media is a very visual platform. In fact, Instagram is a social media platform devoted to visuals. On Facebook, posts with images get over two times the engagement as posts without images. Looking at Twitter, tweets that include images get a lot more engagement in terms of clicks, favorites, and re-tweets. In one study, retweets increased 150% when an image was used. I get it, though.
Those stats are great, but if you’re not a designer, creating social media graphics can seem like a challenge. Have no fear, WebFX is here to tell you how to create your own social media graphics. I’ll go over some valuable tools you can use, some tips, and I’ll also show you social media graphic examples along the way. Let’s go! First things first, you need to know what you can use to make them. If you’re more experienced with creating graphics, you might be familiar with paid tools like Adobe Illustrator and Photoshop.
These are packed full of awesome tools, but they can be a little daunting if you don’t have any sort of design training. Adobe does offer a free graphic creation tool called Adobe Spark that offers different design templates so you can quickly create social media graphics, so this might be a good option for a beginner. 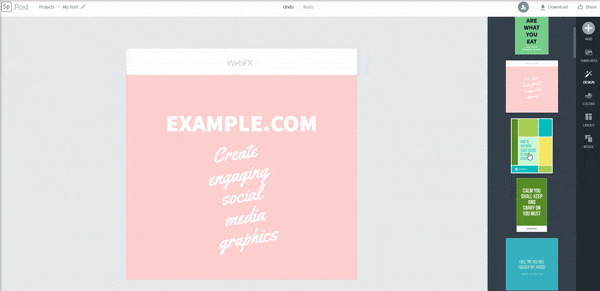 Outside of the Adobe realm, a really popular and free graphic design tool is Canva. Canva has so many different features to help you create professional graphics. Like Adobe Spark, Canva has a bunch of different social media templates available to you. And you can also search through libraries of free images to spice up your content.
 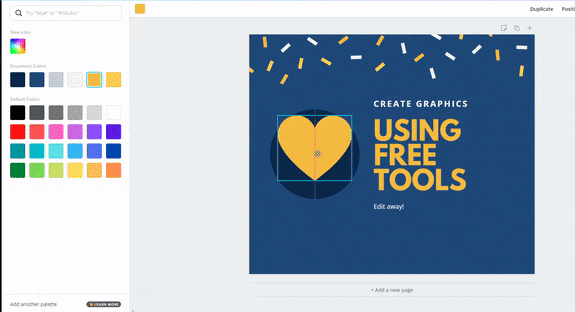 Both Canva and Adobe Spark offer paid plans, but if you’re not ready to invest quite yet, the free plans should be more than enough to help you achieve your graphic goals. If you prefer to find free images on your own and bring them into your graphic editing software, sites like Pixabay, Pexels, and Unsplash offer free images and graphics in nearly every category.
So if you need a picture of a dump truck, you can probably find a free one. Keep in mind that these are popular sites, so if you find an image you really like, it’s possible that another business like yours also found that image. Sometimes it might be worth it to take your own photos…and this adds a nice personal touch. Just be sure what you’re grabbing is royalty-free and available for commercial use. You don’t want to get yourself into any legal trouble.
This means stay away from Google search for images. Most of those are not free to use for your business. Okay, so now that we’ve gotten through the tools, it’s time for the tips.
Here are 5 tips for how to create social media graphics that pop.
1. Use the right image size for the social media platform.
You want your graphics to fit the space they’re in, right? Then pay close attention to the dimensions of what you create. For example, Instagram feed images work well as a square. According to Instagram, if you share an image with a width from 320 to 1080 pixels and height from 566 to 1350, they won’t need to alter the image resolution. But if you want to share something specifically as an Instagram story, a graphic that’s 1080 by 1920 pixels is a good choice. If you’re using a tool like Canva, you can easily choose what type of social media graphic you want to design, and it will size the canvas for you automatically.
These dimensions can often change, so you’ll want to make sure you research the appropriate sizes before you post.
2. Keep your brand in mind when choosing colors, fonts, and other design elements.
Do you have specific brand guidelines you need to follow? If so, your social media graphics should fall in line with them. First, you should definitely try to include your logo in your graphics. Whether it’s the main feature or just in the corner, having your logo somewhere on your social media posts will get more eyes on your brand. Most companies also have a specific color scheme they use in all of their branding. If there’s a font you use consistently for your business, you should consider using it when you incorporate text into your social media graphics. Combining all of these elements will help you create a cohesive brand so that when people see your social media graphics, they associate it with you before even realizing it’s you.
3. Keep your graphic designs simple.
You do want your social media graphics to be eye-catching, but you don’t want them to be too complicated. Don’t overuse text. The great part about posting to social media is that you have the opportunity to share a graphic along with a text update, so you’ll want to keep the blocks of text out of your graphic.
So say you want to post about a new position you want to fill at your company. Instead of packing the graphic with details about the position, you can use a phrase like “We’re Hiring” or “Job Alert,” maybe include the position title, and direct people to read the text status with the image. You can even shorten the written portion and direct people to the actual job posting or your website.
Alternatively, if you’re a water treatment plant using social media, a graphic explaining how plants like yours work should include some text, like stage names, but not a written explanation of each stage. Let the images speak for themselves!
Don’t use too many design elements.
If you include a bunch of shapes, text, and icons, your design can start to feel cluttered and unreadable. Use what you need to get your point across, but don’t go crazy.
4. Choose your colors wisely.
Coordinating your colors can help make your graphics easier to read. If you have set brand colors you want to stick to, then you might not have as much flexibility with color, but if you don’t have a set of colors to follow, there are a lot of different options to choose from. First, colors can convey emotion. Red can mean excitement or passion, blue can have a calming effect, white can communicate minimalism and simplicity, and black can convey sophistication or luxury. Second, make sure your colors work well with each other. Using dark brown text on a black background isn’t exactly going to look pretty. Our color picker tool can help you choose colors that work best for your business. 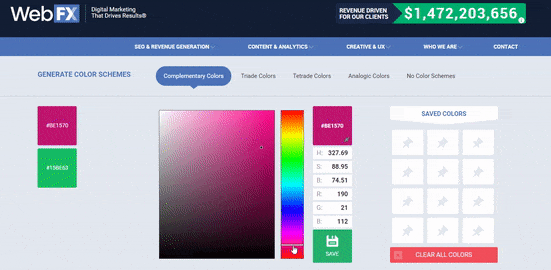 For example, you can select two complementary colors to use in your social content.
Complementary colors sit across from each other on the color wheel. Our color picker will help you figure that out.
5. Use actual images of your business in your graphics.
People on social media LOVE to see what your business is up to. While it may not always be possible to take the time to get photos of your business, it’s definitely a worthy investment of your time. Hiring a photographer will probably get you some amazing photos, but it’s not always the most affordable or practical option. The solution? Grab a phone and start snapping!
Smartphone cameras are pretty solid in terms of quality, and you can easily spruce them up when you’re making your graphics. If you upload your picture to Canva, you can add filters and adjust the brightness, saturation, and more in addition to the graphic elements you can add. 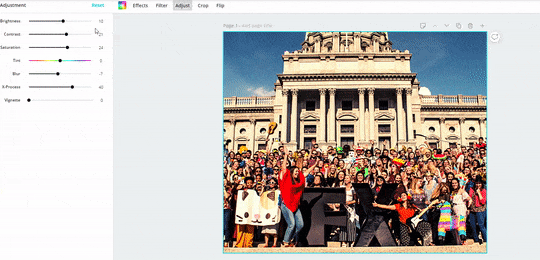 Getting personal can really make a difference. So those are my five tips for how to create social media graphics. If you have any graphic design tips, drop them in the comments! And subscribe to our YouTube channel for digital marketing content every week! See you next time!
-
 Jessica is a Google Analytics certified Digital Video Analyst at WebFX. She has created over 100 videos for the WebFX YouTube channel (youtube.com/webfx) in the last two years. Jessica specializes in video marketing and also loves content marketing, SEO, social media marketing, and many other aspects of digital marketing. When she’s not creating videos, Jessica enjoys listening to music, reading, writing, and watching movies.
 -

WebFX is a full-service marketing agency with 1,100+ client reviews and a 4.9-star rating on Clutch! Find out how our expert team and revenue-accelerating tech can drive results for you! Learn more
Twitter and Facebook Status Generator
Finding engaging social media content for your business can be difficult. Use our tool to quickly find ideas and post directly to your page.
Give Me an Idea
Share this article

Social Media Cost Calculator
Use our free tool to get a free, instant quote in under 60 seconds.
View Social Media CalculatorTwitter and Facebook Status Generator
Finding engaging social media content for your business can be difficult. Use our tool to quickly find ideas and post directly to your page.
Give Me an Idea


