
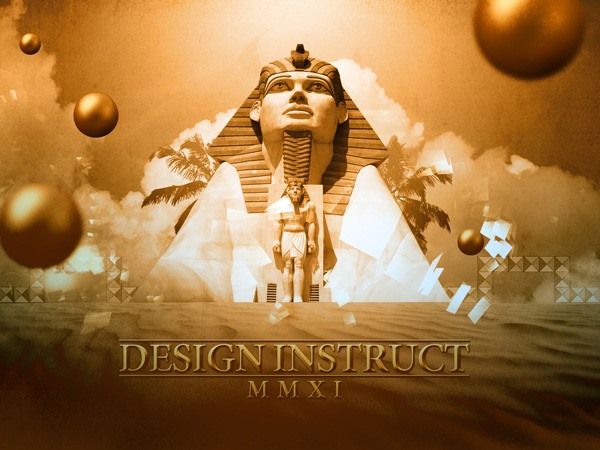
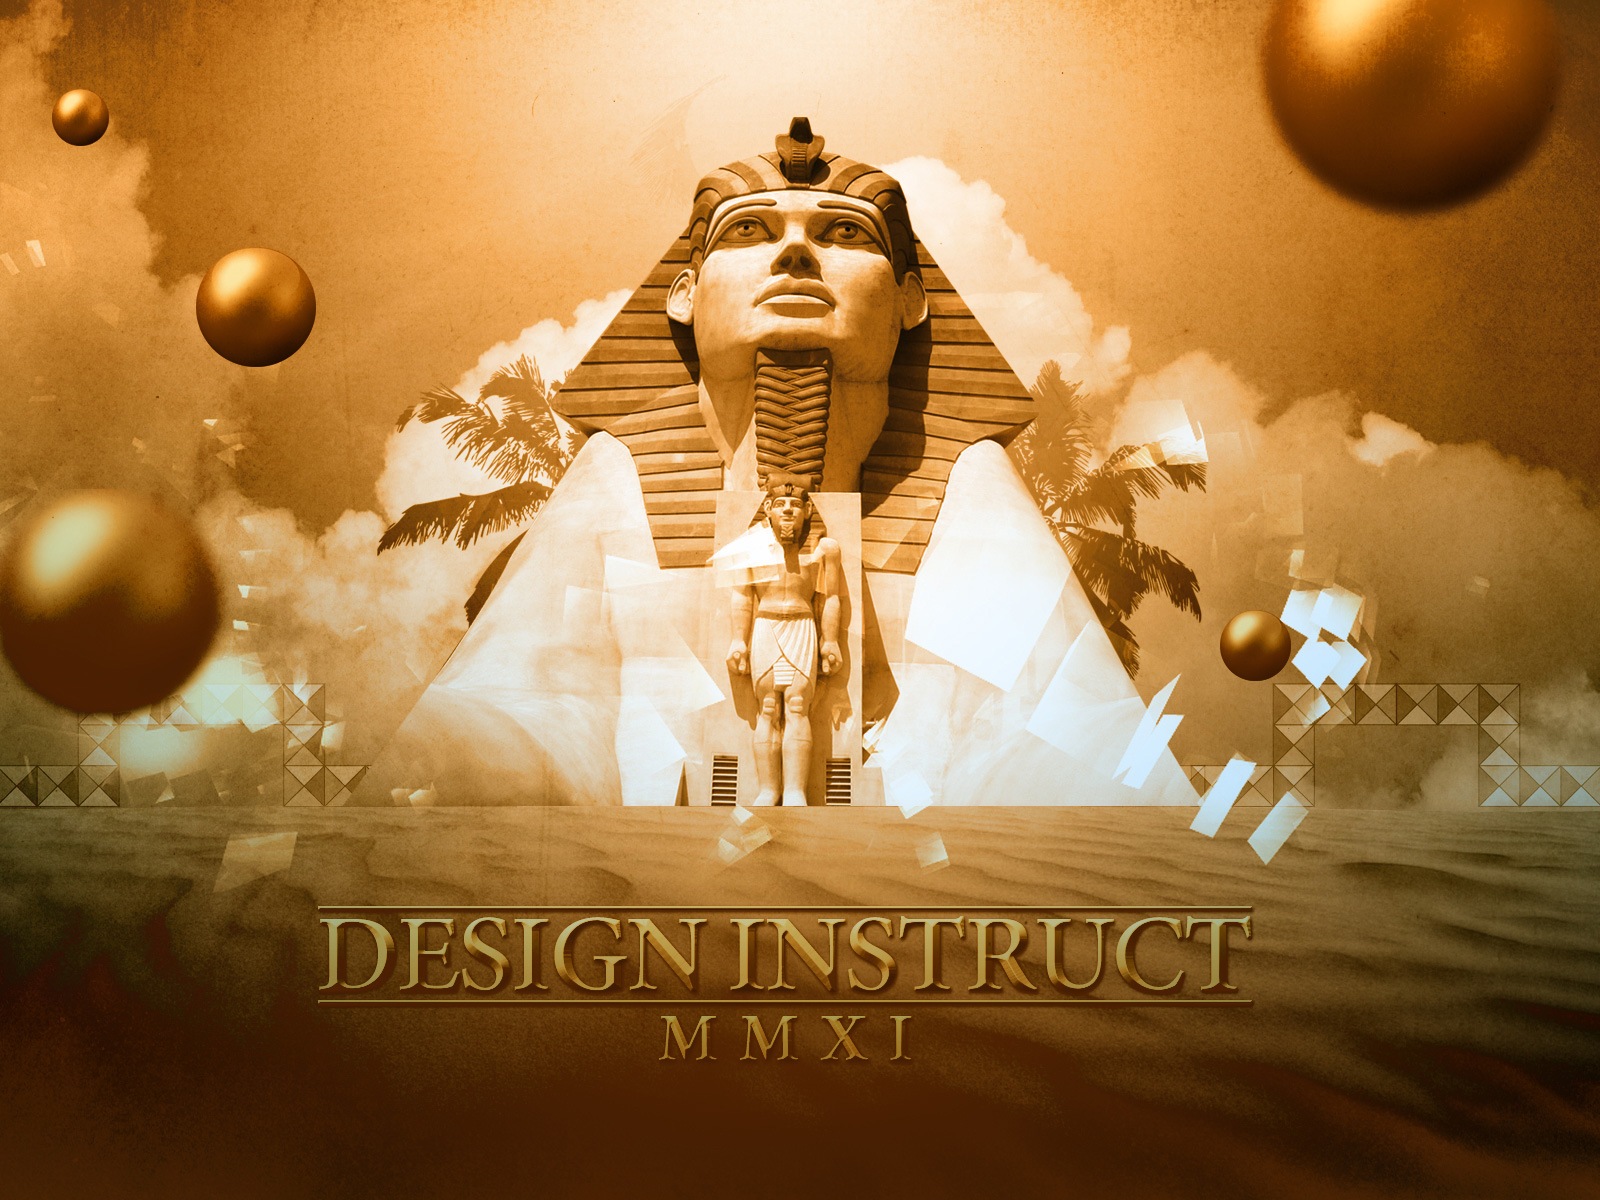
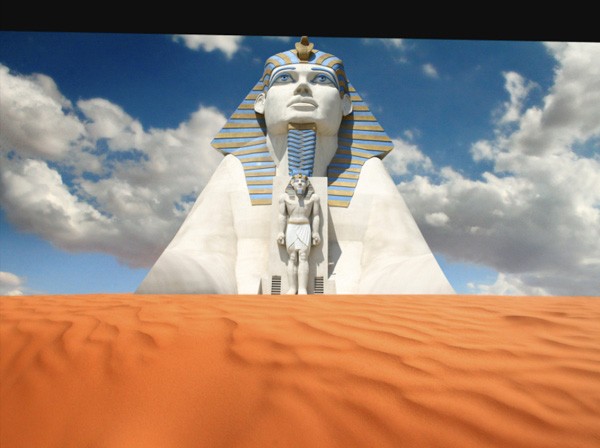
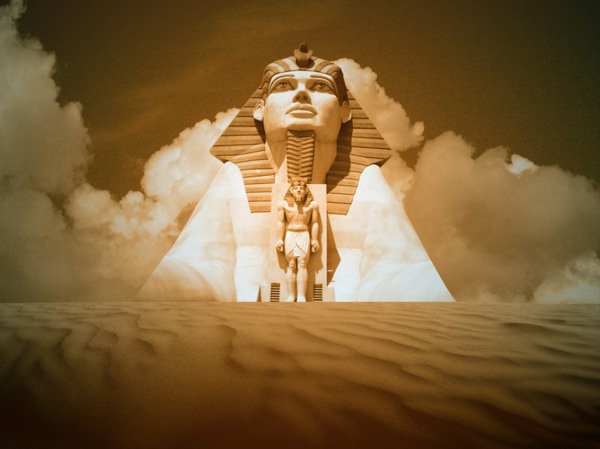
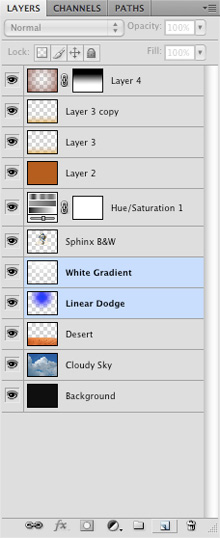
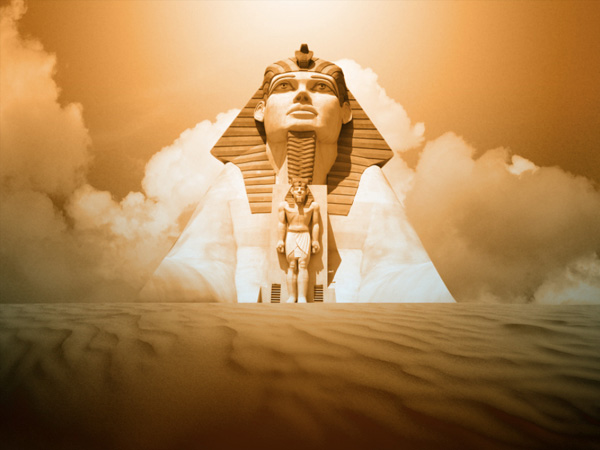
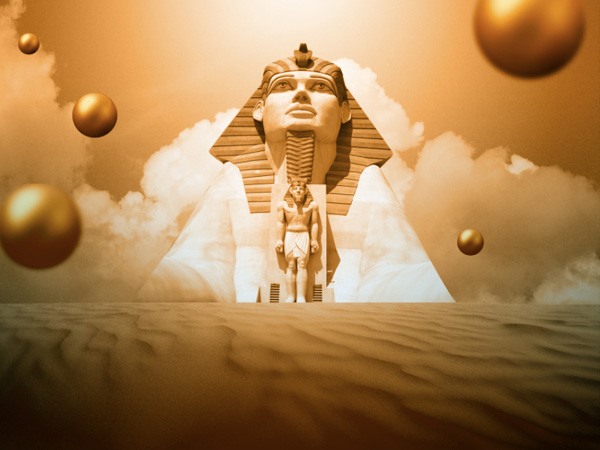
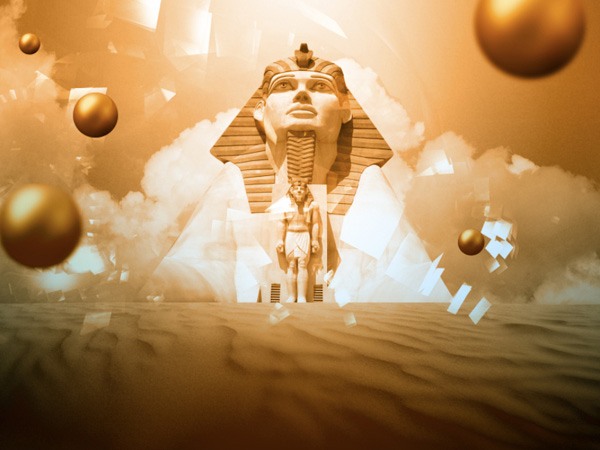
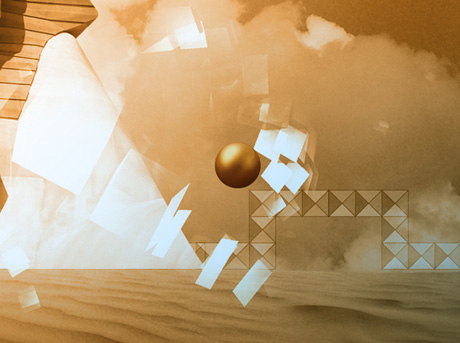
Preview
Click on the image to see it in full scale.
Tutorial Resources
- Stock photo: Sphinx Statue (stock.xchng)
- Stock photo: Sandy Desert (stock.xchng)
- Stock photo: Clouds (stock.xchng)
- Stock photo: Gold Ball (stock.xchng)
- Stock photo: Abstract Gold Explosion (stock.xchng)
- Vectors: triangles_ev
- Stock photo: Palm Tree Silhouette (stock.xchng)
- Texture: Paper Texture (deviantART)
Step 1: Isolate the Sphinx Statue
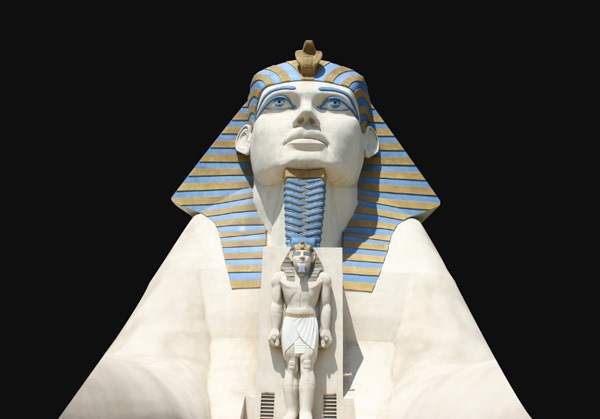
Download the Sphinx Statue and then open it in Photoshop. We want to isolate the statue from its background so that we can build our own background behind it. Zoom into the image using the Zoom Tool (Z) and, with your Pen Tool (P) in Paths mode (which can be set in the Options Bar), begin to trace around the outline of the statue.
It doesn’t have to be spot on but try doing the best you can.

As you’re tracing along the outline of the statue, when you get to the bottom of the statue, continue the path rather than following it outwards (as shown below).
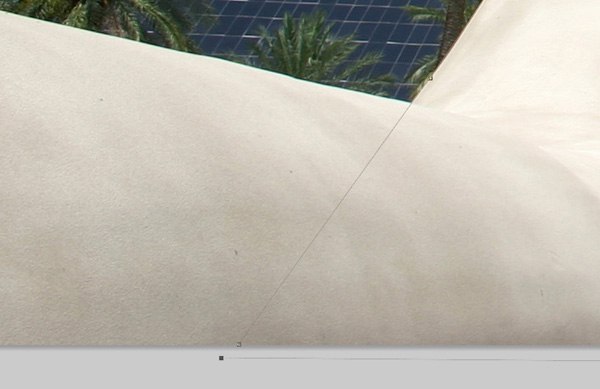
You will need to follow the line from the point where the bottom of the statue turns outward, and continue it down to the bottom.
Once you have finished tracing the outline, Control-click/right-click on your path, then choose Make Selection in the menu that appears, which will load a selection on the path. Press Cmd/Ctrl + J to duplicate your selection onto a new layer.
Step 2: Add the Desert Sand
Go to File > New to create a new document.
Make it 1600px wide by 1200px high, set to 72dpi and in RGB mode.
Fill the default Background layer with black (#000000). Copy your isolated statue image into the new document as a layer above the Background layer.
Download and open up the Sandy Desert stock photo, and place it underneath the statue layer.
Turn off the visibility of the statue layer temporarily so we can focus on the sandy desert layer.
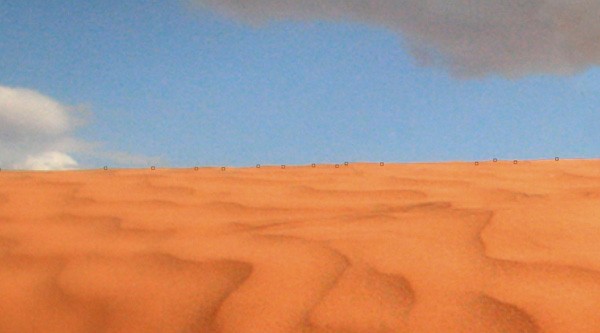
We will select the sky and remove it (and then we will replace it later on). Zoom into the horizon line, then use the Pen Tool (P) to draw a path along where the sky and sand meets.
Complete your path upwards to create a path around the sky.
Once you have closed the path, erase the sky by converting your path into a selection and then going to Edit > Clear. Now turn the visibility of the statue layer back on.
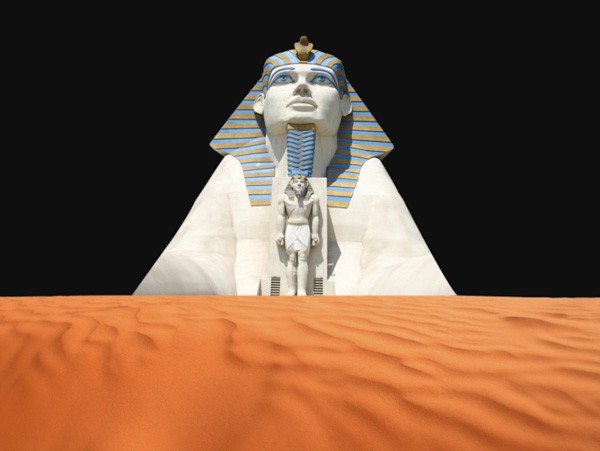
You want to position the statue towards the top of the horizon line so that it appears as though you are looking up at the statue from the sand.
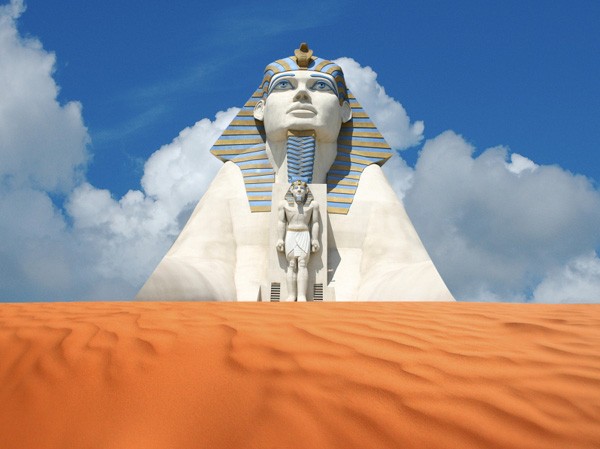
Step 3: Add a New Sky
Next, download and open this Clouds stock photo in Photoshop. Place the image into the scene as a new layer below the sandy desert layer.
You will have to resize it down using Free Transform (Cmd/Ctrl + T) to match the scale of our scene, holding down Shift to maintain proportions.
Step 4: Desaturation Time
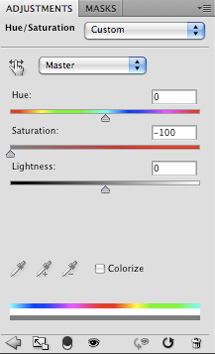
Now we are going to add a Hue/Saturation adjustment layer; do so by clicking on the Add new fill or adjustment layer button at the bottom of the Layers Panel and then choosing Hue/Saturation from the menu that appears. Make sure you have the Hue/Saturation adjustment layer at the top of all the layers so that it affects all the layers below it.
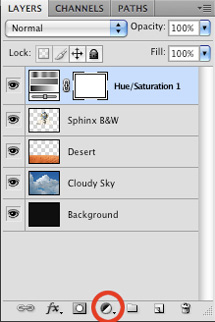
Adjust the Saturation slider all the way to the left to desaturate the colors of the layers below the adjustment layer.
What’s great about using an adjustment layer as opposed to the Image > Adjustments > Desaturate command is that an adjustment layer is non-destructive; that is, if we want to revert to the old colors, we simply toggle off its visibility or delete it, just like any other layer.
Step 5: Add New Colors
Create a new layer at the top of the Layers Panel (above the Hue/Saturation adjustment layer that we created in the previous step) and then switch to the Paint Bucket Tool (G). Change your Foreground Color to a brownish orange (#B55E00) and then use the Paint Bucket Tool to fill the new layer with the color by clicking once on the canvas.
Afterwards, change the Blend Mode of the layer to Color and slightly reduce the layer’s Opacity to about 80%.

Create another new layer.
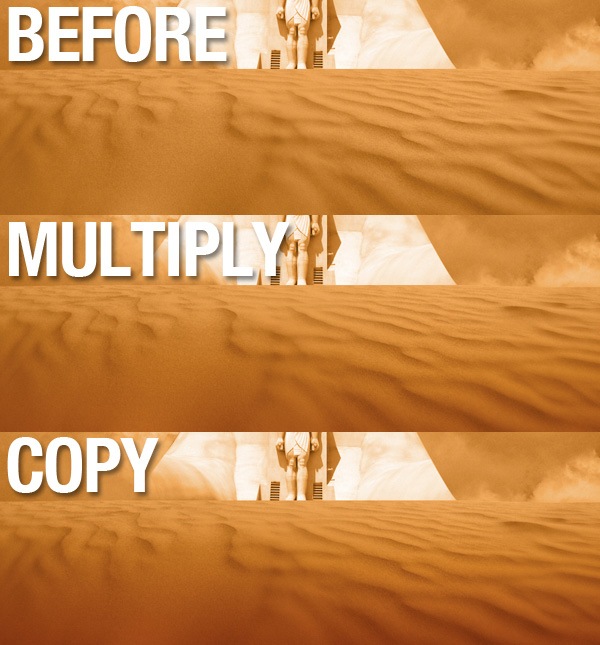
Set your Foreground Color to a dark, muted yellow (#D09711). Switch to the Gradient Tool, and set it up in the Options Bar such that it is set to a Linear Gradient and that the Foreground to Transparent preset is chosen so that the gradient fades from the dark, muted yellow foreground color we just picked out, to transparent. Click-and-hold at the bottom of the canvas, then drag upwards to create the gradient.
Change the Blend Mode of the layer to Multiply.
To enhance the effect, duplicate the layer by going to Layer > Duplicate Layer or pressing Cmd/Ctrl + J.
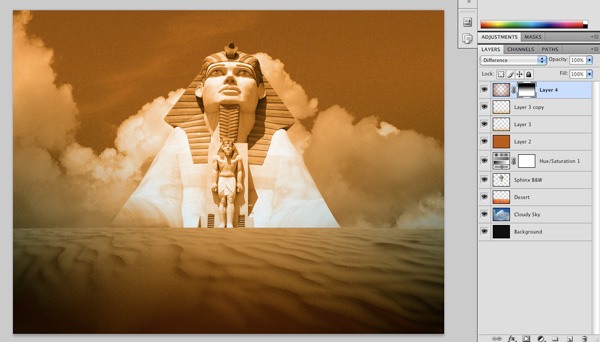
Step 6: Additional Coloring
Create a new layer at the top of the Layers Panel. Change your Foreground Color to a dark orange-brown color (#933F04) and set up your Gradient Tool options as shown below (note that we’re now using a radial gradient):
![]()
Next, click-hold-and-drag from the center of the canvas to create a radial gradient on the new layer that should be transparent in the center and dark orange-brown on the edges.
Change the Blend Mode of the layer to Difference.
On this same layer, create a layer mask by clicking on the Add layer mask button at the bottom of the Layers Panel.
Use the Gradient Tool set to a black-to-white linear gradient and apply it on the layer mask such that the layer is more visible at the bottom, and fades away as it goes upwards (in layer masks, white reveals and black hides).
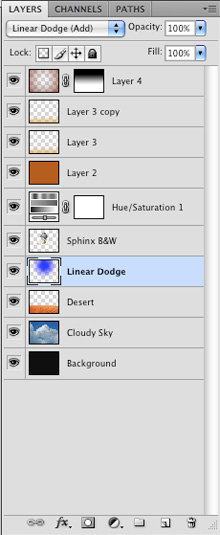
Step 7: Enhancing the Focal Point
Create a new layer below the statue layer and make sure the active tool is still the Gradient Tool.
For the Gradient Tool’s settings, we want a Radial Gradient that fades from a solid color to transparent as we have done in the previous step. Select a bright aqua blue color (#00B4FF) for your Foreground color, click-and-hold in the center of the image, then drag outwards to create the radial gradient.
Once you have made the gradient, change the Blend Mode of the layer to Linear Dodge (Add).
The result will be that it brightens up the center of the scene, thus enhancing the focal point of our piece.
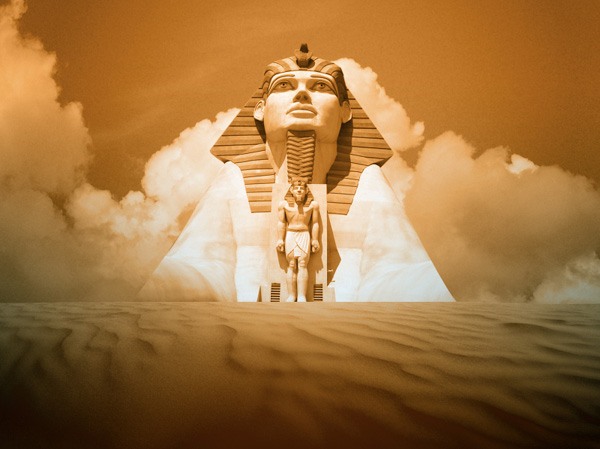
Repeat the above process on a new layer above the blue radial gradient layer; use a white-to-transparent Radial Gradient this time. Switch the Blend Mode to Linear Dodge (Add) as well.
Below is the Layers Panel thus far (to make sure we’re ordering our layers appropriately):
The result makes the statue more prominent, and helps to create some depth within our design.
Step 8: Add the Golden Globes
Download and open this Gold Ball image in Photoshop. Select around the gold ball (excluding its drop shadow) using the Elliptical Marquee Tool (M), holding Shift to create a perfect circle.
With the gold ball now selected, press Cmd/Ctrl + J to duplicate it on a new layer. You can turn off the visibility of the original layer to see how your object isolation went.
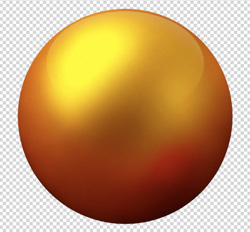
Next, bring the image into the main Photoshop document. Duplicate it several times, use Free Transform to create variations in their sizes, and move them in various locations throughout the scene using the Move Tool (V).
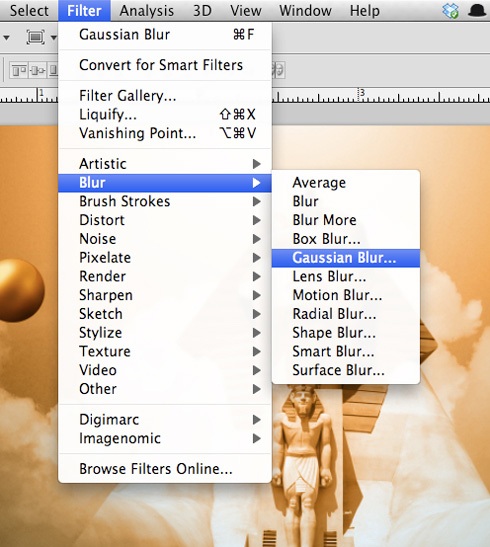
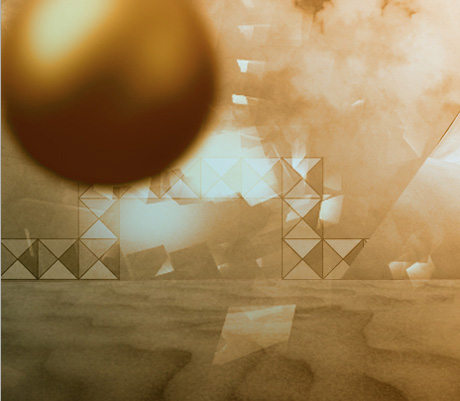
To help reinforce the foreground, I have created two more large golden globes with the Gaussian Blur filter set at 6px Radius applied to them.
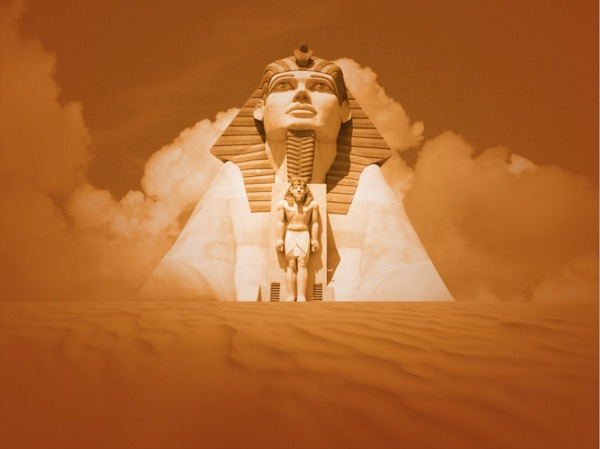
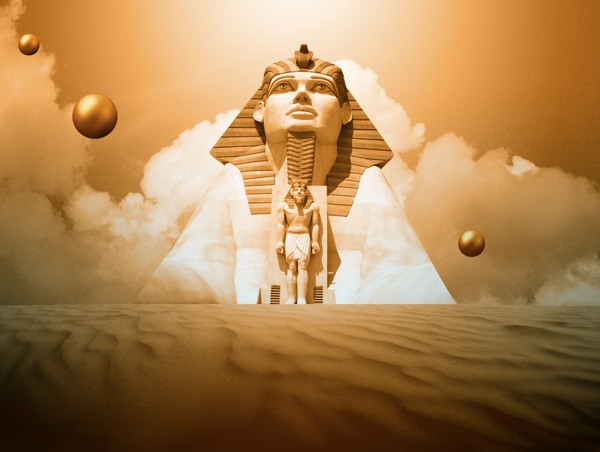
Here’s the result of adding the golden globes:
Step 9: Add a Shattered Effect
Download and open the Abstract Gold Explosion stock image and place it into our Photoshop document; scale it up using Free Transform (Cmd/Ctrl + T) so that it fills out the canvas.
Go to Edit > Transform > Flip Vertical to change the abstract gold explosion’s orientation. Change the layer’s Blend Mode to Screen.
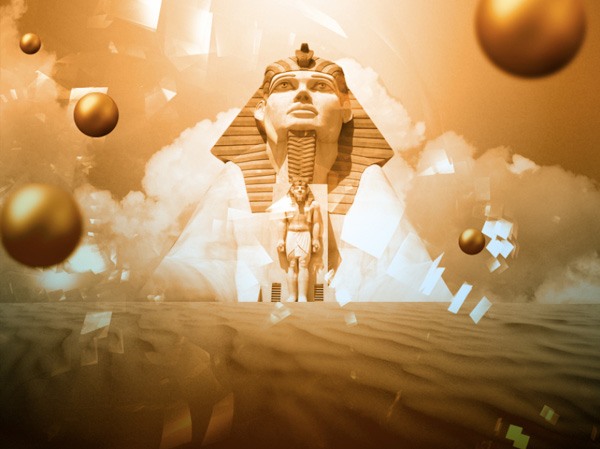
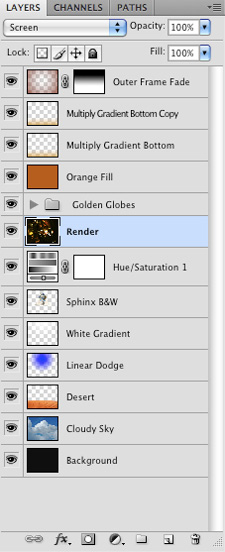
Here is an image of the Layers Panel to show the order of our layers thus far:
Use the Eraser Tool (E) to remove the bottom portion of the abstract gold explosion that is on the sand.
Continue to remove areas of the abstract gold explosion at the top of the scene so we have a background that doesn’t take away too much from our foreground elements.
We mostly want the shattered effect to fall in the middle of the scene, spanning across the clouds.
The shattered effect gives our work some additional visual complexity.
Step 10: Add the Building Blocks Element
Open the triangles_ev vector file in Illustrator and you will see a few simple vector shapes that I have created for this tutorial. We will only use one of them.
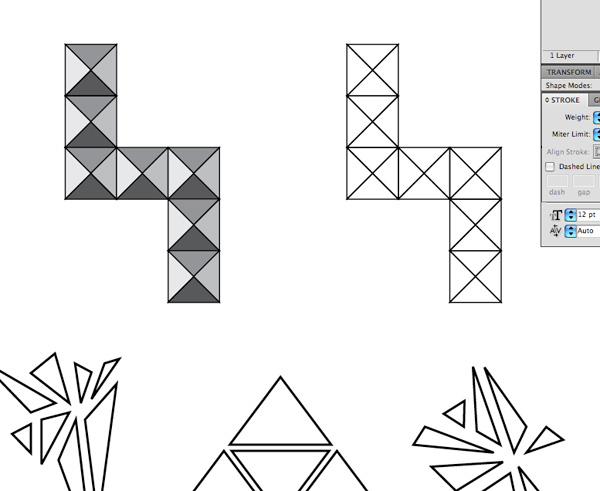
Select the building block that has fill colors (the one on the left). Bring it into the Photoshop document by pasting it in as a smart object.
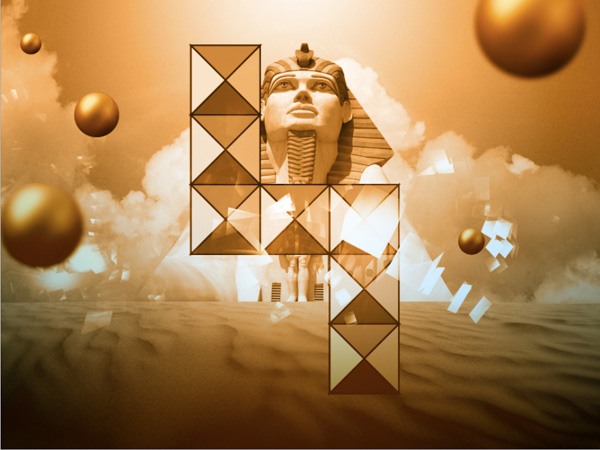
Place the building block below the Sphinx statue layer and scale it down using the Free Transform command.
Rotate and duplicate it to create a border across the horizon. Here is what the right side of the image looks like:
Here is what the other side looks like:
The building blocks add a new design element that supports our surreal theme.
Step 11: Add Palm Trees
Download and open up the Palm Tree Silhouette stock image, and bring it into the Photoshop document. Resize it down to match the scale of our scene and then change its layer’s Blend Mode to Multiply.
Move the layer behind the statue layer.
Use the Eraser Tool (E) to remove parts of the palm trees so you only see them coming out from the middle of scene.

Step 12: Adding Gold Text
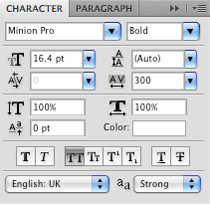
Use the Horizontal Type Tool (T) to create some text. I used Minion Bold at about 24pt and black as the text color. I wrote “Design Instruct.”
Create a new layer above the text layer and, with the Rectangular Marquee Tool (M), make a wide, narrow strip that looks like a border.
Fill the selection with solid black and line it up so it runs from edge to edge of the text. Duplicate this layer by pressing Cmd/Ctrl + J and place the duplicate border down below the text.

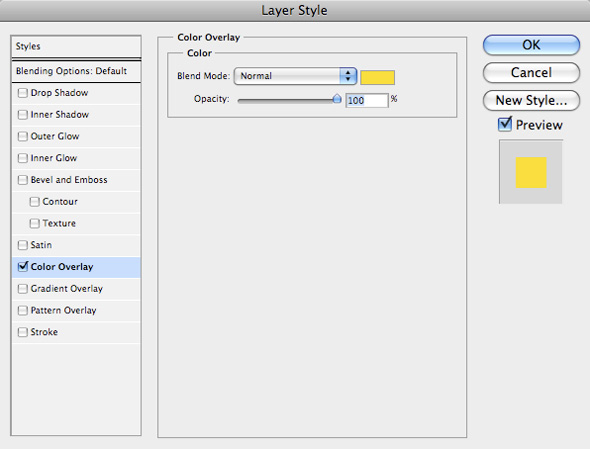
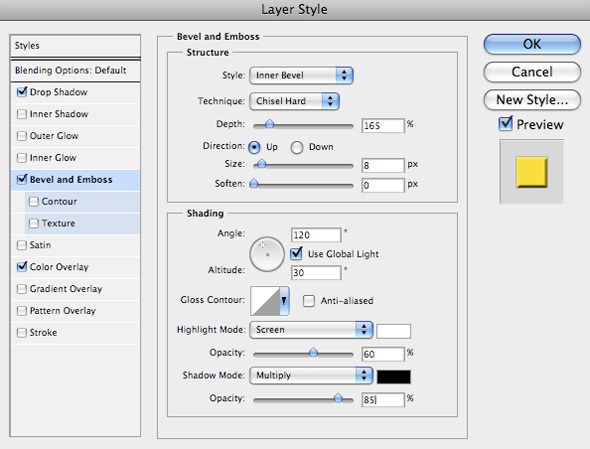
Double-click on your text layer to bring up the Layer Styles window. Give it a Color Overlay layer effect using a bright yellow color (#FFDE00).
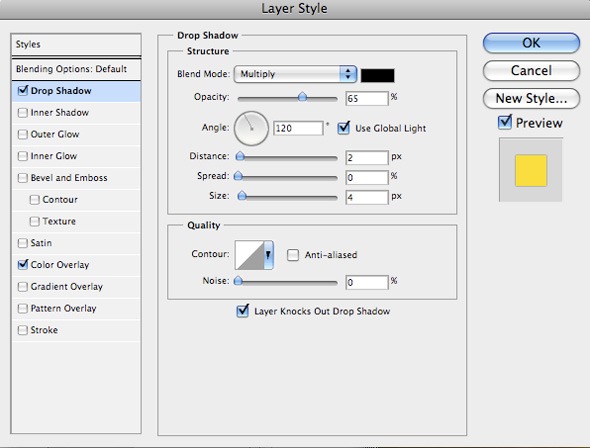
Next, give it a Drop Shadow.
Give it a Bevel and Emboss layer effect as well.
After applying the layer style to the text layer, Control-click/right-click on the text layer in the Layers Panel, then choose Copy Layer Style in the menu that appears.
Next, select both of the text border layers in the Layers Panel, Control-click/right-click on one of them, and then select Paste Layer Style from the menu to paste the layer style from the text layer into them, saving us time from redoing the layer style setup we applied to the text layer.
Cmd-click/Ctrl-click on the text layer’s thumbnail in the Layers Panel; this will load a selection around the characters of the text.
Next, create a new layer just above the text layer and, with the Gradient Tool (G), use a Linear Gradient that fades from white to transparent from top to bottom in order to create a highlighting effect.
Change the Blend Mode of the layer to Overlay. Duplicate the layer to intensify the effect.
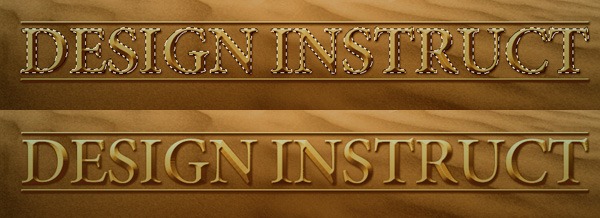
What we end up with is a quick and easy gold text effect.
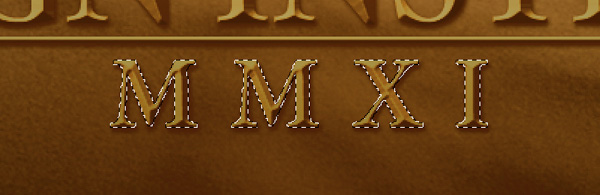
Step 13: Add Golden Roman Numerals
Duplicate the “Design Instruct” text layer by clicking on it in the Layers Panel to make it the active layer and then pressing Cmd/Ctrl + J to duplicate the layer. Use the Move Tool (V) to place the duplicate text layer below the bottom border.
Use the Horizontal Text Tool (T) to edit the text; we are going to type out the roman numeral equivalent of “2011”, which is “MMXI”.
We will also reduce the size of the text as well as increase the kerning to space out the characters.
You should now have something like this:

Use the same technique as in the previous step to give the golden numerals a linear gradient highlight.

Step 14: Adding a Texture
As the last step, download and open up the Paper Texture in Photoshop. Place the paper texture into our main Photoshop document, just above the text layers.
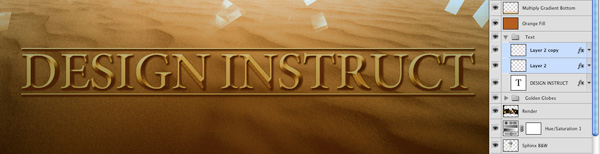
Scale it down using Free Transform (Cmd/Ctrl + T) while holding down Shift; we want it to be about the same width as our canvas. Here is an image that displays our Layers Panel, in order for you to ensure that your layers are in order.
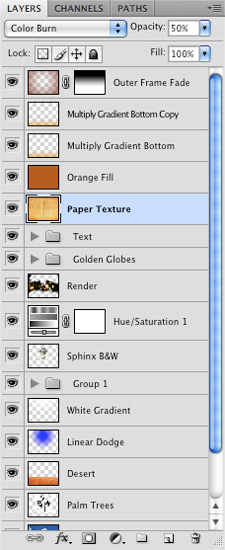
Change the Blend Mode of the paper texture layer to Color Burn and reduce the layer’s Opacity to about 50%.
The texture will help to make the overall image feel old and gives it a sort of sandblasted effect, which I think is a nice touch.

Tutorial Summary
Congratulations, we are now finished with the tutorial! We did a lot: We brought together multiple photos and vectors, combining them to make a cohesive art piece using adjustment layers and other techniques.
We even created a simple gold text effect to go along with our scene.
Be sure to save all of your work and take a moment to look at the image to make sure everything is looking good.
Thank you for following along, and I hope you have picked up a few Photoshop tricks and techniques along the way!
Download Source Files
- ancient_egypt_wallpaper (ZIP, 23.30 MB)
-
 Trevin serves as the VP of Marketing at WebFX. He has worked on over 450 marketing campaigns and has been building websites for over 25 years. His work has been featured by Search Engine Land, USA Today, Fast Company and Inc.
 -

WebFX is a full-service marketing agency with 1,100+ client reviews and a 4.9-star rating on Clutch! Find out how our expert team and revenue-accelerating tech can drive results for you! Learn more
Make estimating web design costs easy
Website design costs can be tricky to nail down. Get an instant estimate for a custom web design with our free website design cost calculator!
Try Our Free Web Design Cost Calculator
Table of Contents
- Preview
- Tutorial Resources
- Step 1: Isolate the Sphinx Statue
- Step 2: Add the Desert Sand
- Step 3: Add a New Sky
- Step 4: Desaturation Time
- Step 5: Add New Colors
- Step 6: Additional Coloring
- Step 7: Enhancing the Focal Point
- Step 8: Add the Golden Globes
- Step 9: Add a Shattered Effect
- Step 10: Add the Building Blocks Element
- Step 11: Add Palm Trees
- Step 12: Adding Gold Text
- Step 13: Add Golden Roman Numerals
- Step 14: Adding a Texture
- Tutorial Summary
- Download Source Files
Share this article


Web Design Calculator
Use our free tool to get a free, instant quote in under 60 seconds.
View Web Design CalculatorMake estimating web design costs easy
Website design costs can be tricky to nail down. Get an instant estimate for a custom web design with our free website design cost calculator!
Try Our Free Web Design Cost Calculator


