
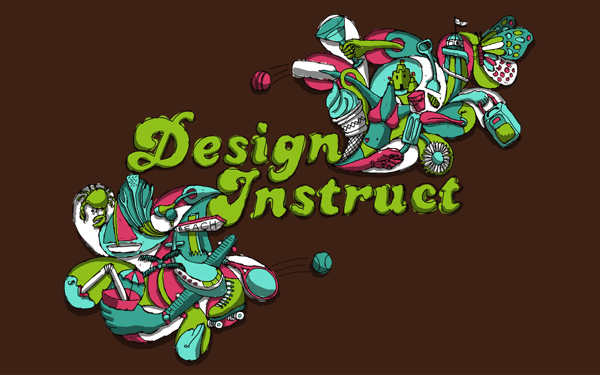
Preview
This is the preview of the final product. Click on the image to see its full size.
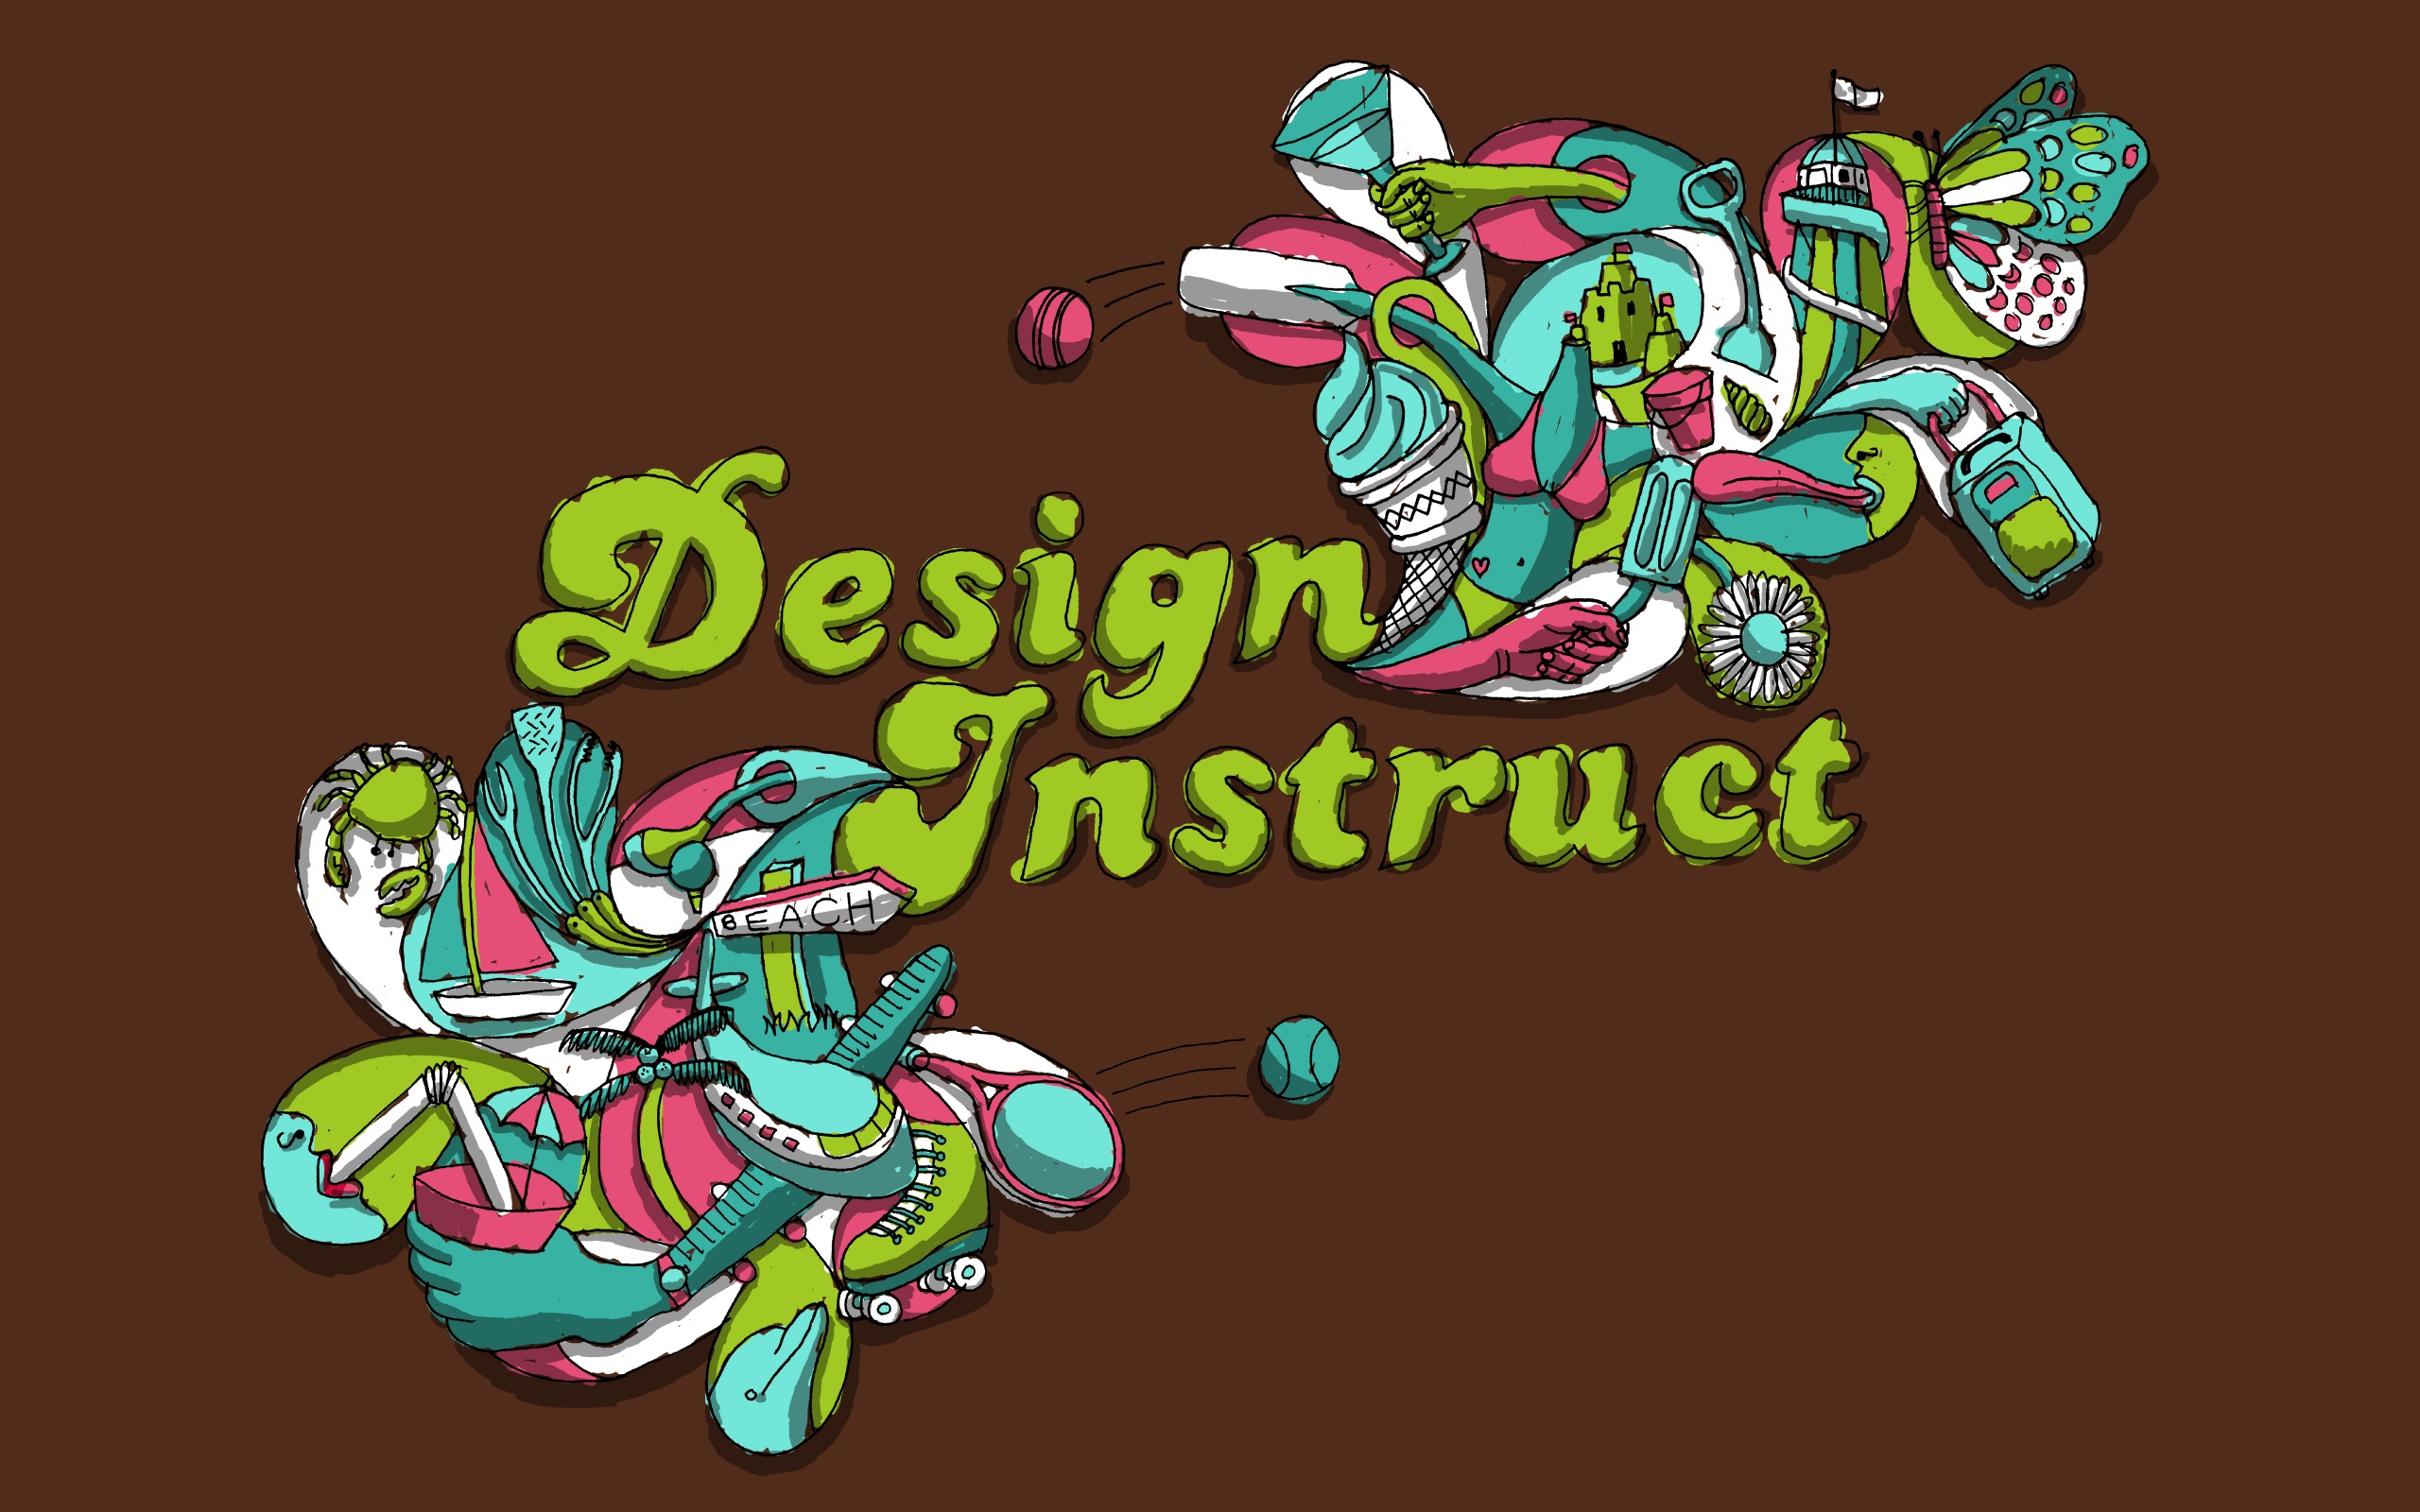
Free Wallpaper Download
I have made the custom desktop available free for you to download. Install it and set it as your desktop wallpaper to show Design Instruct some love.
The size is 2560x1600px so it’s pretty big even for those rocking huge computer monitors. Click the link listed below to get the wallpaper.
Tutorial Resources
- PT Banana Split font (free font download)
Step 1: Think about the document, theme, and layout
The first thing I do when starting a new illustration is planning the document. Is it for screen or print? How big should it be?
I find it better to get all this sorted out before anything else instead of cropping and resizing the document after it’s finished and then finding out that the dimensions no longer fit the client’s needs.
I do this by writing down and sketching out all the important information about the final delivered illustration.
Next up, I decide on the theme and the layout of the illustration.
I’ve decided to use typography as the centrepiece of the illustration. The theme I have chosen is Summer.
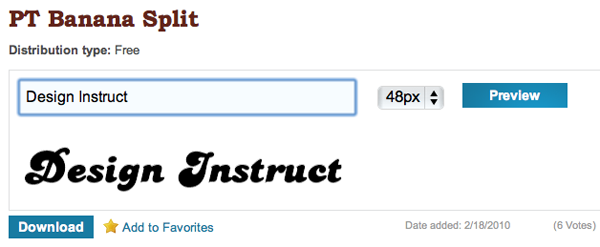
Step 2: Choose fonts
I’ve chosen to use the PT Banana Split font as I feel it fits my illustration style.
Step 3: Re-draw the font
To make sure the typography fits in with the illustration, I re-draw it by hand.
This allows me to draw the rest of the illustration around the type and fit it together seamlessly.

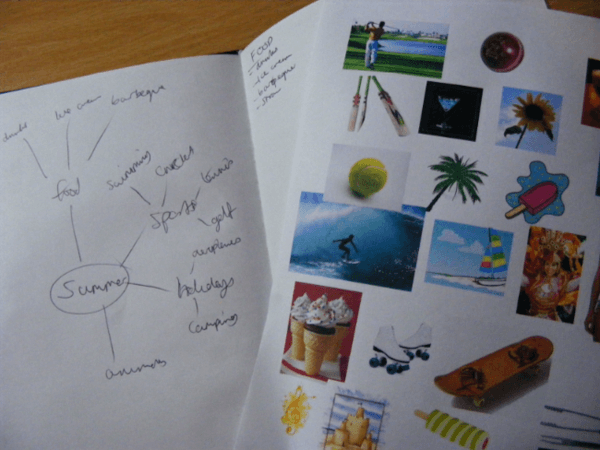
Step 4: Find imagery and inspiration for the chosen theme
The next step is to find suitable images for the theme you have chosen. I like to brainstorm the theme and come up with suitable images that way. I look through my sketchbooks, use Google Images and stock photography websites for inspiration.
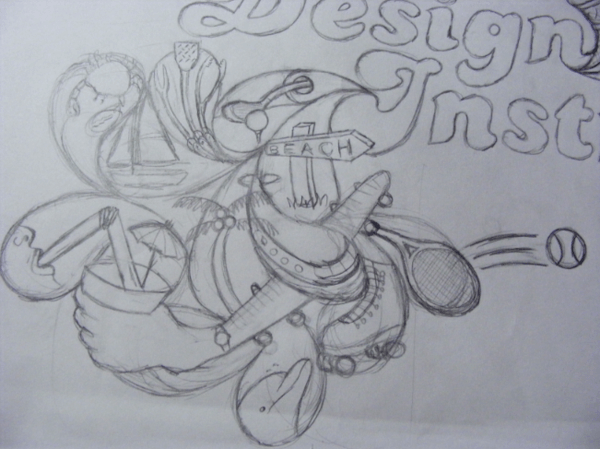
Step 5: Fitting images into the layout
This is where the illustration process starts to get interesting.
It’s here that I start deciding where the images I have are going to fit into the illustration and how they are going to interact with each other.
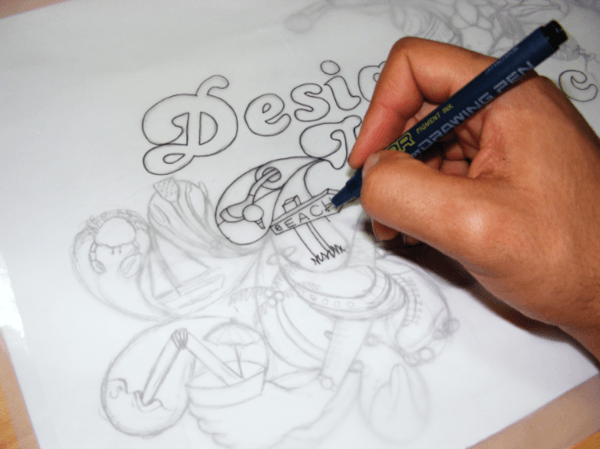
Step 6: Using fineliner and tracing paper
Once I’m happy with the illustration, I trace it using a fineliner and tracing paper. This gives a nice crisp line, which means you don’t have to do too much to the lines in Photoshop.
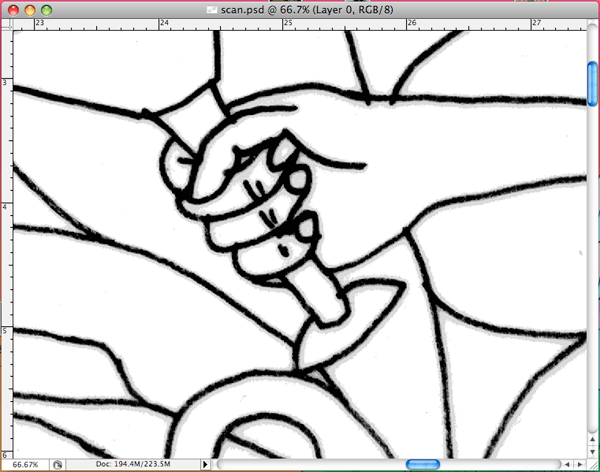
Step 7: Scan into Photoshop
Once you have traced the illustration, scan it into Photoshop.
Although it’s for screen, I scan the artwork at 600 dpi, which allows for easier editing. The resolution will be decreased at the end.
To import your drawing directly from your scanner into Photoshop, in Photoshop, go to File > Import > then choose your scanner source.
Step 8: Make crisper lines
Once the image has been scanned, it’s time to sharpen up the lines and remove any midtones.
You should be left with crisp black lines and a white background.
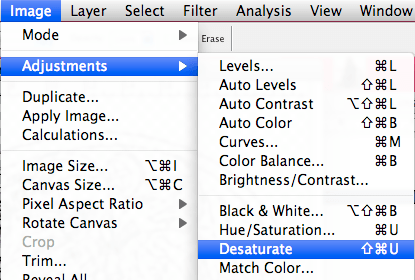
The first step is to convert the image to greyscale by desaturating the image. Do this by going to Image > Adjustments > Desaturate (Cmd/Ctrl + U).
This removes any unwanted colours from the image.
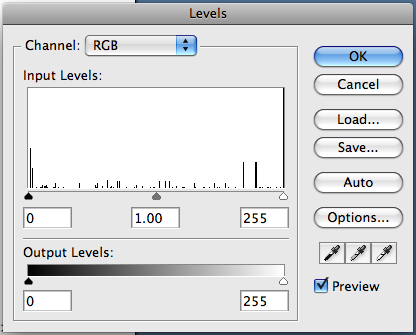
The second step is to remove any midtones so that we are left with just a black and white layer. Use the Levels adjustment dialog window, go to Image > Adjustments > Levels to open it.
Make sure to check the Preview option box to see your changes in real-time.
Play around with the three sliders until all the grey areas are removed and until you are happy with the weight of the black lines. Press OK when you have the result you want.
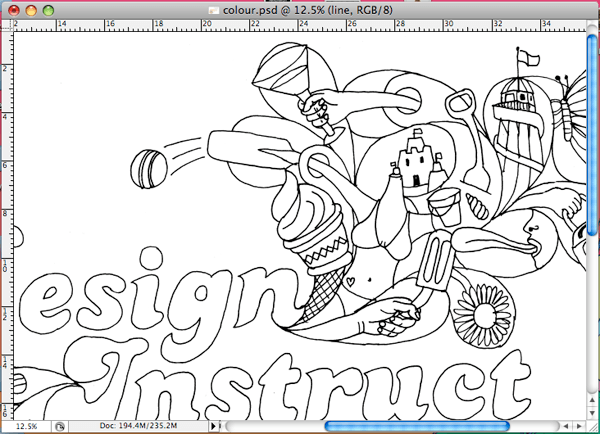
Now you should be left with an illustration that has crisp, black lines and a plain white background.
Rename this layer as “line” and delete all other layers that you may have in your Photoshop document.
Step 9: Organize layers
Create a new layer and name it “colour”. Then drag this layer underneath the “line” layer.
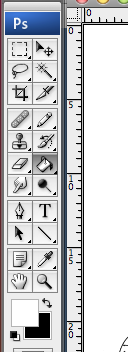
Now select the Magic Wand Tool (W) from the Tools Panel.
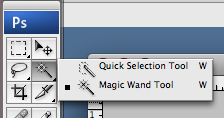
Be sure that the Contiguous option box in the Options bar of the Magic Wand Tool is deselected.
This ensures that you will select the chosen colour across the whole layer, not just the area you select.
![]()
Once this is done, select the white background with the Magic Wand Tool and cut it (Edit > Cut). You should now be left with just a black line illustration.
Create a new layer called “Background” and drag it underneath the “line” layer.
Now with the “Background” layer selected in the Layers Panel, click the Paint Bucket Tool (G) icon in the Tools Panel and use the tool to fill the layer with brown (#512c1a).
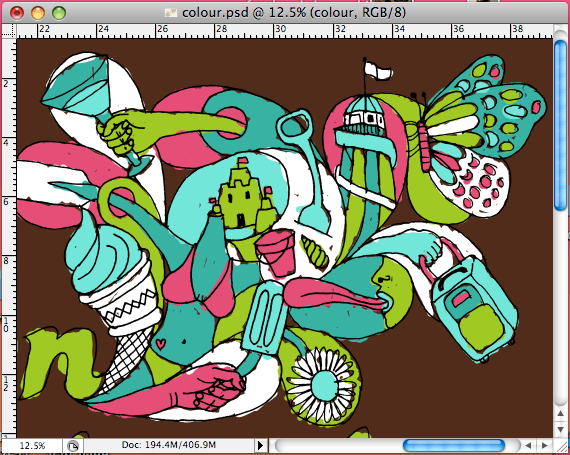
Step 10: Let’s add some colour
Firstly, create a new layer and name it “colour”. Then drag this layer in the Layers Panel so that it’s in between the “line” and the “Background” layer.
The next part (colouring in the lines) is purely based on your preference.
I have chosen to use the following colours:
- Aquamarine: #38b2a3
- Aqua: #72e6d8
- Pink: #e54e77
- Green: #a0c923
- White: #ffffff
With the “colour” layer the active layer in the Layers Panel, begin to paint the elements of the illustration.
Colour Guide

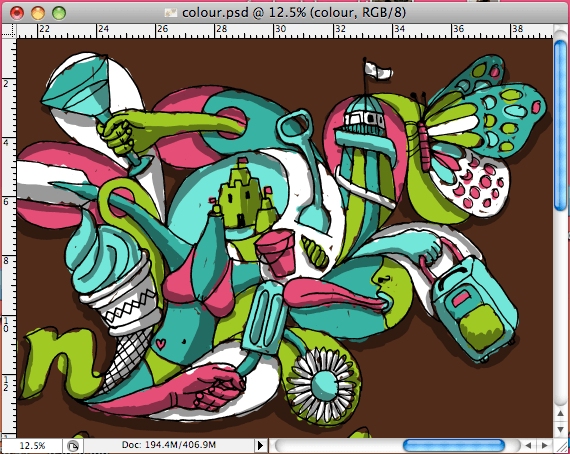
Step 11: Shadowing the illustration
Once the colour has been added, create a new layer above the “colour” layer and name it “shadow”. Set the Foreground colour to Black (#000000) and set the “shadow” layer’s Opacity to 40%
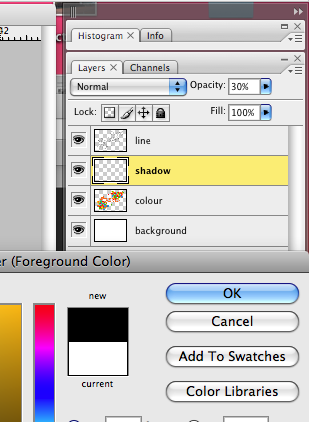
Now, start to paint in dark areas on the illustration.
Step 12: Finishing touches
This is where you can make any necessary tweaks like using blending modes, textures (see the Freebies section for textures that you might want to use), and refining any areas. I’ve changed the background colour from white to beige.
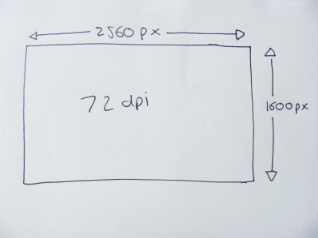
When (and only when) you are happy with the illustration can you decrease the resolution.
Create a new document with the dimensions, 2560 pixels by 1600 pixels and a resolution of 72 dpi.
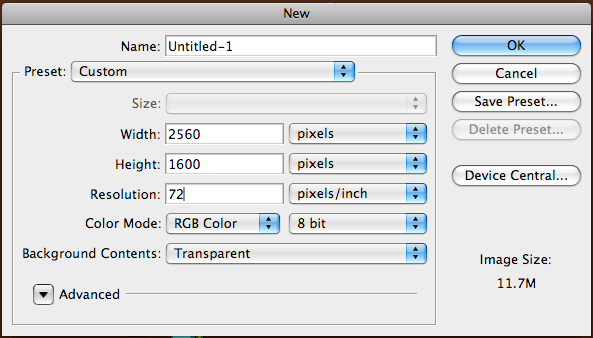
Copy all the layers from the illustration into the new document. Scale and resize the layers until you are happy. Paint in any extra brown needed to fill the background if needed.
Tutorial Summary
In this tutorial, you saw a workflow for importing your line drawings into Photoshop.
You read about the preparation and processing of your line drawings to make the lines crisp and clean in Photoshop, and the coloring process using the Paint Bucket Tool. If you followed along, you should have your very own hand drawn desktop wallpaper. Don’t forget to download the final product and use it on your desktop.
Download Source Files
- handdrawn_desktop_wallpaper (ZIP, 5.32 MB)
-
 Trevin serves as the VP of Marketing at WebFX. He has worked on over 450 marketing campaigns and has been building websites for over 25 years. His work has been featured by Search Engine Land, USA Today, Fast Company and Inc.
 -

WebFX is a full-service marketing agency with 1,100+ client reviews and a 4.9-star rating on Clutch! Find out how our expert team and revenue-accelerating tech can drive results for you! Learn more
Make estimating web design costs easy
Website design costs can be tricky to nail down. Get an instant estimate for a custom web design with our free website design cost calculator!
Try Our Free Web Design Cost Calculator
Table of Contents
- Preview
- Free Wallpaper Download
- Tutorial Resources
- Step 1: Think About the Document, Theme, and Layout
- Step 2: Choose Fonts
- Step 3: Re-draw the Font
- Step 4: Find Imagery and Inspiration for the Chosen Theme
- Step 5: Fitting Images into the Layout
- Step 6: Using Fineliner and Tracing Paper
- Step 7: Scan into Photoshop
- Step 8: Make Crisper Lines
- Step 9: Organize Layers
- Step 10: Let’s Add Some Colour
- Step 11: Shadowing the Illustration
- Step 12: Finishing Touches
- Tutorial Summary
- Download Source Files
Share this article


Web Design Calculator
Use our free tool to get a free, instant quote in under 60 seconds.
View Web Design CalculatorMake estimating web design costs easy
Website design costs can be tricky to nail down. Get an instant estimate for a custom web design with our free website design cost calculator!
Try Our Free Web Design Cost Calculator


