

Preview
Step 1: Draw the iPad’s Basic Shape
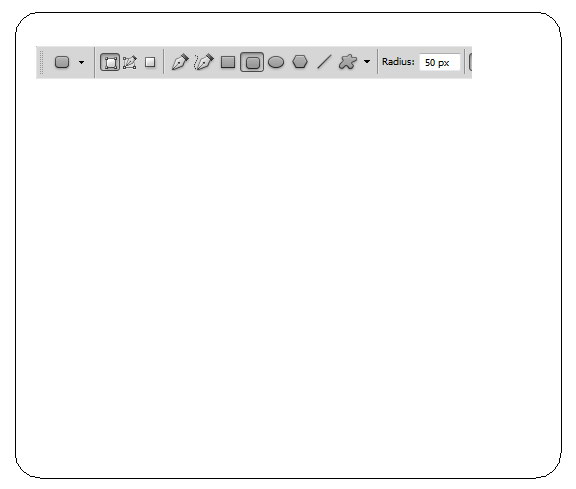
Create a new Photoshop document that has a 1500x1200px canvas. Let’s get right to it by creating a rounded rectangle using the Rounded Rectangle Tool with the Radius at 50px. This will be the basic shape of the iPad.
 We need to modify this shape. Use Free Transform (Ctrl/Cmd + T) for the modification. Ctrl-click/Cmd-click and drag the corners until you get the shape below.
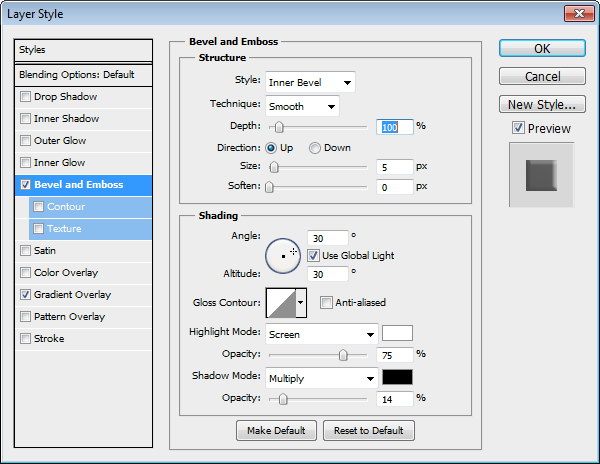
 Add a Bevel and Emboss and a Gradient Overlay layer effect to the shape. Bevel and Emboss will give it a 3D appearance and Gradient Overlay avoids a flat color on the iPad’s body.
Bevel and Emboss
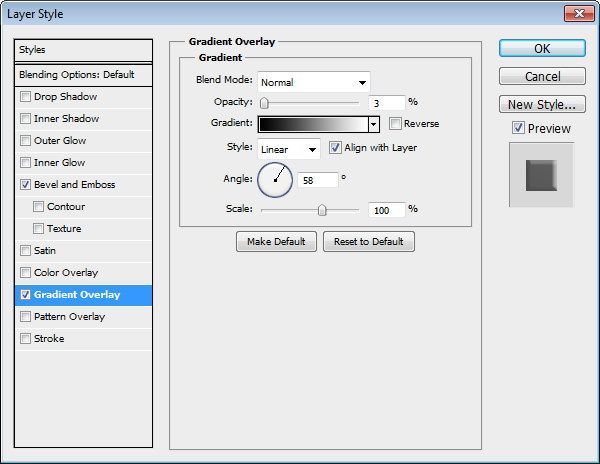
Gradient Overlay
 This is the result of the layer style:
 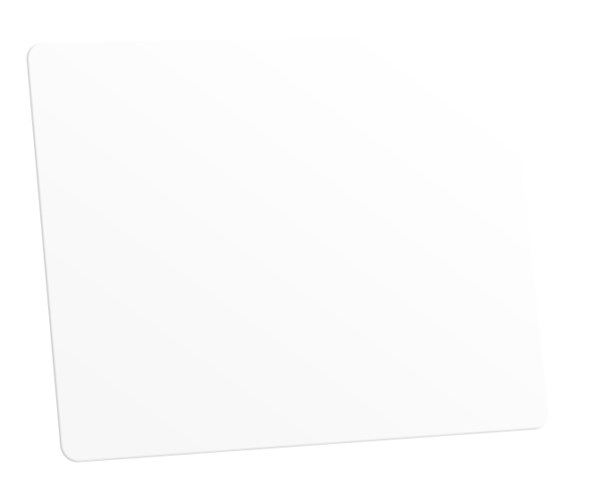 Currently, our iPad is too clean and flat.
Not realistic at all at this point. We need to add some noise texturing to the surface in order to give it a more tactile, real-world feel. To start, create a new layer and place it on top of the iPad.
Fill the layer with white. Right-click on the white layer and choose Convert to Clipping Mask (Ctrl/Cmd + Alt/Option + G). From now on, everything we put on the layer will automatically go just inside the iPad’s body because of the clipping mask.
Change the layer’s Blend Mode to Multiply and reduce its Opacity to 35%. 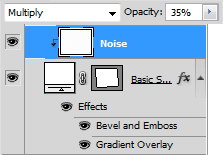 Choose Filter > Noise > Add Noise.
 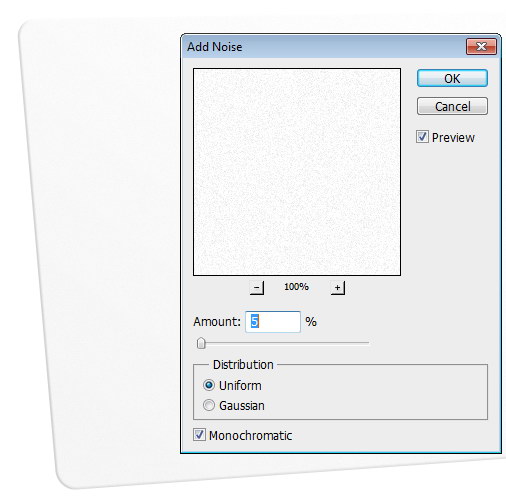 Create a new layer and place it above the iPad.
Again, convert the layer to a clipping mask. Ctrl-click/Cmd-click the iPad shape layer to create a selection around the iPad. Right-click inside the selection and choose Stroke from the menu.
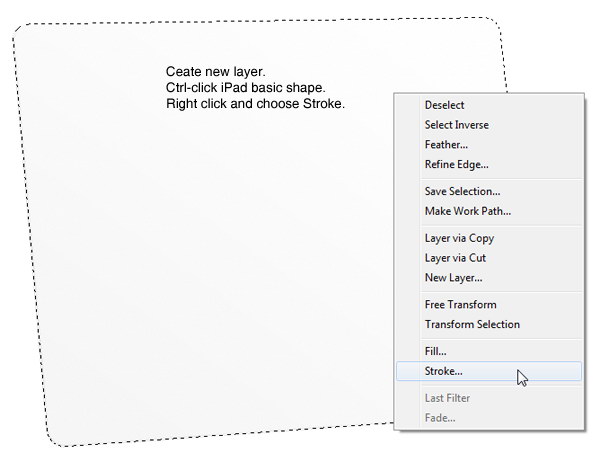 Choose black (#000000) for the Color option, set Width to 15px and set Location to Inside.
 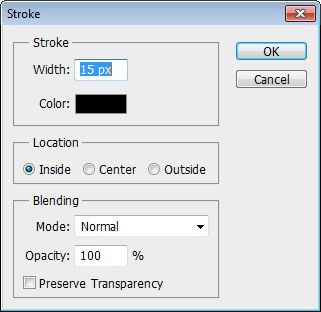 This is the result of the Stroke command:
 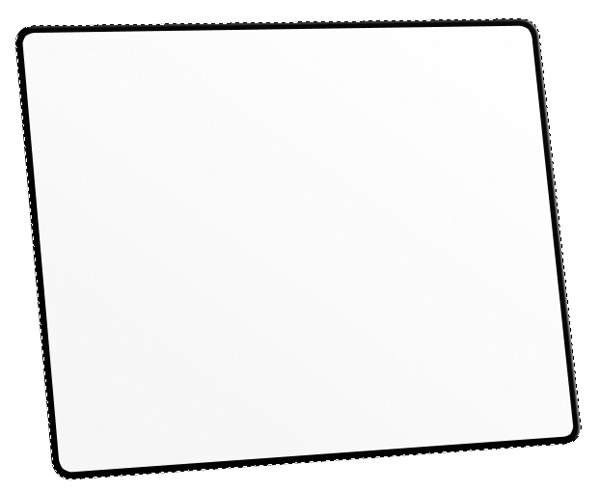 Soften the stroke line using the Gaussian Blur filter (Filter > Blur > Gaussian Blur).
 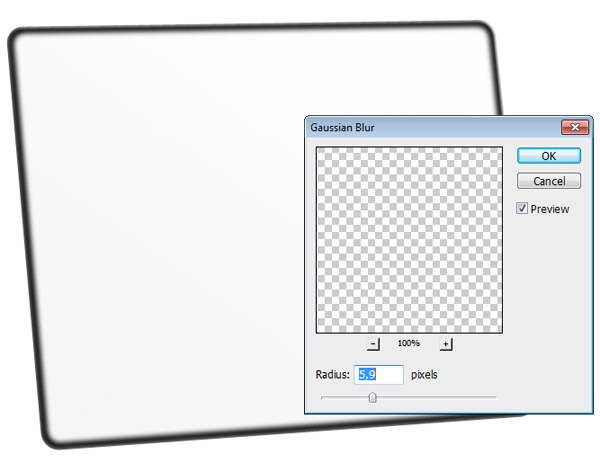 Switch to the Eraser Tool (E).
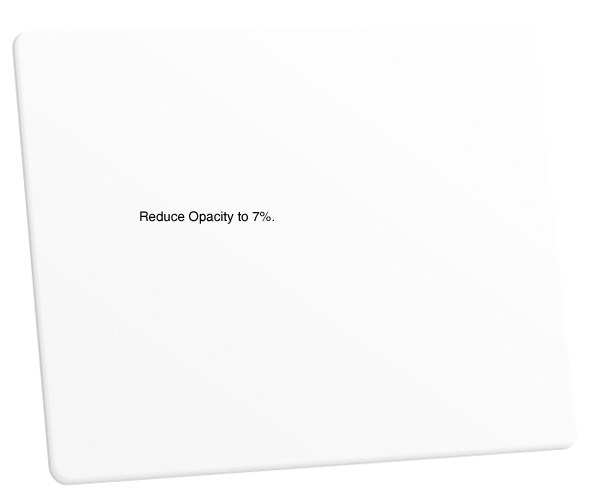
Deselect your selection (Ctrl/Cmd + D). Use the Eraser Tool to delete the top and right stroke. 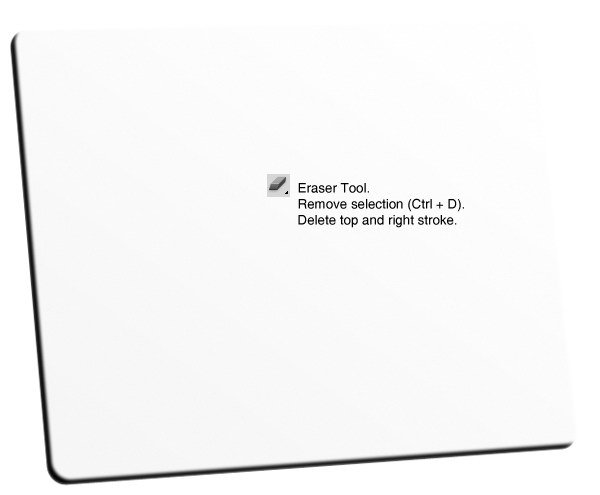 Reduce the layer’s Opacity to 7%.
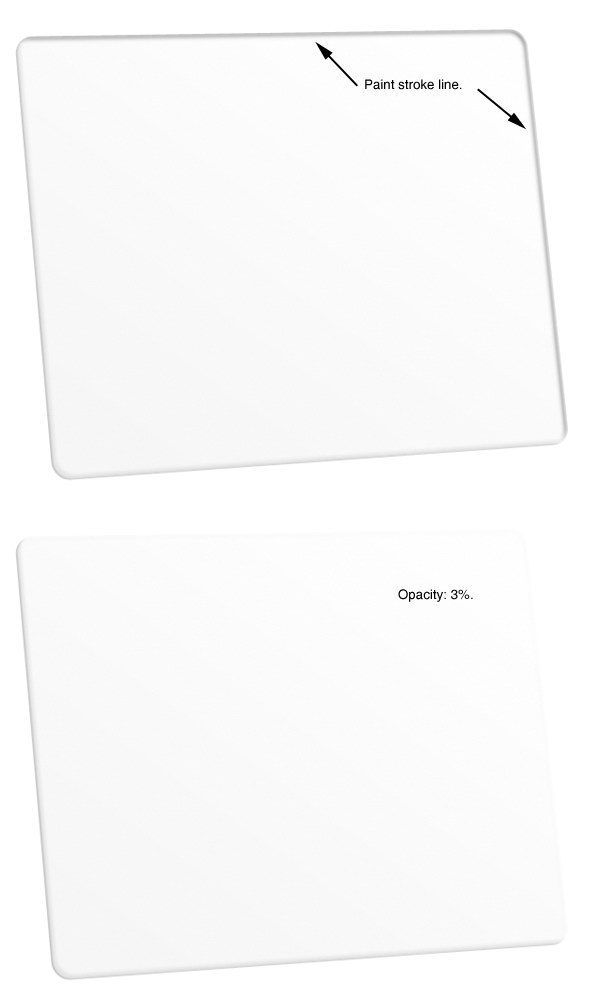
 Repeat the previous process to create another stroke at the top and right side of the iPad. We want this stroke to be lighter because this is the side where our light comes from. So, set its Opacity to 3% (instead of 7%).
Step 2: Drawing the iPad’s Screen
Draw a black rectangular shape with the Rectangle Tool. Activate Free Transform (Ctrl/Cmd + T) on the shape. Ctrl-click/Cmd-click and drag each corner to match the screen’s angle with the iPad’s shape.
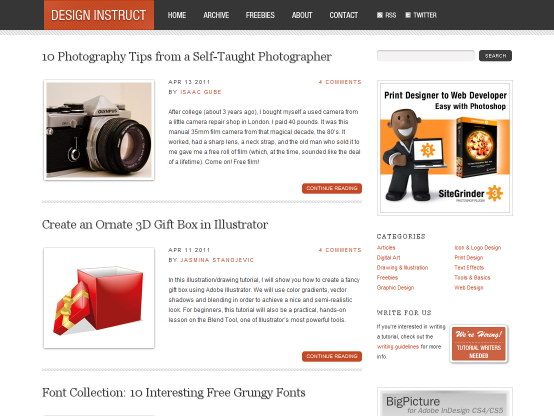
Create a new Photoshop document with a canvas size of 1107x831px. Paste a wallpaper or screenshot of a website (I used a screenshot of Design Instruct) into it. Save the PSD as screen.psd.
 Return to our iPad PSD. Click File > Place and select the PSD we have just created (screen.psd). Now, screen.psd is attached to our main PSD as a Smart Object.
 A Photoshop Smart Object is a special type of layer that contains image data from a vector or bitmap image. They can be vector data from Adobe Illustrator, another Photoshop file, a layer in the file that you have converted to a Smart Object, etc. It allows us to make flexible Photoshop files with components that are easily changed.
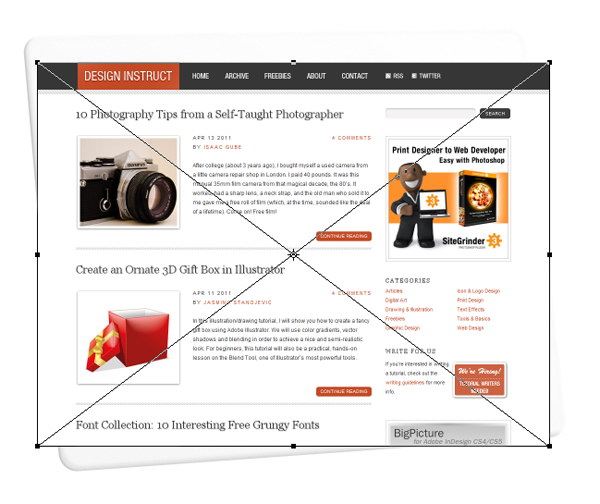
Reduce the Smart Object’s layer Opacity to 0% temporarily to help you adjust the size and angle of the object. Ctrl-click/Cmd-click and drag each of the transform controls at the corners until it fits the screen. 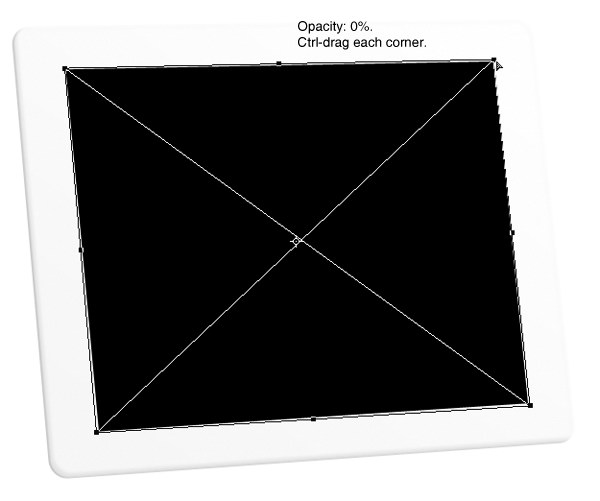 Return the Smart Object’s layer Opacity to 100%.
Press Ctrl/Cmd + Alt/Option + G to convert the layer to a clipping mask. Using a clipping mask here makes sure that any picture we use will only show the area inside the iPad screen (the areas of it that are outside of the clipping mask will not be shown). 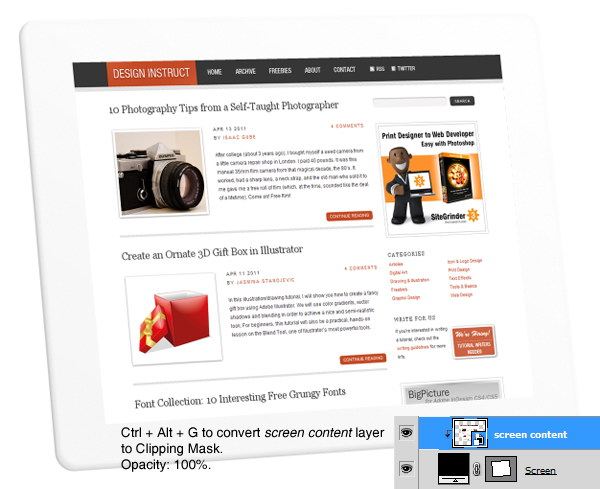 Let’s add a reflection onto the screen.
Create the white shape below with the Pen Tool (P). 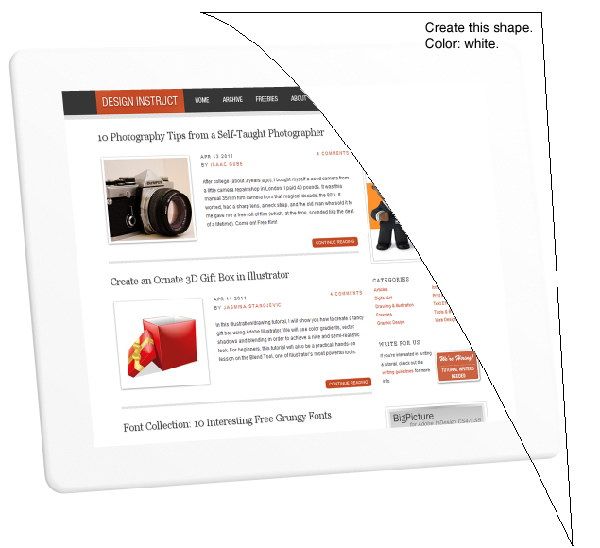 Convert the shape into a clipping mask and reduce the Opacity to 10%.
 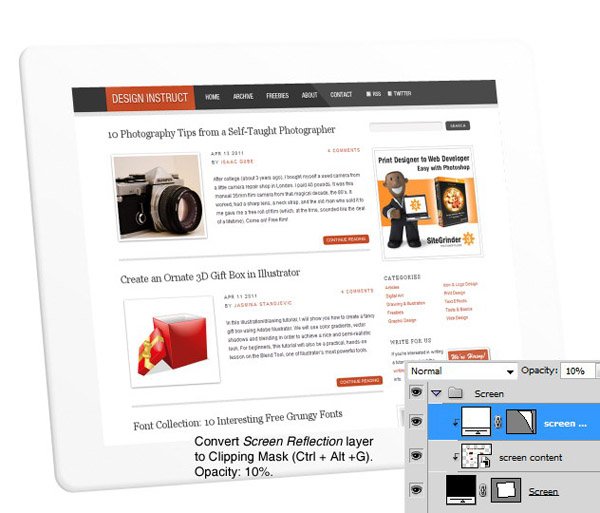 Select the screen layer and give it an Inner Shadow and an Inner Glow.
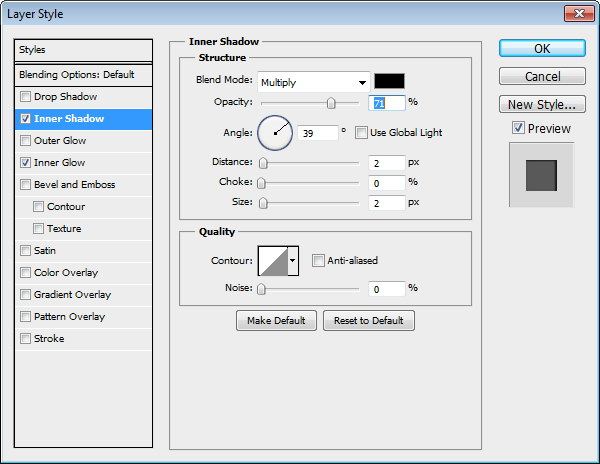
Inner Shadow
Inner Glow
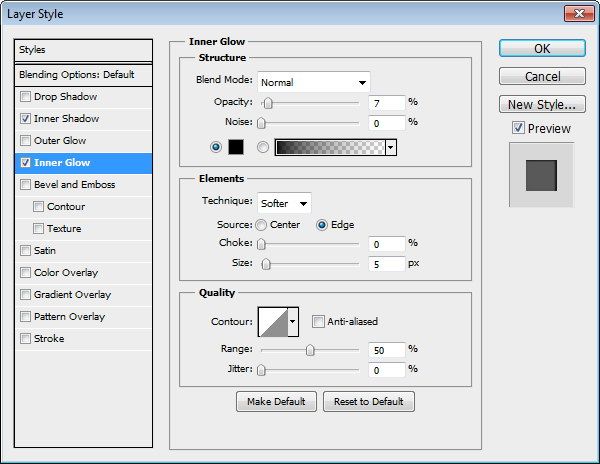 Below, you can see that the Inner Shadow is adding depth onto the screen and the Inner Glow gives the screen more definition on the screen edges.
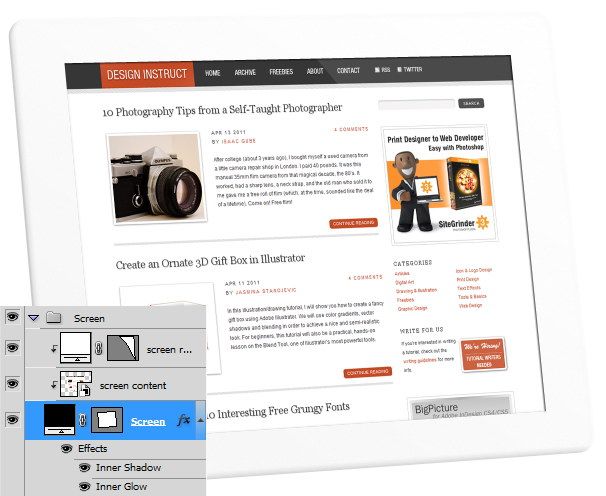
Step 3: Create the Antenna Cover
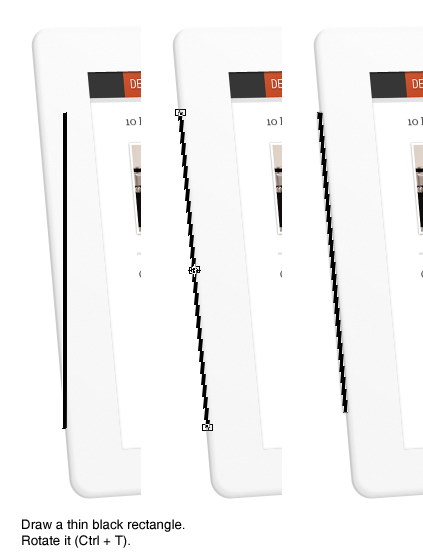
Draw a thin black rectangle with the Rectangle Tool. Rotate it using Free Transform (Ctrl/Cmd + T) until it matches up with the left side of the iPad.
 Ctrl-click/Cmd-click the iPad basic shape layer to load a selection around the iPad’s body, then click the Add layer mask button at the bottom of the Layer Panel.
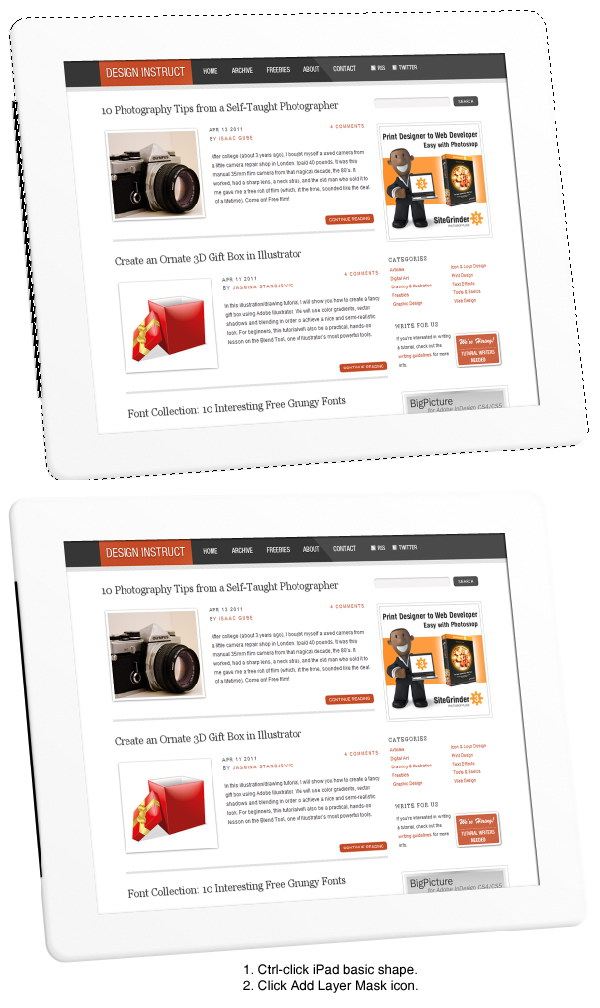
Step 4: Create the Face Time Camera
The iPad has a web cam on the front face. We will need to add this to our composition.
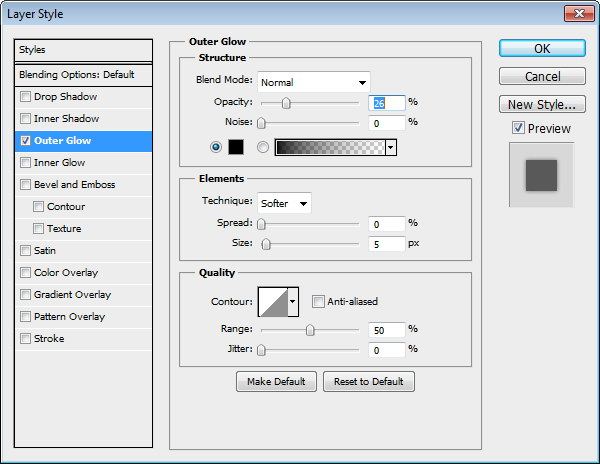
Draw a small circle with the Ellipse Tool on left side of the iPad. We will add an Outer Glow next. 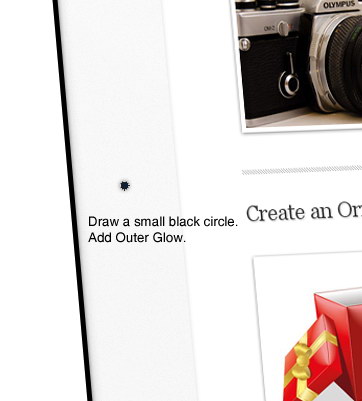
Outer Glow
Step 5: Create the Home Button
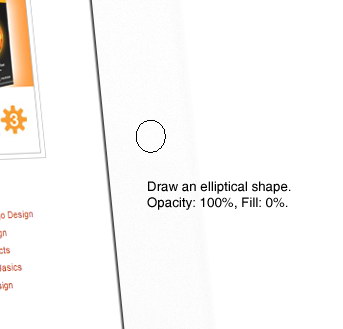
You can find the Home button on some Apple devices (including iPhone).
It’s a multi-purpose button that functions contextually depending on what you are currently doing, but often, pressing it will return you to the Home screen. To draw the Home button, use the Ellipse Tool to draw a circle shape. Set its Opacity to 100% and Fill to 0%.
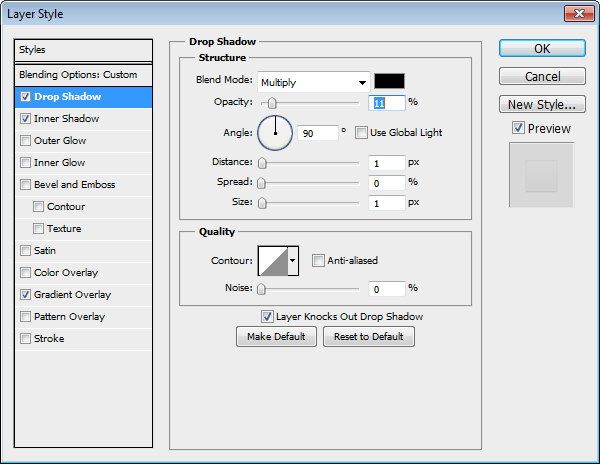
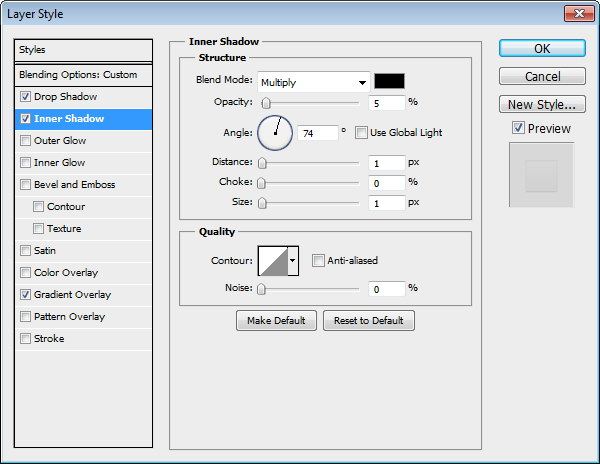
 Give the shape a Drop Shadow, an Inner Shadow, and a Gradient Overlay.
Drop Shadow
Inner Shadow
Gradient Overlay
 This is the result of the layer style we applied above:
 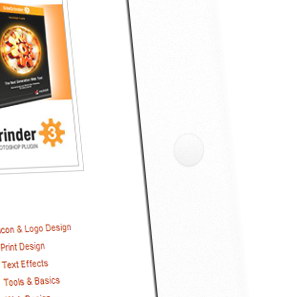 Draw a rounded rectangle at the center of the Home button with the Rounded Rectangle Tool. Set its Fill to 0%.
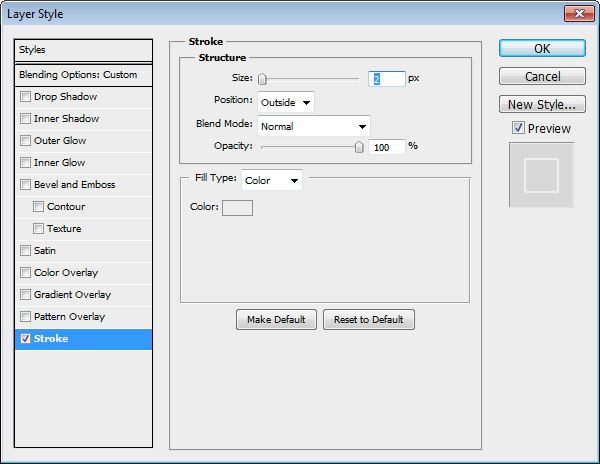
We will give this a Stroke layer effect afterwards. 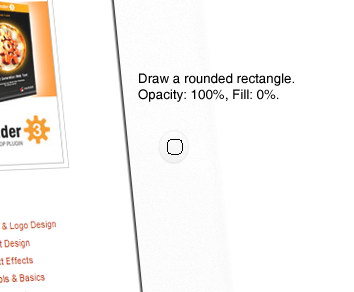
Stroke
 This is the result of the Stroke layer style:
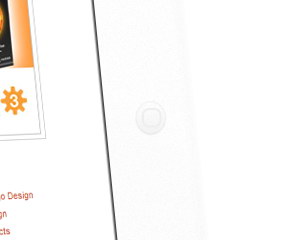
Step 6: Create the Smart Cover
Apple also creates the Smart Cover, which is a specially designed cover to protect and prop up iPad 2. We will draw it in this composition. To start, draw the shape shown below, behind the iPad.  Right-click the Smart Cover shape layer in the Layers Panel and choose Convert to Smart Object from the contextual menu.
We are converting it to a Smart Object to make the process of changing its color easier.  After converting a layer to a Smart Object, you will see an icon on the bottom-right corner of the layer’s thumbnail preview, which indicates that it is a Smart Object.
 ![]() Duplicate the shape we have just created and change its color to #8db0ca.
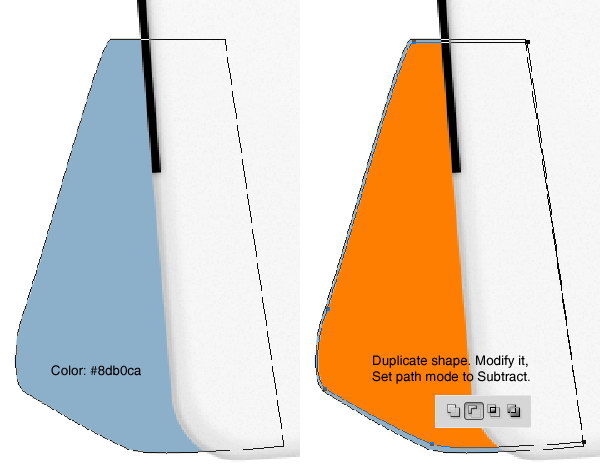
Duplicate the shape we have just created and change its color to #8db0ca.
Duplicate the path, modify it and set its mode to Subtract in the Options Bar. See the image below for reference. Our intent is to get a thin blue shape for the Smart Object’s thickness.
 Draw a rounded rectangle shape and set its Fill to 0%. Hit Ctrl/Cmd + T to activate Free Transform and then use the image below as a reference for the transformation that’s required.
 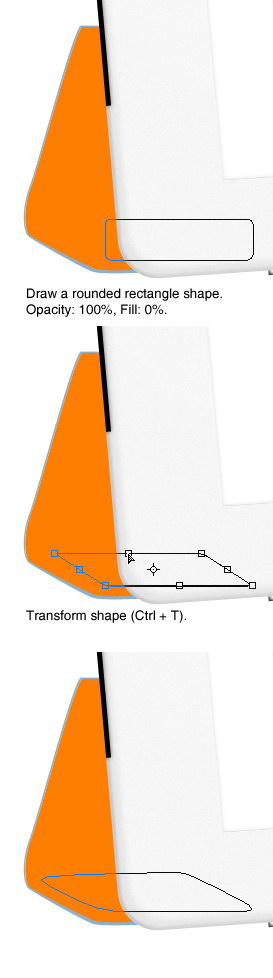 Add an Inner Shadow and a Gradient Overlay.
Inner Shadow
Gradient Overlay
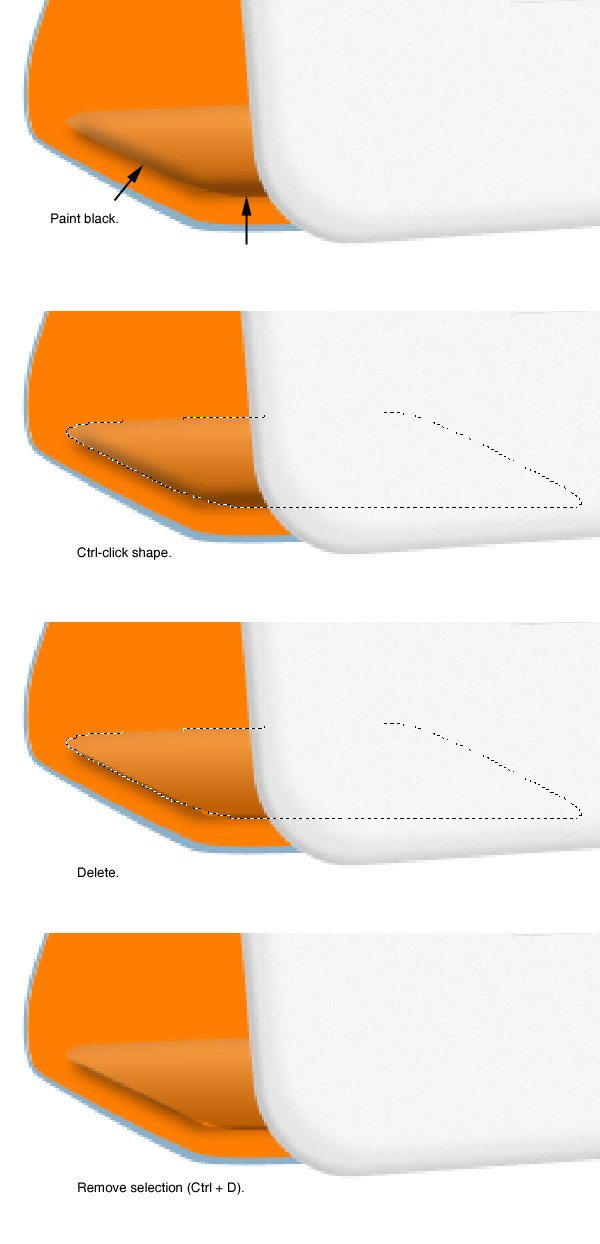
 Use the Brush Tool (B) with black as your brush color to paint on the indicated areas below. Then Ctrl-click/Cmd-click on the shape layer to load a selection around it, and then delete the selected areas. We should end up with a subtle shadow that additionally adds depth onto the shape.
 Draw the front part of the Smart Cover with the Pen Tool.
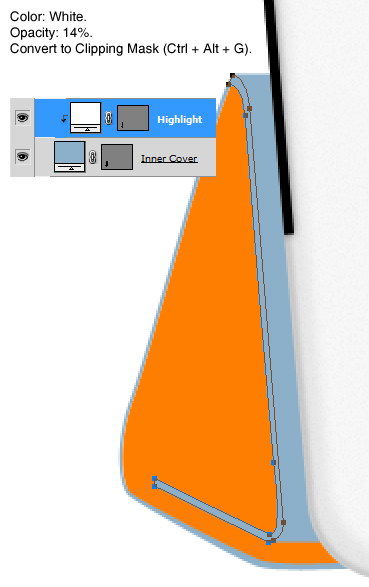
 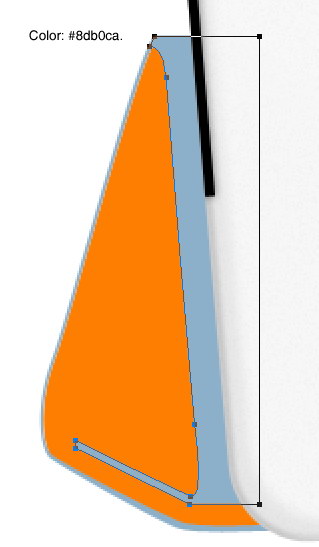 Draw a thin white shape for the Smart Cover’s thickness. Set its Opacity to 14% and convert the layer to a clipping mask.
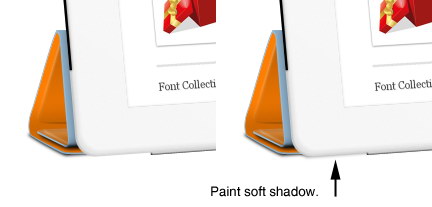
 Paint the shadow that the iPad casts on the Smart Cover using the Brush Tool.
 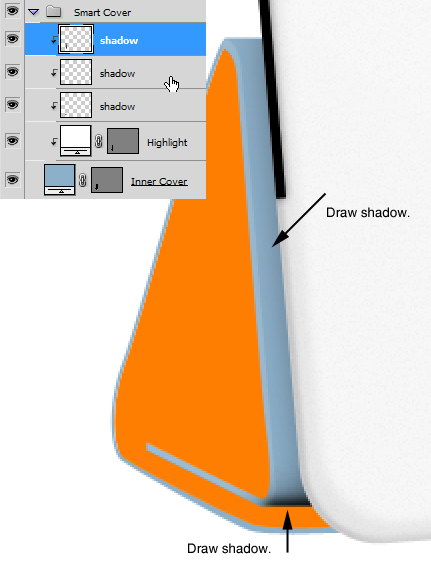 Draw a rounded rectangle with 0% Fill. Transform it until we have following shape:
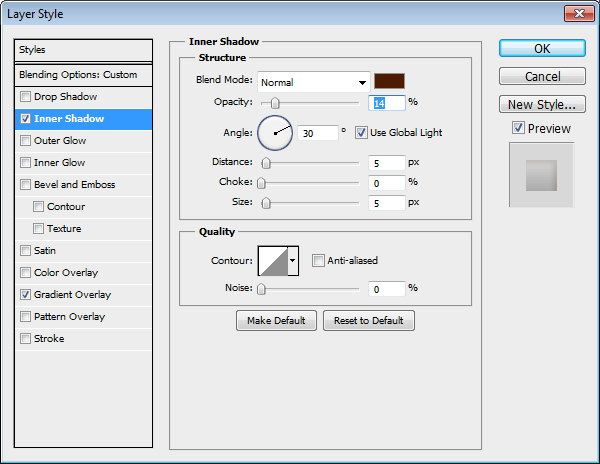
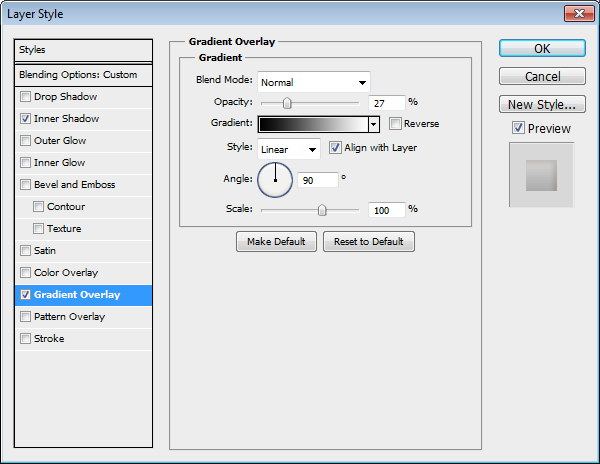
 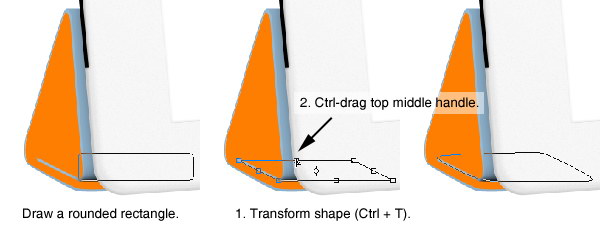 Give the layer an Inner Shadow and a Gradient Overlay.
Inner Shadow

Gradient Overlay
 Use a small, soft brush to draw subtle shadows and highlights on top of the shape.
 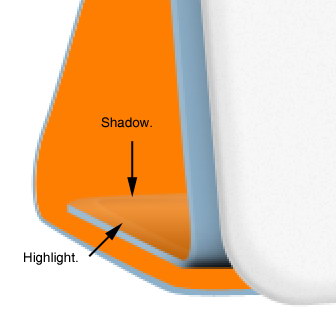 Draw a shadow under the inner side of the Smart Cover.
 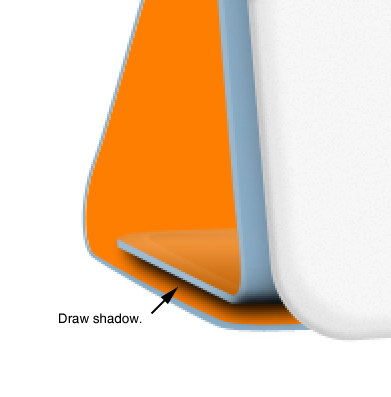 Draw a rounded rectangle shape with 0% Fill.
Transform it until we have following shape: 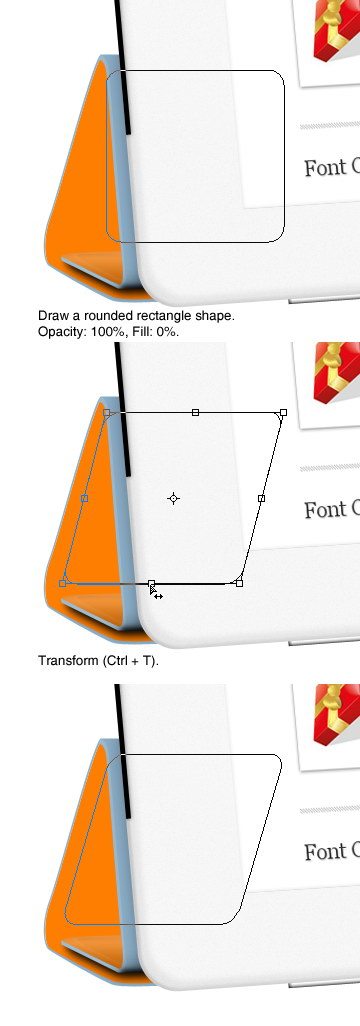 Give the layer an Inner Shadow, a Color Overlay, and a Gradient Overlay.
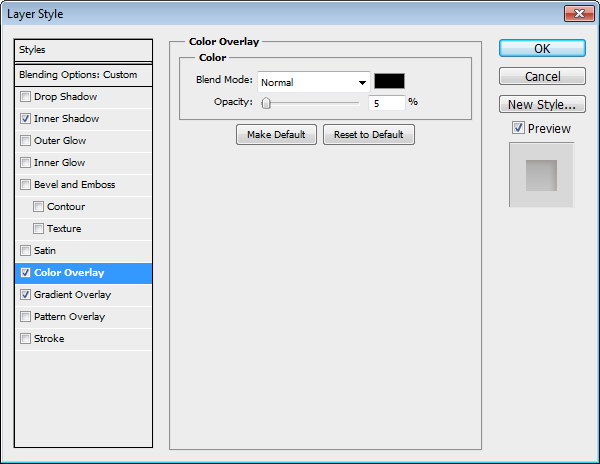
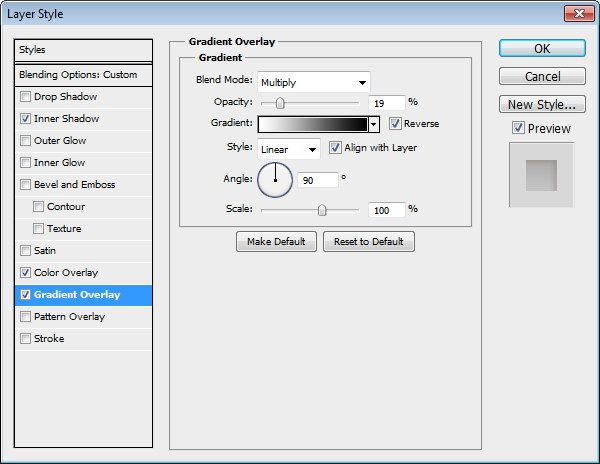
Inner Shadow

Color Overlay
Gradient Overlay
 This is the result of the layer style we applied above:
 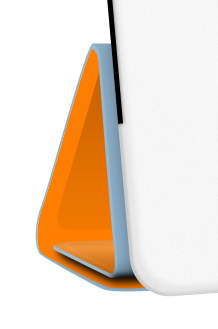 Paint subtle highlights on the left side of the shape.
 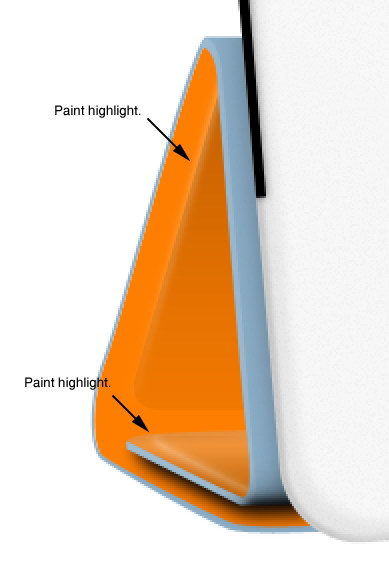 Draw a subtle shadow on the lower side of the shape.
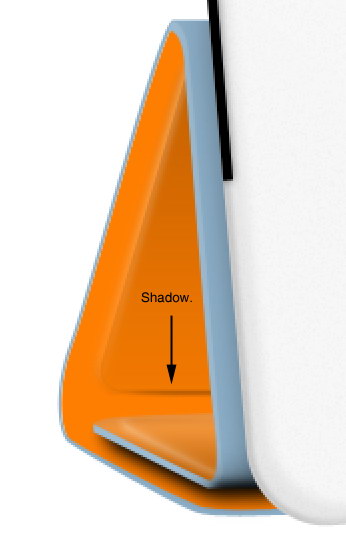 Both highlights and shadows will create a 3D effect on the shape.
 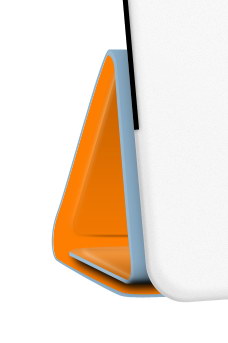 Select a big, soft brush. Paint shadows inside the Smart Cover.
Delete any shadow that spills outside the Smart Cover. 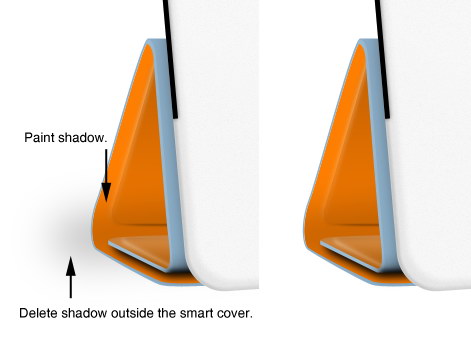
Step 7: Create the Smart Cover’s Hinge
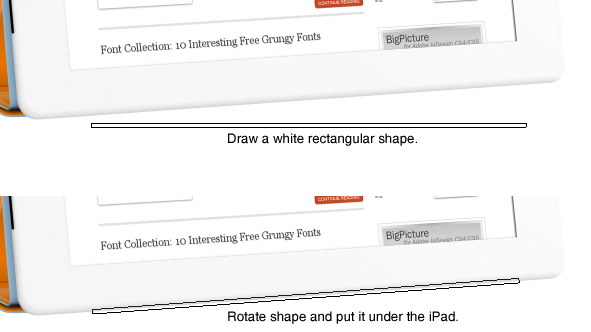
Draw a white rectangular shape for the Smart Cover hinge. Rotate it and put it under the iPad.
 Give it an Inner Glow.
  As you can see below, the Inner Glow gives the flat shape a 3D appearance.
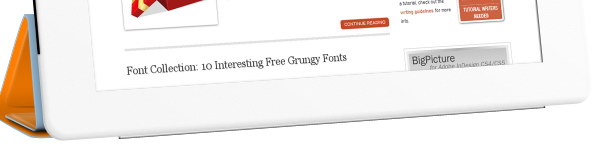
Step 8: Shadow Detailing
Use the Polygonal Lasso Tool (L) to draw a selection under the Smart Cover shaped according to the image shown below.
Create a new layer and place it under the iPad then fill your selection with black. Deselect your selection (Ctrl/Cmd + D) and then use the Gaussian Blur filter to soften the shadow. 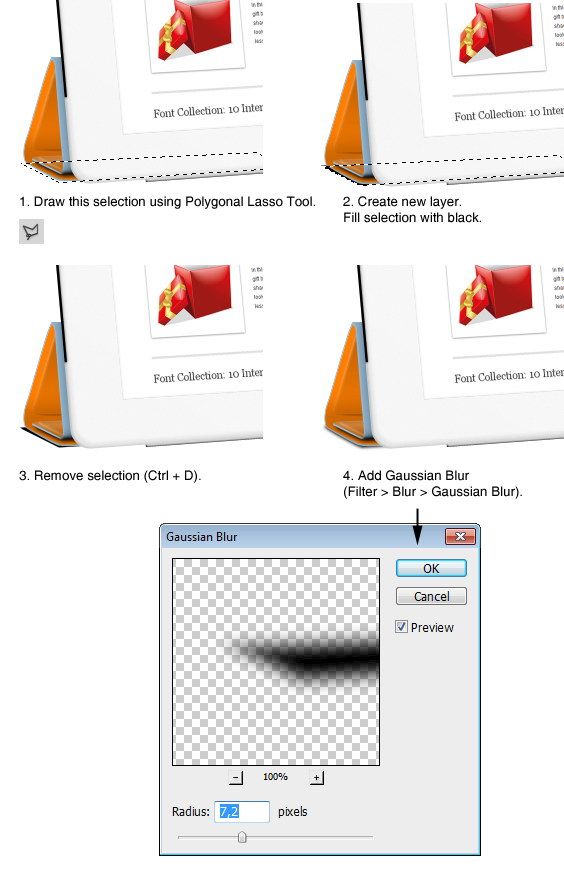 Use a small, soft brush to paint more shadows right under the iPad’s face.
 Next, create a bigger selection with the Polygonal Lasso Tool and fill it with black too. Soften it using the Gaussian Blur filter. Reduce the layer’s Opacity until we have a nice soft shadow.
 Use a small, soft brush to paint more shadows under the iPad and under the Smart Cover’s hinge.
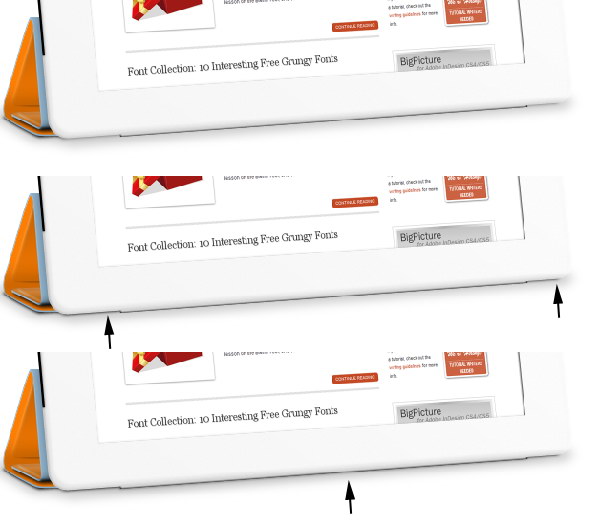
Step 9: Add a Background
We’re done with the iPad. Next, we should create a background that complements it.
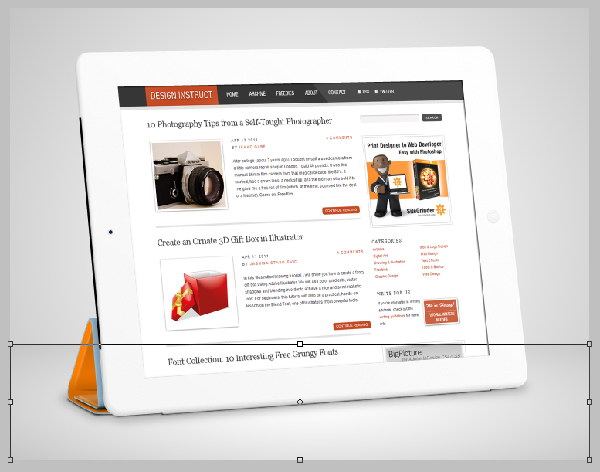
Create a new layer and place it under the iPad and its shadow layers. Fill the new layer with a radial gradient that goes from white at the center to gray.  Duplicate the layer (Ctrl/Cmd + J) then transform it until we have a floor.
Step 10: Organizing Your Layers
That’s it, we’re done with the actual production. We could stop here if we wanted to. However, one of my goals in this tutorial is not just to create a flat image of an iPad, but rather, a template/mockup PSD that others can use to showcase their own image.
So the next few steps all relate to preparing a Photoshop file for the public. Use these tips when you are sharing your PSD files with your design team or when you are offering up PSD freebies on your website. First, we want to ensure that all layers are organized well, so anyone — including those who have limited Photoshop knowledge — can easily use our PSD.
Give each layer an appropriate name and organize layers into layer groups. Lock layer groups that aren’t going to be frequently modified to make sure that the user will not accidentally modify it. This includes groups such as the Home button and the iPad’s basic shape.
Remember how we created the Smart Objects for the screen and the Smart Cover? We use Smart Objects because a Smart Object can be easily modified. Duplicate the “screen” Smart Object and the “smart cover color” Smart Object by Alt-dragging/Option-dragging it in the Layers Panel.
Put it on top of all other layers and then hide them by clicking on the eye icons on the left of their name. These duplicated layers are the same as the original layers. If we edited these layers, the original layers will also changed.
We duplicate them right on top so that all of our Smart Objects are quickly accessible. We will see the purpose of this further down below.  Close the layer groups to hide all those messy layers.
Save the PSD file. 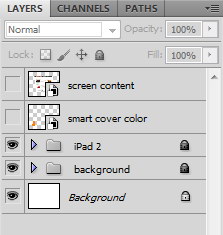
Step 11: Changing the Screen Content
The iPad mockup is done. In this step, we will change the screen content.
Double-click the “screen” Smart Object layer and it will be opened it in a separate window. 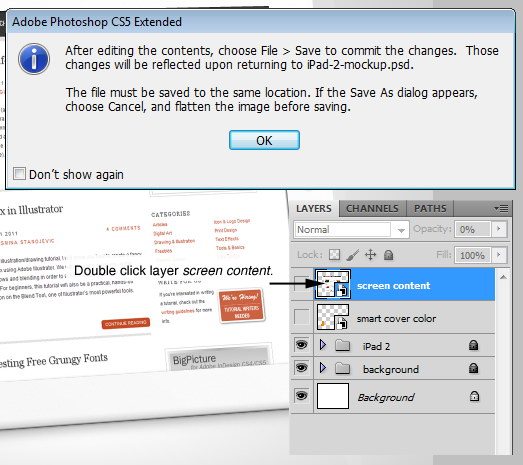 Paste a new image in the new document. Here, I’m using a screenshot of my own site.
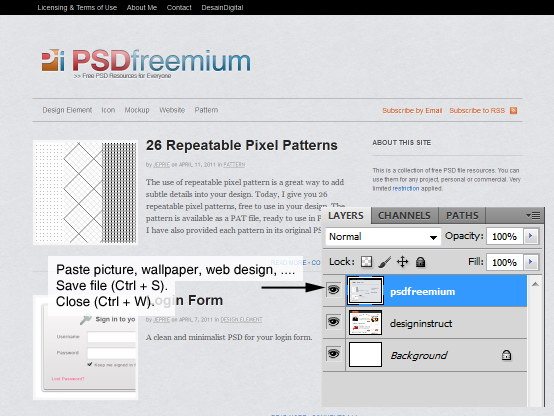 Hit Ctrl/Cmd + S to save the changes. Close the file and return to the main PSD. You can see that the screen content is automatically updated.
No transformations or modifications needed. This makes it easy even for novice Photoshop users to swap the image out. 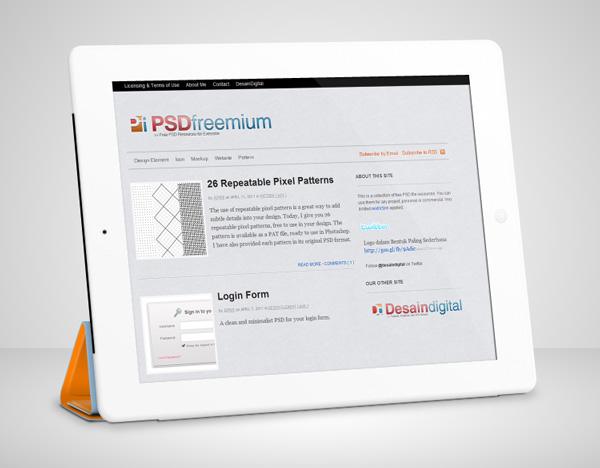 I used the same process to change the screen content to Six Revisions.
All I did was take a screen capture and paste it into the Smart Object document. Very easy. 
Step 12: Change the Smart Cover Color
The “smart cover color” Smart Object is a bit different because it’s a completely vector object that we made inside the main PSD document (i.e.
we didn’t import it). So let’s look at how Smart Objects help us with this kind of data. In the Layers Panel, double-click the “smart cover color” Smart Object.
Like the “screen” Smart Object, it is opened in a new document window. There, you will find a Solid Color adjustment layer. Double-click on its color thumbnail in the Layers Panel to change its color.
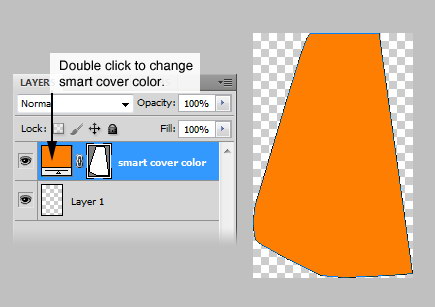
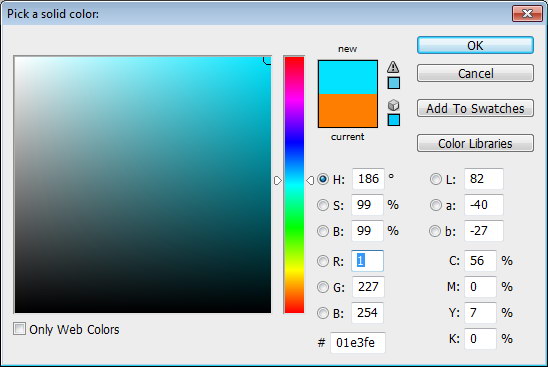 Save the file and then close it. When you return to the main PSD, the color of the Smart Cover is automatically updated.
Tutorial Summary
In this tutorial, I showed you how to create an iPad 2. More than that, I showed you the power of using Smart Objects and how to organize and create flexible, easy-to-use PSD files. I hope you enjoyed this Photoshop tutorial and have picked up some useful tricks and techniques! Don’t forget that you can use this iPad 2 mockup to showcase your own designs and screenshots.
Download Source Files
- ipad2 (ZIP, 9.55 MB)
-
 Trevin serves as the VP of Marketing at WebFX. He has worked on over 450 marketing campaigns and has been building websites for over 25 years. His work has been featured by Search Engine Land, USA Today, Fast Company and Inc.
 -

WebFX is a full-service marketing agency with 1,100+ client reviews and a 4.9-star rating on Clutch! Find out how our expert team and revenue-accelerating tech can drive results for you! Learn more
Make estimating web design costs easy
Website design costs can be tricky to nail down. Get an instant estimate for a custom web design with our free website design cost calculator!
Try Our Free Web Design Cost Calculator
Table of Contents
- Preview
- Step 1: Draw the IPad’s Basic Shape
- Step 2: Drawing the IPad’s Screen
- Step 3: Create the Antenna Cover
- Step 4: Create the Face Time Camera
- Step 5: Create the Home Button
- Step 6: Create the Smart Cover
- Step 7: Create the Smart Cover’s Hinge
- Step 8: Shadow Detailing
- Step 9: Add a Background
- Step 10: Organizing Your Layers
- Step 11: Changing the Screen Content
- Step 12: Change the Smart Cover Color
- Tutorial Summary
- Download Source Files
Share this article


Web Design Calculator
Use our free tool to get a free, instant quote in under 60 seconds.
View Web Design CalculatorMake estimating web design costs easy
Website design costs can be tricky to nail down. Get an instant estimate for a custom web design with our free website design cost calculator!
Try Our Free Web Design Cost Calculator


