
Preview

Introduction
Throughout the tutorial, almost every shape is drawn with Photoshop’s Pen Tool. If you are not experienced with the Pen Tool, you can refer to this excellent tutorial called “Become a Master of the Pen Tool in Under 30 Minutes” by Simon Hubbert on PSDFan.
Step 1: Set up the Photoshop document
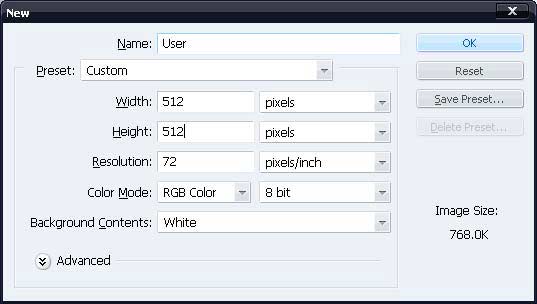
To start, create a new document in Photoshop with these settings.
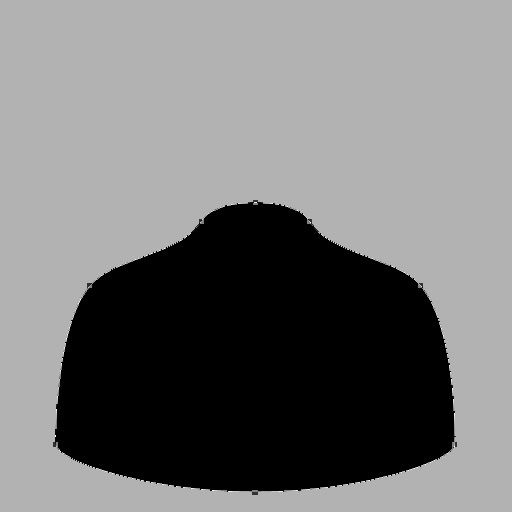
 For convenience, fill the Background layer with a shade of gray and position a vertical guide (View > New Guide) at the center of the document. This guide will help us keep things symmetrical.
Step 2: Start with the body
 One easy way of achieving symmetry for such a shape is to make just one half of it first.
Choose the Pen Tool (P) from the Tools Pnael and draw a shape as shown below. Before you make the shape, make sure to select Shape layers option from Options bar, and to set black (#000000) as your foreground color. 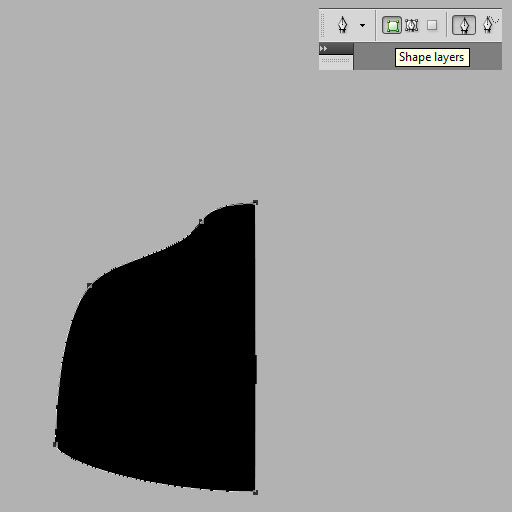 Once you have done half of the shape, select Path Selection Tool (A) and click on the shape in the canvas.
Now press Ctrl/Cmd + C and then Ctrl/Cmd + V to copy and paste a copy of same path on the layer. Next, go to Edit > Transform Path > Flip Horizontal and move the other half rightward so that the ends of two halves join together. 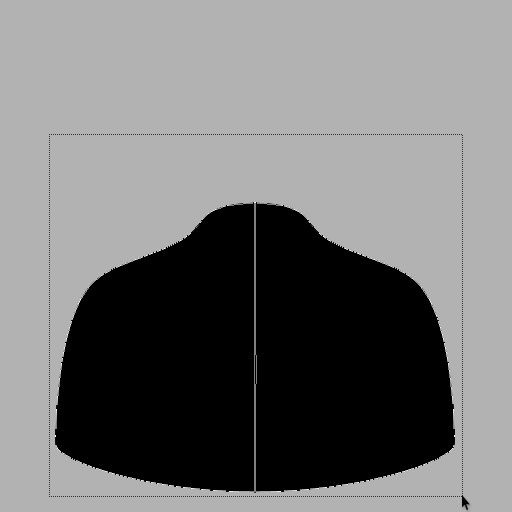 With Path Selection Tool (A) still selected, stretch out a selection over the two halves then click the Combine button in the Options bar; this will add the two halves together, resulting in just one symmetrical shape.
 Name the shape layer as “body” to keep our layers organized.
Step 3: Add layer styles to the body
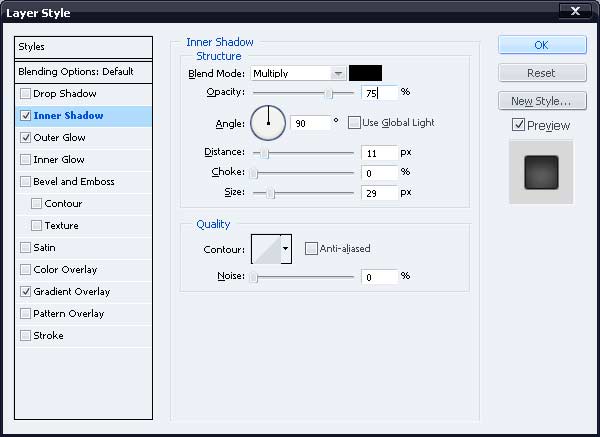
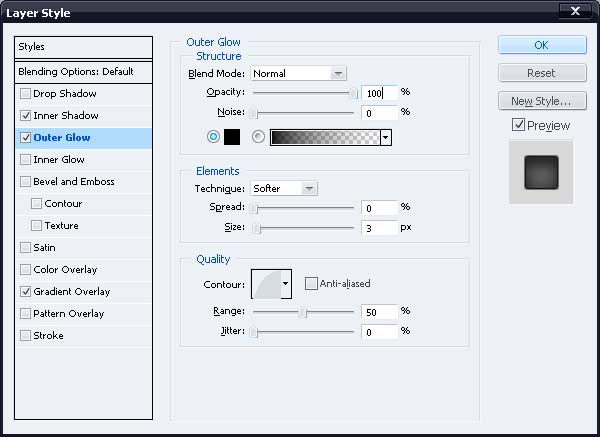
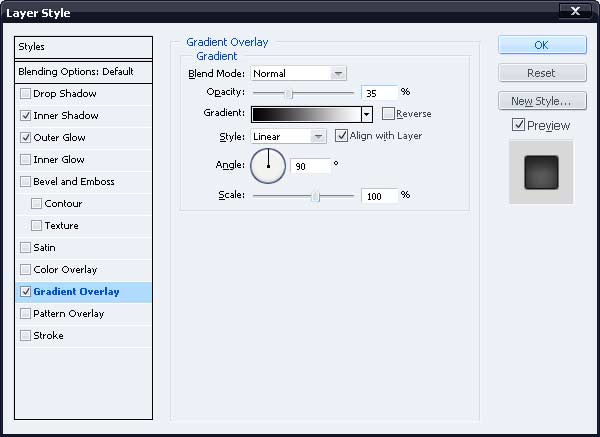
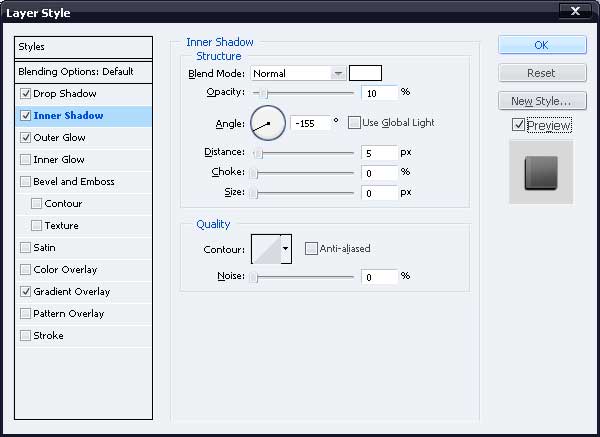
Go to Layer Style options for the “body” layer and give it these styles:
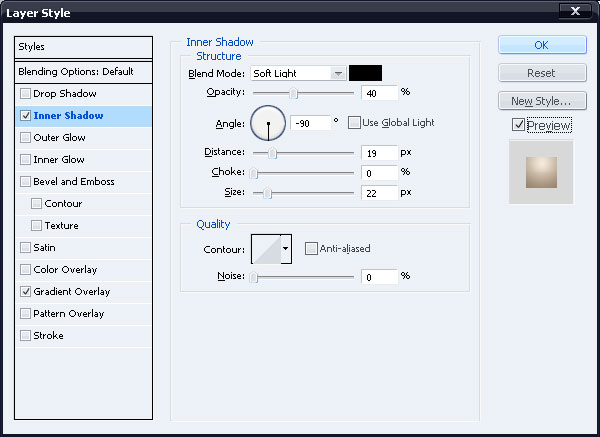
Inner Shadow layer style
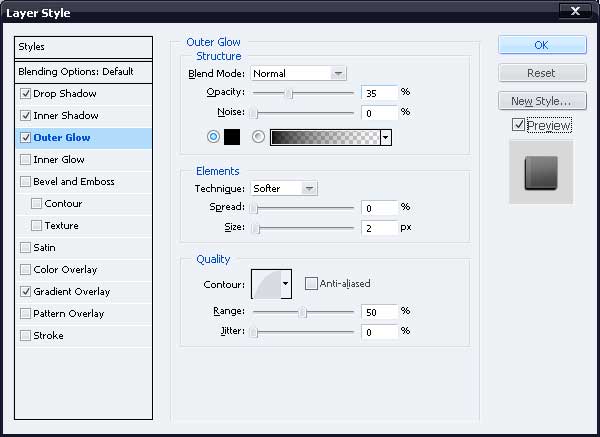
Inner Glow layer style
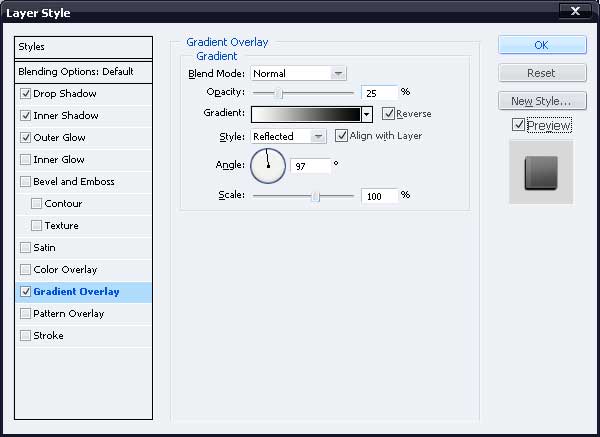
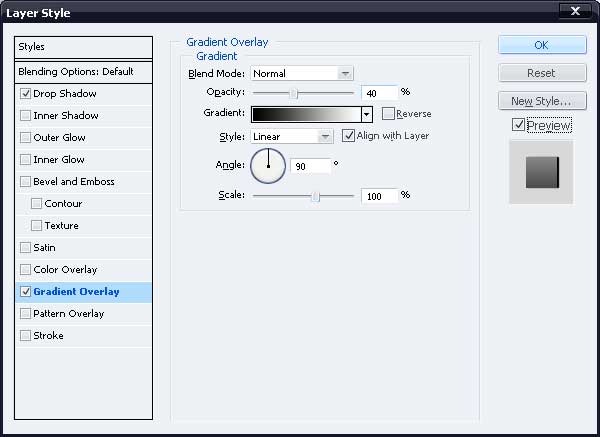
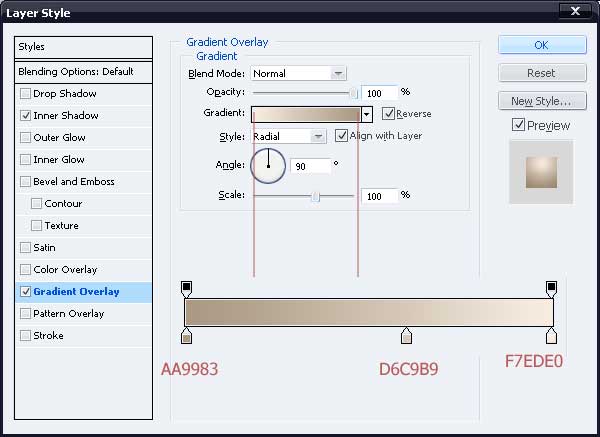
Gradient Overlay layer style
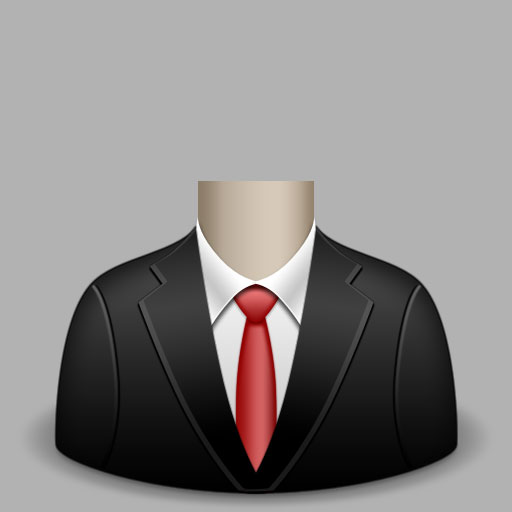
 Here’s what it should look like after the layer styles have been applied.
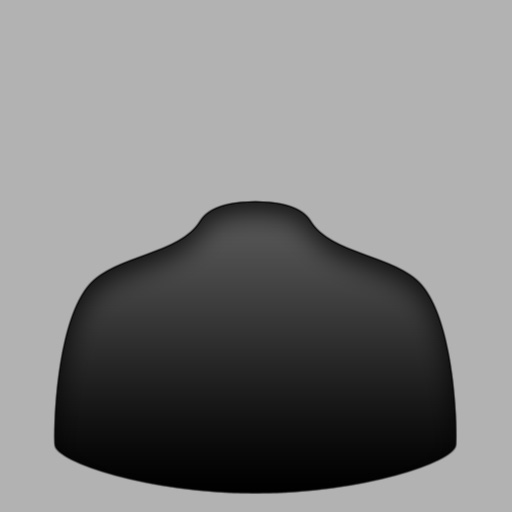
Step 4: Add shadow to the body
Create a new layer and place it below “body” layer.
Fill a selection on it using the Elliptical Marquee Tool (M) and reduce its opacity to 30%. Next, apply two filters on it (Gaussian Blur and Motion Blur).
Filter > Blur > Gaussian Blur
Set the radius option at 3.0px.

Filter > Blur > Motion Blur
Set the Angle at 0 degrees and Distance to 30px. 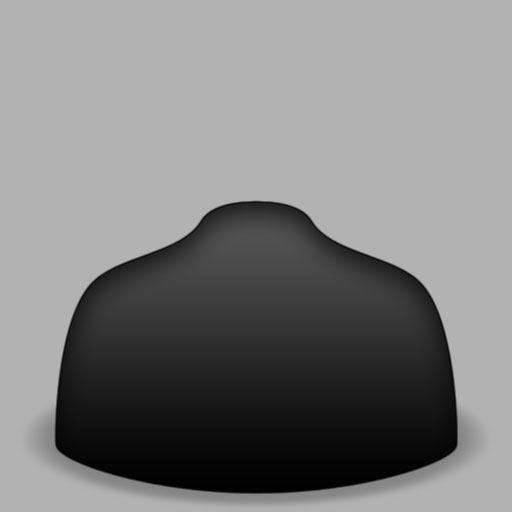 Create a new layer and Ctrl/Cmd-click on “body” layer to load a selection around it, and then fill it with black (#000000) on the new layer. With the selection still loaded, go to Select > Modify > Expand and expand the selection by 2px.
Move the selection 5px up then hit the Delete key to clear the area below the selection. Select Move Tool (V) and move the layer 3px down. Finally, apply a Gaussian Blur filter of 2.5px radius and reduce the opacity of layer to 50%.
If followed correctly, you’ll have something like this by now. 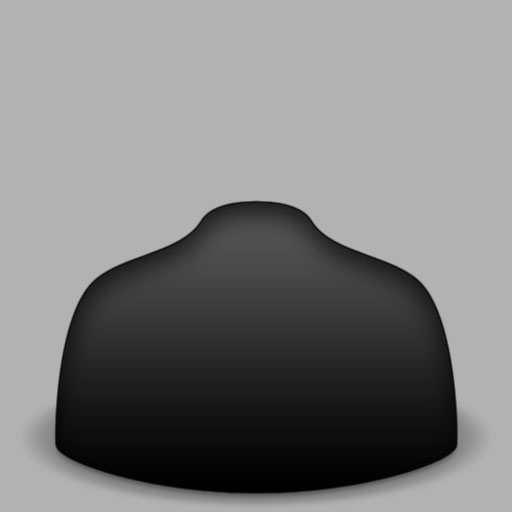
Step 5: Create the shirt
Using the Pen Tool (P), draw a shape like the one shown below and name it “shirt“. 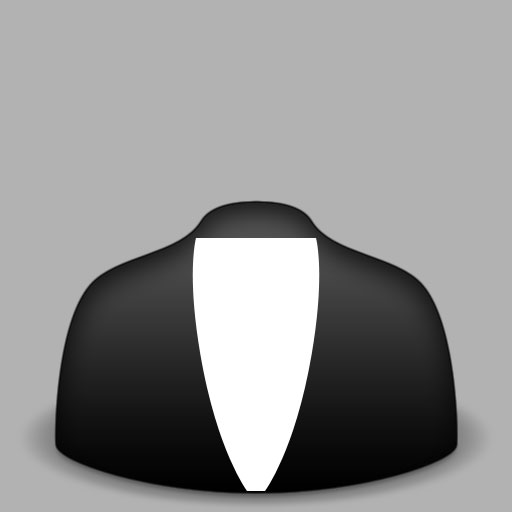 Once the shape is finished, give it a Gradient Overlay of light gray shade.
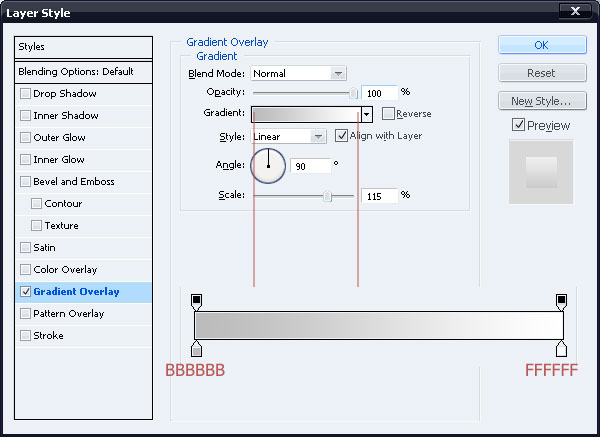

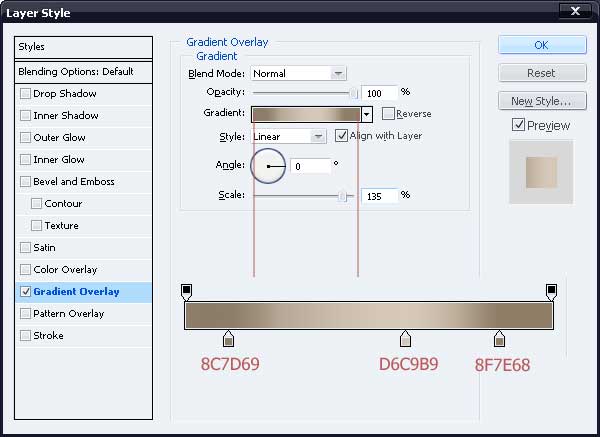
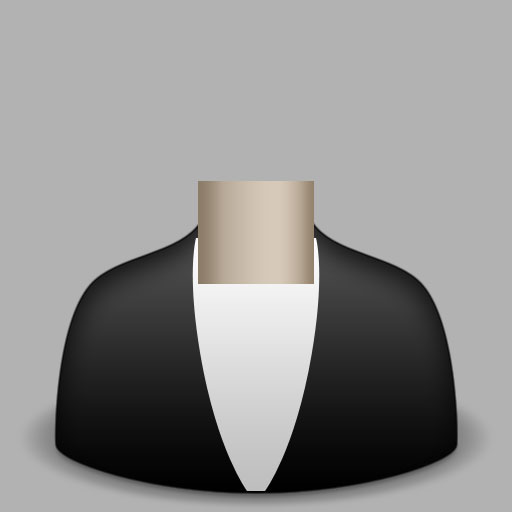
Step 6: Create the neck
Choose the Rectangular Marquee Tool (M) and on a new layer, fill a selection with any color as shown (we will add a layer style to it so the color you fill it with doesn’t matter). 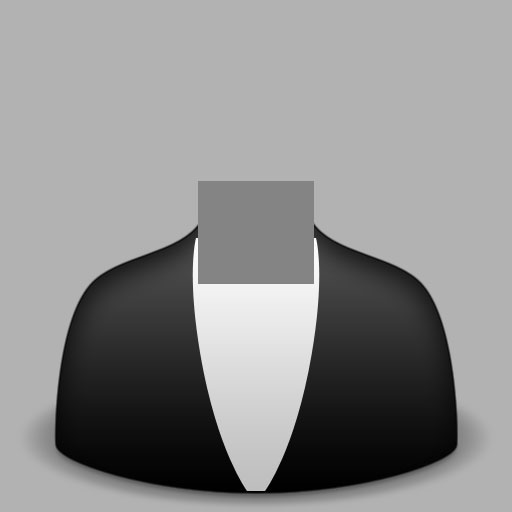 Give the layer a Gradient Overlay layer style afterwards.
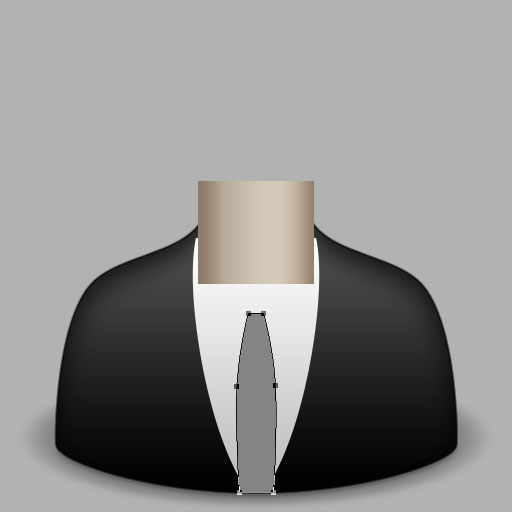
Step 7: Create the tie
Next up is the tie. It’ll be a red tie, but I encourage you to experiment with different tie colors and patterns! Create the tie shape with Pen Tool (P) using similar processes as the ones we’ve been talking about.
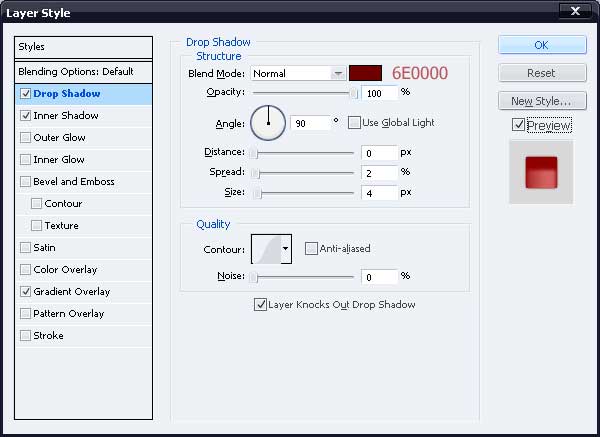
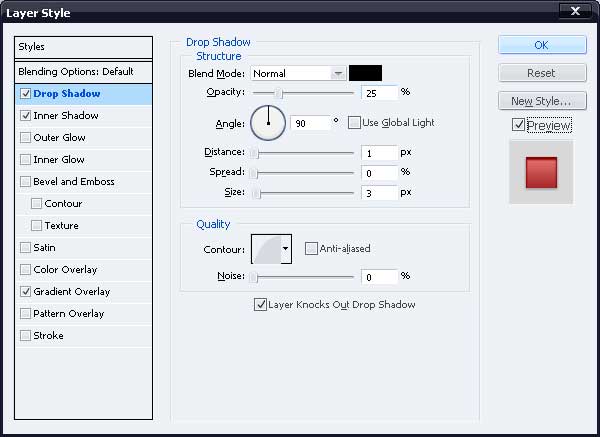
 Next, we’ll give the tie some layer styles:
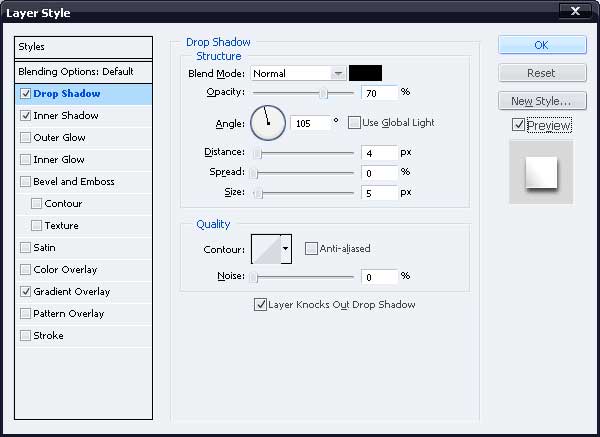
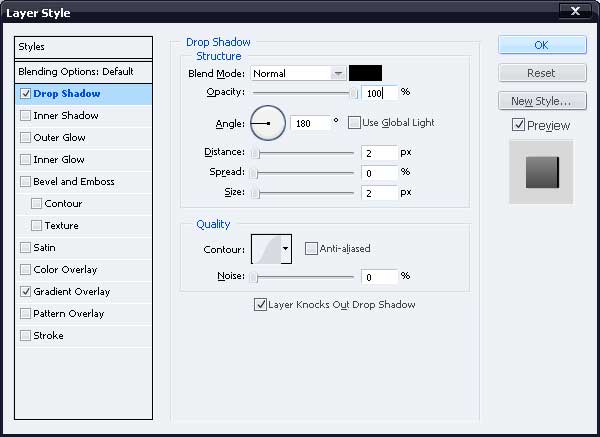
Drop Shadow layer style
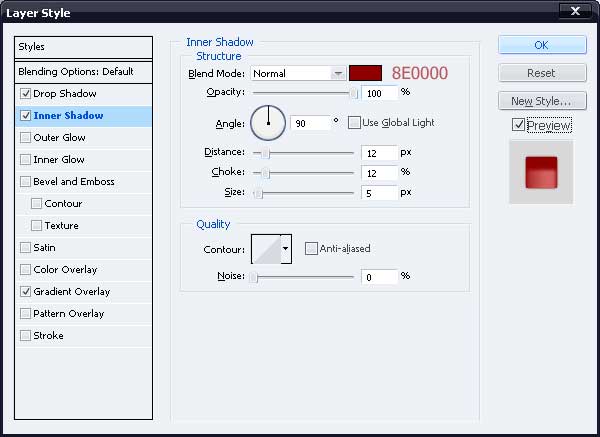
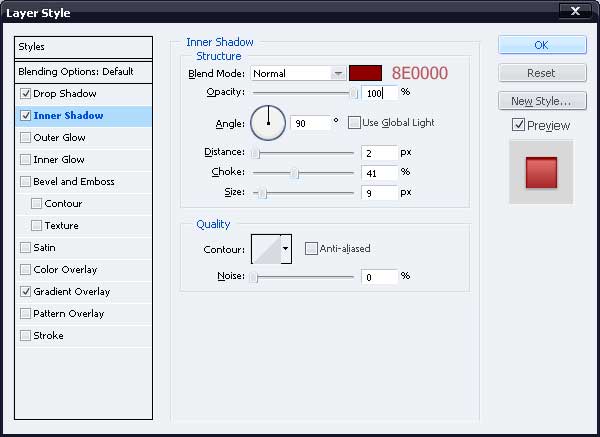
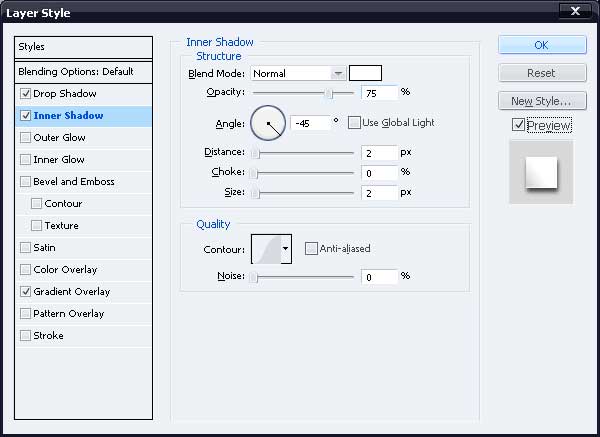
Inner Shadow layer style
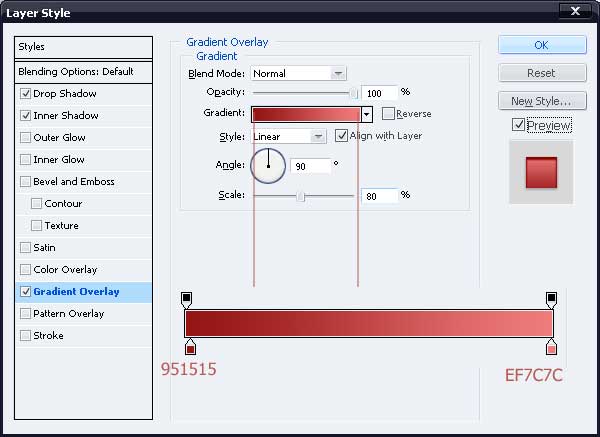
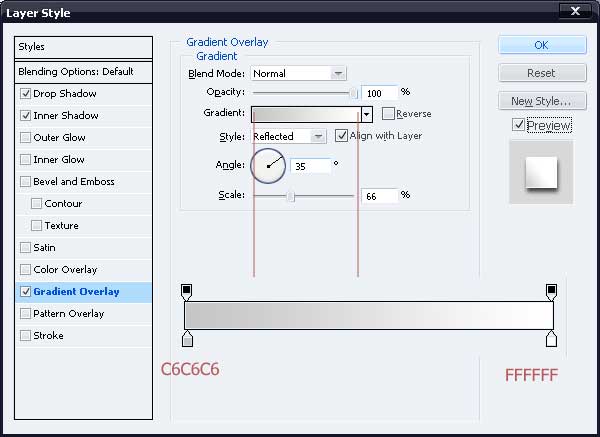
Gradient Overlay layer style
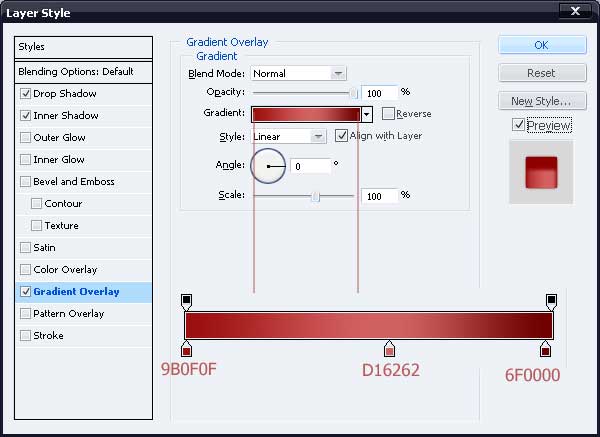 Voila, here’s what the tie looks like now.
 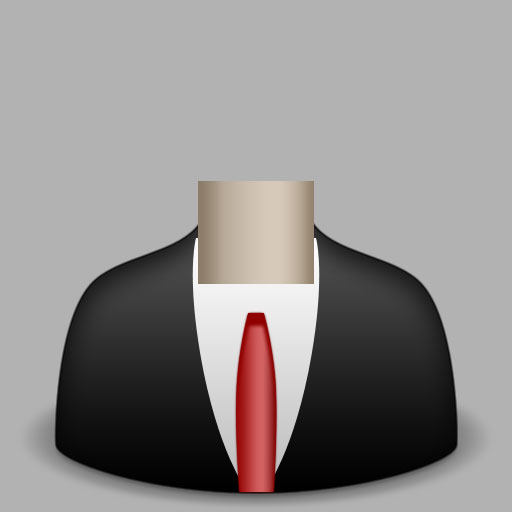 Next, we need to make another shape with the Pen Tool (P) for the knot.
  Let’s apply some layer styles to the tie knot.
Drop Shadow layer style
Inner Shadow layer style
Gradient Overlay layer style
 Here’s our entire neck tie finished.
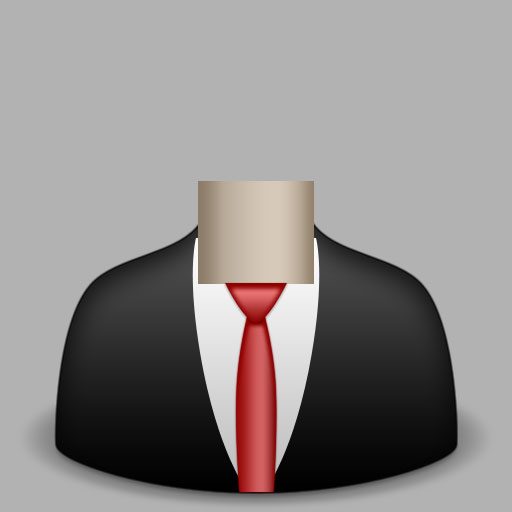
Step 8: Make the shirt collar
It’s time to make the collar of the shirt. Draw a shape as shown; the fill color you pick is arbitrary since it’ll be covered up by layer styles later on (just pick a color that you can easily distinguish from the background).
Name this new shape layer “collar“. 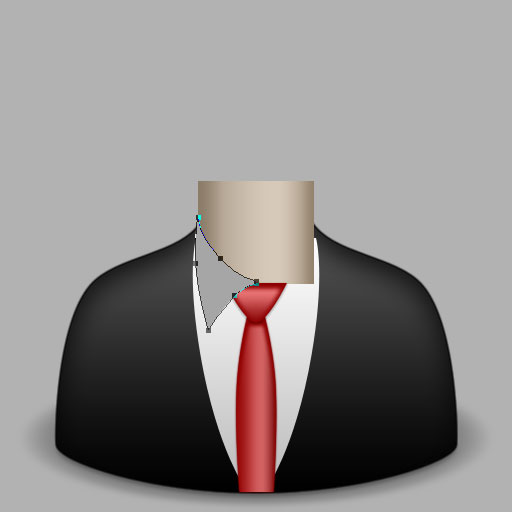 After drawing the shape, give it these Layer Styles to make it look consistent with shirt.
Drop Shadow layer style
Inner Shadow layer style
Pattern Overlay layer style
 Here’s the left collar after it’s finished.
 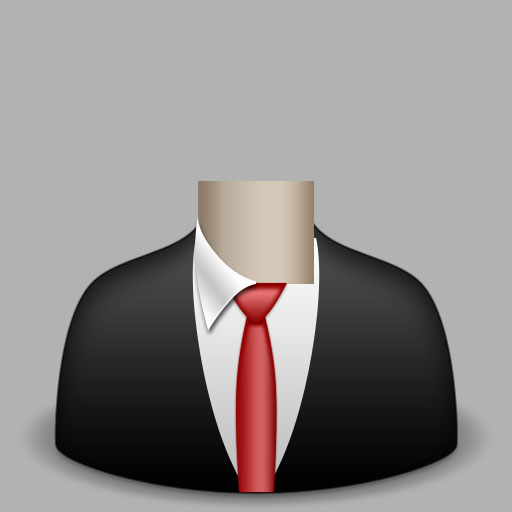 To complete the collar, you need to duplicate the left collar and flip it horizontally.
Since the “collar” layer contains Layer Styles, transforming a duplicate copy won’t work. Therefore, to get the desired outcome, select the “collar” layer and press Ctrl/Cmd + J to duplicate it. Now create a new layer and merge the duplicate layer with it.
This flattens the left collar so that when we transform it, the styles won’t be affected. After that, go to Edit > Transform > Flip Horizontal and move the other half rightward using the Move Tool (V) in order to complete the collar. 
Step 9: Add lapels to the suit
Set your foreground and background colors to default by pressing D (this sets the foreground color to black and background to white).
Then make a shape for the left lapel of the suit as shown below.  Add the following layer styles to this shape layer:
Drop Shadow layer style

Inner Shadow layer style
Outer Glow layer style
Gradient Overlay layer style
 This is our left lapel finished with layer styles.
 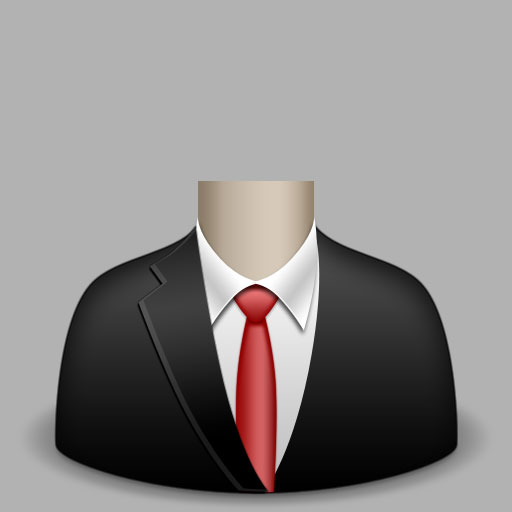 Just like the collar in the previous step, add a copy of this shape on right side so that you get something like this.

Step 10: Delineate the arms of the suit
Select the Brush Tool (B) and pick a 4px soft brush tip. ![]() Now grab the Pen Tool (P) and click on the Paths option as shown.
Now grab the Pen Tool (P) and click on the Paths option as shown. ![]()
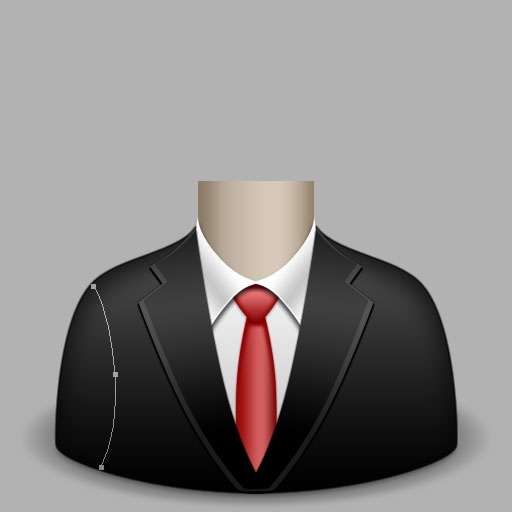 Create a new layer and draw a curve over right shoulder.
With the foreground color set to black (#000000), right-click on the path and select Stroke Path from menu. 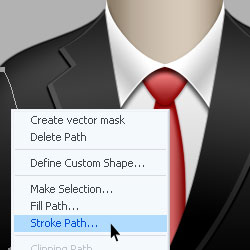 Click OK after setting the Tool option to Brush.
 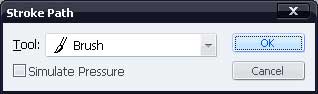 Now give the new path these layer styles:
Drop Shadow layer style
Gradient Overlay layer style
 Put a duplicate copy of layer on the opposite side so that you get something like this.
Step 11: Create the head
Draw an elliptical shape for the face as shown below.  Next, and give it shades of skin color with these layer styles:
Inner Shadow layer style
Gradient Overlay layer style
 You should end up with something like this:
Step 12: Add a shadow to the face
Create a new layer and Ctrl/Cmd-click on the “face” shape layer to make a marquee selection around it automatically. Move the selection 4px down and fill it with the color #423820 on the new layer.
 Apply the Motion Blur filter (Filter > Blur > Motion Blur) with an angle of 90 degrees and Distance at 10px. Repeat the same exact filter by pressing Ctrl/Cmd + F. With the shadow layer selected, Ctrl/Cmd-click on “neck” layer to create a marquee selection around it, then press Ctrl/Cmd + Shift + I to invert the selection.
Press the Delete key to clear the area beneath the inverted selection. 
Step 13: Create the hair
The last thing to be added to the icon is the hair. Feel free to create any hairstyle for the icon, but the purposes of this tutorial, let’s start with something simple.
 After making the simple shape, give it a white to black Gradient Overlay layer style.
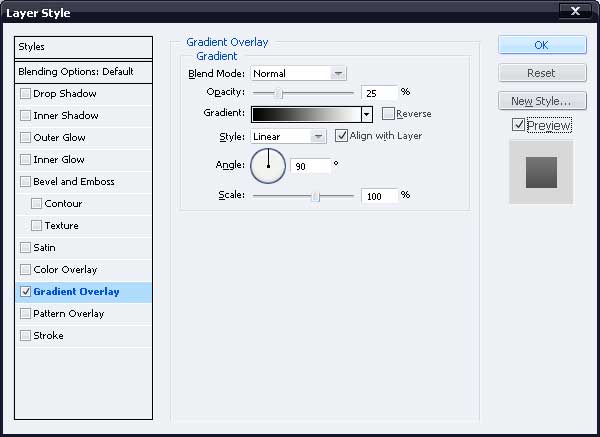
Step 14: Add shadow to the hair
Just like you did with the shadow for the face, add a shadow for the hair over the face using the same color, but with a lower opacity (about 70%). 
Step 15: More improvements on the hair
Create a new layer and Ctrl/Cmd-click on “hair” shape layer to load its selection.
Move the selection 7px upward and fill it with white (#ffffff). With the selection still loaded, move it 5px up and press Delete to clear the area below the selection. Now apply these filters on the layer:
Filter > Blur > Gaussian Blur
Set the Radius option to 1px.
Filter > Sharpen > Sharpen
Apply this filter twice. Next, set fill opacity of the layer to 0% and give it a Gradient Overlay layer style. 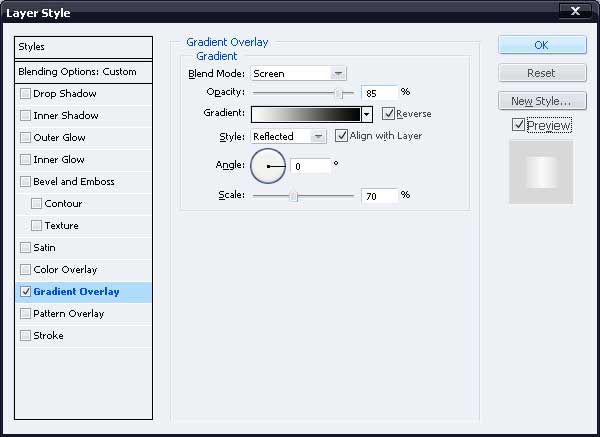
Conclusion
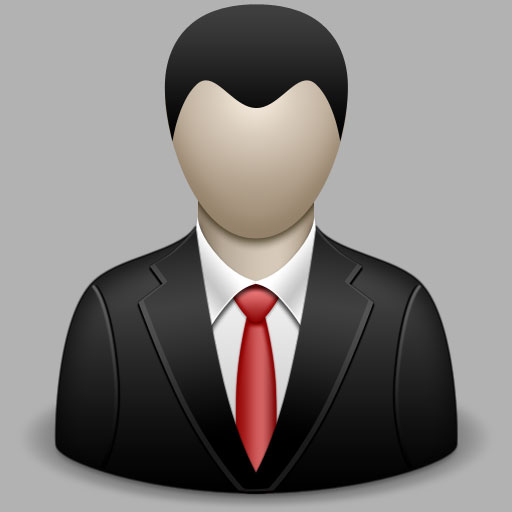
We’re done!
Thank you for following along this tutorial and I hope that you were able to learn a new trick or two in Photoshop. If I have inspired any of your works at all with this tutorial, I encourage you to add it to the Design Instruct Flickr group pool; please help us build this collection up! Here is the final version of the icon design.

Download Source Files
- professional_buddy_icon (ZIP, 0.20 MB)
-
 Trevin serves as the VP of Marketing at WebFX. He has worked on over 450 marketing campaigns and has been building websites for over 25 years. His work has been featured by Search Engine Land, USA Today, Fast Company and Inc.
 -

WebFX is a full-service marketing agency with 1,100+ client reviews and a 4.9-star rating on Clutch! Find out how our expert team and revenue-accelerating tech can drive results for you! Learn more
Make estimating web design costs easy
Website design costs can be tricky to nail down. Get an instant estimate for a custom web design with our free website design cost calculator!
Try Our Free Web Design Cost Calculator
Table of Contents
- Preview
- Introduction
- Step 1: Set Up the Photoshop Document
- Step 2: Start with the Body
- Step 3: Add Layer Styles to the Body
- Step 4: Add Shadow to the Body
- Step 5: Create the Shirt
- Step 6: Create the Neck
- Step 7: Create the Tie
- Step 8: Make the Shirt Collar
- Step 9: Add Lapels to the Suit
- Step 10: Delineate the Arms of the Suit
- Step 11: Create the Head
- Step 12: Add a Shadow to the Face
- Step 13: Create the Hair
- Step 14: Add Shadow to the Hair
- Step 15: More Improvements on the Hair
- Conclusion
- Download Source Files
Share this article


Web Design Calculator
Use our free tool to get a free, instant quote in under 60 seconds.
View Web Design CalculatorMake estimating web design costs easy
Website design costs can be tricky to nail down. Get an instant estimate for a custom web design with our free website design cost calculator!
Try Our Free Web Design Cost Calculator


