

Preview
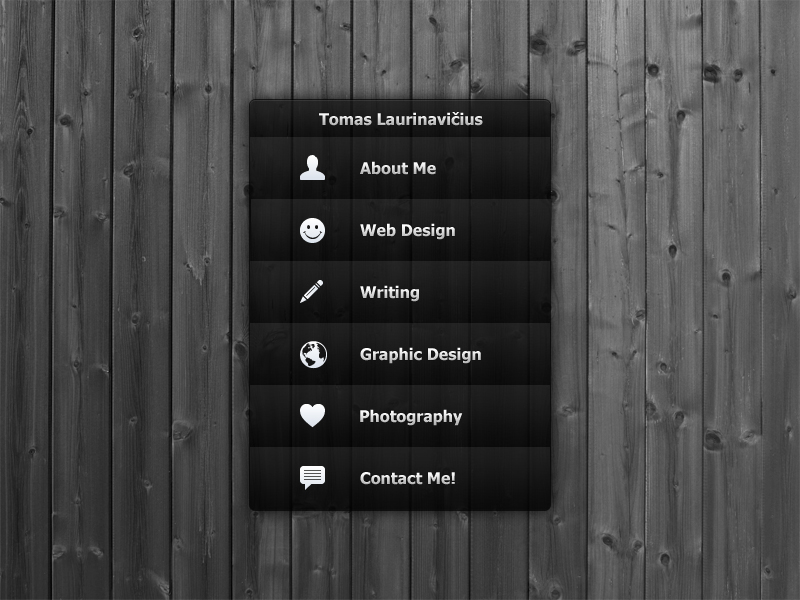
Click on the image below to see the final result in full size.
Tutorial Resources
- Texture: Wood Texture
- Icons: Free iphone toolbar icons
Step 1: Create a New Document
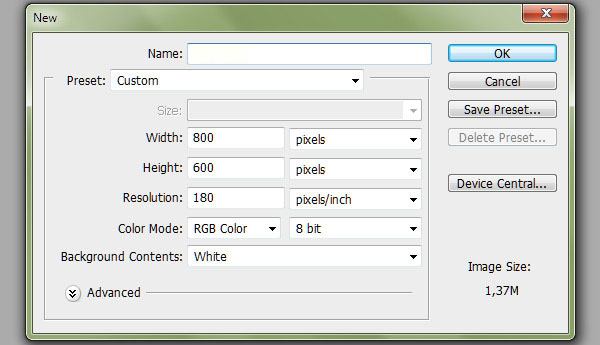
Start by creating a new document in Photoshop (Ctrl/Cmd + N). Make the document 800px by 600px with a white background.
Step 2: Add Guides
To help with alignment, we should set up some guides. I recommend using the New Guide dialog window (View > New Guide) so that you can place the guides on the canvas with pixel-perfect accuracy.
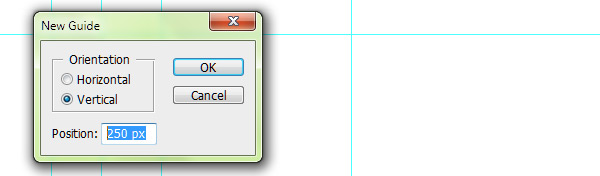
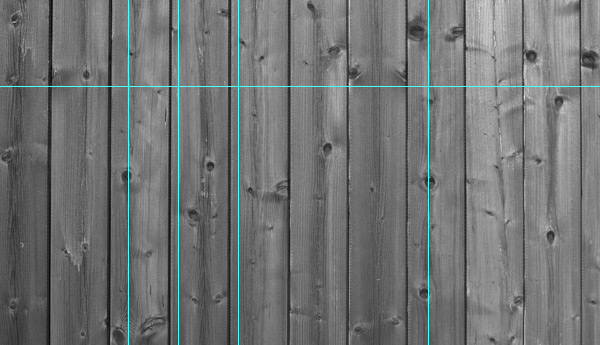
Place 4 vertical guides at these following positions:
- 250px
- 300px
- 360px
- 550px
Place 2 horizontal guides at these following positions:
- 100px
- 510px
Step 3: Create the Dark Wooden Background
This step is rather optional. I’m going to place a background for our work to make it look more interesting. You can use a different background (or no background at all) and the design will still look great.
Note that the background texture that I’m using is just for display purposes; I’m not going to worry about how this background will be tiled in the actual web design. As such, feel free to use a background that can be repeated seamlessly and then just use similar techniques to process it to get the same look-and-feel as below.
Download and open the Wood Texture from stock.xchng. Place the image into our working document.
We will need to resize this background texture.
Press Ctrl/Cmd + T (shortcut for Edit > Free Transform). In the Options Bar, you can resize the image accurately by setting the H (Height) and W (Width) options to 32%.
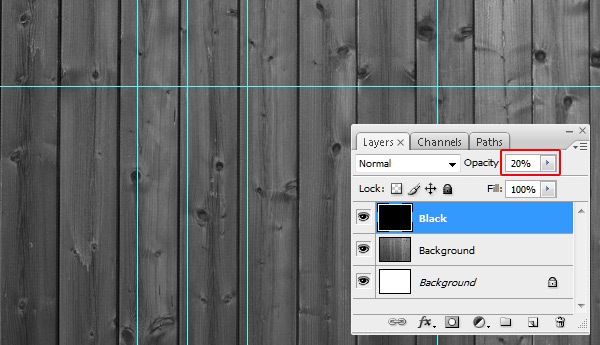
The background image I used has real wood colors, but I want it to be black and white so I went ahead and desaturated it via Image > Adjustments > Desaturate (Shift + Ctrl/Cmd + U).
We will increase the blacks of the texture a bit more with a simple trick. Create a new layer (Shift + Ctrl/Cmd + N) above the wooden texture layer; I’ve just named this new layer as “Black” so that I’m keeping my work organized.
Set your Foreground Color to black (#000000). Go to Edit > Fill (Shift + F5). In the Fill dialog window, make sure that the Use option (it’s a dropdown menu) is set to Foreground Color, and then just press OK to fill the layer.
Then just reduce the Opacity of the layer to about 20% to let the wooden texture background show through.
Step 4: Draw a Rounded Rectangle for the Body
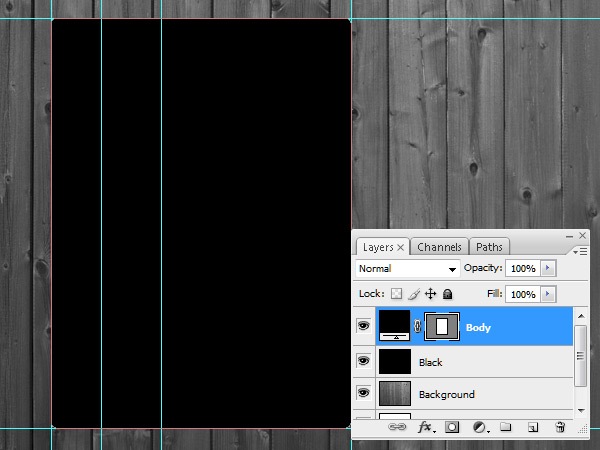
Create a new layer above the layer we called “Black” and name this new layer as “Body.”
Make sure your Foreground Color is still set to black (#000000).
Choose the Rounded Rectangle Tool (U). In the Options Bar, set the drawing option to Shape layers (which is the default setting) and the Radius to 5px. Draw a rounded rectangle using the leftmost and rightmost vertical guides as well as the horizontal guides to draw the shape accurately.
Step 5: Style the Body Shape
We now want to style the base shape for the body of our menu using the Layer Style dialog window.
(Read our guide to become a master of Layer Styles in Photoshop.)
While the “Body” layer is selected in the Layers Panel, go to Layer > Layer Style > Blending Options to access the Layer Styles dialog window. You can also double-click on the “Body” layer in the Layers Panel to access this dialog window.
Next, we will give this layer 3 layer effects: Inner Shadow, Outer Glow, and Stroke.
The settings for each of these layer effects are presented below.
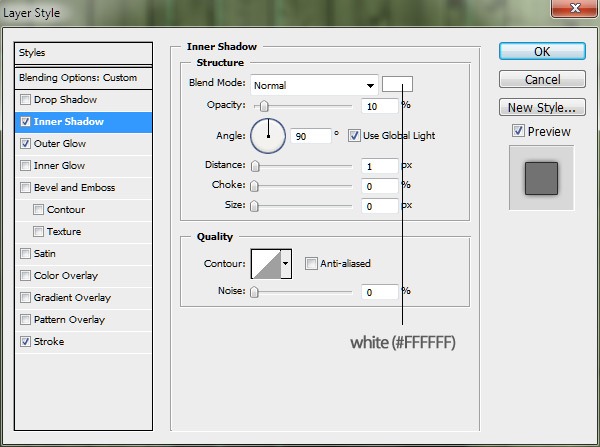
Inner Shadow
Make sure to switch the Color option of this layer effect to white (#ffffff); the default is black. Note as well that we need to set the Blend Mode to Normal instead of the default (Multiply).
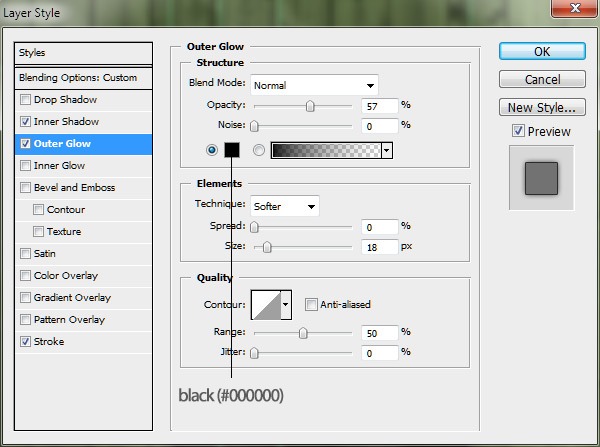
Outer Glow
Set the Color option to black (#000000). By default, it’s yellow.
Stroke
The Stroke Color is black as well (#000000).
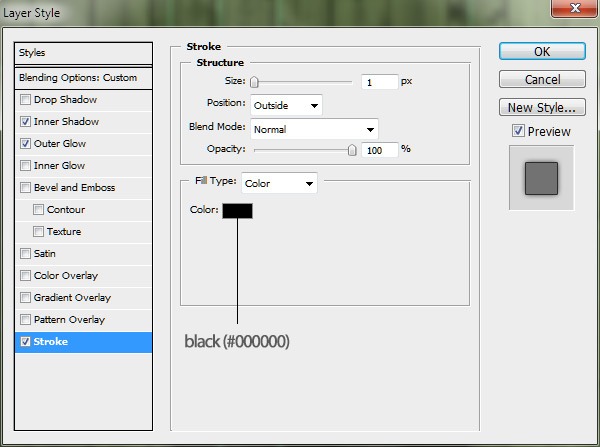
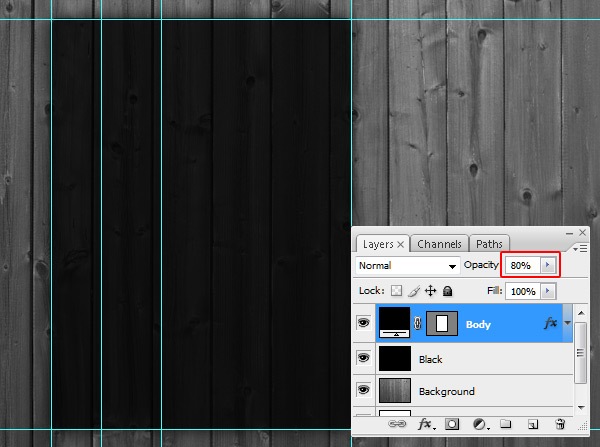
After you are done setting up the layer style, press OK to apply it to the “Body” layer.
Then just reduce the Opacity of the layer to about 80%.
Step 6: Make the Buttons/Menu Items
I will refer to each menu item as a “button,” which are the things the user would click on to reveal the content associated with it. We will have 7 buttons, with the top one being shorter in height than the others (the one that contains the name of the site or heading text of the other buttons).
The first thing we should do is create a new layer group for these buttons to keep our work organized and easier to work with. Go to Layer > New > Group (or click on the “folder” icon at the bottom of the Layers Panel) that we will place our buttons into.
By default, this layer group will be called “Group 1,” but in web design, it’s very important to be as organized as possible so that when someone else works with our mock-up, they will know where things are easily. So, rename the layer group to “Buttons.”
Next, hold down Ctrl/Cmd and then click on the “Body” layer’s thumbnail in the Layers Panel to automatically place a selection around it.
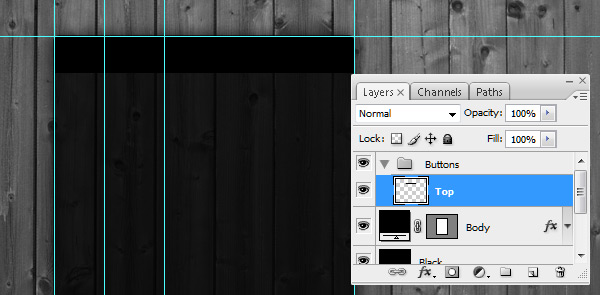
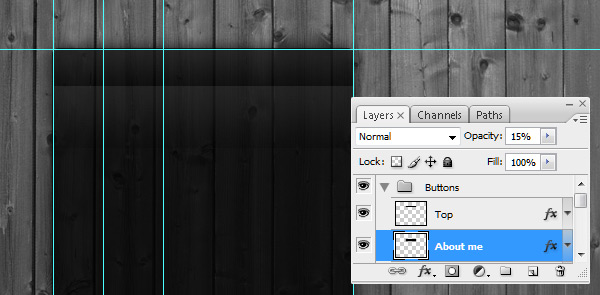
Then create a new layer inside the “Buttons” layer group named “Top.”
Then get the Rectangular Marquee Tool (M) from the Tools Panel. Hold down Alt/Option and drag your mouse onto the bottom part of the selection, which should reduce our selection to just the shape of our first button.
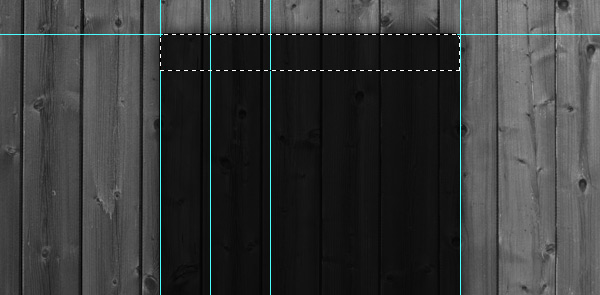
After that, fill that selected area with black (#000000).
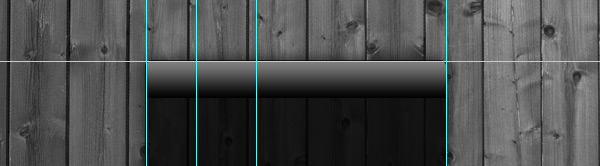
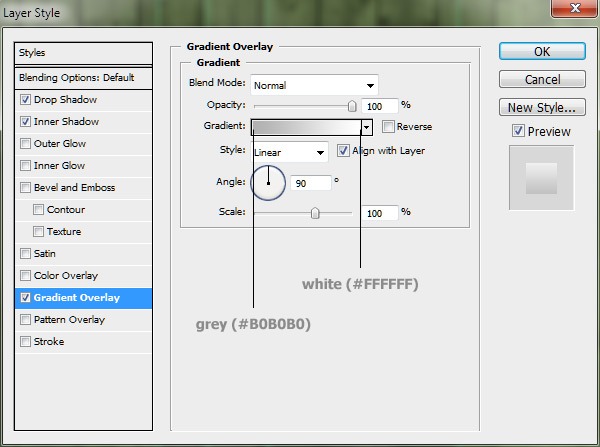
Give this layer a Gradient Overlay using the following settings.

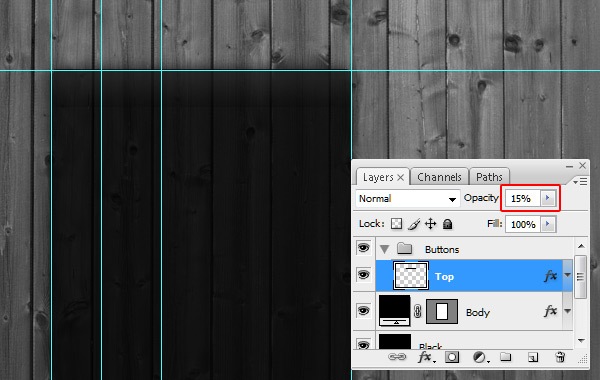
After that, lower the “Top” layer’s Opacity to 15%.
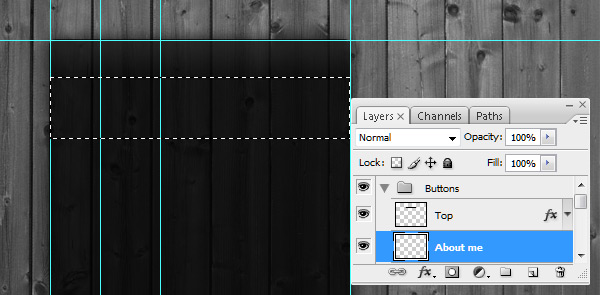
Now we will create the other buttons, starting with the “About me” button.
Create a new layer (Shift + Ctrl/Cmd + N) under the “Top” layer and name it “About me.”
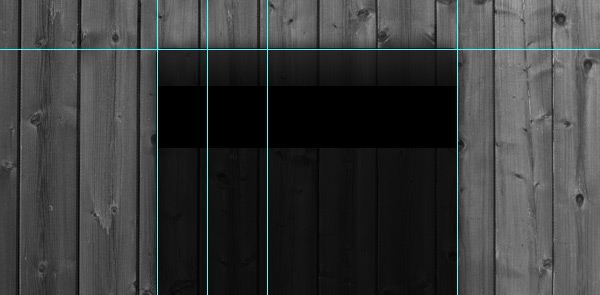
Just like before, make sure your Foreground Color is set to black (#000000), then place a selection around the content of the “Body” layer by holding Ctrl/Cmd and then clicking on the “Body” layer. Afterwards, choose the Rectangular Marquee Tool (M), press down Alt/Option, and then deselect the top and bottom areas of the current selection.
Fill the selected area with the Foreground Color (which should be black) using this handy shortcut: Alt/Option + Backspace.
After that, apply the same style as the one used for “Top” layer. Just right-click on the “Top” layer in the Layers Panel and then choose Copy Layer Style in the menu that appears, click on the “About me” layer to make it the active layer, right-click on it, and then choose Paste Layer Style.
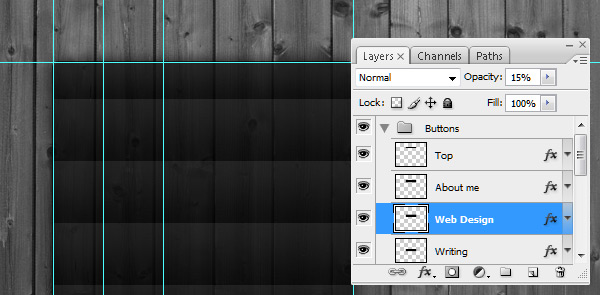
Create more buttons by copying the “About me” button layer several times.
Name the button layers as follows: “Web Design,” “Writing,” “Graphic Design,” “Photography,” and “Contact me.” Of course, depending on what you’re doing, you might want to rename these buttons to something else.
Step 7: Place the Text
Now minimize the “Buttons” layer group by clicking on the small triangle next to the group’s name in the Layers Panel. This makes our Layers Panel, which by now has a lot of layers, easier to work with.
Create a new layer group named “Text” above the “Buttons” layer group. This is where all of our text layers will go.
Set your Foreground Color to white (#ffffff) then choose the Horizontal Type Tool (T).
In the Options Bar, set up your Type Tool options such that it is using the Tahoma (Bold) font with a font size of 6.4pt and using an anti-aliasing method of Crisp.
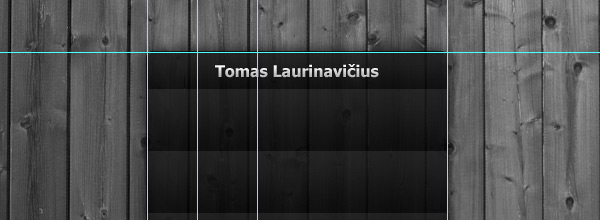
At the dead center of the “Top” button, write your name or site name.
Below, you can see that I just used my own name for the text of the “Top” button.

After that, go to Layer > Layer Style > Blending Options to open the Layer Style dialog window. We will give our text layer a Drop Shadow, an Inner Shadow, and a Gradient Overlay.
Drop Shadow
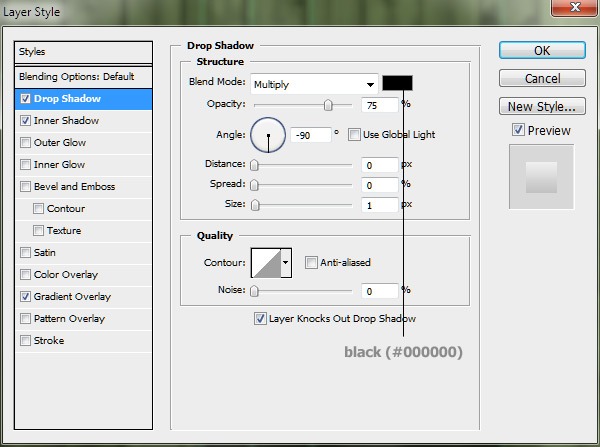
Inner Shadow
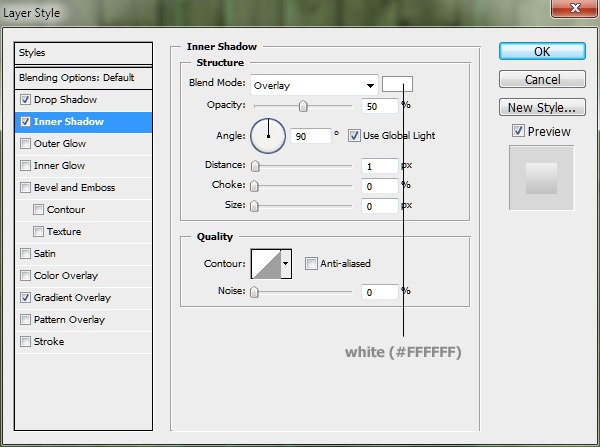
Gradient Overlay
Here’s what our text looks like now.
Then just duplicate this text layer (Ctrl/Cmd + J) and modify their text for the other buttons. Align them to the third vertical guide from the left.

Step 8: Place the Icons
We are done with the text, now it’s time to download the Free iphone toolbar icons and unzip the contents.
For this design, I have used these 6 files from the icon set:
- icon_user.png
- icon_smile_face.png
- icon_pencil.png
- icon_blog.png
- icon_favorities.png
- icon_post.png
![]()
Place those PNG files in a new layer group called “Icons.”
Align the icons to the second vertical guide from the left.
Make sure you don’t forget to organize your layers by renaming the icon layers to “About Me,” “Web Design,” “Writing,” etc.
![]()
That’s it. We’re done!
Tutorial Summary
Congratulations — we have finished our simple and slick accordion menu! We used a wood texture and processed and styled it to create a dark and detailed background for our accordion menu.
We also used basic tools and techniques to draw and stylize our design elements. I hope that you understood all the steps and actions used in creating this work, and if not, we are here to help so just drop your questions in the comments below. I’d also like to hear your opinion about this tutorial and final result.
Download Source Files
- slick_accordion_menu (ZIP, 2.10 MB)
-
 Trevin serves as the VP of Marketing at WebFX. He has worked on over 450 marketing campaigns and has been building websites for over 25 years. His work has been featured by Search Engine Land, USA Today, Fast Company and Inc.
 -

WebFX is a full-service marketing agency with 1,100+ client reviews and a 4.9-star rating on Clutch! Find out how our expert team and revenue-accelerating tech can drive results for you! Learn more
Make estimating web design costs easy
Website design costs can be tricky to nail down. Get an instant estimate for a custom web design with our free website design cost calculator!
Try Our Free Web Design Cost Calculator
Table of Contents
- Preview
- Tutorial Resources
- Step 1: Create a New Document
- Step 2: Add Guides
- Step 3: Create the Dark Wooden Background
- Step 4: Draw a Rounded Rectangle for the Body
- Step 5: Style the Body Shape
- Step 6: Make the Buttons/Menu Items
- Step 7: Place the Text
- Step 8: Place the Icons
- Tutorial Summary
- Download Source Files
Share this article


Web Design Calculator
Use our free tool to get a free, instant quote in under 60 seconds.
View Web Design CalculatorMake estimating web design costs easy
Website design costs can be tricky to nail down. Get an instant estimate for a custom web design with our free website design cost calculator!
Try Our Free Web Design Cost Calculator


