
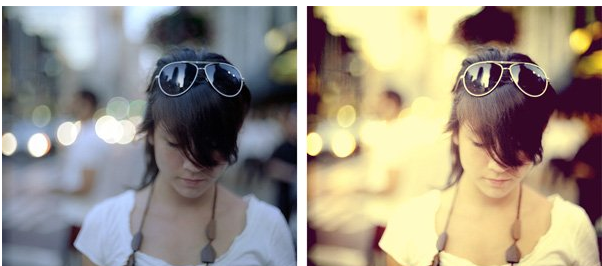
Preview
Tutorial Resources
- NYC by vonSchnauzer
Step 1: Open the Photo
The photo being used in this tutorial is NYC by vonSchnauzer — download it and then open it up in Photoshop. Feel free to use your own photo. 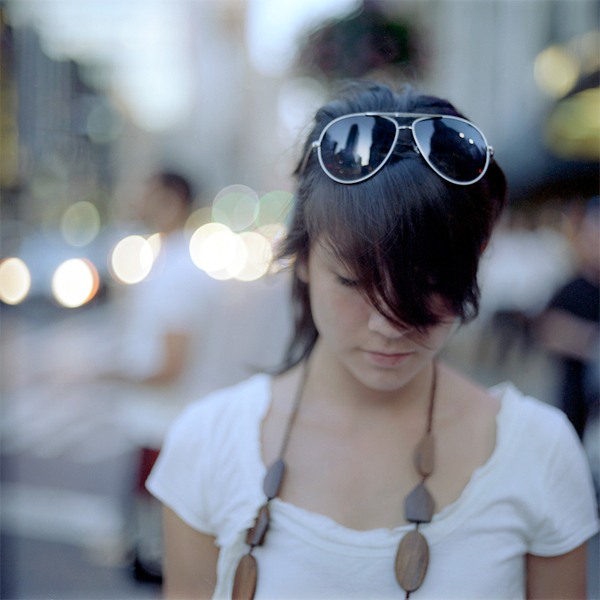
Step 2: Curves Image Adjustment
First thing we’re going to do is go to Image > Adjustment > Curves.
We’re going to lighten up the photo by clicking on the rightmost eyedropper icon, which we’ll use to set the white point of the image. Click on the brightest white we can find in the photo, which is on the t-shirt of the subject. 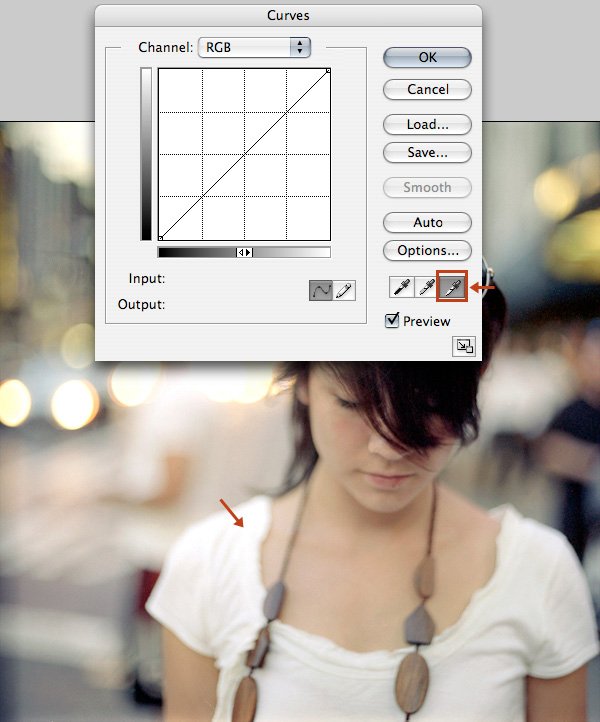
Step 3: Add a Gradient Map
Now go to Layer > New Adjustment Layer > Gradient Map.
Click the gradient editor and choose the Blue, Yellow, Blue gradient preset. Check the Reverse option. 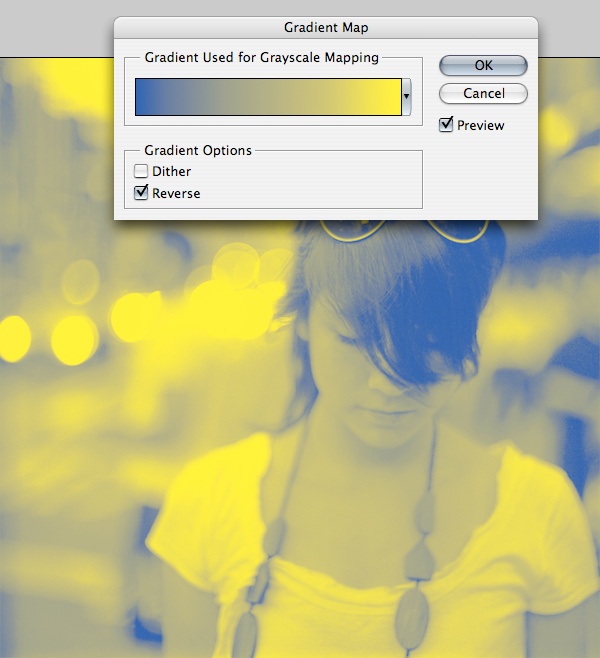
Step 4: Reduce the Opacity of the Gradient Map Layer
In the Layers Panel, drop the Opacity of the Gradient Map layer down to 30%.
Step 5: Add a Curves Adjustment Layer
Go to Layer > New Adjustment Layer > Curves. Make sure this layer is under the Gradient Map layer that we created in Step 3. We’re going to give our image a little more brightness and contrast by adjusting the curves. 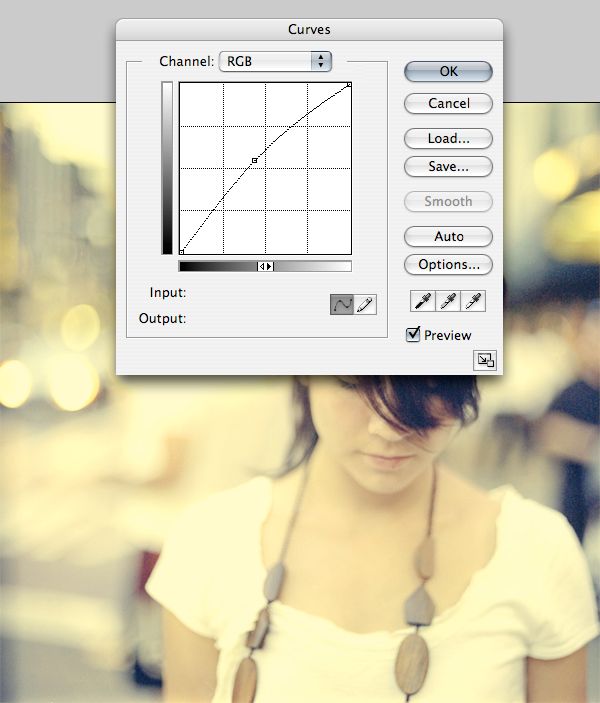
Step 6: Add an Inner Shadow Layer Style
By default, in Photoshop, the photo you use will be opened as the Background layer and this layer will be uneditable (denoted by a padlock icon). In the Layers Panel, double-click on the Background layer and click OK to unlock it.
Next, go to Layer > Layer Style > Inner Shadow and apply the settings shown below. 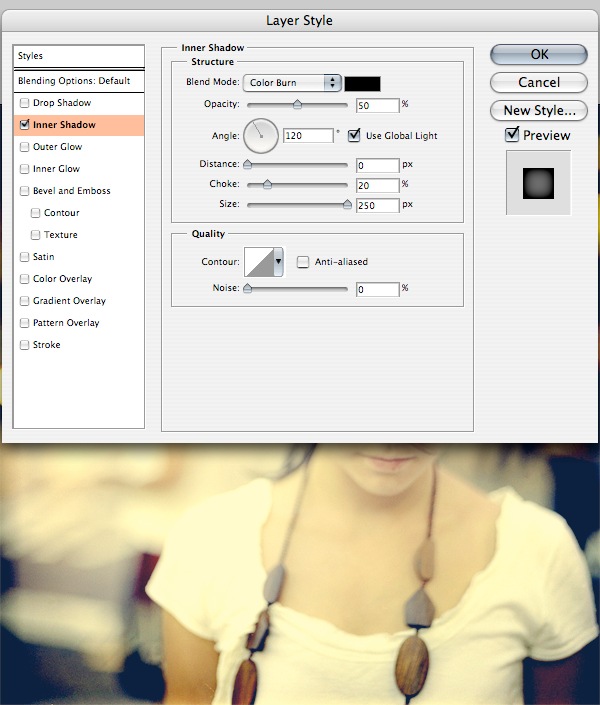
Step 7: Add a Gradient Overlay Layer Style
This is the final step. Go to Layer > Layer Style > Gradient Overlay.
Change the Style to Radial and use the Black, White gradient preset as shown below. 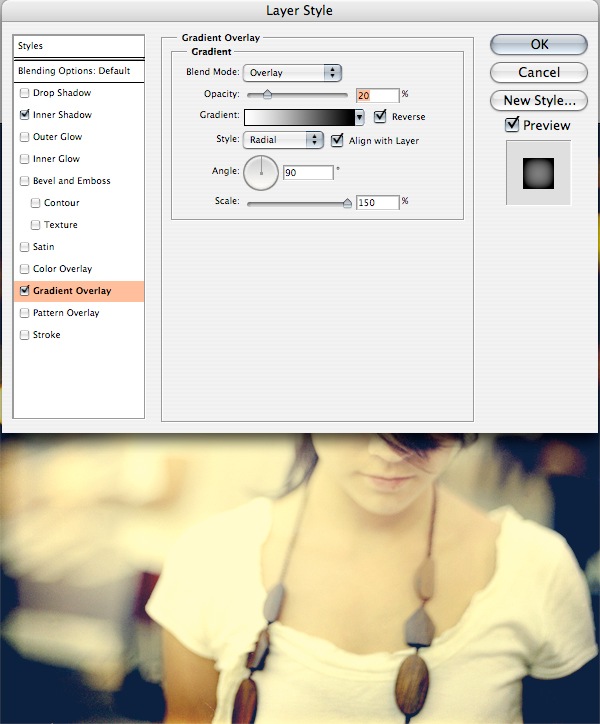
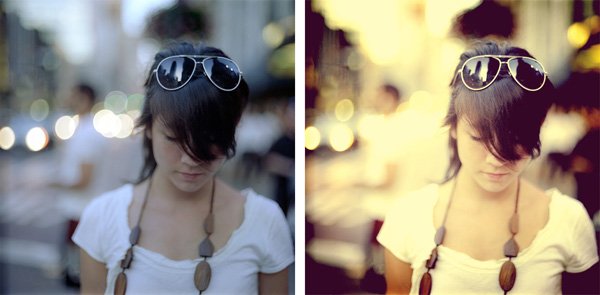
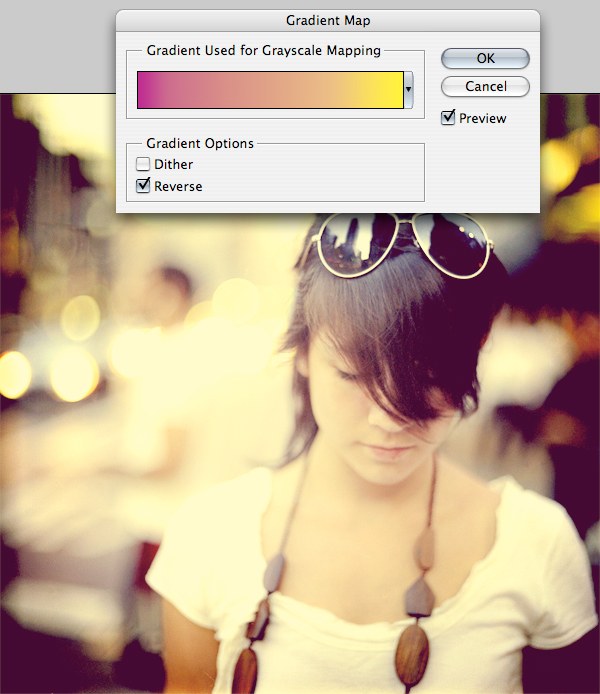
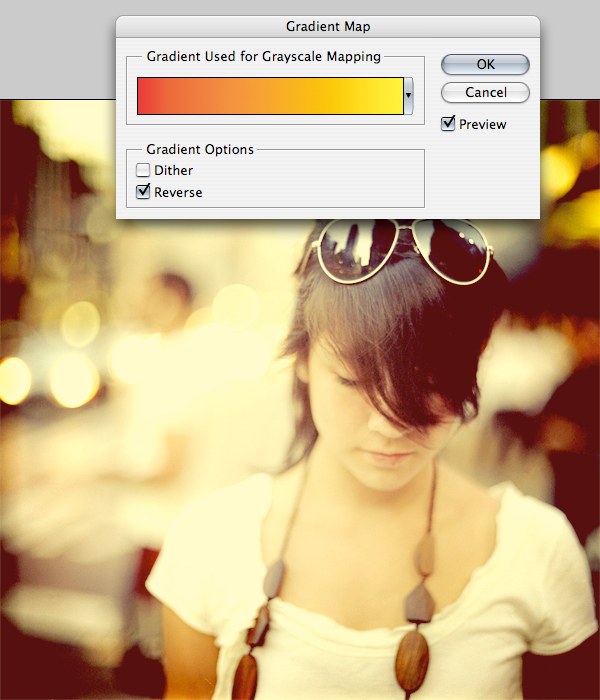
Optional: Changing the Gradient Map
You can tweak the outcome by double-clicking on the Gradient Map and making adjustments to it. Below, you can see different versions of the final outcome.

Tutorial Summary
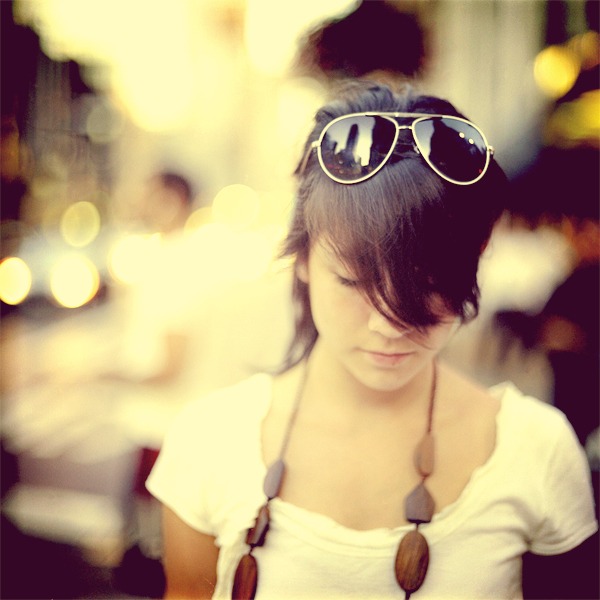
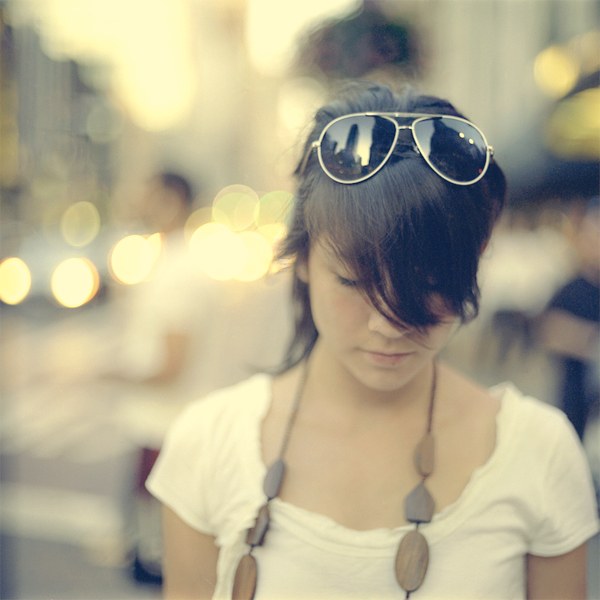
In this quick and simple Photoshop tutorial, I showed you a way to apply a vintage-inspired photo effect to a regular photo. We performed a Curves image adjustment, added a couple of adjustment layers and we also used layer styles. Below is the final result.
If you followed along, feel free to link to your own results in the comments below!
Download Source Files
- photoshop_vintage_effect (ZIP, 1.33 MB)
-
 Trevin serves as the VP of Marketing at WebFX. He has worked on over 450 marketing campaigns and has been building websites for over 25 years. His work has been featured by Search Engine Land, USA Today, Fast Company and Inc.
 -

WebFX is a full-service marketing agency with 1,100+ client reviews and a 4.9-star rating on Clutch! Find out how our expert team and revenue-accelerating tech can drive results for you! Learn more
Make estimating web design costs easy
Website design costs can be tricky to nail down. Get an instant estimate for a custom web design with our free website design cost calculator!
Try Our Free Web Design Cost Calculator
Table of Contents
- Preview
- Tutorial Resources
- Step 1: Open the Photo
- Step 2: Curves Image Adjustment
- Step 3: Add a Gradient Map
- Step 4: Reduce the Opacity of the Gradient Map Layer
- Step 5: Add a Curves Adjustment Layer
- Step 6: Add an Inner Shadow Layer Style
- Step 7: Add a Gradient Overlay Layer Style
- Optional: Changing the Gradient Map
- Tutorial Summary
- Download Source Files
Share this article


Web Design Calculator
Use our free tool to get a free, instant quote in under 60 seconds.
View Web Design CalculatorMake estimating web design costs easy
Website design costs can be tricky to nail down. Get an instant estimate for a custom web design with our free website design cost calculator!
Try Our Free Web Design Cost Calculator


