
Table of Contents
- Preview
- Resources
- Step 1: Prepare your Photoshop canvas
- Step 2: Enhance the lips
- Step 3: Work on the subject’s eyes
- Step 4: Add the first shape
- Step 5: Add more shapes
- Step 6: Adjust the color of the tree element
- Step 7: Erase the arm
- Step 8: Smudge paint
- Step 9: Final adjustments
- Conclusion
- Download Source Files
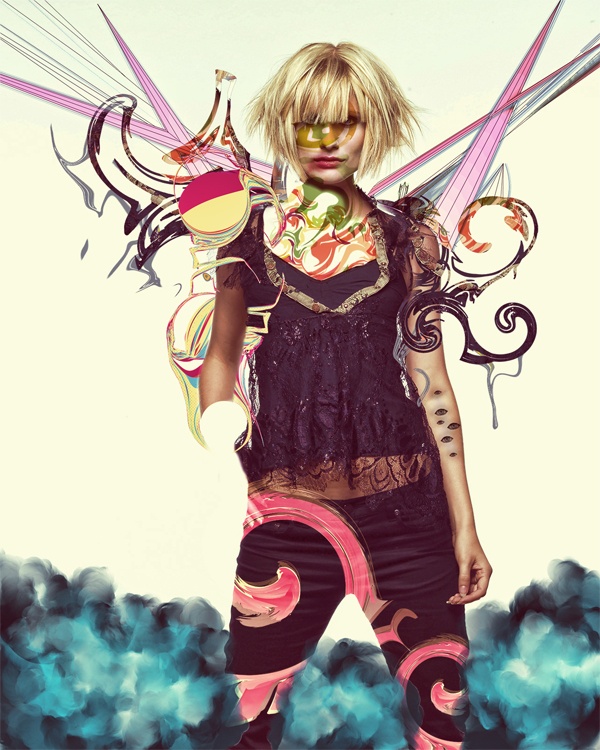
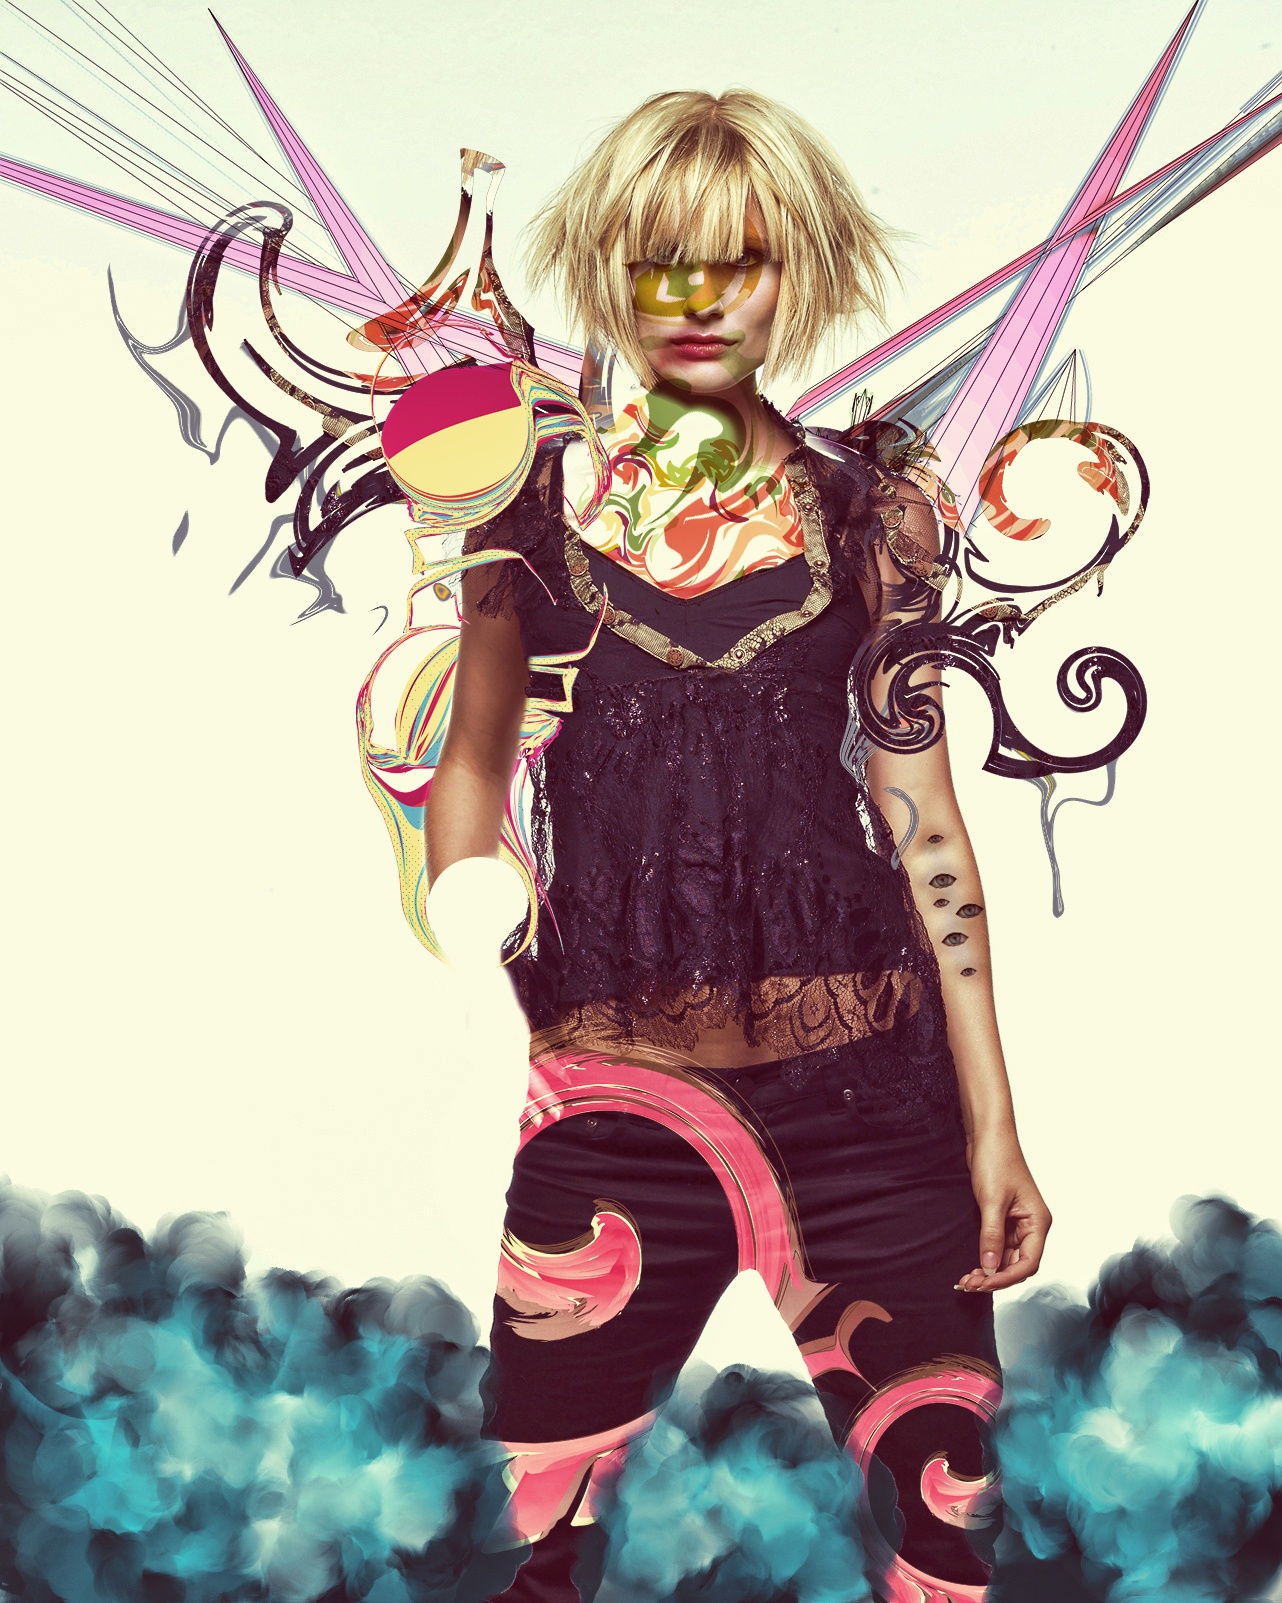
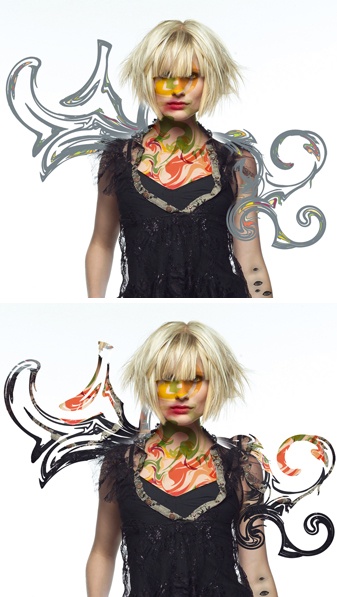
Preview
This is what we’ll be creating in this tutorial. Click on the image below to view the full size.
Resources
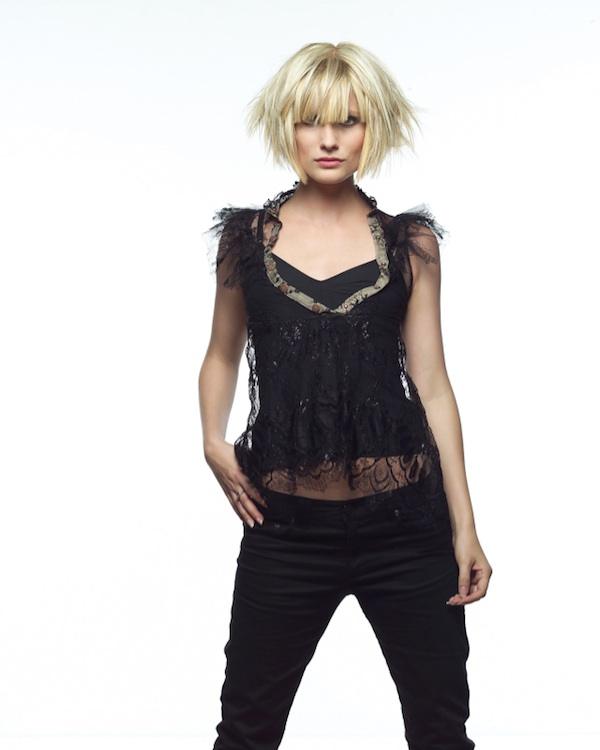
- Female Stock 6 by Katanaz-Stock (Read personal stock rules)
- 130 Surprise Pack by Brett Millward (free)
- C4D pack by Brett Millward (free)
Step 1: Prepare your Photoshop canvas
Open the image of the model (Female Stock 6 in the Resources listing) in Photoshop.
Duplicate the layer (Ctrl/Cmd + J) and delete the original. Make a layer beneath it and fill (G) it with white (#ffffff).
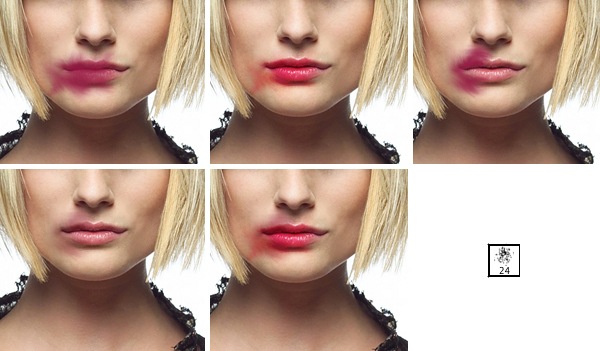
Step 2: Enhance the lips
Let’s first enhance the lips a bit. Make a new layer, take out a soft brush (B) with a dark pink color (#951943) and brush over the lips of our subject.
Next, take the Smudge Tool (S) and smudge the brush strokes with a default brush as shown below.
Set the layer’s blend mode to Overlay.
Do the exact same thing on a new layer, but this time, set the layer’s blend mode to Multiply and at 50% opacity.
Step 3: Work on the subject’s eyes
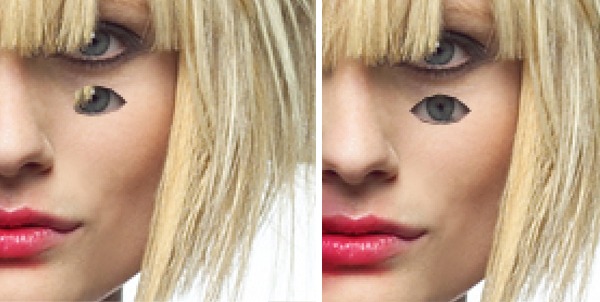
Now take the Lasso Tool (L) and trace around our model’s left eye. Place it on a new layer by copying (Ctrl/Cmd + C) the area under the Lasso Tool, creating a new layer (Ctrl/Cmd + J), and then pasting the copied selection into it (Ctrl/Cmd + V).
Unfortunately, hair covers the eye, so duplicate (Ctrl Cmd + J) the eye layer and then choose Edit > Transform > Flip Horizontal. Try to locate it on the other side of the eye in such a way that it remains symmetrical, and then erase the bits of hair with the Eraser Tool (E).
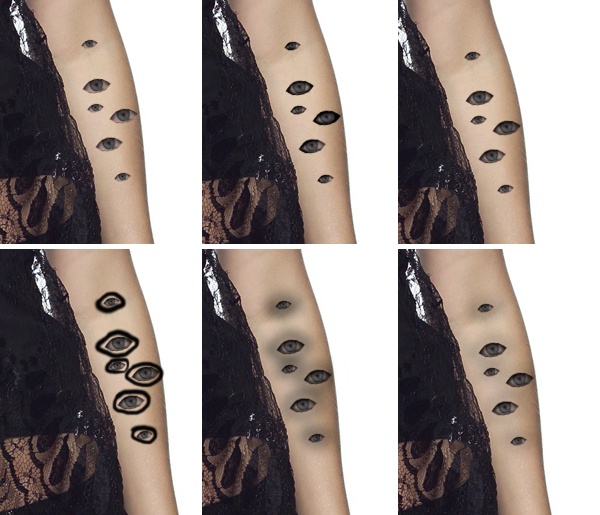
Duplicate (Ctrl/Cmd + J) the eye several times and resize some of them with the Free Transform command (Ctrl/Cmd + T).
You can place them anywhere you want—I decided to put them on her arm.
Select all the duplicated eye layers and merge them into one layer afterwards (Ctrl/Cmd + E).
Create a new layer and make a clipping mask (Ctrl/Cmd + Alt/Option + G).
Take a soft brush (B) and brush with black (#000000) on the edges of the eyes. Set the opacity of the brush to around 50%.
Next, brush with the same brush tip on a new layer around the eyes. Apply a Gaussian Blur (Filter > Blur > Gaussian Blur) on these brush strokes with a radius of 6px.
Erase (E) all parts of the Gaussian Blur that spill over her arm or over the eyes.
Set the opacity of this layer to around 50%.
Step 4: Add the first shape
Open the first shape image (011.png from the 130 Surprise Pack). Copy and paste it into your canvas, resize it (Ctrl/Cmd + T), place it anywhere you want and set its layer’s blend mode to Multiply.
Step 5: Add more shapes
Paste the next shape image (014.png from the 130 Surprise Pack) in your canvas. As before, erase (E) all parts which you do not like with a soft brush.
Make this layer invisible by clicking on the little eye icon right next to the layer and click Ctrl/Cmd + Alt/Option + Shift + E to merge all layers on a new layer.
Make the layer with the shape visible again and apply a clipping mask with the merged layer (Ctrl/Cmd + Alt/Option + G).
Move the layer around until you think it fits and duplicate it if necessary.
Duplicate the shape you just used (Ctrl/Cmd + J) and in the menu bar choose Filter > Liquify. Play around with the settings until you get something that you like. Then, place this layer beneath the layer with the original shape.
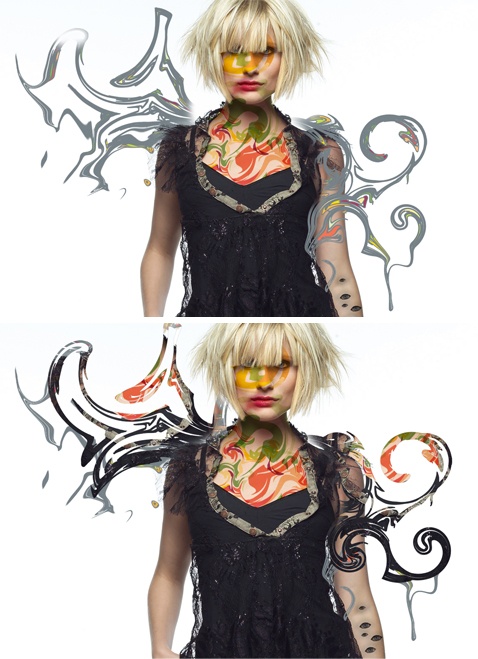
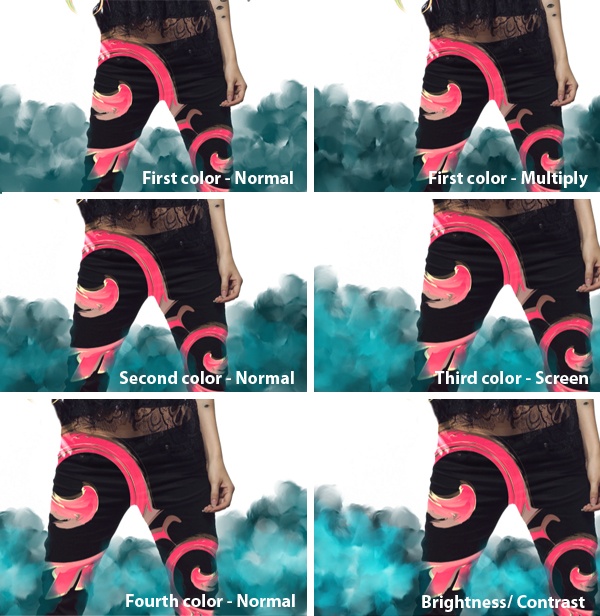
Next, paste more shapes to the poster composition.
I used the images 08.png, 16.png from the 130 Surprise Pack and 19.png from the C4D pack. See below for the placement and color modes I used.
As always, erase (E) any parts of the shape that you do not like.
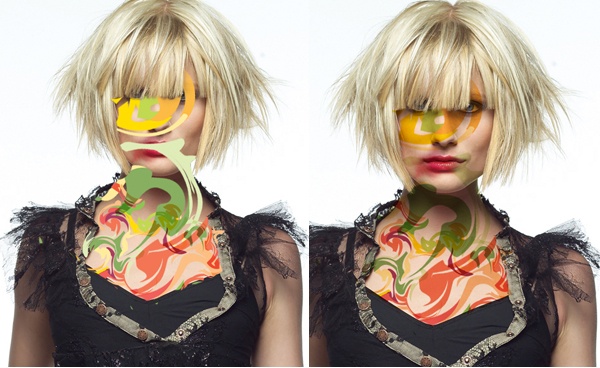
Step 6: Adjust the color of the tree element
The tree’s color does not fit in, so we need to create a new layer and make a clipping mask (Ctrl/Cmd + Alt + G).
Take your Eyedropper Tool (I) and take a color from the picture. I picked a random color from the handbags on the upper part of the image, #b20307.
Take your Brush (B) and brush with a big, soft brush on the new layer.
Change the color mode to Color.
Step 7: Erase the arm
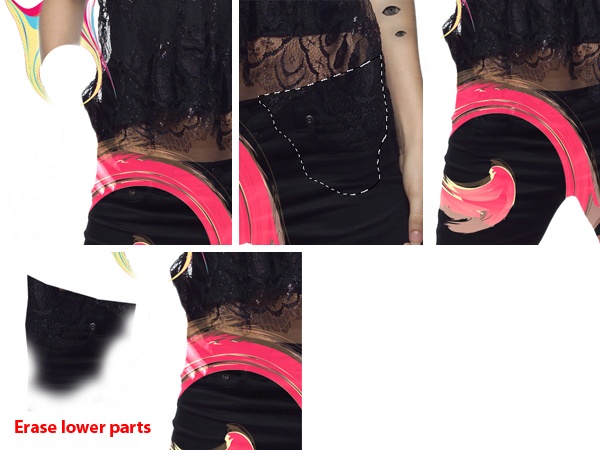
Take the Elliptical Marquee Tool (M) and erase (E) the part of the arm as shown in the following figure. Also, erase all other parts except the ones that go over the pants with a hard brush.
Take the Lasso Tool (L) and select parts of the right side of the pants.
Copy and paste it into a new layer (Ctrl/Cmd + C, then Ctrl/Cmd + V).
Go to Edit > Transform > Flip Horizontal and place it over the other side. Afterwards, resize the element using the Free Transform command (Ctrl/Cmd + T) if needed.
Select the edges of the pants with the Lasso Tool (L) and delete the selected area.
Take the Eraser Tool (E) and erase the lower parts of the copied pants with a soft brush.
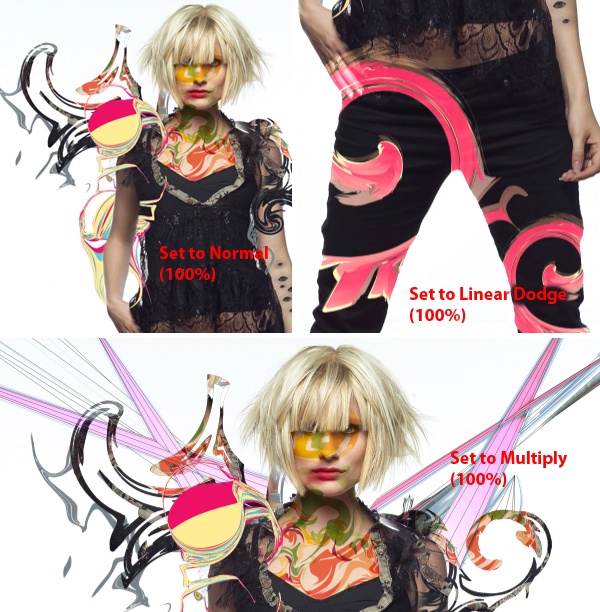
Step 8: Smudge paint
Next, take out the Brush Tool (B) and brush around the subject’s pants with 4 different colors (#013f45, #013f45, #01e1f7, #ffffff), each on its own layer.
After that, take the Smudge Tool (S) and smudge the paint strokes around, using different layer blend modes for each layer.
Merge these layers and give it a Brightness/Contrast adjustment layer with a clipping mask (Ctrl/Cmd + Alt/Option + G), with Contrast set to 100.
Step 9: Final adjustments
Merge all visible layers on a new layer (Ctrl/Cmd + Alt/Opt + Shift + E).
Apply Filter > Other > High Pass. Set it to about 7px and change the blending mode to Overlay.
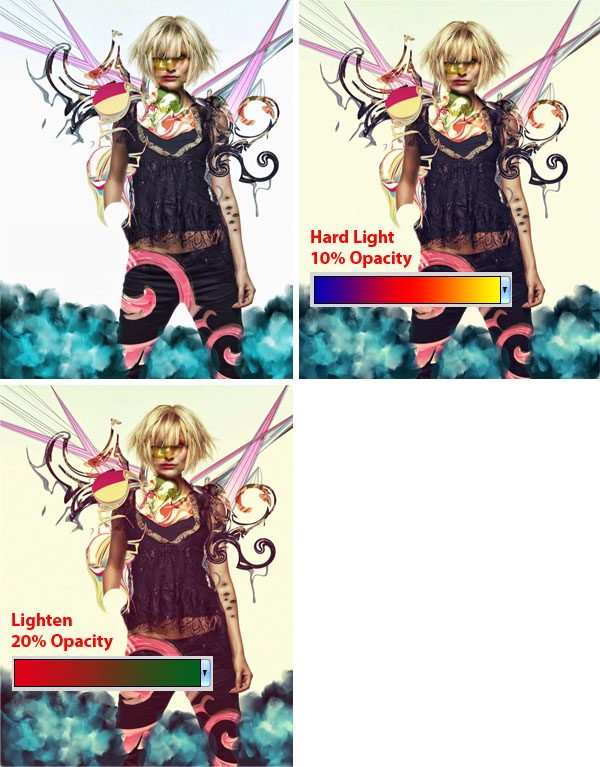
After that, mak Gradient Adjustment layers, set them as shown below.
Conclusion
Along with the great selection of shapes you downloaded and this tutorial, you can start to create your own unique designs. You now should have a great way to make your work more visually appealing.
I hope you enjoyed reading this tutorial and I’m looking forward to your comments and thoughts!
If my tutorial inspired you in any way, please join the Design Instruct Flickr group pool as well as share your work there.
Download Source Files
- Action file: high-impact_fashion_poster_action (ATN, 4.8 KB)
- PSD and Action file: high-impact_fashion_poster (ZIP, 19.5 MB)
-
 Trevin serves as the VP of Marketing at WebFX. He has worked on over 450 marketing campaigns and has been building websites for over 25 years. His work has been featured by Search Engine Land, USA Today, Fast Company and Inc.
 -

WebFX is a full-service marketing agency with 1,100+ client reviews and a 4.9-star rating on Clutch! Find out how our expert team and revenue-accelerating tech can drive results for you! Learn more
Make estimating web design costs easy
Website design costs can be tricky to nail down. Get an instant estimate for a custom web design with our free website design cost calculator!
Try Our Free Web Design Cost Calculator
Table of Contents
- Preview
- Resources
- Step 1: Prepare your Photoshop canvas
- Step 2: Enhance the lips
- Step 3: Work on the subject’s eyes
- Step 4: Add the first shape
- Step 5: Add more shapes
- Step 6: Adjust the color of the tree element
- Step 7: Erase the arm
- Step 8: Smudge paint
- Step 9: Final adjustments
- Conclusion
- Download Source Files
Share this article


Web Design Calculator
Use our free tool to get a free, instant quote in under 60 seconds.
View Web Design Calculator
Make estimating web design costs easy
Website design costs can be tricky to nail down. Get an instant estimate for a custom web design with our free website design cost calculator!
Try Our Free Web Design Cost Calculator