Table of Contents
- Images
- Step 1: Draw the Cracked Eggshell Components
- Step 2: Fill the Shapes with the Gradient Tool
- Step 3: Build the Cracked Eggshell
- Step 4: Add Surface Highlights
- Step 5: Adding a Shadow
- Step 6: Create a Custom Symbol
- Step 7: Drawing the Nest
- Step 8: Adding a Dimensional Effect to the Nest
- Step 9: Compose the Nest and Eggshell
- Step 10: Adding Light Effects
- Step 11: Creating More Eggs in Different Colors
- Optional Step: Add a Twitter-Like Bird
- Tutorial Summary
- Download Source Files
Images
Here is a preview of the various images we will be creating using Illustrator: 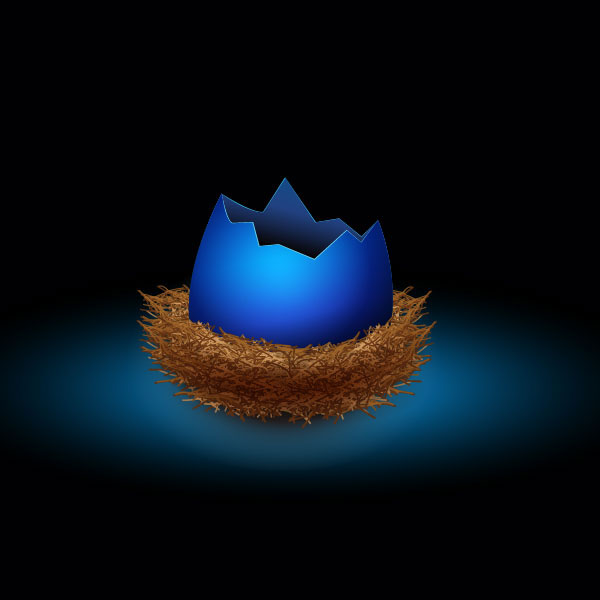

Step 1: Draw the Cracked Eggshell Components
In Illustrator, open up a new document by going to File > New (Ctrl/Command + N). Select the Pen Tool (P). Start by drawing an egg shape.
Afterwards, use the Pen Tool again to draw a zigzag line that will later be used to create the cracked edges of the eggshell. Important: Make a copy of the eggshell shape because we need two of them (one for the front and one for the back of the eggshell). Position the zigzag line at the top of the egg shape and then press the Divide command in the Pathfinder panel.
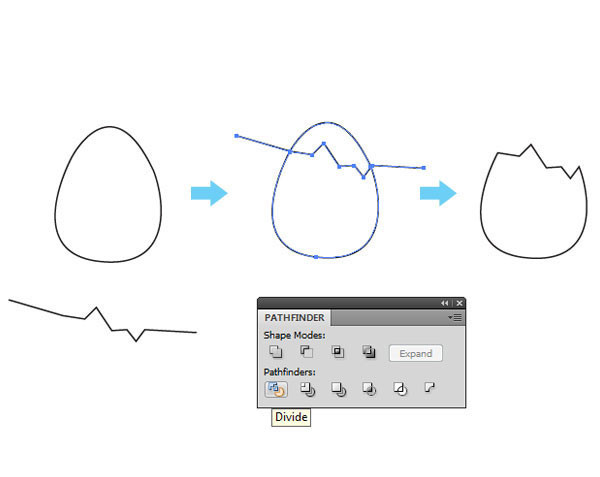 Once the egg shape has been divided, select the top part with the Direct Selection Tool (A) and delete it as we don’t need this component anymore. The resultant object will be the back part of the cracked eggshell. Repeat the process above with the other egg shape (which will be the front of our eggshell), but create another zigzag line so that it won’t look identical to the back.
Place the zigzag line lower than the first so we can use the resultant object as the front of the eggshell. 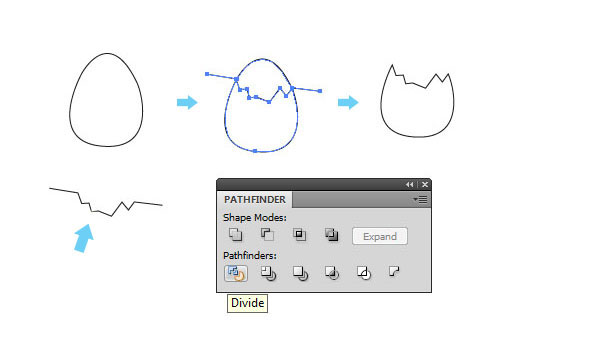
Step 2: Fill the Shapes with the Gradient Tool
Select the first eggshell shape (which, as stated earlier, will be the back of the eggshell). Click on the Gradient Tool (G) in the Tools panel to make it the active tool.
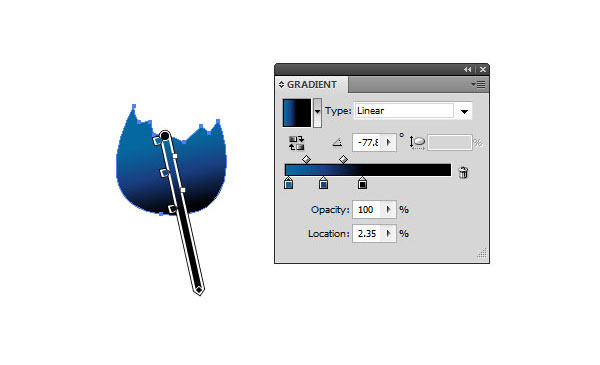
Turn on the Gradient Annotator by going to View > Show Gradient Annotator (Alt/Option + Ctrl/Command + G) so that you can easily adjust the gradient even after you have applied it. Create the linear gradient with the settings shown below. 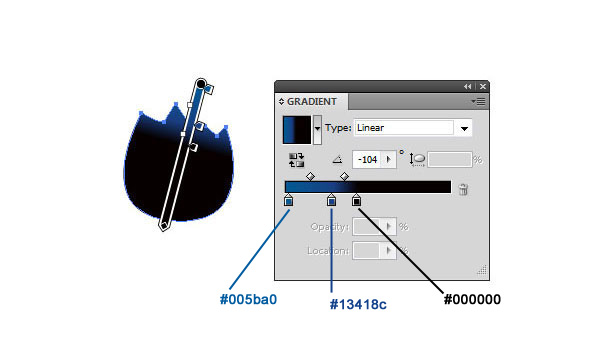 Repeat the process with the second eggshell shape (the front); use the same colors as the previous gradient, but modify the direction and angle.
Step 3: Build the Cracked Eggshell
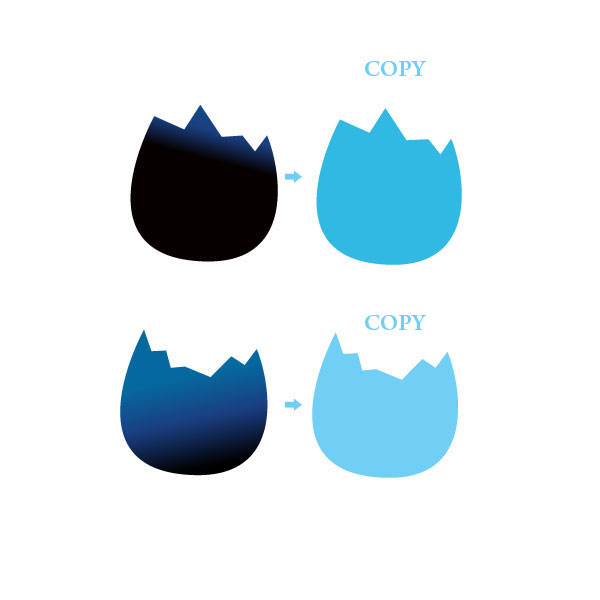
Now we have the basic eggshell shapes. Since we created the front and the back eggshell shape using the same shape as the starting point, we can overlay them easily.  Make a copy of each shape and fill it with a light blue.
 Place the light blue copy of the back eggshell shape and the light blue copy of the front eggshell shape behind each, and then move the blue copies slightly to the left. This creates a thicker edge.
  Group the two back shapes together.
Group the two front shapes together. Place the front group on top of the back group. 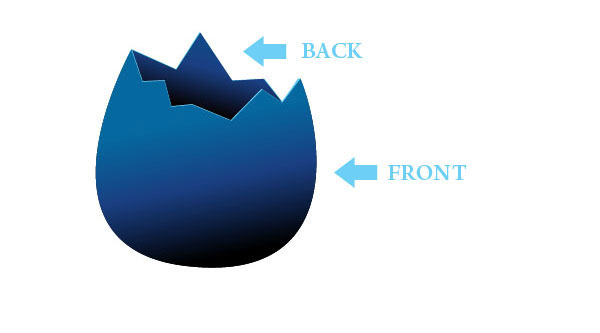
Step 4: Add Surface Highlights
Duplicate the front eggshell shape (without the blue shape behind it) by copying (Edit > Copy) and then pasting in front (Edit > Paste in Front).
For the front eggshell shape duplicate, use the Transparency panel (Shift + Ctrl/Command + F10) to set the Blending Mode to Overlay and Opacity to 33%. This gives the front side of our cracked eggshell a nice highlight. 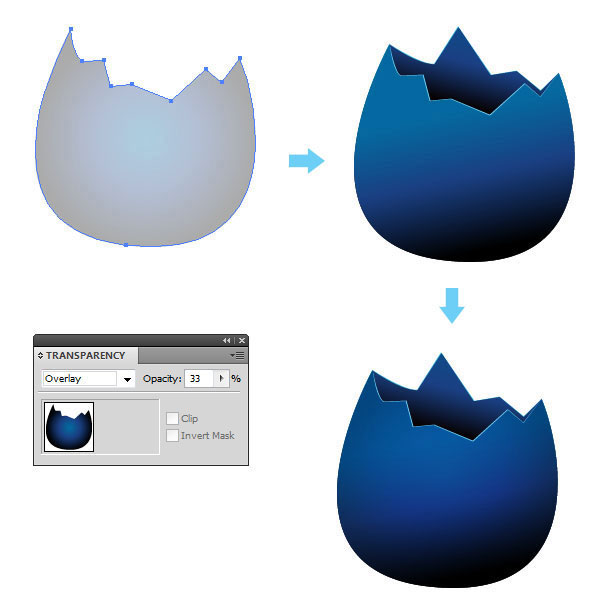
Step 5: Adding a Shadow
Create an ellipse using the Ellipse Tool (L) and place it underneath the egg.
Fill the ellipse with a radial gradient that goes from black to transparent (see the settings for the radial gradient in the image below). 
Step 6: Create a Custom Symbol
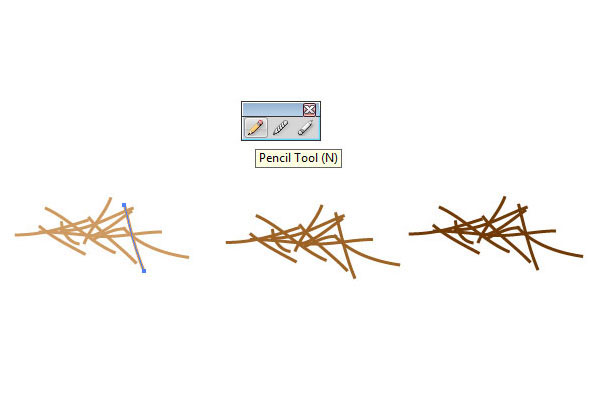
Let us create the nest. Select the Pencil Tool (N) to create vector paths as shown below.
Group the paths together. Then duplicate it twice (so that now you have three groups). Make the other two groups slightly darker colors.
 Place each group on top of each other. Group the three groups into one group called “nest symbol”.
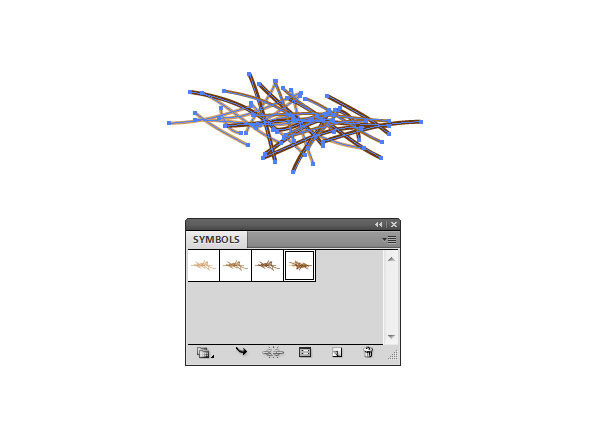
 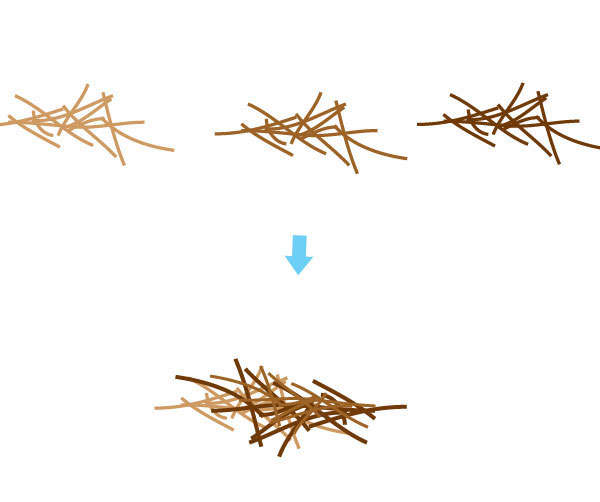 To make drawing the nest easier, we’re going to take the nest shapes to create a symbol. To do this, have the Symbols panel open by going to Window > Symbols (Shift + Ctrl/Command + F11). Drag the “nest symbol” group into the Symbols panel.
Step 7: Drawing the Nest
Adobe Illustrator has several tools that allow you to apply and modify symbols. To start, select the Symbol Sprayer Tool (Shift + S) to apply our custom symbol on the artboard. Try to keep the symbols close together.
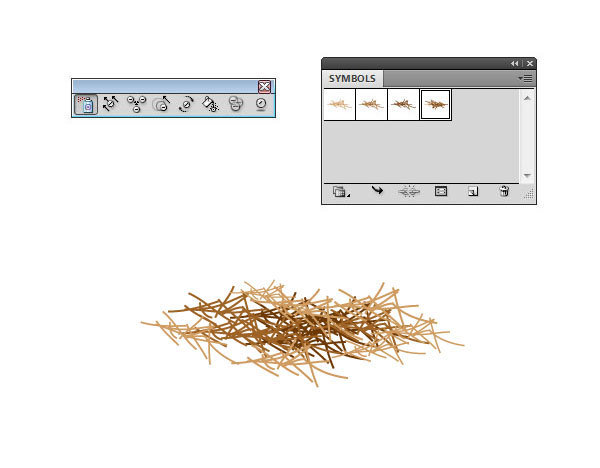 Once you have a few overlapping symbols, select the Symbol Shifter Tool and shift the symbols around. Consider also using the Symbol Scruncher Tool, Symbol Sizer Tool and Symbol Spinner Tool until you end up with something you’re satisfied with.
 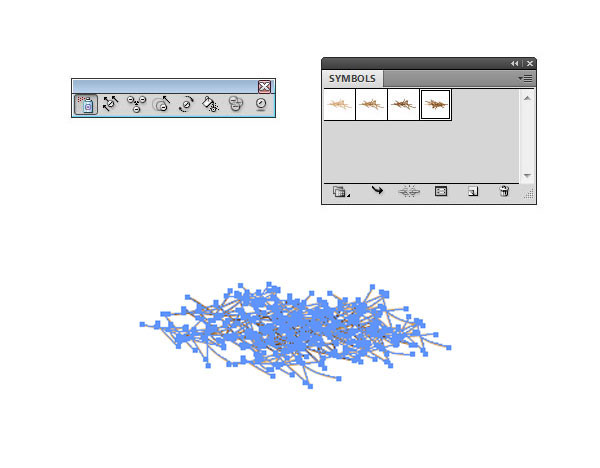 You can make several copies of the above and overlay them to make the nest thicker and fuller.
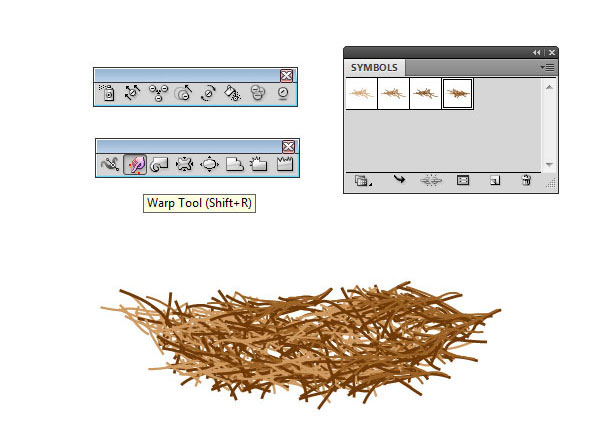 Use the Warp Tool (Shift + R) to continue shaping the nest. If needed, you can make more copies and build up the thickness and fullness of the nest.
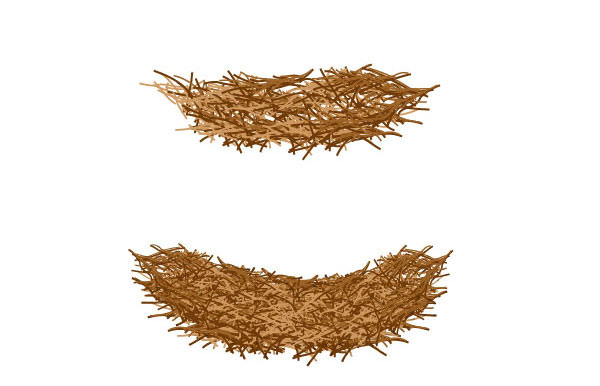
Step 8: Adding a Dimensional Effect to the Nest
We want to make the nest look three-dimensional as much as possible.
I’ll show you a trick for this. Start by creating two ellipses using the Ellipse Tool (L) — these ellipses shouldn’t be much bigger than the nest. Fill both ellipses with a brown color and position them on top of each other (as shown below).
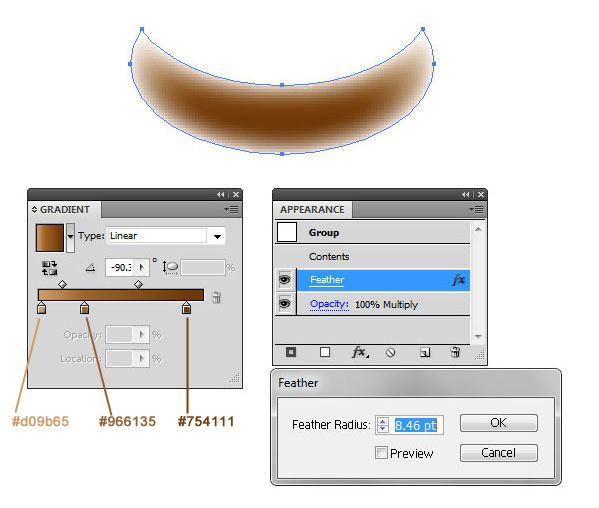
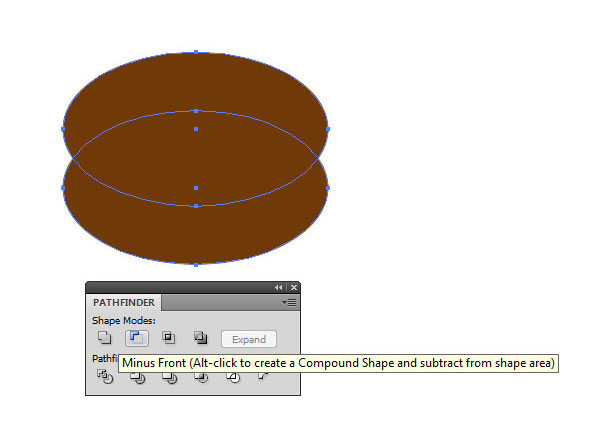 Click on the Minus Front command in the Pathfinder panel so that you are left with a half-moon-like object that’s facing upward. Give the object a linear gradient using the settings shown below. Give it a Feather effect (Effect > Stylize > Feather) with Feather Radius set to about 8.46 pt (or more).
 Place the feathered object on top of the nest shape and, in the Transparency panel, set the Blending Mode to Multiply and Opacity at 100%.
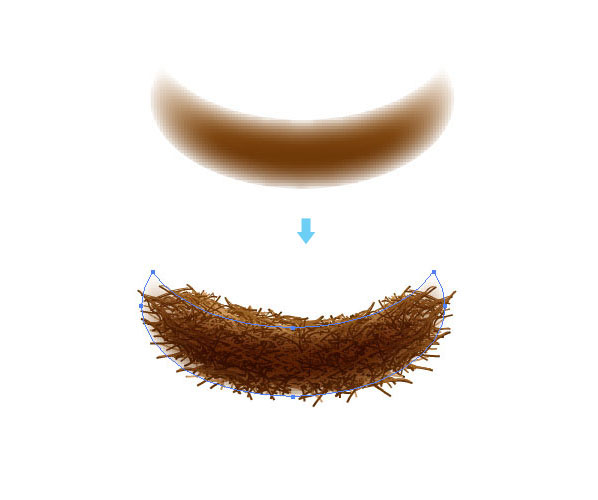
Step 9: Compose the Nest and Eggshell
Place the nest shape and the feathered object in front of the egg. Duplicate just the nest shape (without the feathered object) and place the duplicate behind the egg.
 Now we have our little eggshell inside the nest.
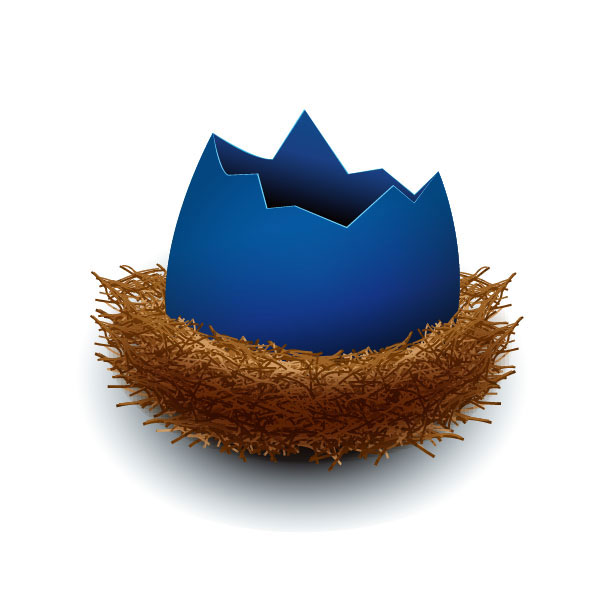
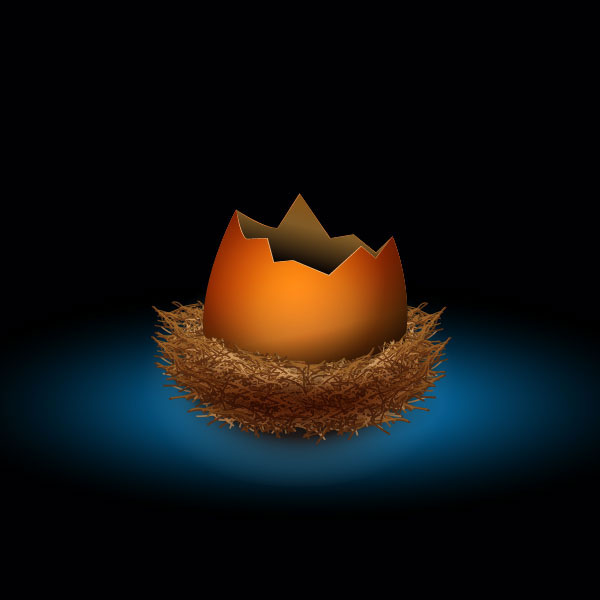
Step 10: Adding Light Effects
Let’s say we want the composition on a dark background (like black, for example). In order to do this, we want to highlight the bottom of the egg to make it more interesting and so it doesn’t blend in too much with the background.
Start by creating an ellipse using the Ellipse Tool (L) and then fill it with a radial gradient going from dark blue to lighter blue using the settings shown in the image below. Once created, place it underneath the nest. 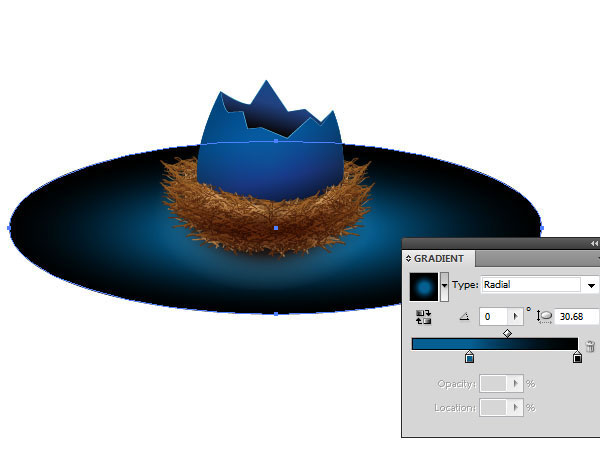 To add some shine to the egg, make a copy of the front eggshell shape and add a radial gradient that’s blue and white, then use the Transparency panel to set the object’s Blending Mode to Overlay and Opacity at 100%.
When you place the shape on top of the egg, we get a nice highlight effect. 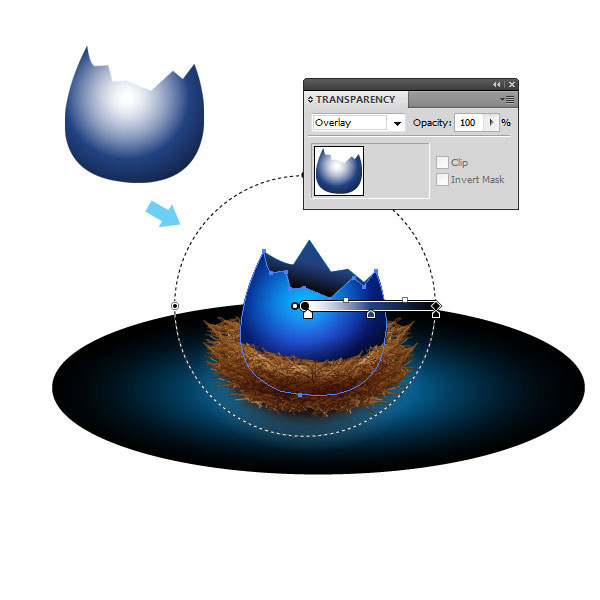 Last but not least, add a black background.
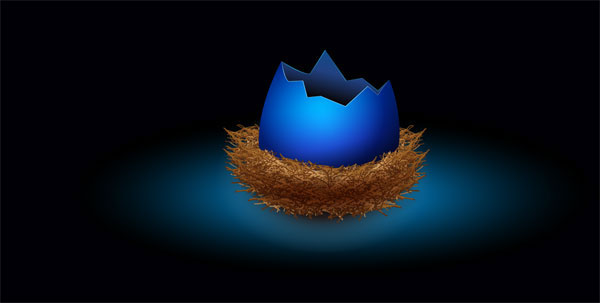
Step 11: Creating More Eggs in Different Colors
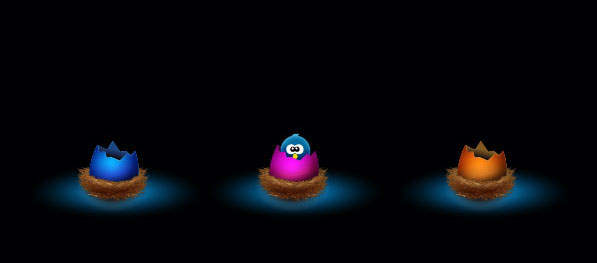
Now we are going to create two more eggs, but with different colors.
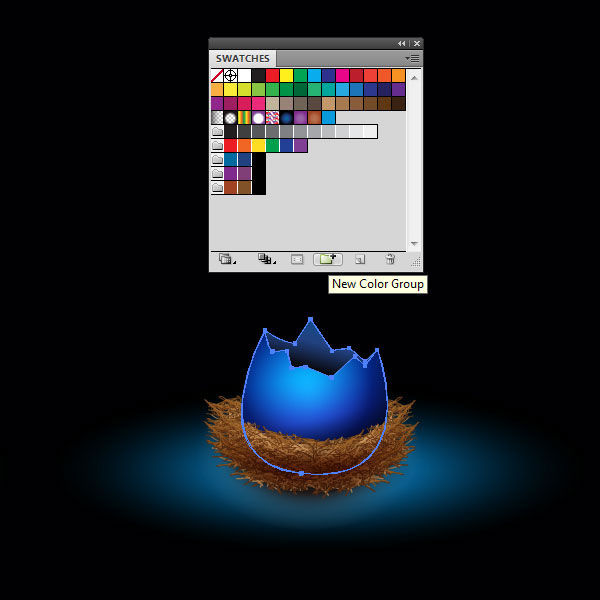
To start, make a copy of the egg and nest. 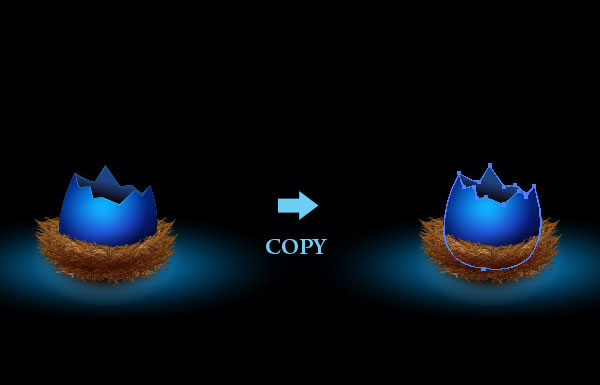 Select only the egg shapes, leaving out the nest and other elements. At the bottom of the Swatches panel, click on the New Color Group icon — doing this will add all the colors of the egg in a color group.
 Select the color group by clicking on the small folder icon next to your new color swatches (I just named the new color group “Color Group 1”), and then click the Edit or Apply Color Group icon at the bottom (the icon looks like a color wheel). Make sure the egg is still selected in the artboard.
 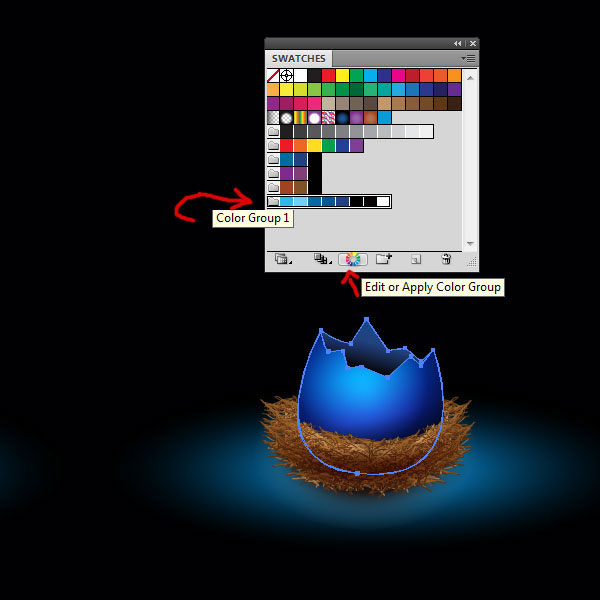 The Recolor Artwork window should appear, and from there, we can easily change the color of your egg.
Click on the Edit tab and move the color handles around until you’re satisfied with your new egg colors. Click OK to apply the recolor artwork edit (when asked if you want to save the new colors to the group, click Yes). 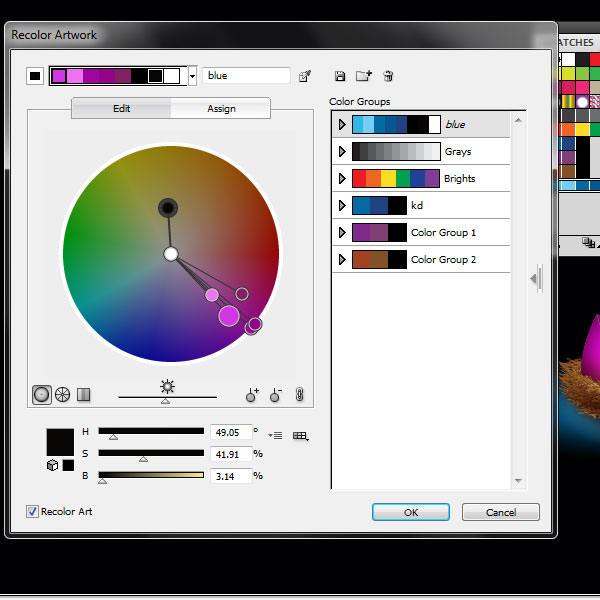 I went for a pink/dark pink color for the second egg.
Then, using the same technique, I created one more egg with an orange color. Here are the eggs: 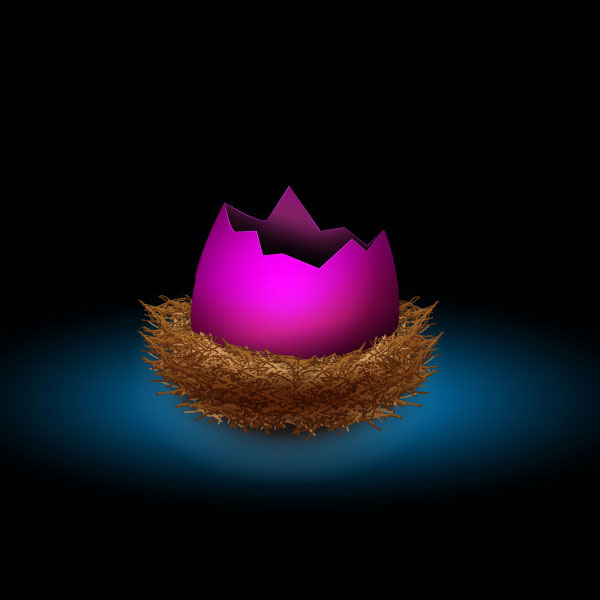
Optional Step: Add a Twitter-Like Bird
I created a small Twitter-like bird with simple shapes and placed it into the middle eggshell.
Tutorial Summary
We have finished creating our bird’s nest in Illustrator.
Feel free to comment below with any question and/or suggestions that you may have.
Download Source Files
- birds_nest_illustrator (ZIP, 4.86 MB)
-
 Trevin serves as the VP of Marketing at WebFX. He has worked on over 450 marketing campaigns and has been building websites for over 25 years. His work has been featured by Search Engine Land, USA Today, Fast Company and Inc.
 -

WebFX is a full-service marketing agency with 1,100+ client reviews and a 4.9-star rating on Clutch! Find out how our expert team and revenue-accelerating tech can drive results for you! Learn more
Make estimating web design costs easy
Website design costs can be tricky to nail down. Get an instant estimate for a custom web design with our free website design cost calculator!
Try Our Free Web Design Cost Calculator
Table of Contents
- Images
- Step 1: Draw the Cracked Eggshell Components
- Step 2: Fill the Shapes with the Gradient Tool
- Step 3: Build the Cracked Eggshell
- Step 4: Add Surface Highlights
- Step 5: Adding a Shadow
- Step 6: Create a Custom Symbol
- Step 7: Drawing the Nest
- Step 8: Adding a Dimensional Effect to the Nest
- Step 9: Compose the Nest and Eggshell
- Step 10: Adding Light Effects
- Step 11: Creating More Eggs in Different Colors
- Optional Step: Add a Twitter-Like Bird
- Tutorial Summary
- Download Source Files
Share this article


Web Design Calculator
Use our free tool to get a free, instant quote in under 60 seconds.
View Web Design Calculator
Make estimating web design costs easy
Website design costs can be tricky to nail down. Get an instant estimate for a custom web design with our free website design cost calculator!
Try Our Free Web Design Cost Calculator