
Preview

Tutorial Resources
- Image: light_bulb (Jasmina Stanojevic)
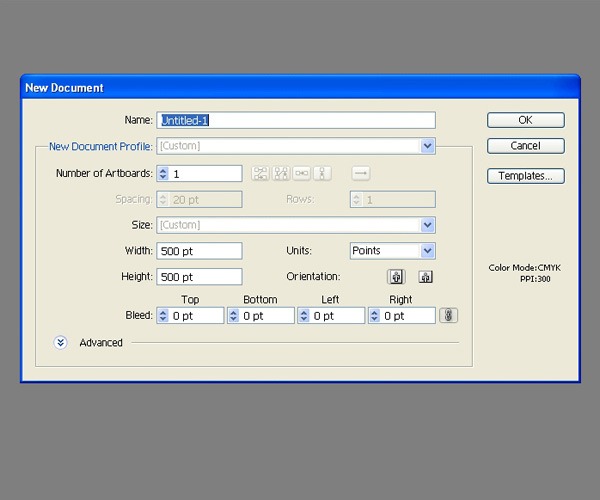
Step 1: Create a New Illustrator Document
First, let’s set up our artboard. Create a new Illustrator document that’s 500x500px in size.
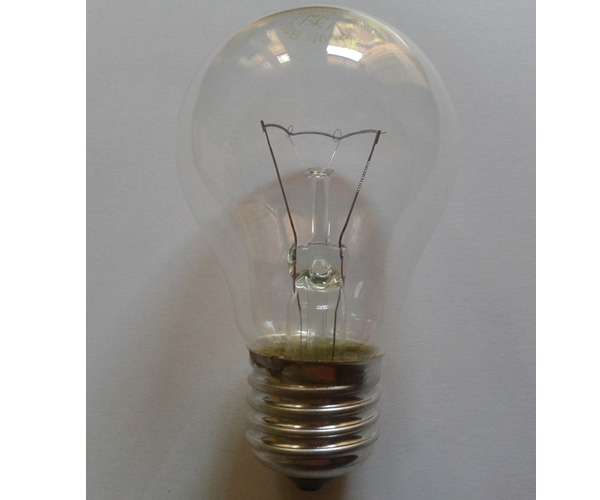
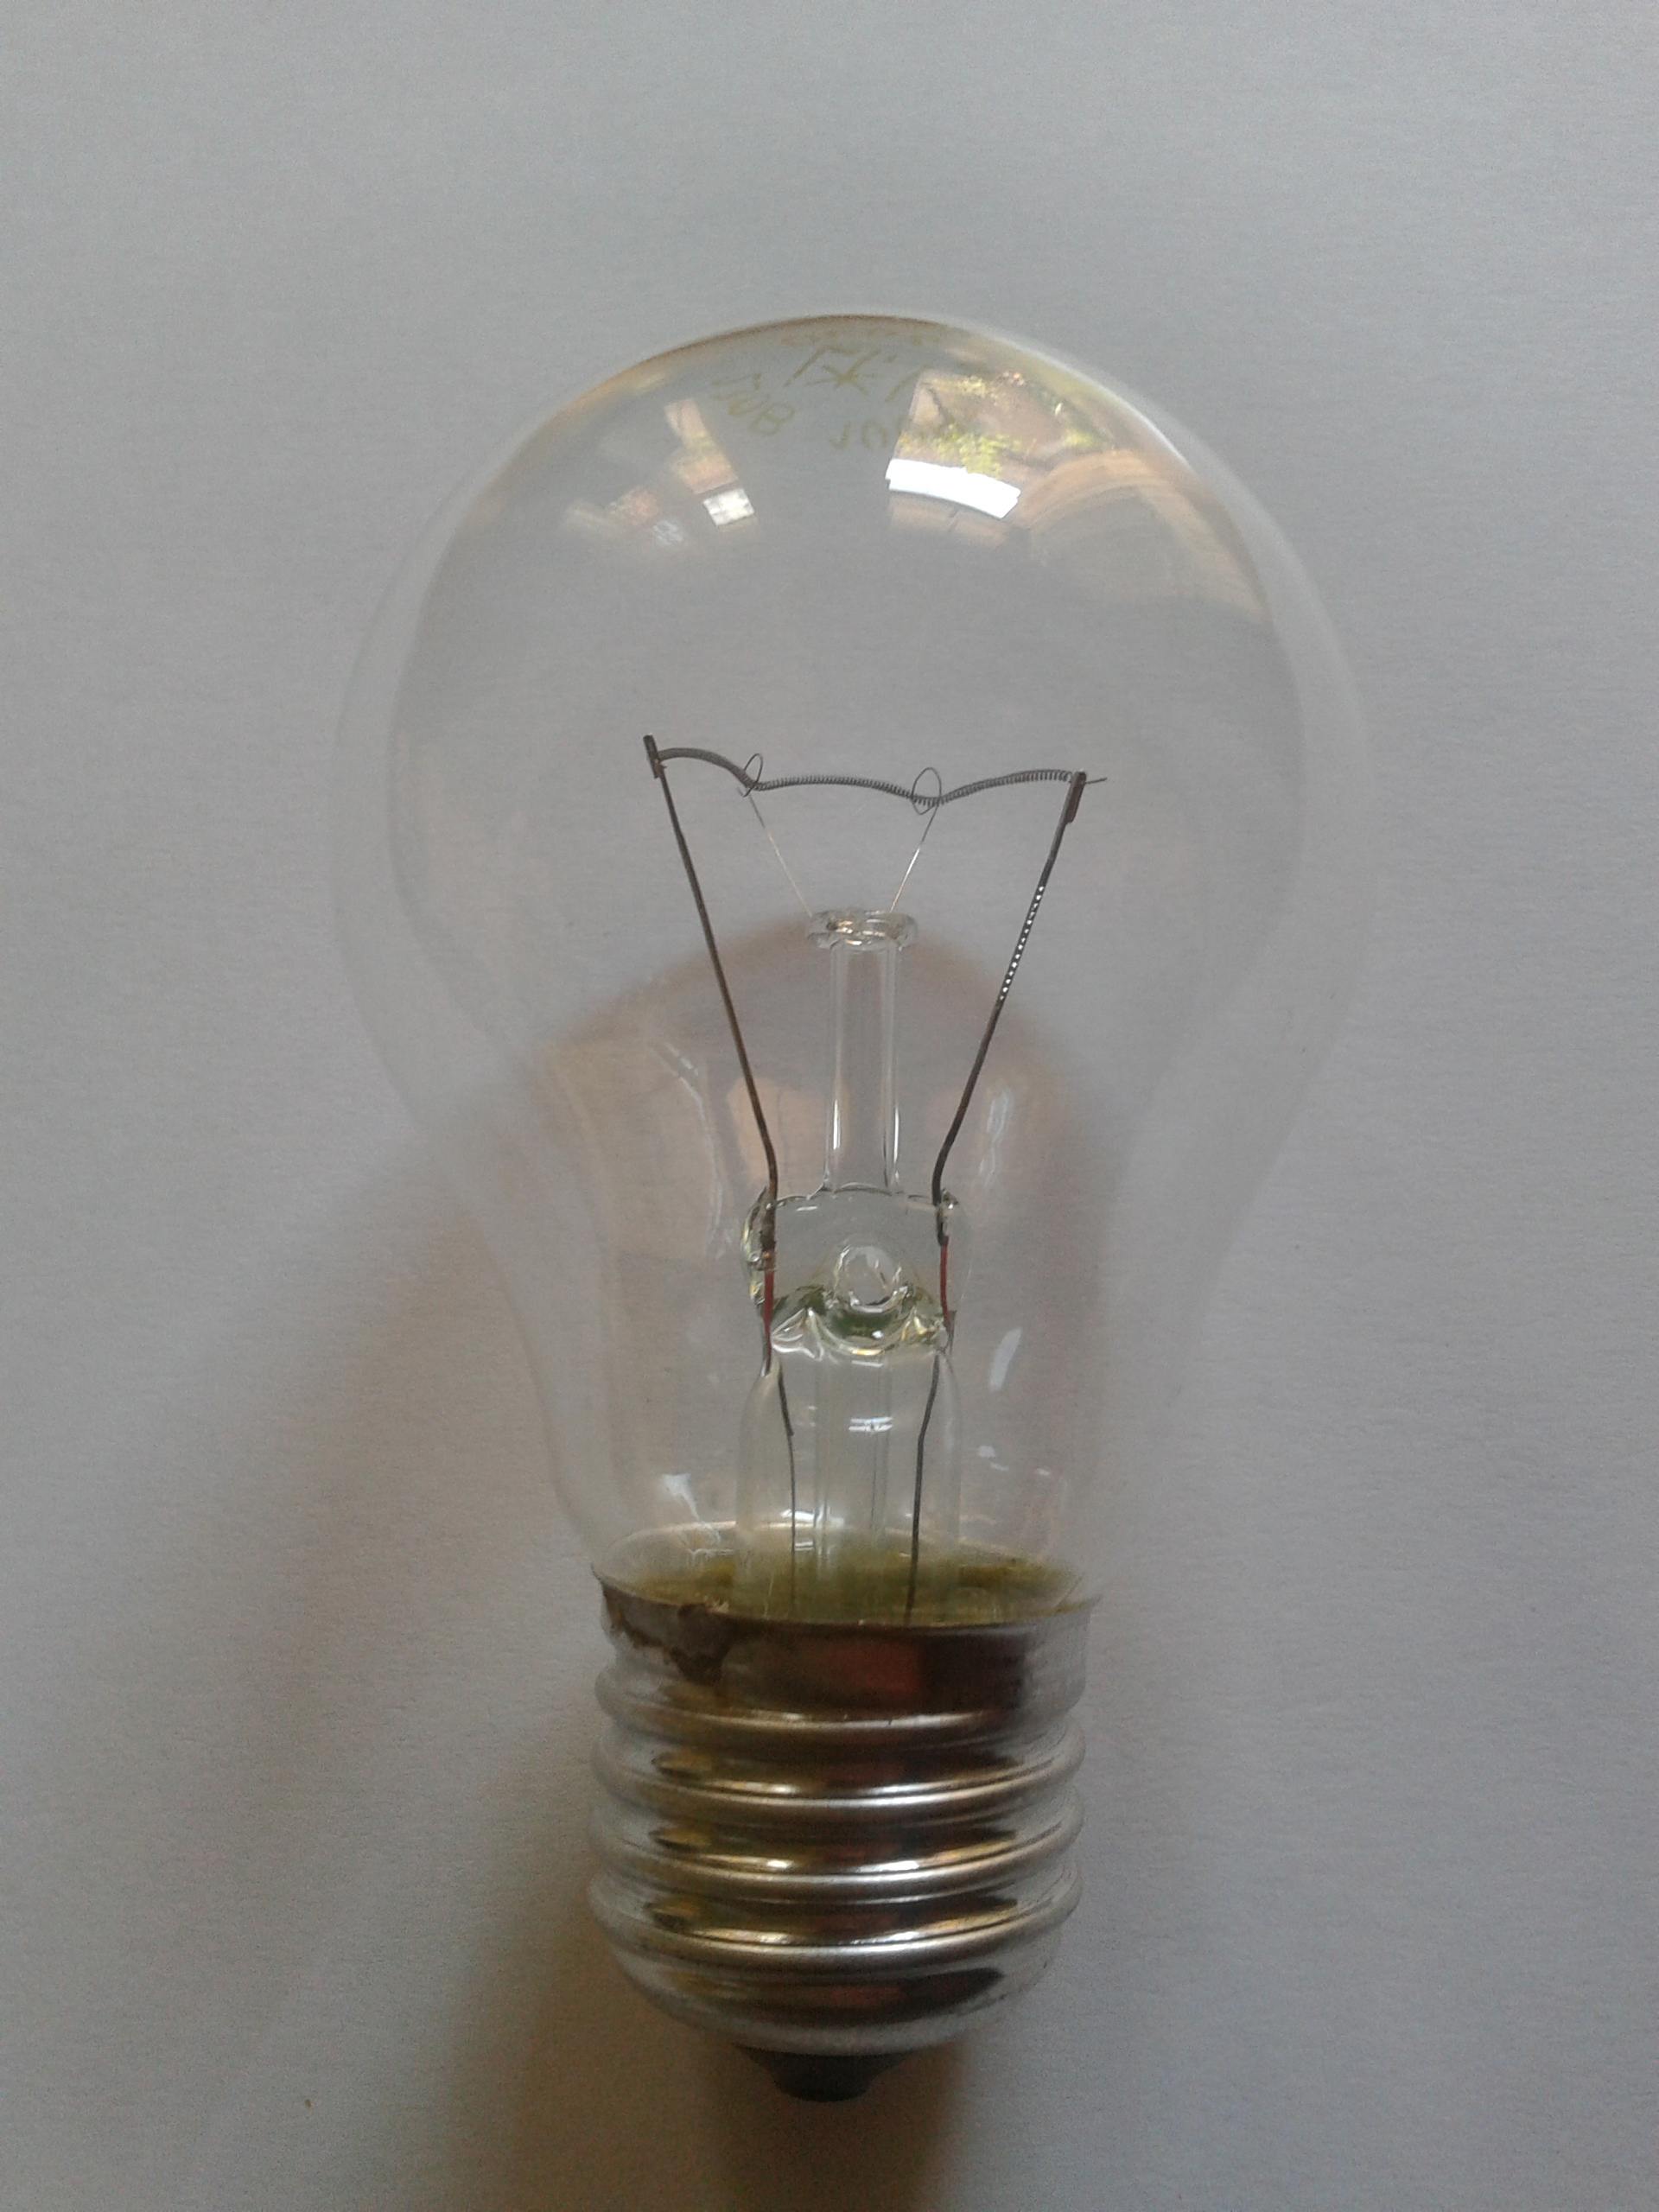
Step 2: Import a Reference Photo
I used a light bulb I had at home as a reference photo; I’ve provided it to you for this tutorial. Download this light bulb image and open it in Illustrator.
Lock the layer of the photo to avoid accidentally moving it.
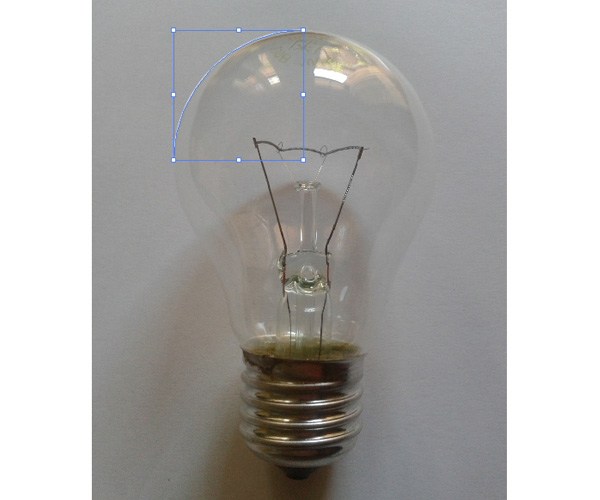
Step 3: Draw the Light Bulb’s Outline
Create a new layer above the reference photo; the new layer is where we’ll draw our illustration.
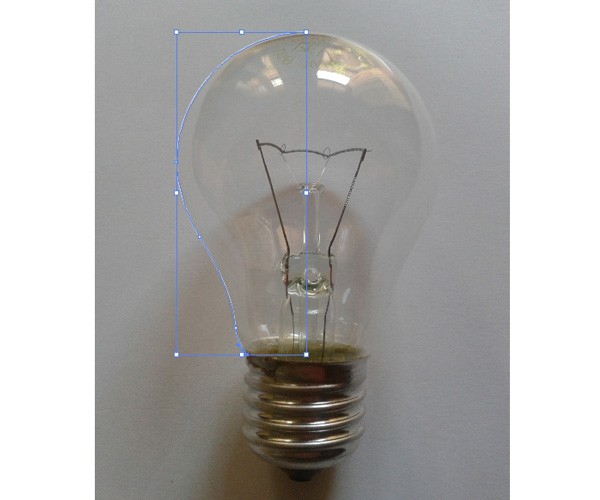
To start, we’ll draw the outline of the light bulb. Grab the Pen Tool (P) and trace the left side of the light bulb.

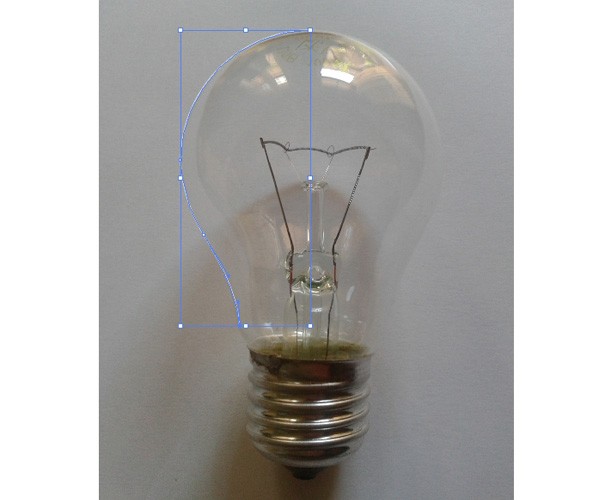
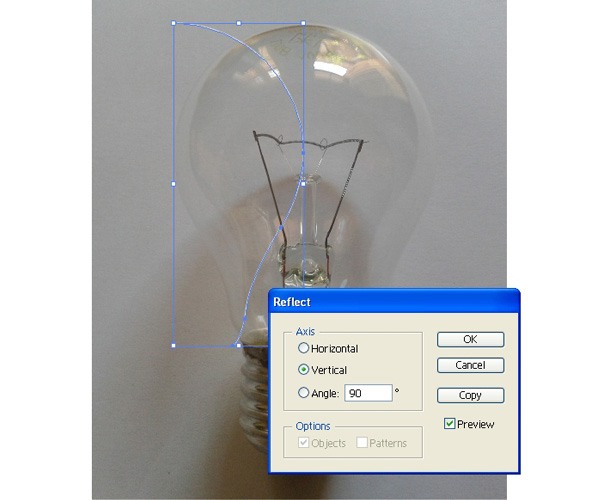
Switch to the Selection Tool (V) then click on the path we have just created to select it. Go to Object > Transform > Reflect.
Select the Vertical option and then hit the Copy button. This will create a mirror image.
Hold down Shift, click on the reflected path, and then drag it to the right; we have to hold down Shift so that movement is constrained horizontally.
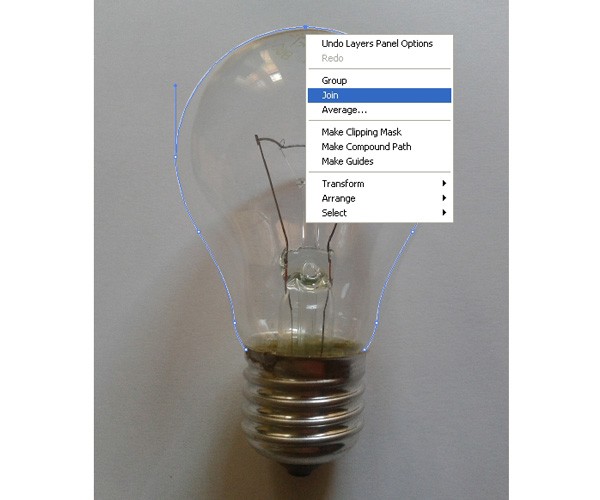
Grab the Direct Selection Tool (A) and select just the upper anchor points of both the left and right paths. Right-click on one of them and then choose Join from the contextual menu that appears to combine both anchors.
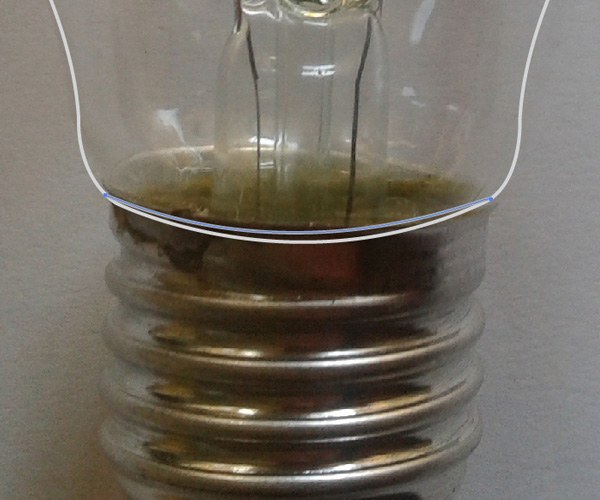
To join the lower anchor points, just grab the Pen Tool (P) and click on each anchor point to close the outline’s vector path.
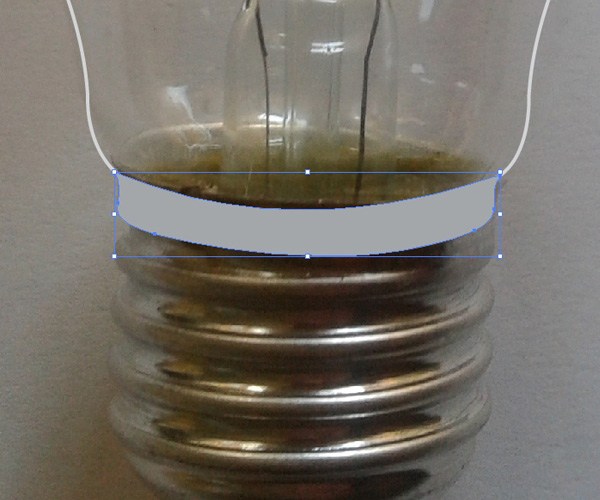
Step 4: Draw the Screw Cap’s Shape
Next, we’ll create the lower part of the light bulb (the metallic part) which is commonly called the screw cap.
Select the Pen Tool (P) and start to draw the top part of the screw cap where it meets with the bulb.
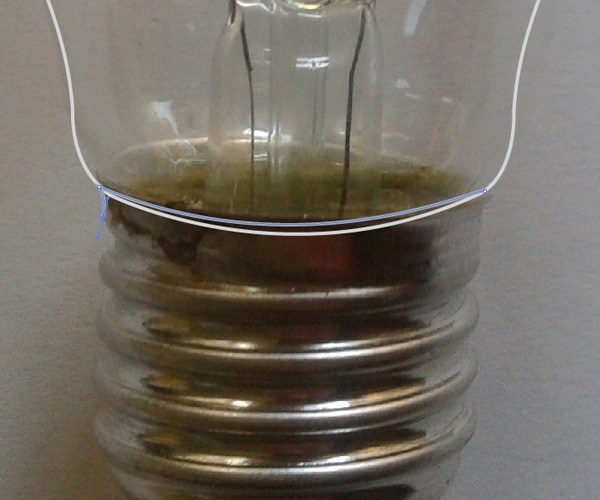
The middle part of the screw cap is a little bit tricky to draw.
But it doesn’t need to be perfect, just try to follow the shape of the cap and do your best. Make sure to draw smooth lines and curves, and don’t worry if you can’t draw it nicely the first time around; you can always adjust and tweak individual anchor points using the Direct Selection Tool.
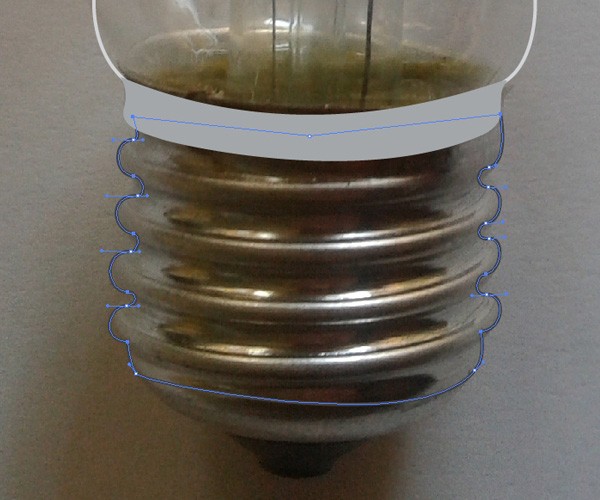
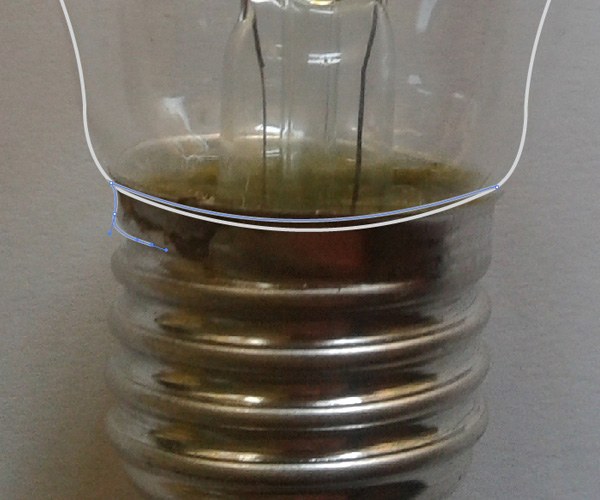
Keep drawing until you have all the main parts of the metal cap.
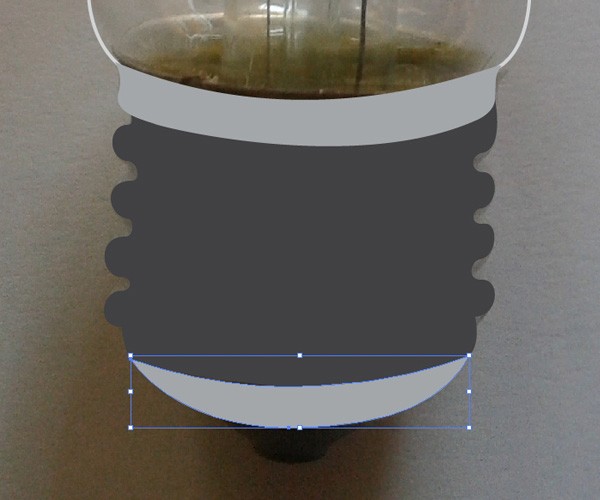
Step 5: Draw the Threads on the Screw Cap
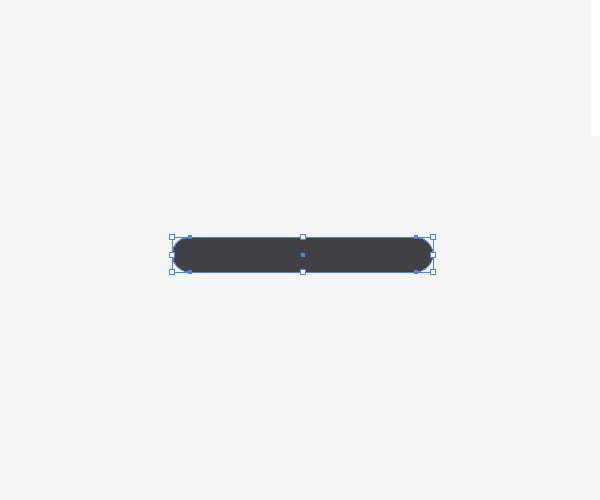
Now we need to make the screw cap’s threads. Select the Rounded Rectangle Tool and then create the rectangle shown below.
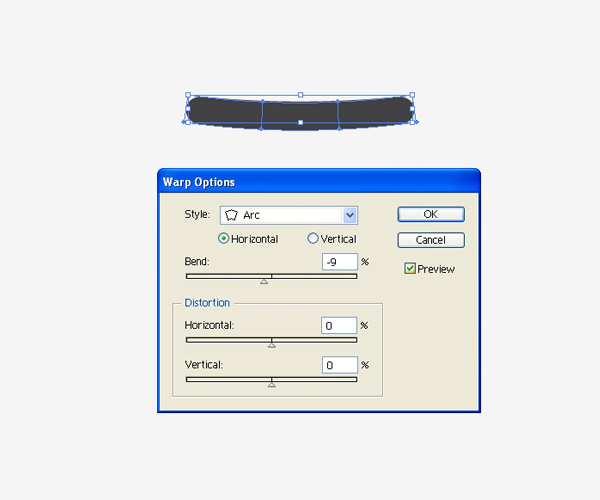
We need to distort it a little bit.
Select the rectangle then go to Object > Envelope Distort > Make with Warp.

In the Warp Options dialog window, choose Arc for the Style option, choose the Horizontal option, and set the value for Bend to -9. This will bend the rectangle exactly in half.
With the Direct Selection Tool (A), select four anchor points at the middle of the rectangle by holding Shift and clicking on each of the anchor points. When the anchor points are selected, use the Left Arrow key to nudge the anchors a few pixels to the left. It will distort the rectangle a bit more, which will contribute to the realistic look.
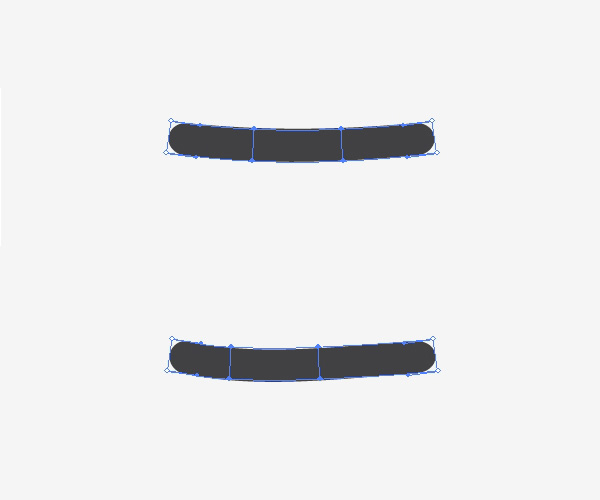
Switch to the Selection Tool (V) and click on the rectangle to select it, then expand it by choosing Object > Expand.
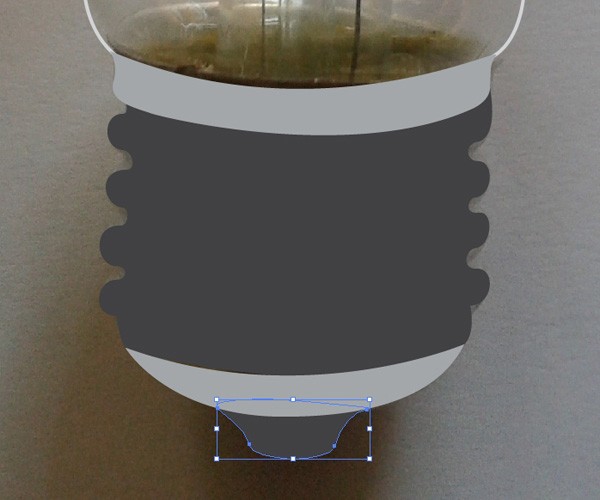
Afterwards, move it on the metal cap of the light bulb.
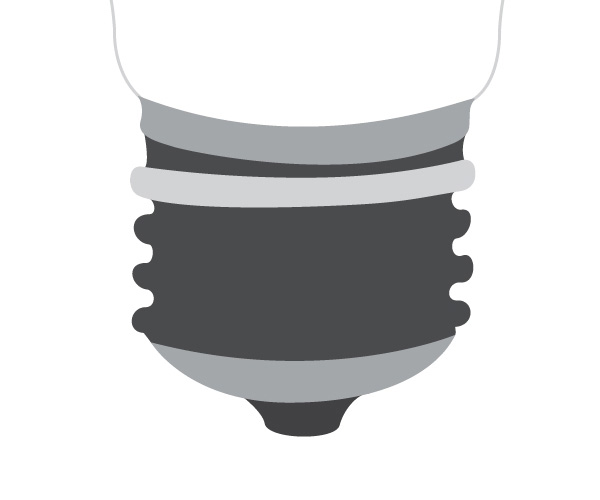
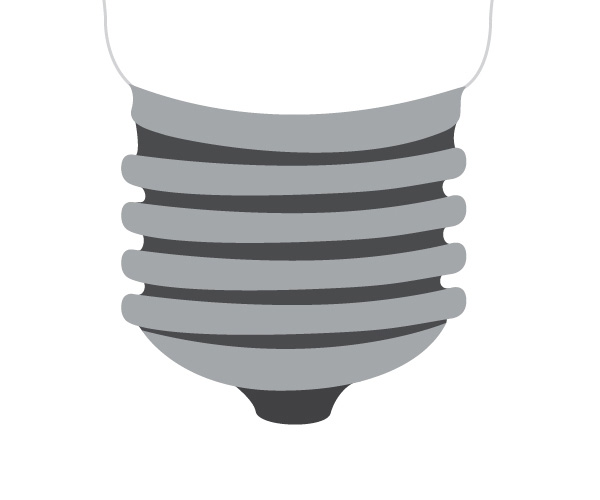
Duplicate it several times and place the duplicates as shown below.
More or less, this is the basic shape of the metal cap:
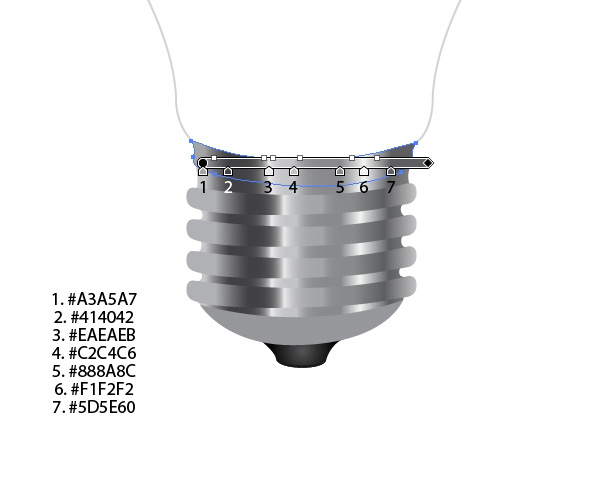
Step 6: Applying Gradients to the Screw Cap
With nice metal color gradients, we can make the lower part of light bulb more persuading. It will also help us create some depth in this illustration.
To apply gradients, go to Window > Gradient (Ctrl/Cmd + F9) to open the Gradient Panel.
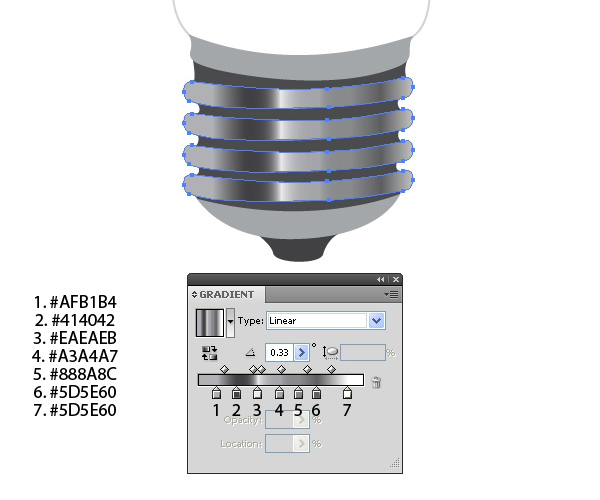
For the threads, apply the gradient shown below.
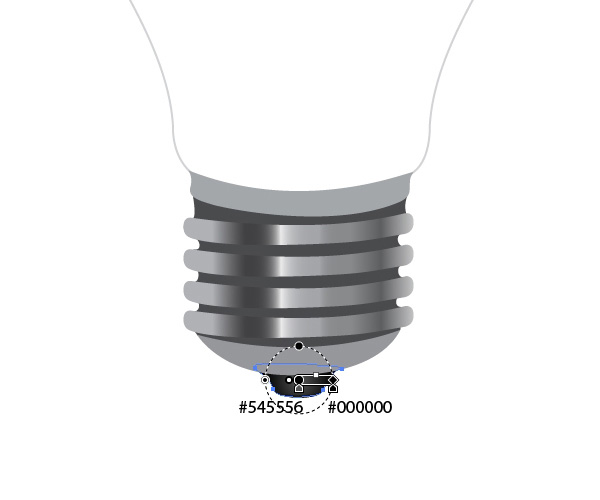
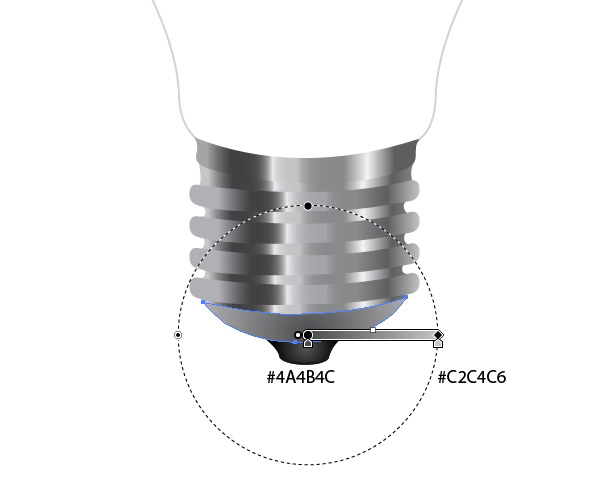
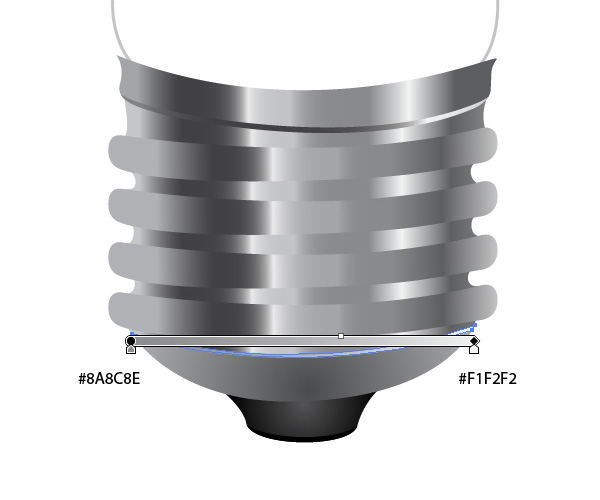
For the electrical contact, we’ll use a simple radial gradient.
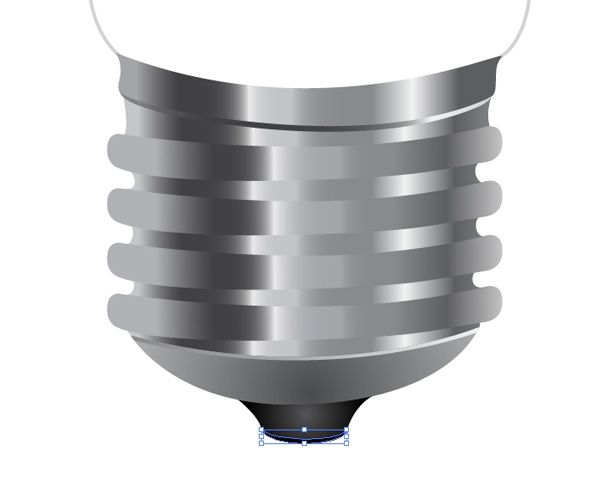
Continue using metallic gradients until you reach the desired look.
Step 7: Creating Metallic Highlights
Let’s highlight some edges. It will improve the metallic look of the screw cap.
Select the upper part of the cap and duplicate it two times by copying (Ctrl/Cmd + C) and then pasting in front (Ctrl/Cmd + F) twice. You should know have three copies; the original plus two duplicates. Nudge one of the duplicates 2px upwards and scale it up a little bit.
Then select both copies and, under the Pathfinder Panel, press the Minus Front button.
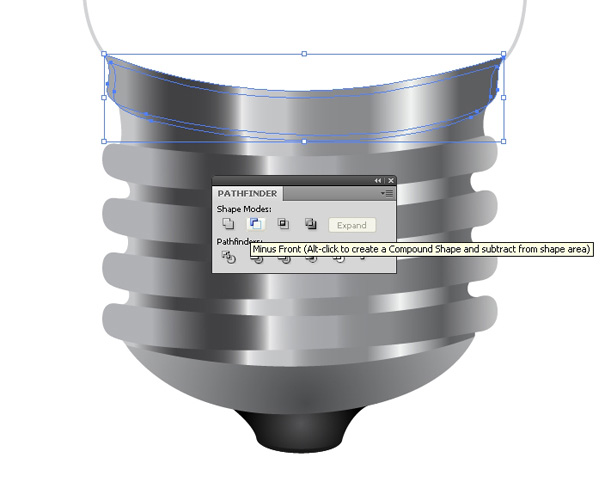
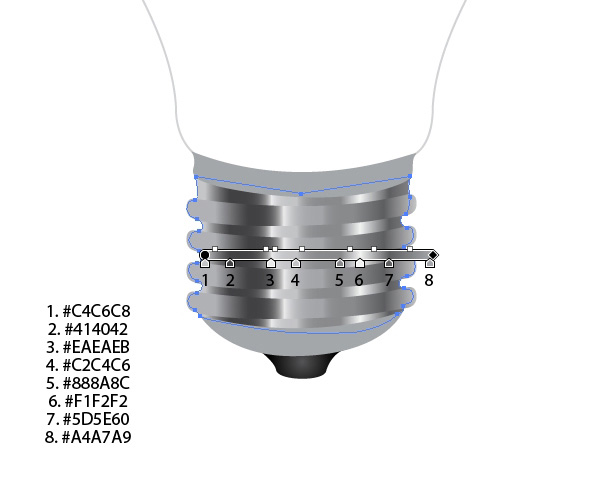
Apply the linear gradient shown below.
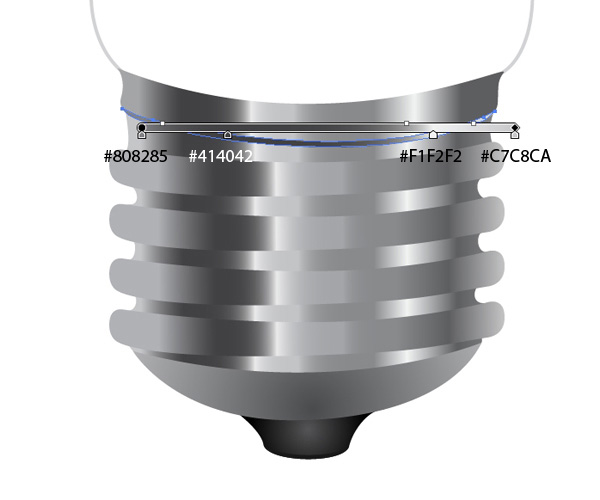
Do the same thing for the lower part of the cap.
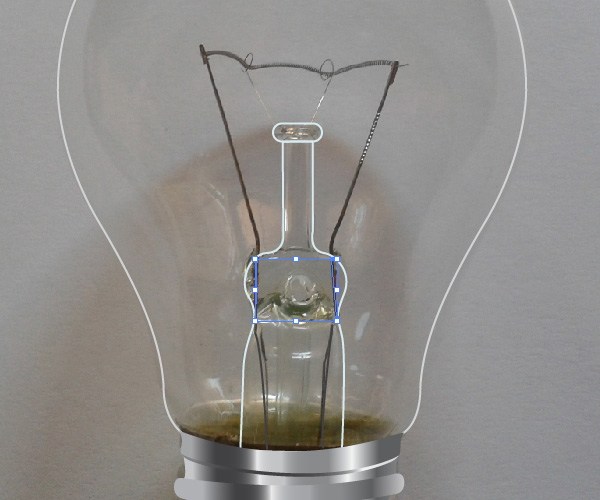
Step 8: Create the Inner Components of the Light Bulb
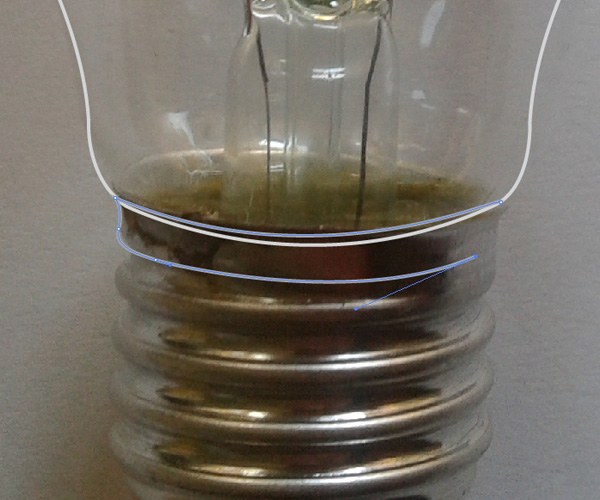
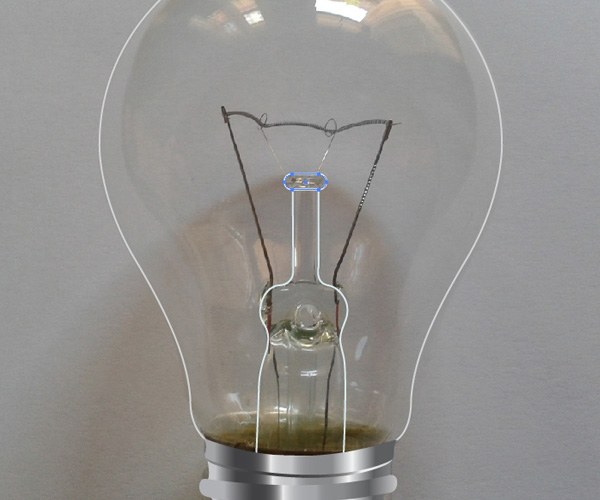
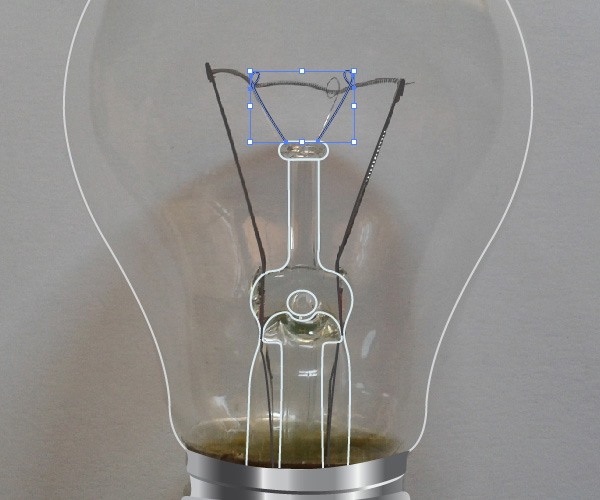
In this step, we’ll use our reference photo to create the elements inside the glass part of the light bulb.
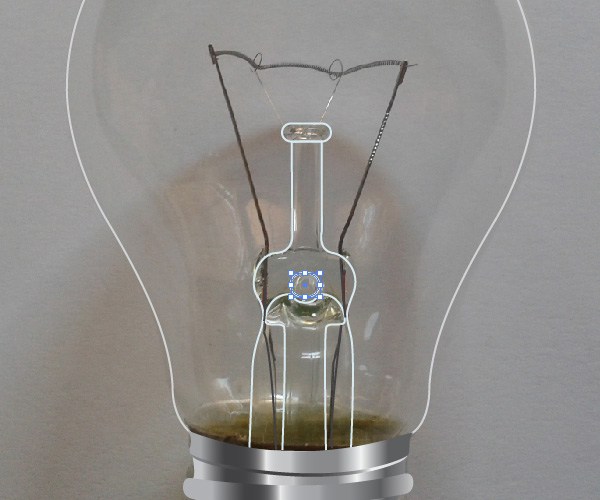
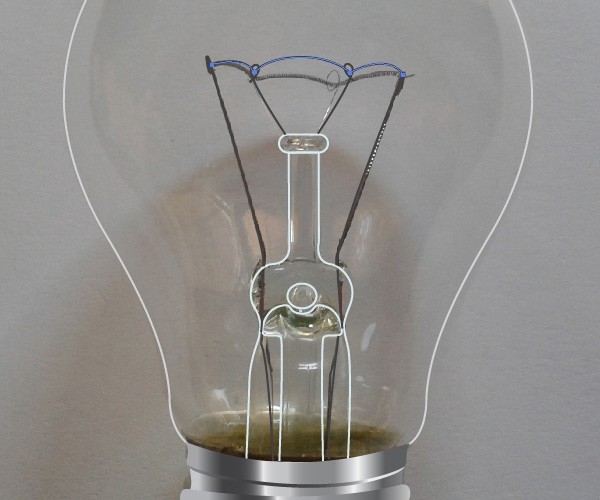
To start, just grab the Pen Tool (P) and start drawing. A tip: Just follow the shape of the object you’re drawing; it doesn’t need to be perfect because we can adjust individual anchor points in case we don’t like how it looks. As a reference while you’re drawing, follow along in the progression below.
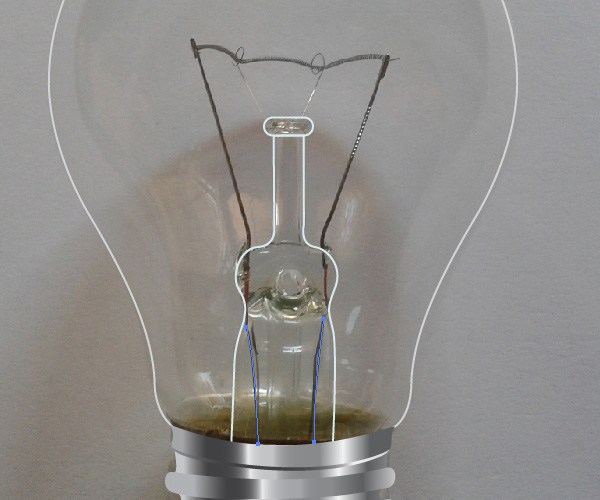
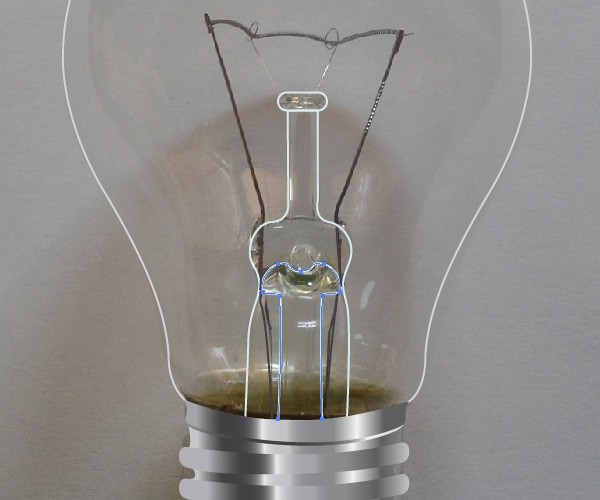
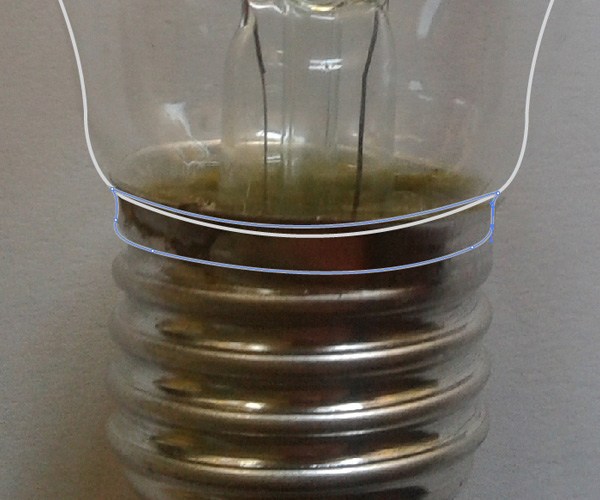
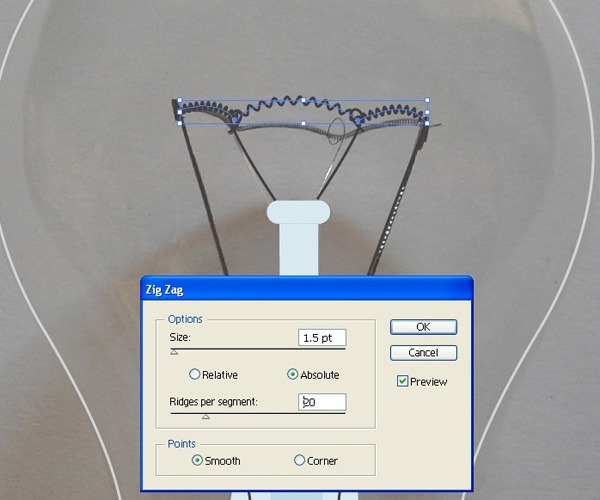
To create the coiled tungsten filament — the curly wire that goes across in the middle — select the path we drew at the top and then go to Effect > Distort & Transform > Zig Zag.
Set the Size to 1.5pt, Ridges per Segment to 20, Points to Smooth.
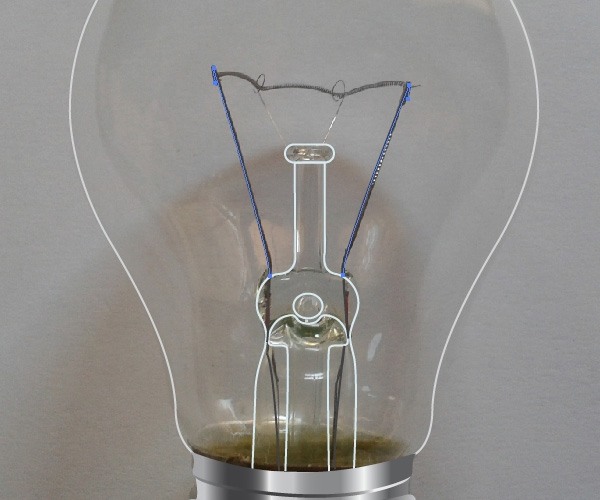
Without the light bulb reference photo, our illustration should look like this:
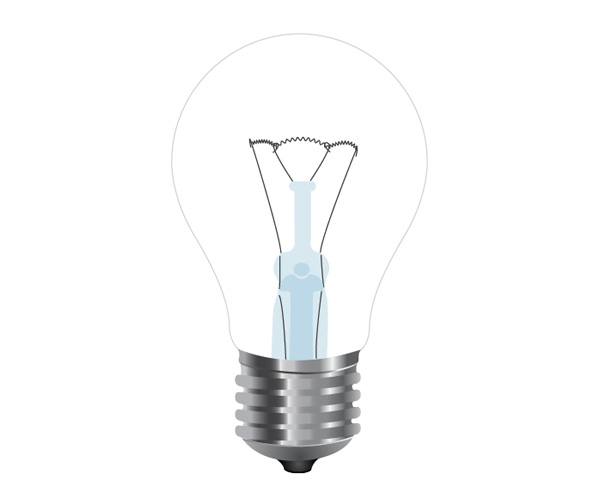
We’re moving along quite nicely, wouldn’t you say?
Step 9: Apply Colors to the Glass Part of the Light bulb
Our light bulb looks flat and it certainly needs some color. Let’s apply a nice blue gradient and see what we get.
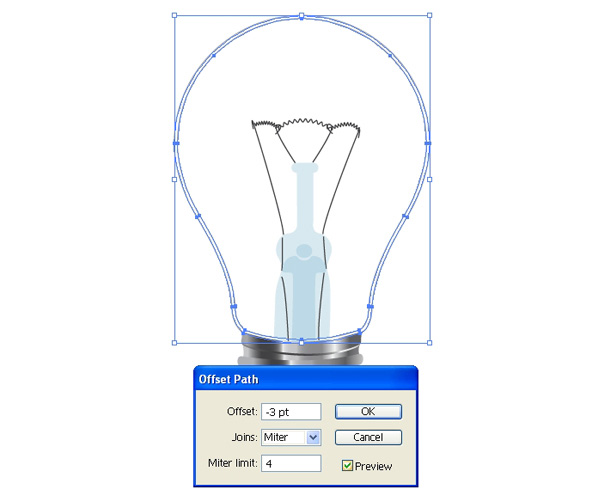
First, we’ll create a white outline for the glass of the light bulb. Select the glass and then choose Object > Path > Offset Path.
Set the Offset to -3.
Select the inner shape of the glass and then duplicate it.
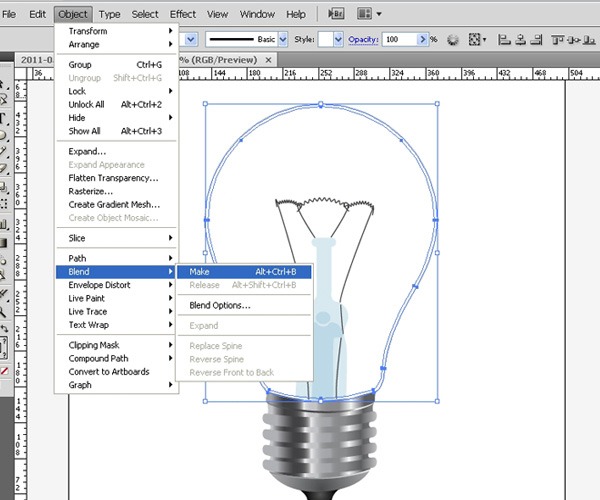
Set the Stroke color of the larger shape to a light gray (#C2C4C6) and the Stroke color of the smaller shape to white (#FFFFF). Select them both and go to Object > Blend > Make.
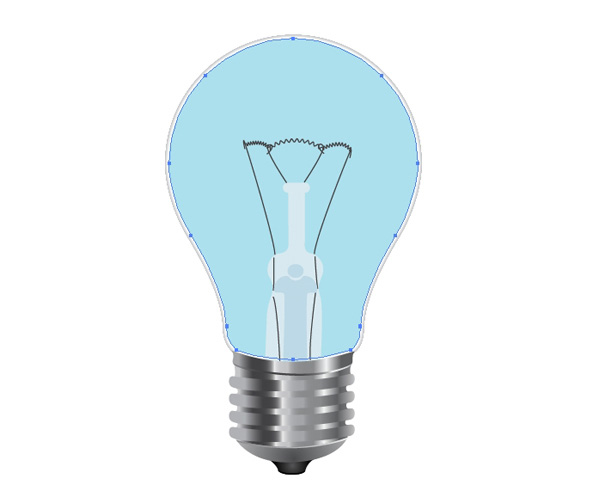
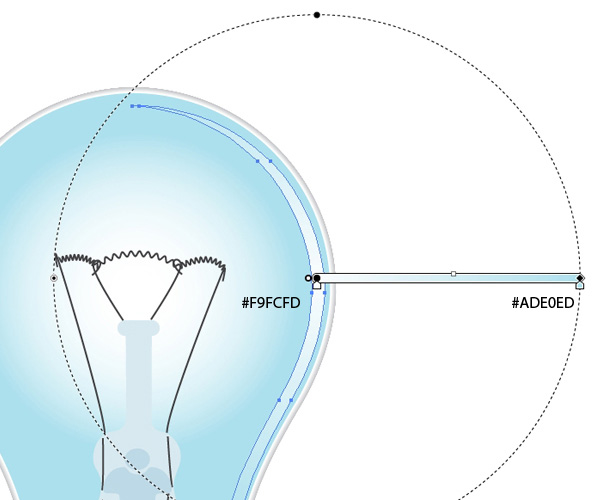
Now, select the other copy of the smaller shape and set the Fill color to a light blue (#ADE0ED).
Grab the Ellipse Tool (L) and create a circle at the middle of the glass. Give the circle a nice blue-to-white radial gradient.

Step 10: Applying Reflections and Shadows
We are almost done!
All we need to do is to create some nice reflections and shadows (it is a light bulb, after all!) Reflections can be various shapes and forms, but the best way to make them is to follow the shape of the object.
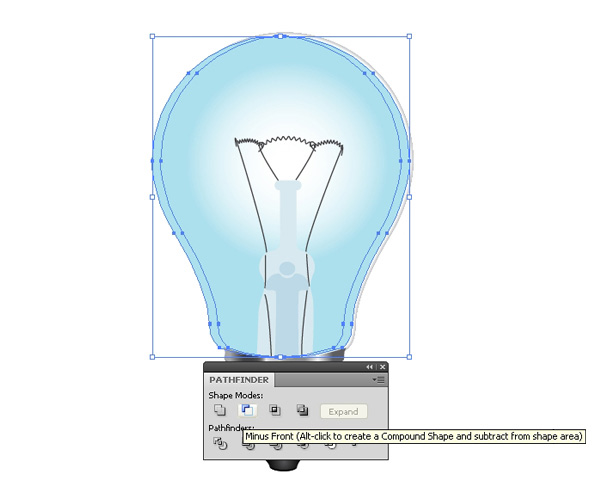
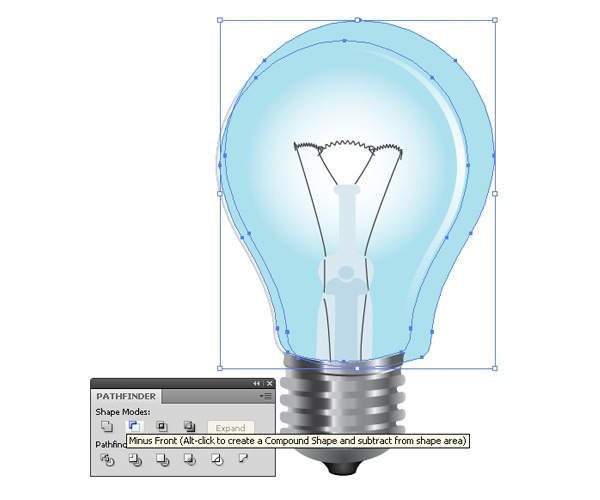
Select the blue shape of the light bulb and create two copies. Move one of the copies, then rotate it a bit. Select both copies and, under the Pathfinder Panel, hit the Minus Front button.
Select the resultant shape and scale it down a bit.
Apply the radial gradient shown below.
Let’s do the same thing, but on the other side of the light bulb. Create two copies of the blue shape again, move one of the copies a little bit, rotate it, scale it up or down (feel free to be creative and follow your instincts). This way, you can mimic the non-uniformity of reflections in the real world.
When you’re satisfied, hit the Minus Front button in the Pathfinder Panel to create the reflection.
Select the reflection object and give it a radial gradient.

Using the same technique, create a few more interesting reflections.
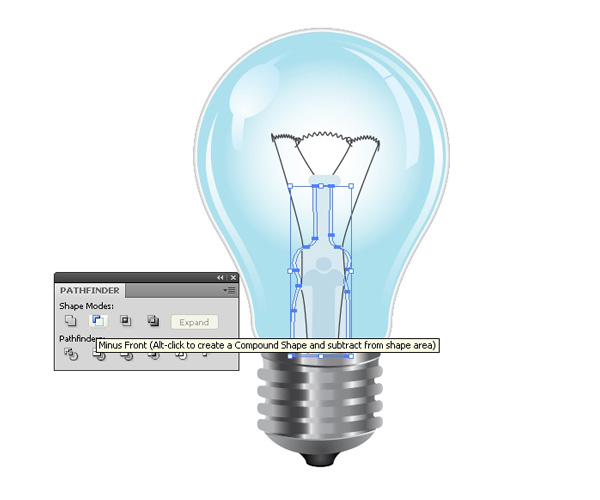
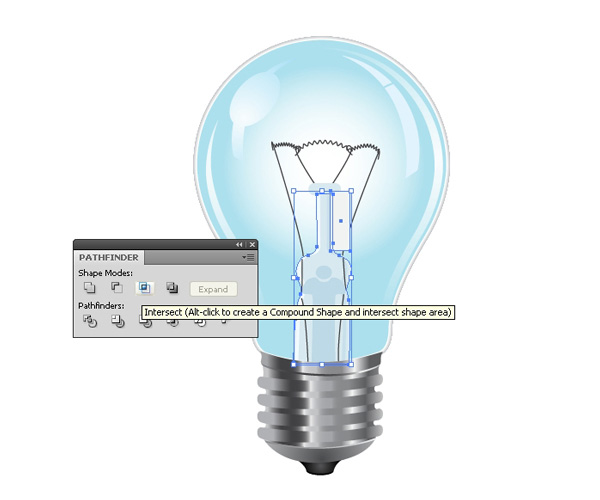
We should do the same with the inner components of the light bulb. Each time you want to create a reflection, use the same technique: duplicate the object twice, move one of the copies, rotate, scale it up or down and when you’re happy with the shape of the reflection, hit the Minus Front, Unite, or Intersect button in the Pathfinder Panel depending on what you’re trying to achieve.
The more details we focus on, the more compelling and realistic our illustration will be. Just make sure not to exaggerate; we don’t want to create a busy, overcrowded and unfocused illustration.
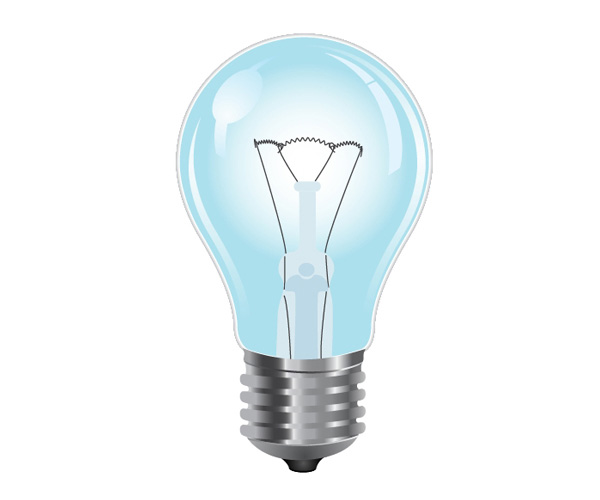
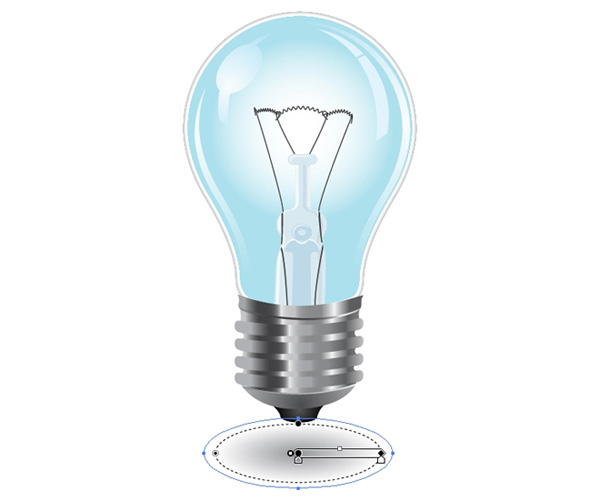
When you’re done creating reflections and details, adjust the position and size of all the elements in order to complete the light bulb illustration.
Also, don’t forget to create the shadow.
Tutorial Summary
In this tutorial, we used the Pen Tool quite a lot.
The Pen Tool is really a powerful Adobe Illustrator feature, but it requires practice to master. Also, I showed you a popular technique that many illustrators do, which is to use a reference photo for helping us draw our illustrations. It’s much easier when you have a reference image that you can use for tracing.
I hope you liked this tutorial and thank you for following along!
Download Source Files
- realistic_lightbulb_illustrator (0.25 MB)
-
 Trevin serves as the VP of Marketing at WebFX. He has worked on over 450 marketing campaigns and has been building websites for over 25 years. His work has been featured by Search Engine Land, USA Today, Fast Company and Inc.
 -

WebFX is a full-service marketing agency with 1,100+ client reviews and a 4.9-star rating on Clutch! Find out how our expert team and revenue-accelerating tech can drive results for you! Learn more
Make estimating web design costs easy
Website design costs can be tricky to nail down. Get an instant estimate for a custom web design with our free website design cost calculator!
Try Our Free Web Design Cost Calculator
Table of Contents
- Preview
- Tutorial Resources
- Step 1: Create a New Illustrator Document
- Step 2: Import a Reference Photo
- Step 3: Draw the Light Bulb’s Outline
- Step 4: Draw the Screw Cap’s Shape
- Step 5: Draw the Threads on the Screw Cap
- Step 6: Applying Gradients to the Screw Cap
- Step 7: Creating Metallic Highlights
- Step 8: Create the Inner Components of the Light Bulb
- Step 9: Apply Colors to the Glass Part of the Light bulb
- Step 10: Applying Reflections and Shadows
- Tutorial Summary
- Download Source Files
Share this article


Web Design Calculator
Use our free tool to get a free, instant quote in under 60 seconds.
View Web Design Calculator
Make estimating web design costs easy
Website design costs can be tricky to nail down. Get an instant estimate for a custom web design with our free website design cost calculator!
Try Our Free Web Design Cost Calculator


