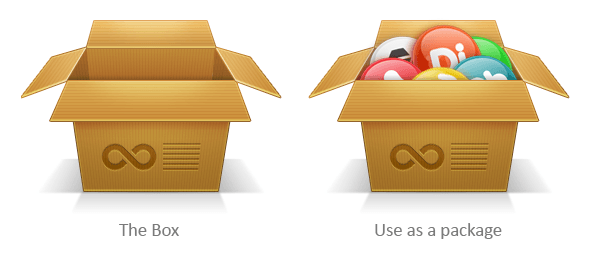
Preview
Tutorial Resources
- Icons: Qure Dock Icons by Prax08
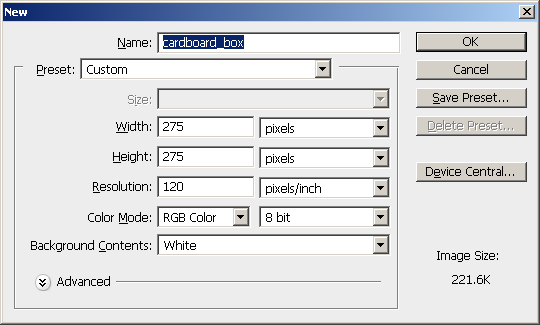
Step 1: Setting Up the Canvas
Create a new Photoshop document by going to File > New (Ctrl/Cmd + N). We will use a 275×275-pixel canvas that has a white background.

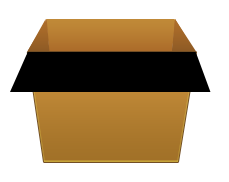
Step 2: Create the Front of the Box
Create a new shape above the Background layer for the front of the box.
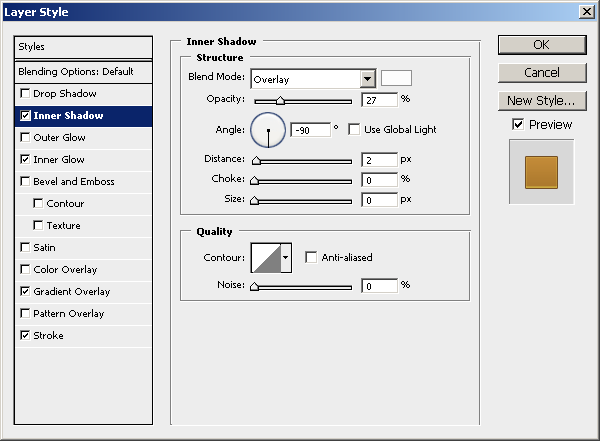
Double-click on the layer in the Layers Panel to access the Layer Style dialog window.
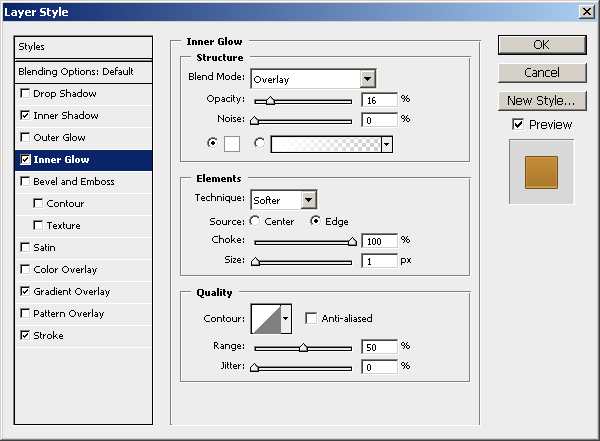
We want to give the layer an Inner Shadow, Inner Glow, Stroke, and Gradient Overlay.
Inner Shadow
The color of the Inner Shadow is white (#FFFFFF).
Inner Glow
The color of the Inner Glow is also white (#FFFFFF).
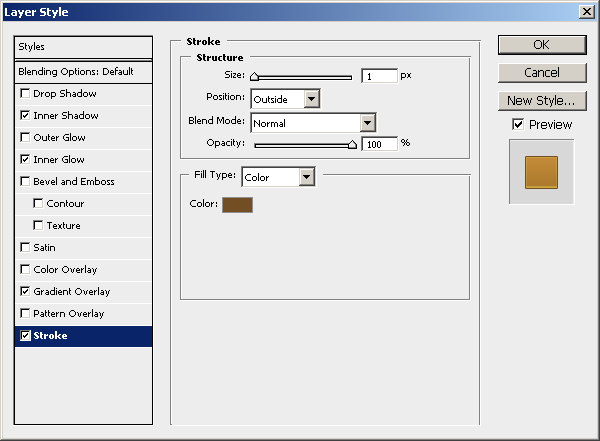
Stroke
The color of the stroke is a brown color (#734E24).
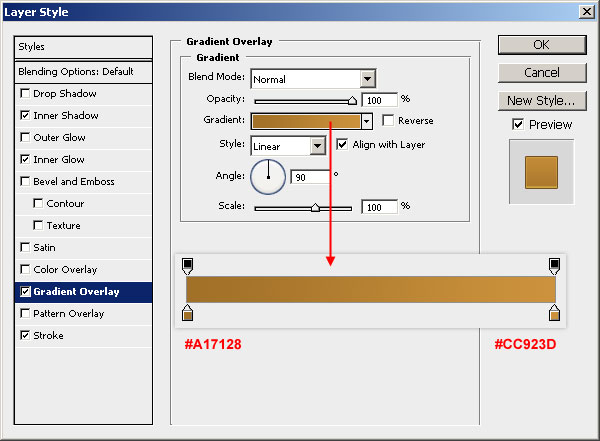
Gradient Overlay
The gradient is a dark cardboard box color on the left (#A17128) and a lighter one (#CC923D) on the right.
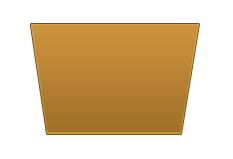
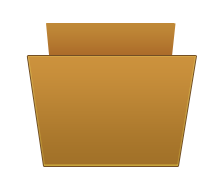
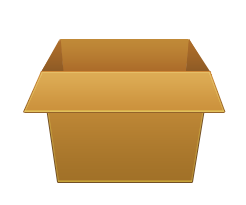
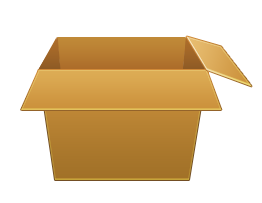
The above styles will make the front of our cardboard box appear like this:
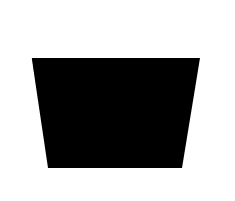
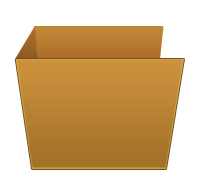
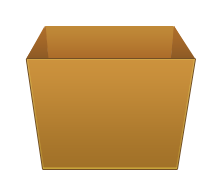
Step 3: Create the Back of the Box
The process for drawing the back part of the box will be similar to the one above. Create a new layer above the default Background layer, but below the “front” layer. Create the black shape shown below; it represents the back face of our box.
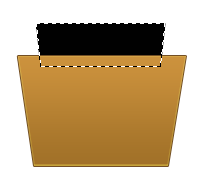
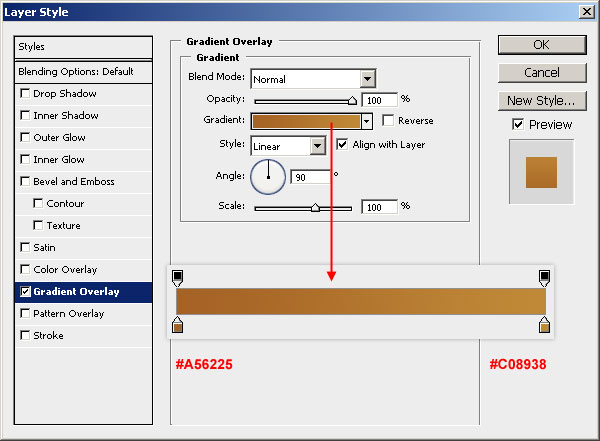
Give this shape a Gradient Overlay layer effect, with the color gradient set to #A56225 on the left and #C08938 on the right.
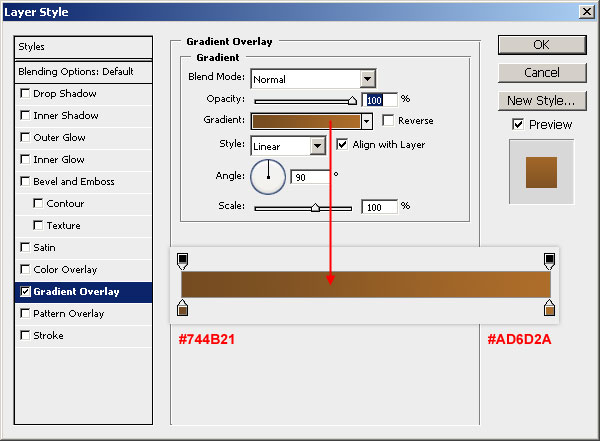
Step 4: Create the Left and Right Sides of the Box
Draw the left side of the box on a new layer.
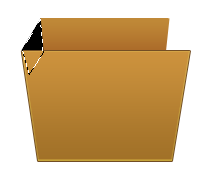
Give the layer a Gradient Overlay with #744B21 as the color on the left and #AD6D2A as the color on the right. This should produce a darker color gradient, which is what we want so that our design is as accurate as possible.
Use the same procedure to draw the right side of the box.
Step 5: Creating the Front Flap of the Box
Let us now draw the flaps of the cardboard box, starting with the front flap.
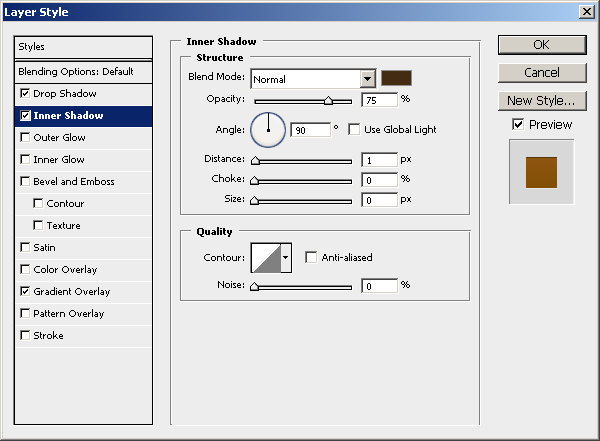
We will give this layer an Inner Shadow, Inner Glow, Gradient Overlay, and Stroke.
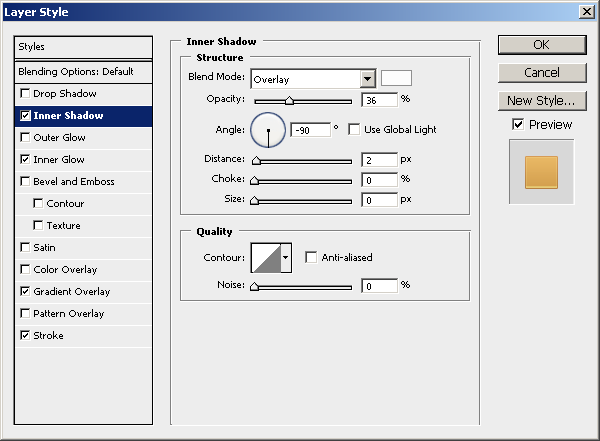
Inner Shadow
The color of the Inner Shadow is white (#FFFFFF).

Inner Glow
The color of the Inner Glow is also white (#FFFFFF).

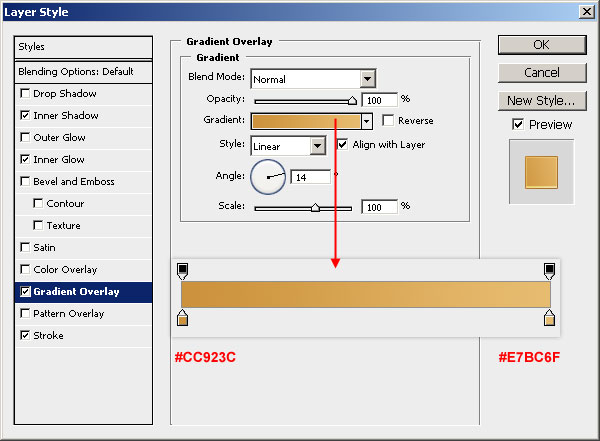
Gradient Overlay
The color gradient is #CB913C on the left and #DDAC55 on the right.
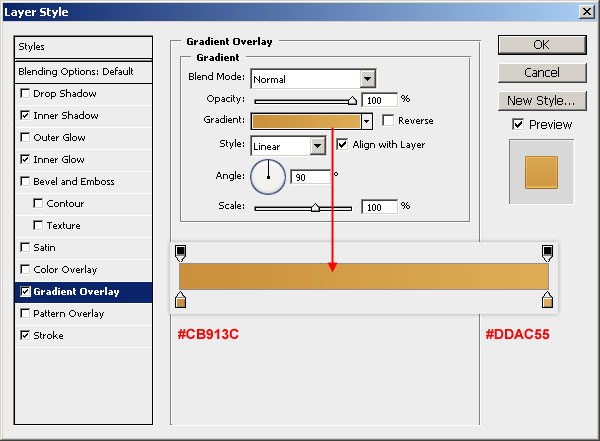
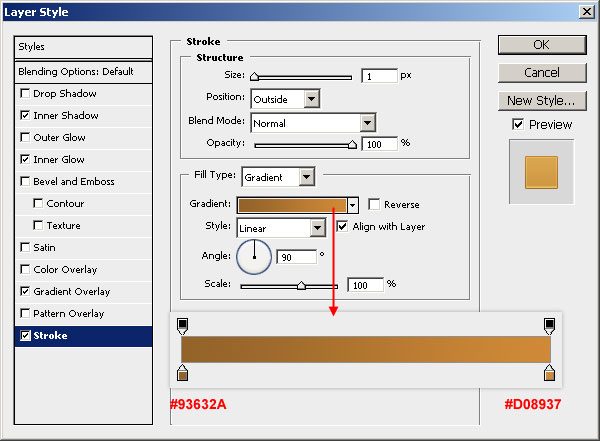
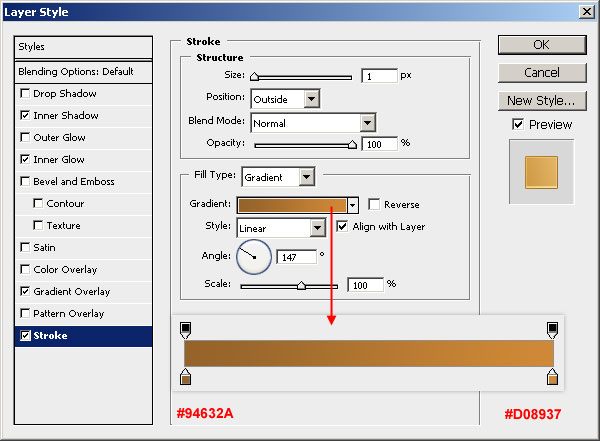
Stroke
The stroke’s Fill Type should be set to Gradient. The stroke’s color gradient should be #93632A on the left and #D08937 on the right.
Step 6: Draw the Right and Left Flaps of the Box
Draw the right flap on a new layer.
Give this layer an Inner Shadow, Inner Glow, Gradient Overlay, and Stroke.
Inner Shadow
The Inner Shadow’s color is white (#FFFFFF).

Inner Glow
The Inner Glow’s color is also white (#FFFFFF).
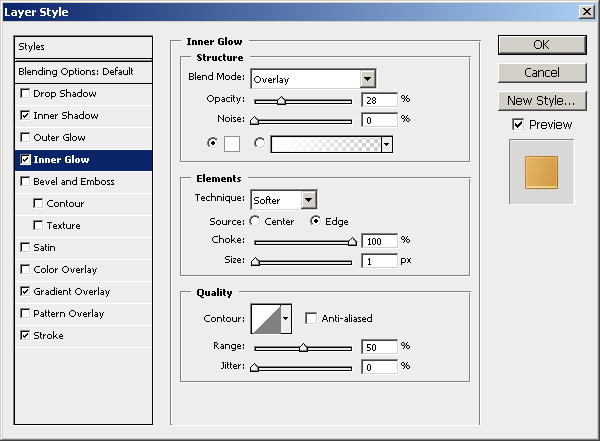
Gradient Overlay
The color gradient is #CCC923C on the left and #E7BC6F on the right.

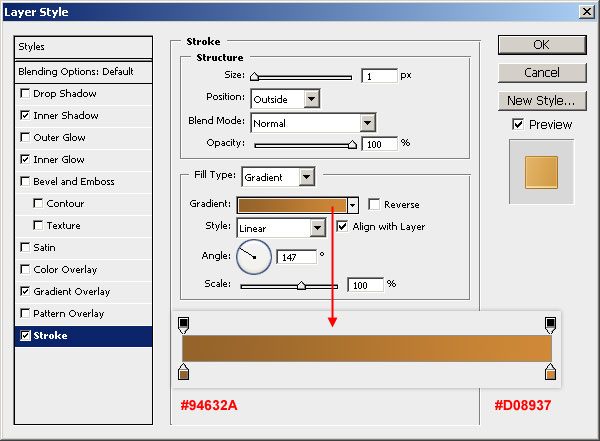
Stroke
The Fill Type of the stroke should be set to Gradient.
The color gradient should be #94632A on the left and #D08937 on the right.
In the same way as the right flap, create the shape for the left flap. You might be able to get away with duplicating the right flap and flipping it horizontally (Edit > Transform > Flip Horizontal).

We need to give the left flap’s layer a similar layer style, with a few tweaks to keep the lighting of our piece accurate.
Inner Shadow
The color of the Inner Shadow color should be white (#FFFFFF).

Inner Glow
The Inner Glow color should also be white (#FFFFFF).

Gradient Overlay
The color gradient is #CC923C on the left and #E7BC6F on the right.
Stroke
The Fill Type should be set to Gradient. The color gradient is #94632A on the left and #D08937 on the right.

Step 7: Create the Back Flap
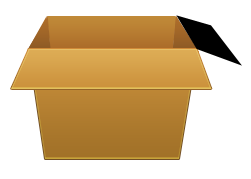
Time to create the last flap — it will follow similar procedures as the other flaps, just tweaks in its layer style.
On a new layer, draw the back flap as shown below.

For its layer style, we will need an Inner Shadow, Inner Glow, Gradient Overlay, and Stroke.
Inner Shadow
The Inner Shadow color should be white (#FFFFFF).
Inner Glow
The Inner Glow color should also be white (#FFFFFF).

Gradient Overlay
The color gradient should be #CB9546 on the left and #F0C16C on the right.

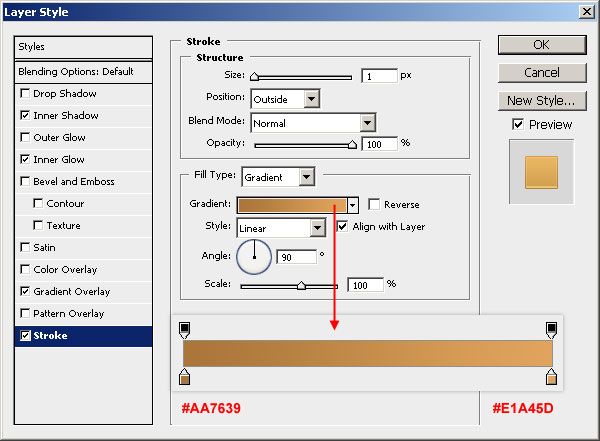
Stroke
The Fill Type should be set to Gradient. The color on the left of the gradient is #AA7639, while the color on the right is #E1A45D.
Now you will have it looking like this:

Step 8: Give the Flaps Some Highlights
We will use a simple technique for giving our flap surface some added visual interest with the use of highlights. On a new layer, draw a white elliptical shape using the Ellipse Tool on top of the front flap.

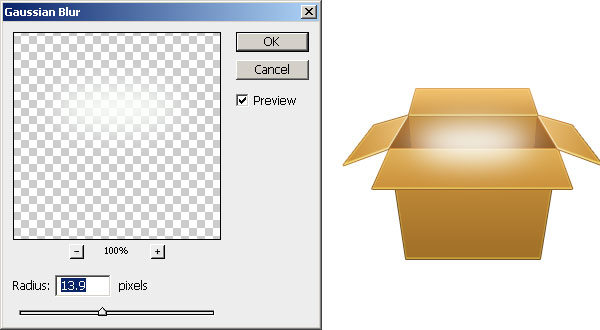
Now go to Filter > Blur > Gaussian Blur.
If you apply the filter on the shape layer, you will get a warning that looks like this:
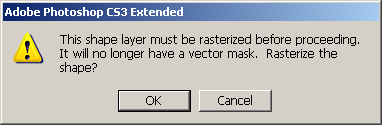
Just click OK to rasterize the layer.
Set the Radius of the Gaussian Blur filter to 13.9 pixels.
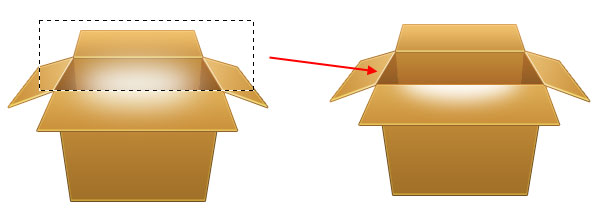
Choose the Rectangular Marquee Tool (M) and make a selection at the top of the white glow, then hit Delete to remove the selected area.
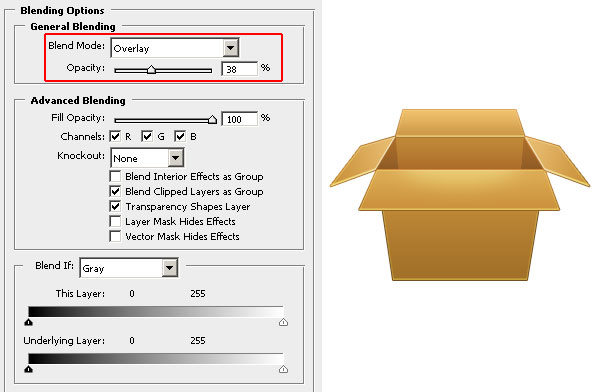
Set the Blend Mode of the layer to Overlay as well as reduce its Opacity to 38%.
Following the same procedure as above, give the back flap a highlight as well.

Step 9: Adding Details to the Box
Find a logo or icon that you’d like to place on the front flap.
I used an infinity symbol for mine. Try looking at the Custom Shapes that are included in Photoshop to see if you find something of interest.

For the layer style of the logo/icon, we need a Drop Shadow, Inner Shadow, and Gradient Overlay.
Drop Shadow
The Drop Shadow’s color is white (#FFFFFF).

Inner Shadow
The Inner Shadow’s color is a dark brown (#432C11).
Gradient Overlay
The color gradient is #925814 on the left and #7E4C02 on the right.
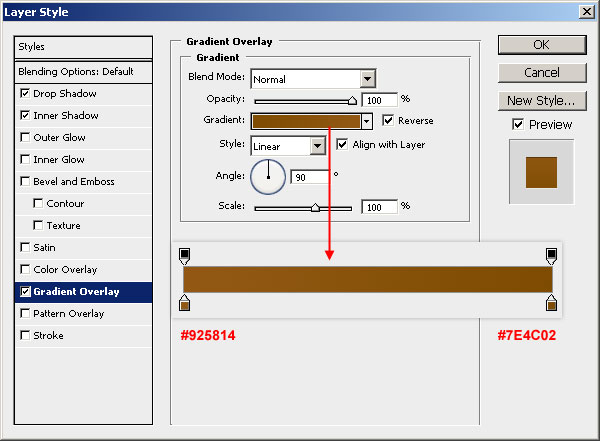
The above layer effects will make our logo/icon look like this:

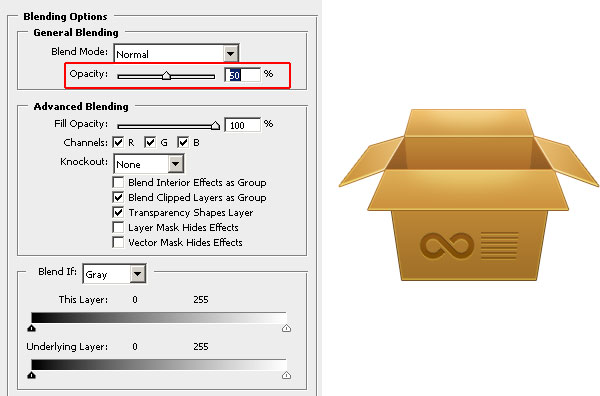
You can add some horizontal lines on the right of the logo/icon to simulate text that’s usually found on packages that are shipped by mail. Use the same layer style as the logo/icon.

Set the Opacity of the layer to 50%.
Step 10: Adding a Texture to the Box
Now that we are done creating the basic box, we need to add some texture to its surface to make it look like cardboard.
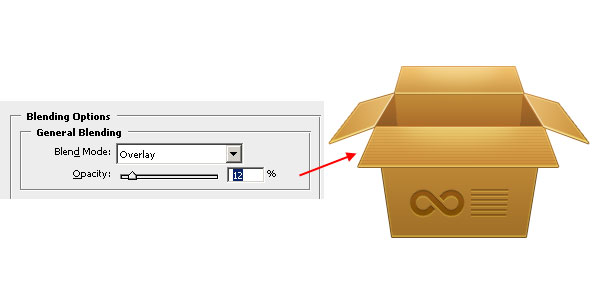
Create some thin black lines on the front flap (as shown below).

Switch the layer’s Blend Mode to Overlay and set the Opacity at about 12%.
Using the same process, create lines on the right flap, set the Blend Mode of its layer to Overlay, and reduce the Opacity to 12%.
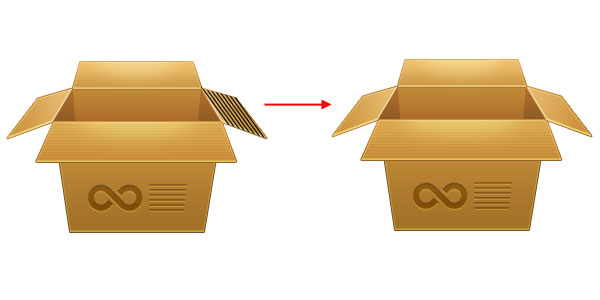
Use the exact same process for adding lines on the remaining flaps and the sides of the box.

Step 11: Adding Shadows on the Floor
Let us make our design cast a shadow on the floor.
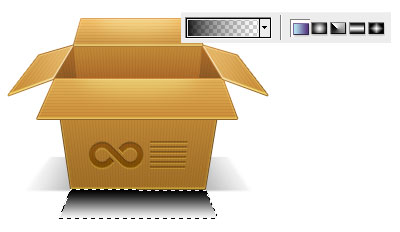
Create a new layer right above the Background layer. Use the Rectangular Marquee Tool (M) to make a rectangular selection at the base of our box.

Set up the Gradient Tool so that it goes from black (#000000) to transparent; also set the method to Reflected Gradient. Then draw the gradient from left to right.
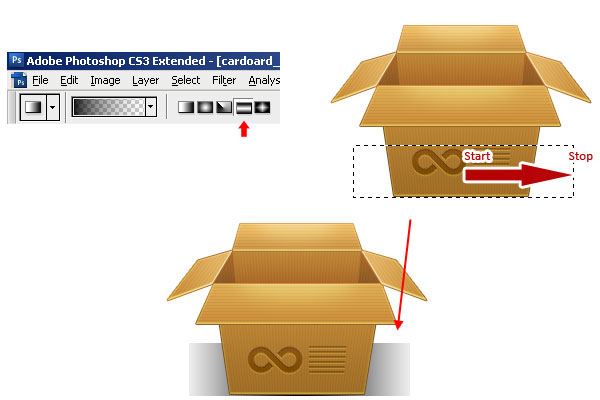
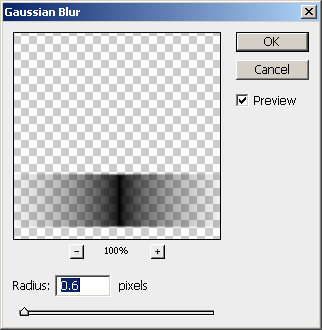
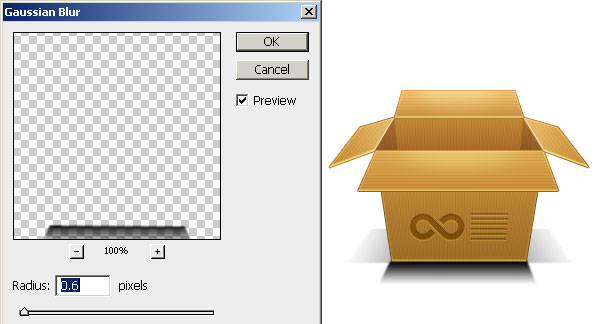
Soften the shadow by using a Gaussian Blur filter; use a Radius of 0.6 pixels.
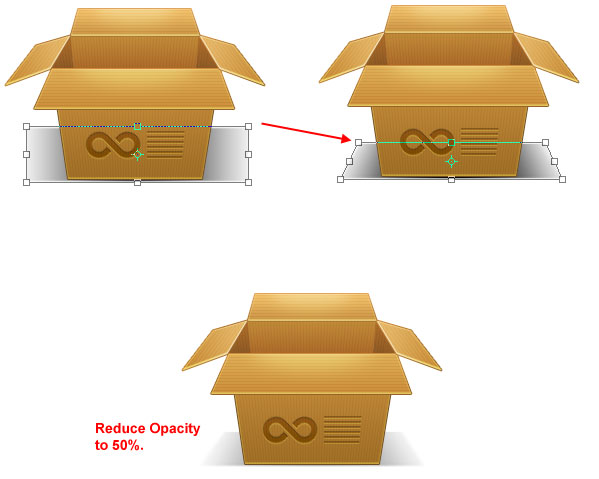
Tweak the perspective of the shadow to match our box.
Do so by choosing Edit > Transform > Skew. A rectangular boundary will appear around the shadow. Drag the top-right and top-left transform controls inwards.
Press Enter to accept the transformation. Set the Opacity of the shadow layer to 50%.
Use the Polygonal Lasso Tool (L) from the Tools Panel to make a selection in front of the box.
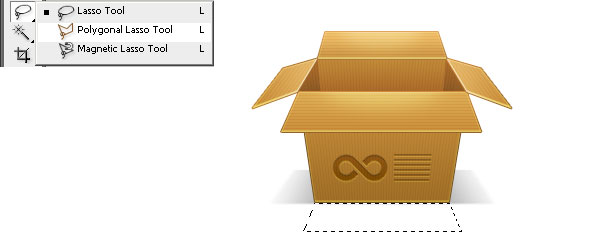
Again, use the Gradient Tool (G) set at Linear Gradient to make a black-to-transparent gradient within the selection, starting from the top of the selection to the bottom.
Apply a Gaussian Blur filter to the layer with Radius at 0.6 pixels.
Set the Opacity of the layer to 15%.

Step 12: Add Minor Shading
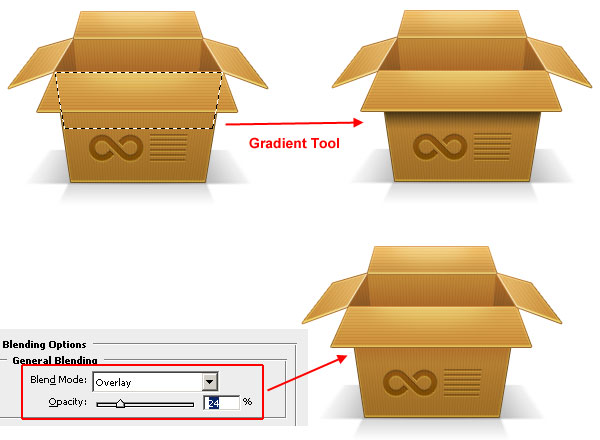
Create a layer between the front flap and the front of the box. Use the Polygonal Lasso Tool (L) to create a selection (shown below).
Use the Gradient Tool to make a black-to-transparent gradient from the top to the bottom of the selection. Set the Blend Mode of the layer to Overlay and reduce the Opacity to 24%.
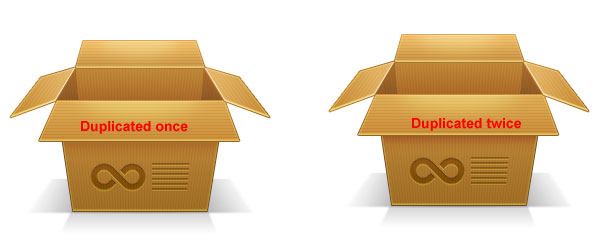
Duplicate this layer twice (Ctrl/Cmd + J) to intensify and layer the shading.
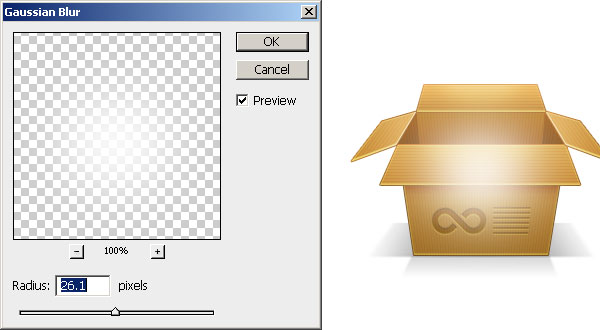
On a new layer above all the other layers, create a white circular shape in the middle of the icon.

Apply a Gaussian Blur filter on the layer with Radius at 26 pixels.
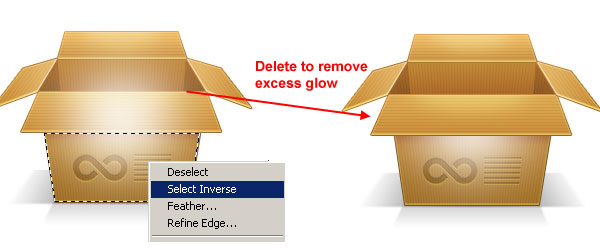
Use the Polygonal Lasso Tool (L) to create a selection of the front face of the box.

Choose Select > Inverse (Ctrl/Cmd + Shift + I) to invert your selection. After inverting the selection, just hit Delete to remove the excess white glow.
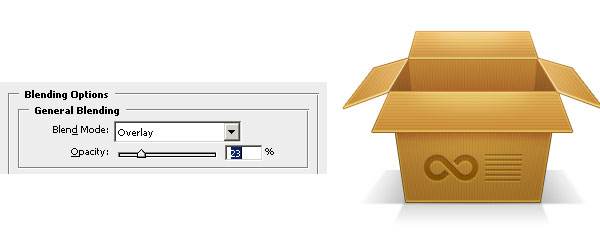
Set the Blend Mode to Overlay and Opacity to 23%.
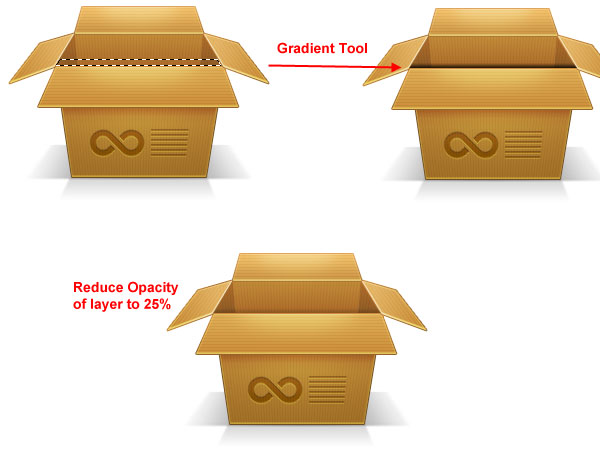
Use the Polygonal Lasso Tool (L) to create a selection as shown below.
On a new layer, use the Gradient Tool (G) to create a linear black-to-transparent gradient starting from the bottom and going to the top. Reduce the Opacity of the layer to 25%.
Step 13: Filling Up the Box with Some Goodies
This step is optional. What we will do is place some objects inside the box.
I will use the Qure Dock Icons by my friend and fellow “iconist”, Prax08.
Open up the object you would like to place inside the box in Photoshop. Press Ctrl/Cmd + A to select the entire canvas of the image. Switch back to our main document and just press Ctrl/Cmd + V to paste the object.

Add more objects as desired.

Arrange the images to your heart’s content; use the Move Tool to move the objects around.
Place these objects into a layer group by selecting all of them in the Layers Panel and then pressing Ctrl/Cmd + G.
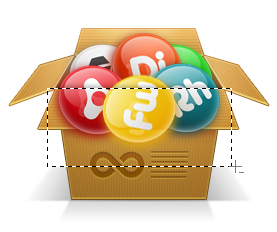
Create a layer mask on the layer group by pressing the Add layer mask icon at the bottom of the Layers Panel. Use the Rectangular Marquee Tool (M) to make a selection that covers parts of the objects that are spilling out of the box.
Go to Edit > Fill ( Shift + F5) and fill the selection with Black to mask out the selected area.
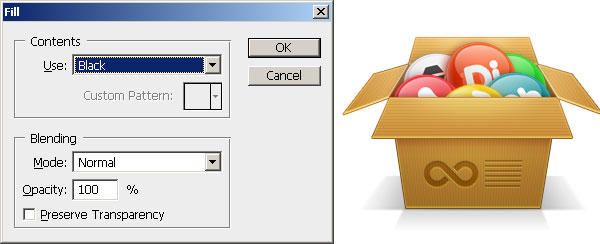
We’re done!
Tutorial Summary
I hope that you learned a few techniques in this tutorial that you will find useful in your own icon design and drawing projects.
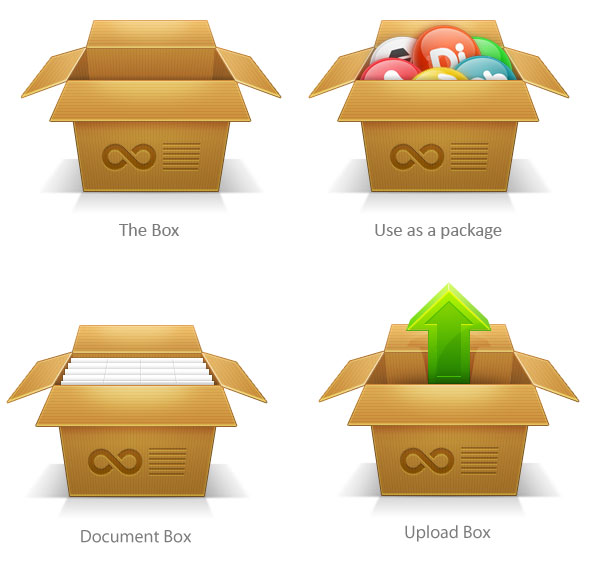
We used various techniques to compose a box icon using fundamental tools in Photoshop. I would like to leave you now by showing you some possible variations of our final product (for inspiration).
Download Source Files
- cardboard_box_icon (ZIP, 0.16 MB)
-
 Trevin serves as the VP of Marketing at WebFX. He has worked on over 450 marketing campaigns and has been building websites for over 25 years. His work has been featured by Search Engine Land, USA Today, Fast Company and Inc.
 -

WebFX is a full-service marketing agency with 1,100+ client reviews and a 4.9-star rating on Clutch! Find out how our expert team and revenue-accelerating tech can drive results for you! Learn more
Make estimating web design costs easy
Website design costs can be tricky to nail down. Get an instant estimate for a custom web design with our free website design cost calculator!
Try Our Free Web Design Cost Calculator
Table of Contents
- Preview
- Tutorial Resources
- Step 1: Setting Up the Canvas
- Step 2: Create the Front of the Box
- Step 3: Create the Back of the Box
- Step 4: Create the Left and Right Sides of the Box
- Step 5: Creating the Front Flap of the Box
- Step 6: Draw the Right and Left Flaps of the Box
- Step 7: Create the Back Flap
- Step 8: Give the Flaps Some Highlights
- Step 9: Adding Details to the Box
- Step 10: Adding a Texture to the Box
- Step 11: Adding Shadows on the Floor
- Step 12: Add Minor Shading
- Step 13: Filling Up the Box with Some Goodies
- Tutorial Summary
- Download Source Files
Share this article


Web Design Calculator
Use our free tool to get a free, instant quote in under 60 seconds.
View Web Design Calculator
Make estimating web design costs easy
Website design costs can be tricky to nail down. Get an instant estimate for a custom web design with our free website design cost calculator!
Try Our Free Web Design Cost Calculator