
Preview
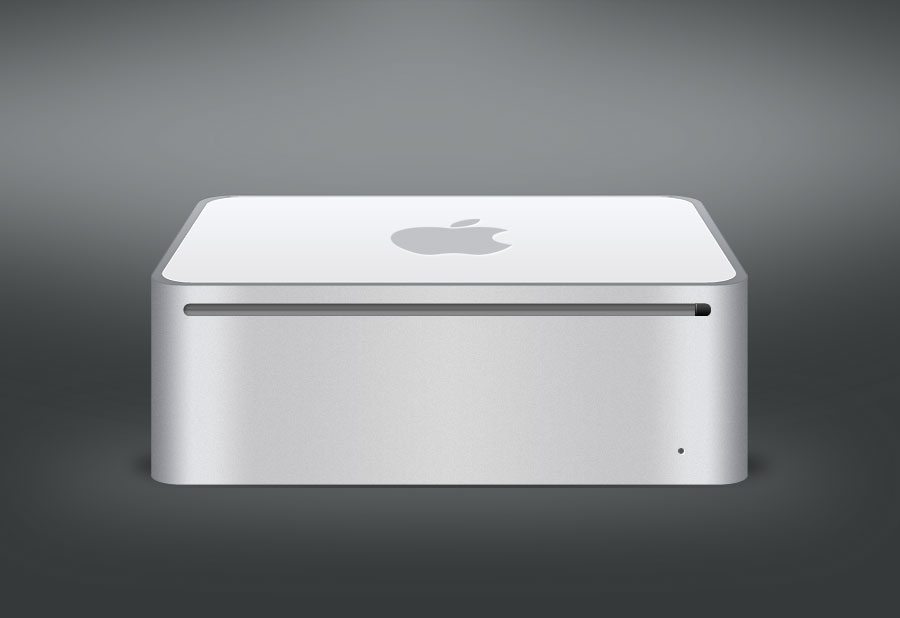
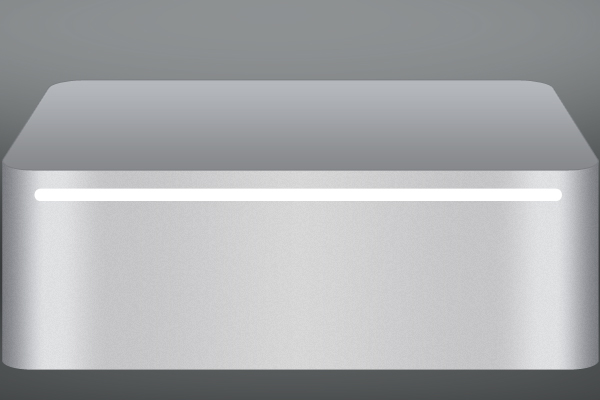
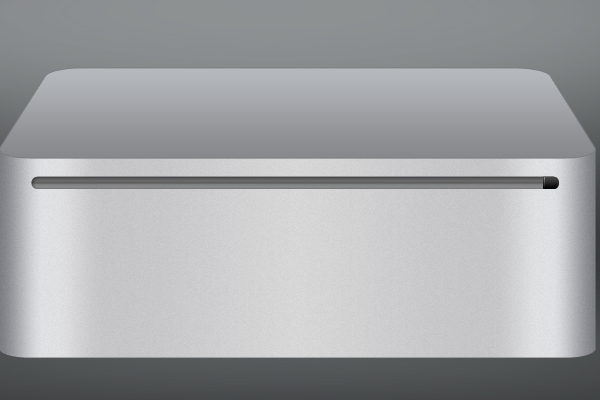
Once you have finished the tutorial, you should have something like the preview image below. Click the image for a full size view.
Tutorial Resources
Step 1: Create your background
Create a new document (Ctrl/Cmd + N) that is 900px in Width and 620px in Height.
Select the Paint Bucket Tool (G) and fill your Background layer with a very dark gray color (#36393a). this will help us give our artwork good contrast with its background since the the Mac Mini is mostly light/metallic gray.
Now create a new layer above your Background layer and label it “background 1.”
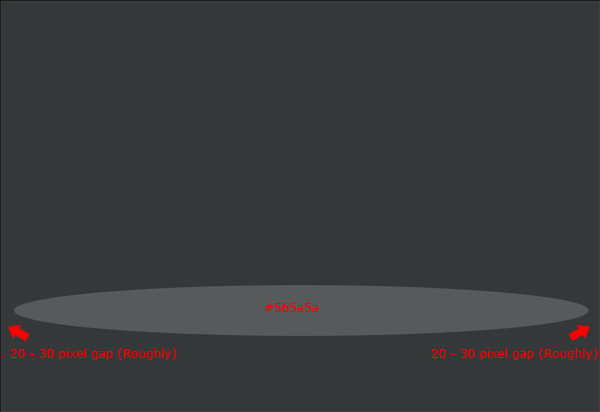
Set your Foreground color to a slightly lighter gray color (#575b5b). Next, select the Elliptical Marquee Tool (M), drag out an ellipse at the bottom portion of your canvas then fill it with your Foreground color using the Paint Bucket Tool (G).
The ellipse should be nearly the width of the canvas, leaving about 20–30px on either side of the canvas.
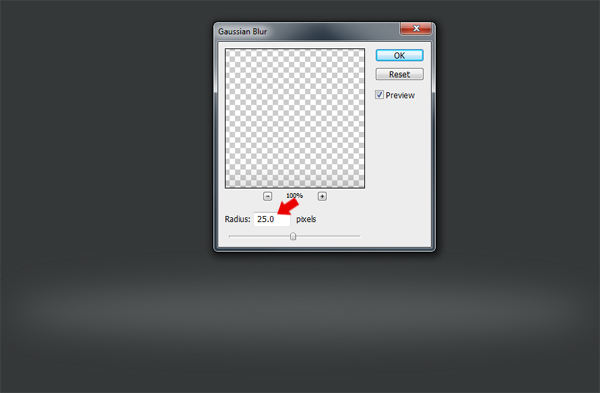
Make sure your “background 1” layer is selected in the Layers Panel and then go to Filter > Blur > Guassian Blur — blur the ellipse by about 25px Radius.
Create a new layer above your “background 1” layer — label it “background 2.”
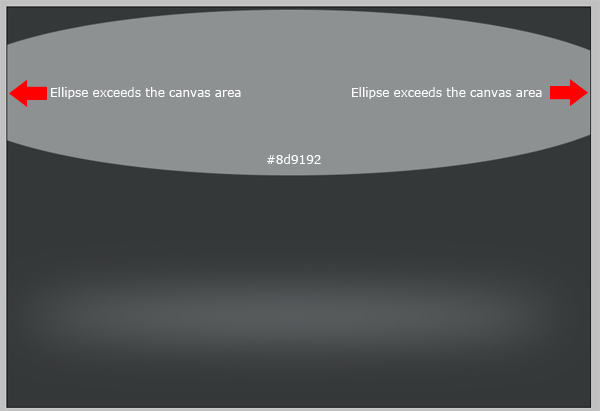
Select the Elliptical Marquee Tool (M) and drag out an ellipse at the top of your canvas. Once you’ve created the ellipse, fill it with the Paint Bucket Tool (G) using a gray color (#8e9293).
The ellipse should be quite big, exceeding the width of the canvas, but should roughly be the same height — if not a little bit bigger — than your bottom ellipse.
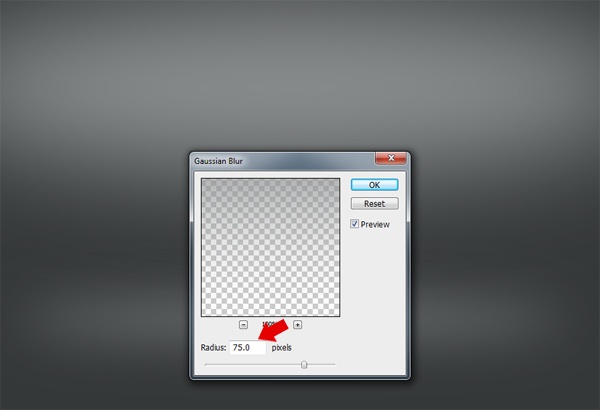
Make sure your “background 2” layer is selected in the Layers Panel, then go to Filter > Blur > Guassian Blur — blur the ellipse by about 75px Radius.
That’s your background completed.
Step 2: Create the Mac Mini’s base shape
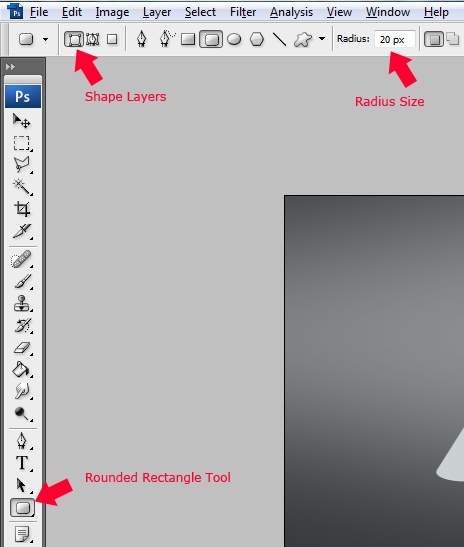
Set your Foreground color to a light gray (#ccd1d3), then pick up the Rounded Rectangle Tool (U) from the Tools Panel with a Radius of 20px.
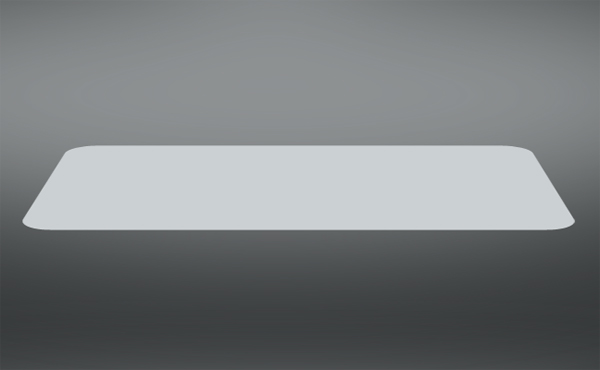
Create a new layer labeled “top,” then drag out a rectangle onto your canvas.

Go to Edit > Transform > Skew, hold down the Shift key on the keyboard and drag the top left and top right anchor points inwards (one at a time).
If you find that the rectangle is too big height-wise, then press Ctrl/Cmd + T to use the Free Transform command on the shape, and drag the bottom center anchor point upwards to reduce the height.
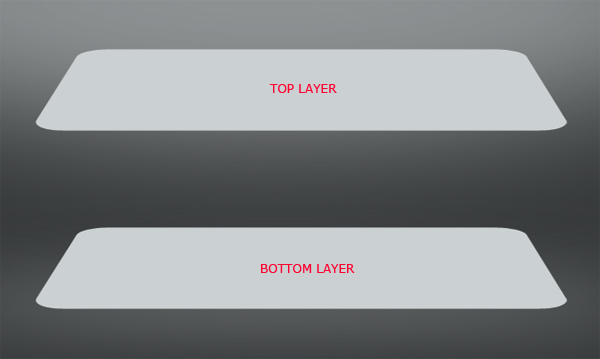
Duplicate your “top” layer then rename the duplicated layer “bottom.”
Shift your “bottom” layer down underneath the “top” layer in the Layers Panel. Choose the Move Tool (V) in the Tools Panel, and whilst holding down the Shift key, press the Down Arrow key on the keyboard 20 times to move the “bottom” layer down by 200px (the default increment of the Move Tool while holding down the Shift key is 10px).
Select the Rounded Rectangle Tool (U) then switch to the Add to shape layer (+) option in the Options bar.
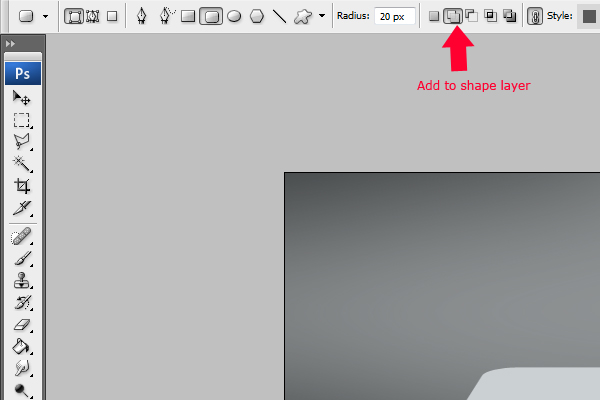
Make sure your “bottom” layer is the active layer in the Layers Panel, then drag a rounded rectangle shape from the bottom curved corners of the the “top” layer down to the top curved corners of the “bottom” layer.
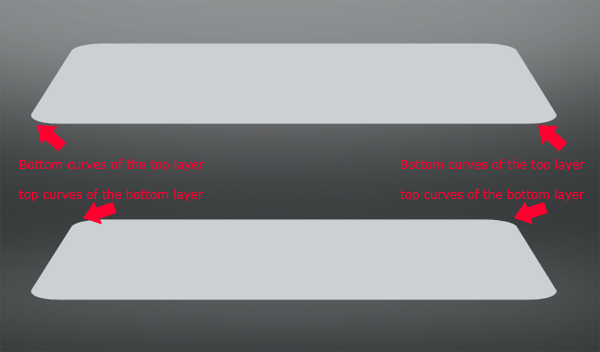
When you drag out the rounded rectangle, the shape will combine with the “bottom” layer shape to make one shape because we used the Add to shape layer (+) option, so make sure it is as accurate as possible.
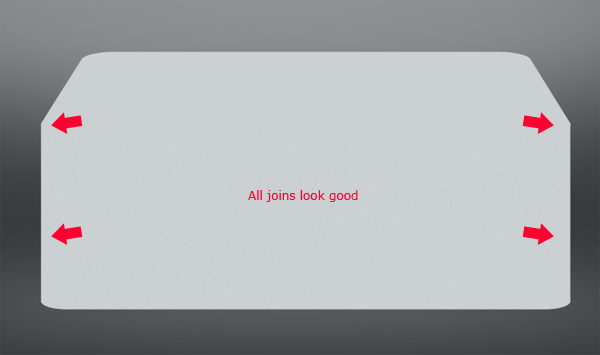
Finish this step by converting both “top” and “bottom” layers to smart objects by right-clicking on each layer in the Layers Panel and then choosing Convert to Smart Object from the menu.
Step 3: Give the Mac Mini’s base textures and details
Double-click the little icon on the “top layer” to access the “top” layer.
![]()
Once double-clicked, another separate PSD should open containing our top shape.
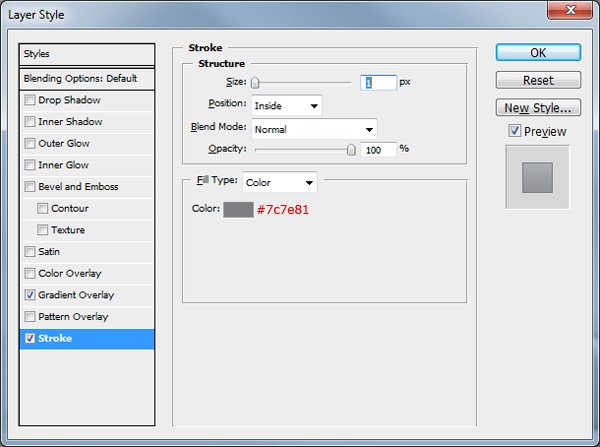
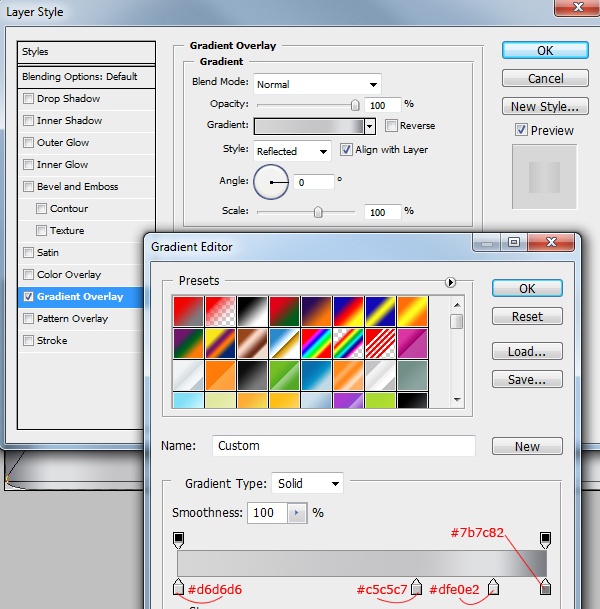
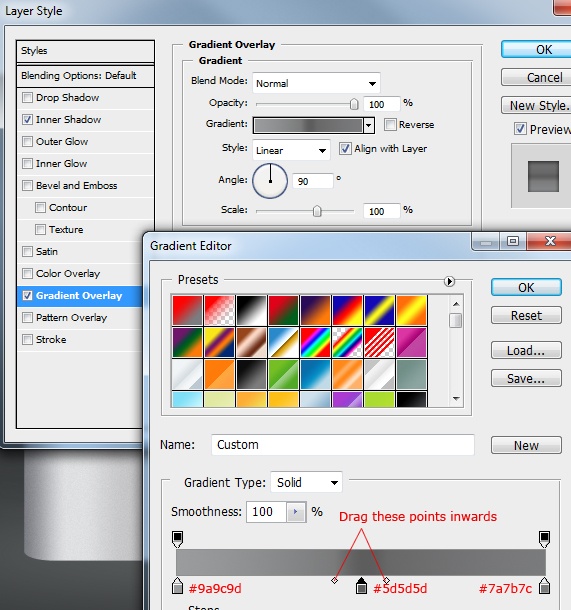
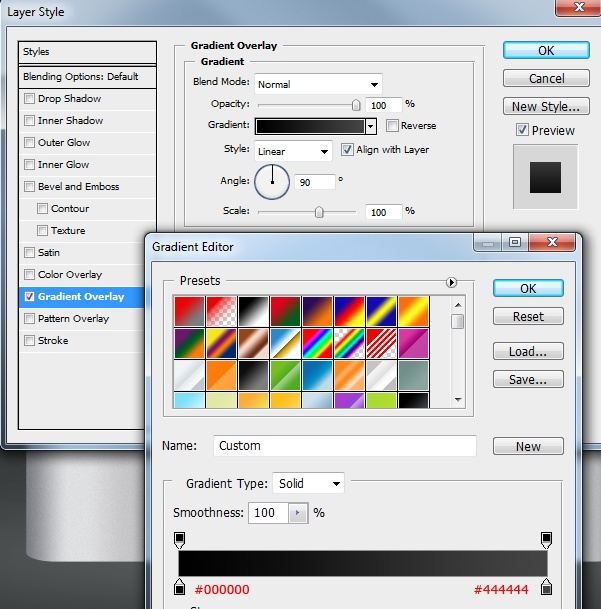
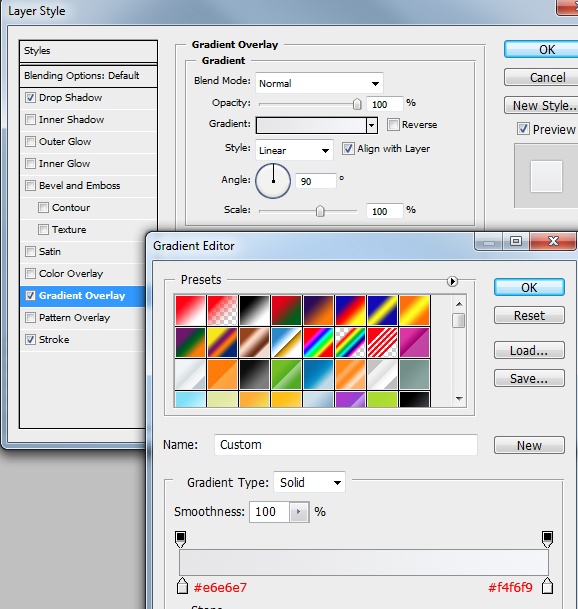
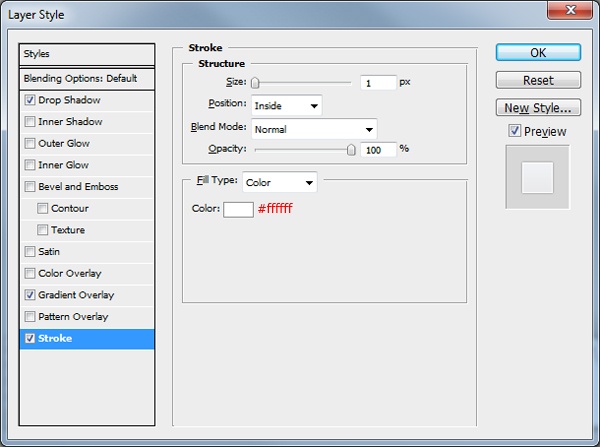
Give the “top” layer shape a couple of layer styles (Gradient Overlay and Stroke).
Gradient Overlay
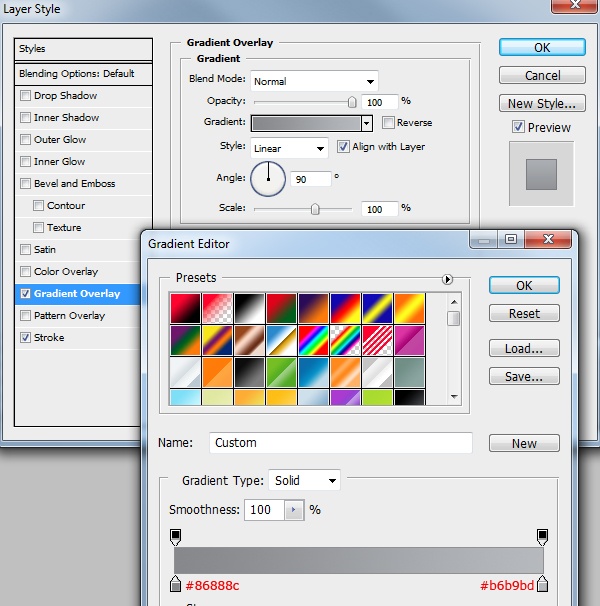
Stroke
Close the PSD, saving it before you exit.
Your “top” layer should automatically be updated with the layers.
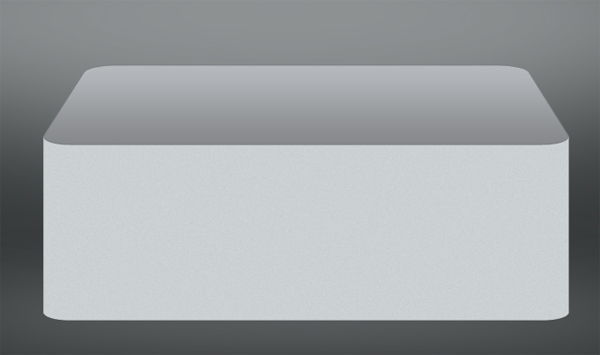
Now double click the “bottom” layer’s little icon and add a Gradient Overlay layer style to it.
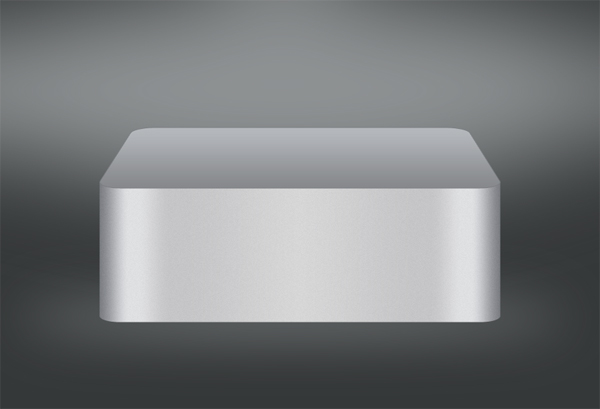
Close your “bottom” layer PSD, saving it before you exit. Your “bottom” layer should now have been updated.
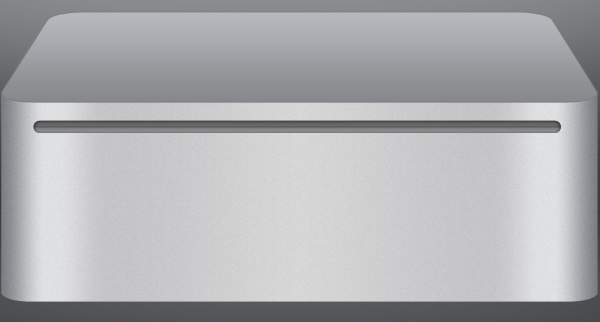
Step 4: Create the CD slot
Select the Rounded Rectangle Tool (U) then drag out a rectangle across the front of the Mac Mini for its CD slot — make sure the rectangle is on a layer that is above your “bottom” layer.
Give the CD slot a Gradient Overlay layer style.
Step 5: Creating the disk drive button
Create a new layer and label it “cd button.” Select the Rounded Rectangle Tool (U) and create a small rectangle with the same height as your CD slot. Place the rectangle on the right side of the CD slot.

Using the Rectangular Marquee Tool (M) to make a selection around the left half of the rectangle and hit the Delete key on the keyboard to remove that part.
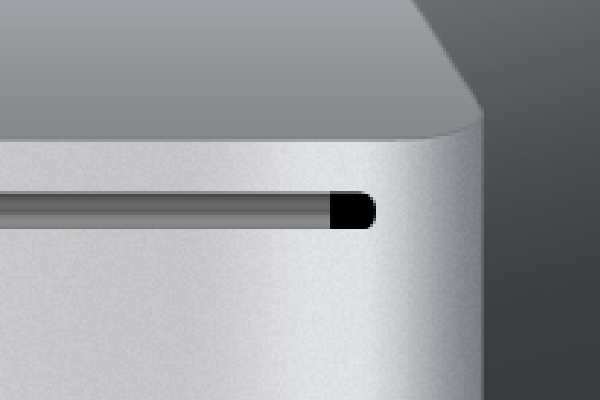
Now add a Gradient Overlay to your button rectangle.
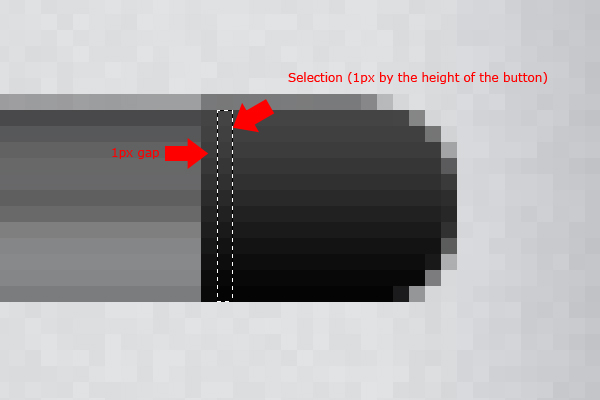
Use the Zoom Tool (Z) to zoom in onto the disk drive button to make it easier to decorate.
Select the Rectangular Marquee Tool and make a 1px selection top to bottom on the button, leaving a 1px gap from the edge.
Create a new layer and label it “white line,” fill (G) the selection with the color white (#ffffff), and then set the layer’s Blend Mode to Overlay.
Step 6: Make the power light
Create a new layer and label it “light”.
And then use the Elliptical Marquee Tool (M) to make a circular selection near the bottom of the Mac Mini. Fill (G) the selection with the color black (#000000).

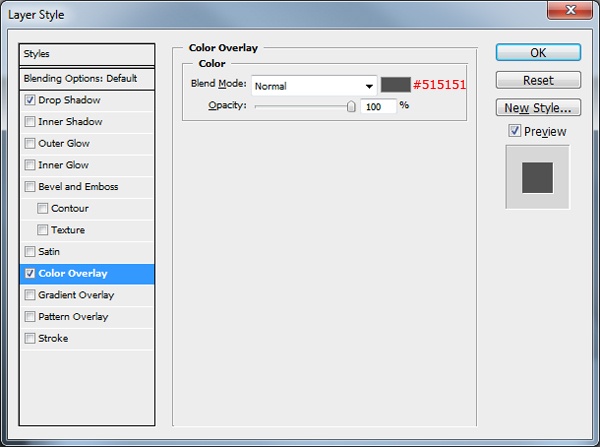
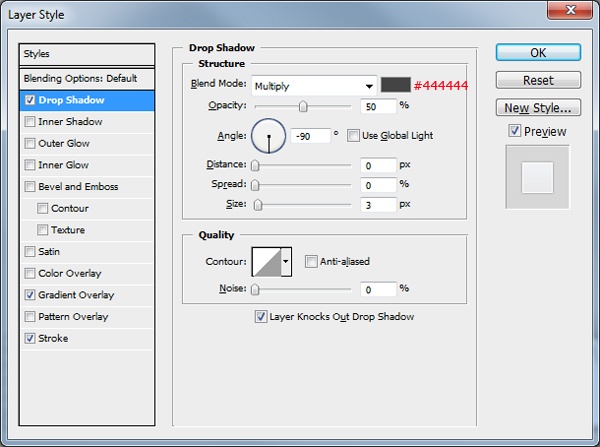
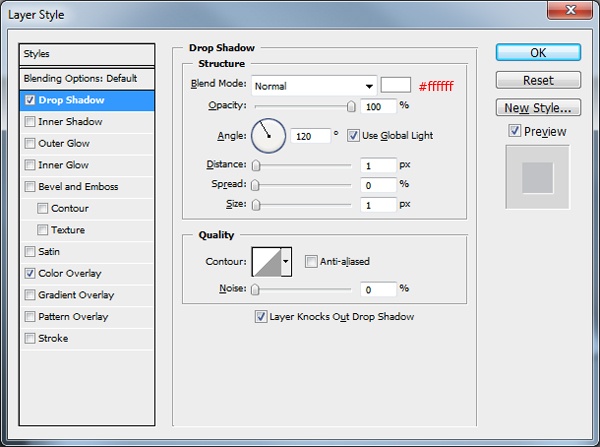
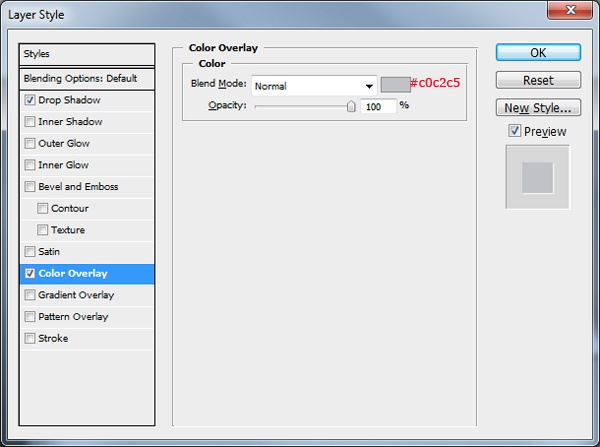
Now add a Drop Shadow layer style and a Color Overlay layer style to your “light” layer.
Drop Shadow
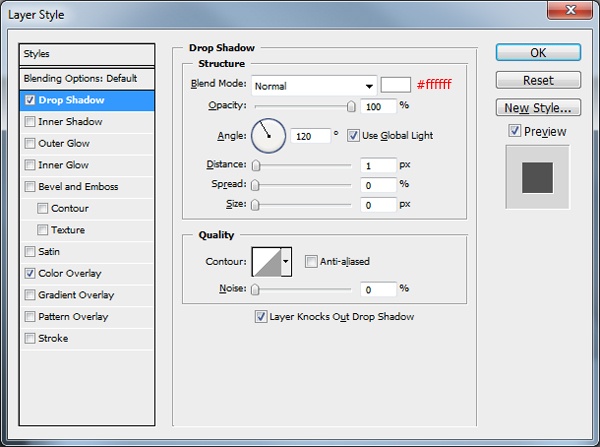
Color Overlay
Your button should now look like it is pressed down into the body.
Step 7: Create a shadow behind the Mac Mini
Create a new layer and label it “shadow.” Move the new layer in the Layers Panel down to the bottom of the stack, but above your three background layers.
Select the Elliptical Marquee Tool (M) and make a ellipse across the bottom of the Mac Mini.
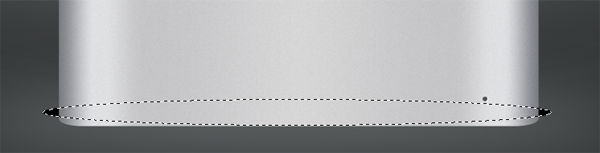
Fill (G) the selection with the color black (#000000).
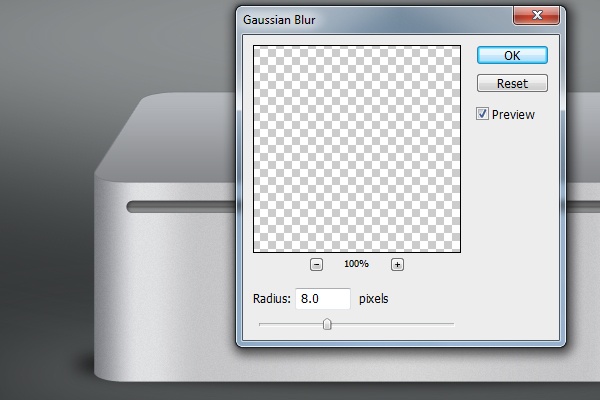
Deselect the selection (Ctrl/Cmd + D) then go to Filter > Blur > Guassian Blur. Blur the ellipse by 8px Radius.
Set the “shadow” layer’s Opacity to 45% then make a selection using the Rectangular Marquee Tool (M).
Make the selection across the bottom of the shadow where it exceeds past the bottom of the Mac Mini.
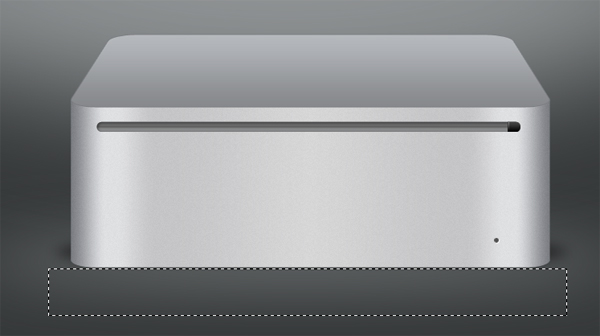
Make sure the “shadow” layer is selected and then hit the Delete key to remove that part of the shadow.
Step 8: Create Mac Mini’s top
Right-click your “top” layer in the Layers panel and choose New Smart Object via Copy from the menu. Rename the duplicated smart object layer as “top2” then access the shape by double-clicking on the little thumbnail on the layer.
Once the shape has opened in a new PSD, give it a Drop Shadow, Gradient Overlay, and Stroke.
Drop Shadow
Gradient Overlay
Stroke
Once you’ve added the layer styles, close the PSD file, saving it on exit. On your original canvas, your “top2” layer should automatically be updated.
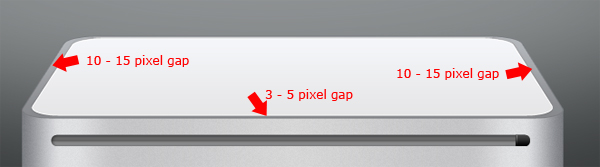
Make sure the layer is selected then press Ctrl/Cmd + T to enter Free Transform to resize the shape.
Drag the left and right anchor points inwards — you’re looking for a 10–15px gap on the left and right sides.
Once you’ve done the left and right sides, do the bottom side next, only this time, your looking for about 3–5px gap.
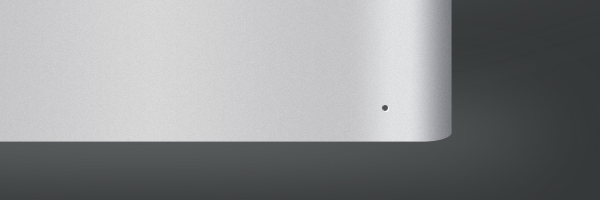
Step 9: Add the Apple logo
You’re now going to need the apple logo, you can use my premade logo.
Place the logo onto your canvas, making sure the logo’s layer is above your “top2” layer.
Simply use the Free Transform command to modify the logo’s perspective, dragging the bottom center anchor point upwards until your happy with the perspective.
![]()
Finish off this tutorial by adding a Drop Shadow layer style and a Color Overlay layer style to your Apple logo’s layer.
Drop Shadow
Color Overlay
Tutorial Summary
This tutorial showed you how to replicate the Apple Mac Mini using Photoshop. You’d be surprised that we only used basic techniques to do this 3D-looking design. We used basic selection and shape tools and some simple layer styles that — when combined skillfully — can go a long way in producing pieces that look stunning.

Download Tutorial Source Files
- apple_mac_mini (ZIP, 0.96 MB)
-
 Trevin serves as the VP of Marketing at WebFX. He has worked on over 450 marketing campaigns and has been building websites for over 25 years. His work has been featured by Search Engine Land, USA Today, Fast Company and Inc.
 -

WebFX is a full-service marketing agency with 1,100+ client reviews and a 4.9-star rating on Clutch! Find out how our expert team and revenue-accelerating tech can drive results for you! Learn more
Make estimating web design costs easy
Website design costs can be tricky to nail down. Get an instant estimate for a custom web design with our free website design cost calculator!
Try Our Free Web Design Cost Calculator
Table of Contents
- Preview
- Tutorial Resources
- Step 1: Create your background
- Step 2: Create the Mac Mini’s base shape
- Step 3: Give the Mac Mini’s base textures and details
- Step 4: Create the CD slot
- Step 5: Creating the disk drive button
- Step 6: Make the power light
- Step 7: Create a shadow behind the Mac Mini
- Step 8: Create Mac Mini’s top
- Step 9: Add the Apple logo
- Tutorial Summary
- Download Tutorial Source Files
Share this article


Web Design Calculator
Use our free tool to get a free, instant quote in under 60 seconds.
View Web Design Calculator
Make estimating web design costs easy
Website design costs can be tricky to nail down. Get an instant estimate for a custom web design with our free website design cost calculator!
Try Our Free Web Design Cost Calculator


