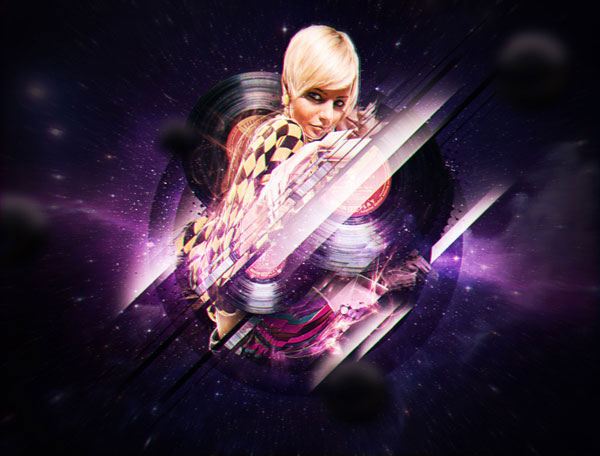
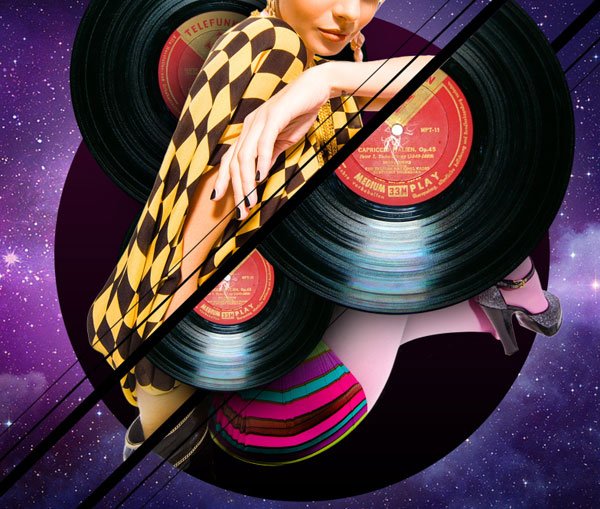
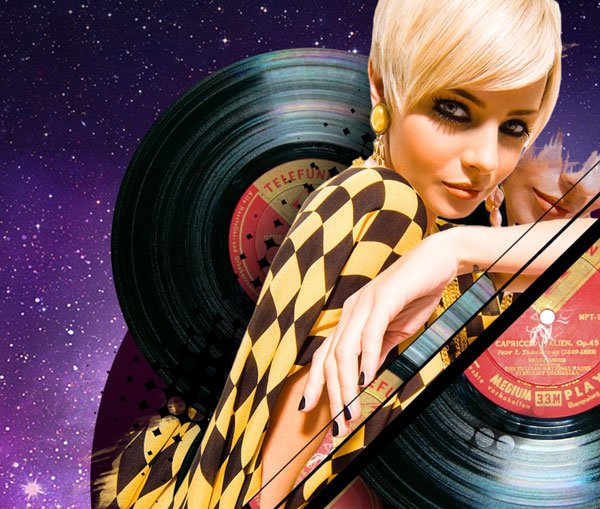
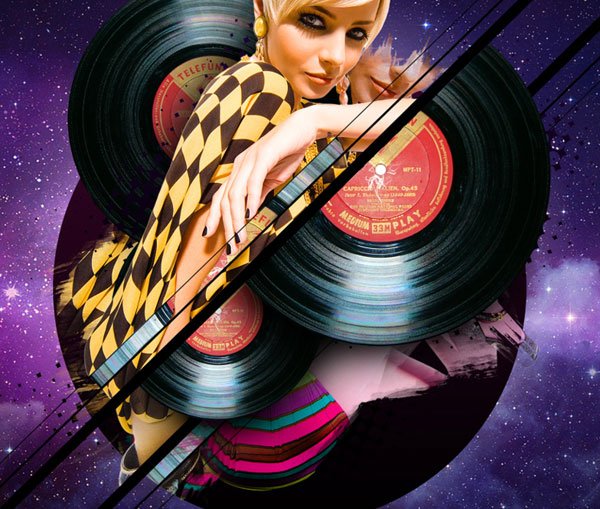
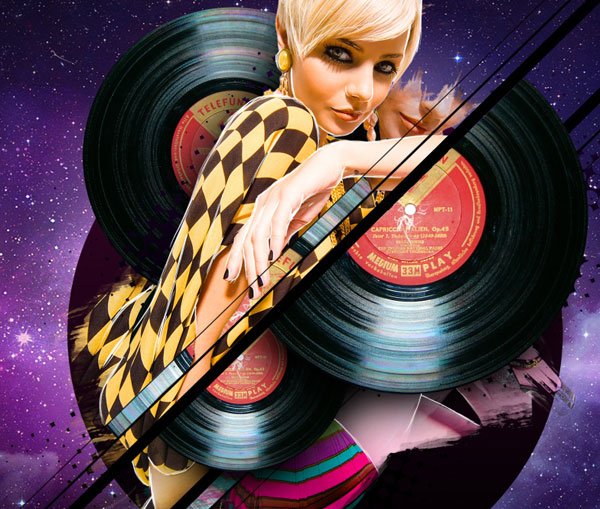
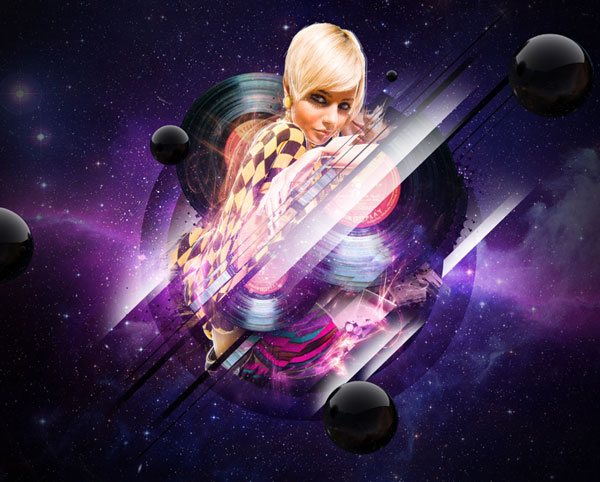
Preview
Tutorial Resources
- Image: Space Galaxy – Desktop Wallpaper (Desktopmedia)
- Image: Female Stock 131 (Katanaz-Stock)
- Image: vinyl_record (Refe Tuma)
- Brushes: Hi-Res Watercolor Photoshop Brushes (Bittbox)
- Brushes: Halftone pack (Media Militia)
- Images: Wisps Pack (Media Militia)
- Image: orbs (Sekani Solomon)
Step 1: Create a Radial Gradient Layer
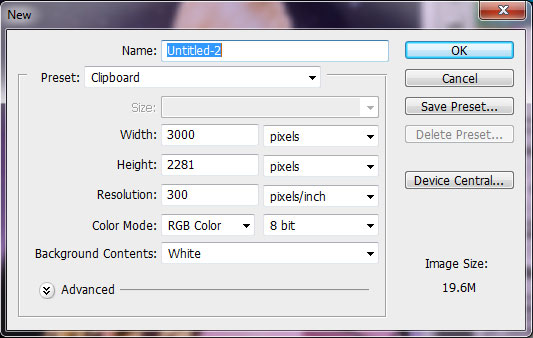
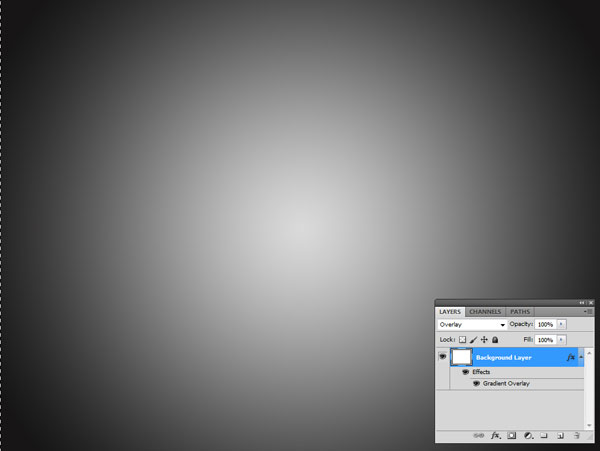
We will begin by making a new Photoshop document (3000x2281px, 300 DPI).
Duplicate the default Background layer and then delete the original.
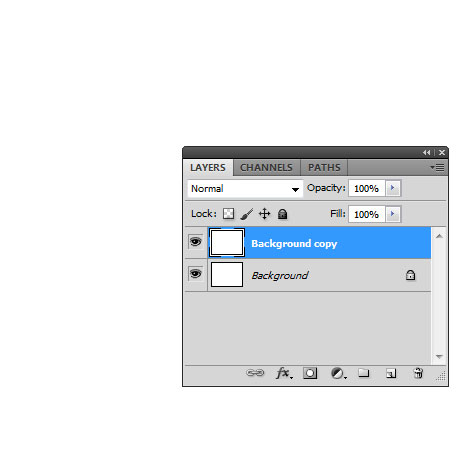
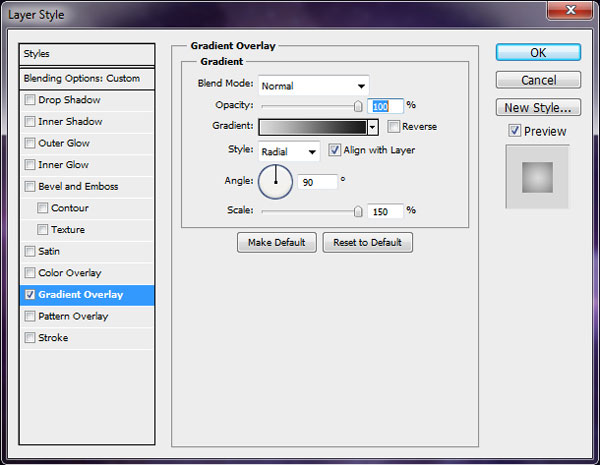
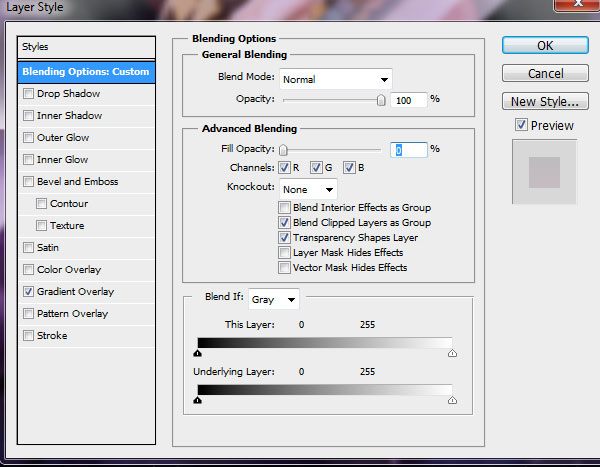
Give the layer a Gradient Overlay layer style (Layer > Layer Style > Gradient Overlay) with the following settings (the colors are: #dadada and #171616):
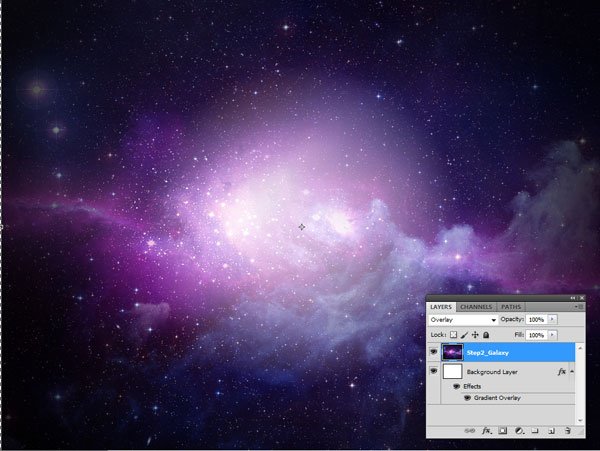
Step 2: Add the Galaxy Background
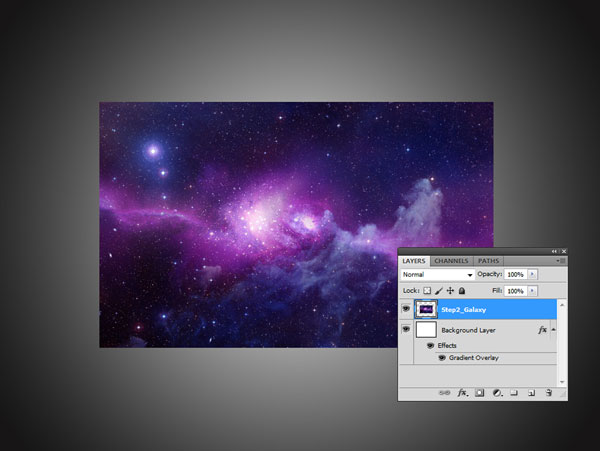
Here, we are going to begin building the background. Download and open Space Galaxy – Desktop Wallpaper and place it over the Background layer.
Resize it to fit the entire composition and then set the Blend Mode of its layer to Overlay.
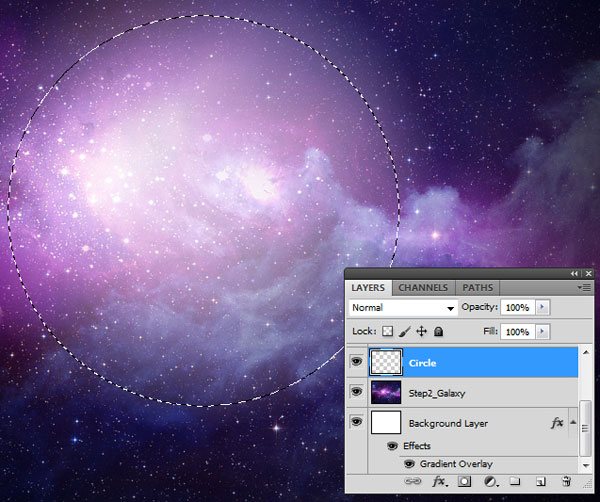
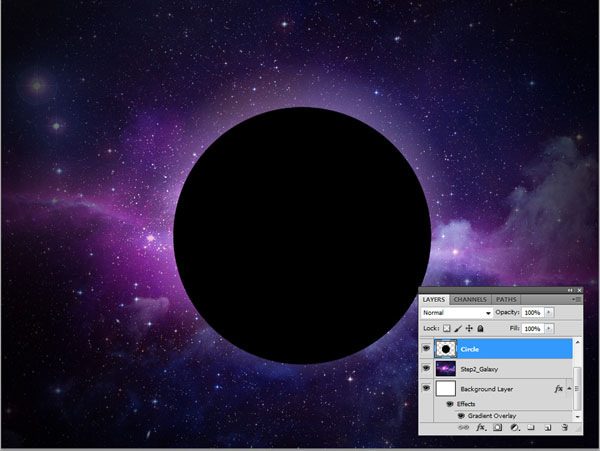
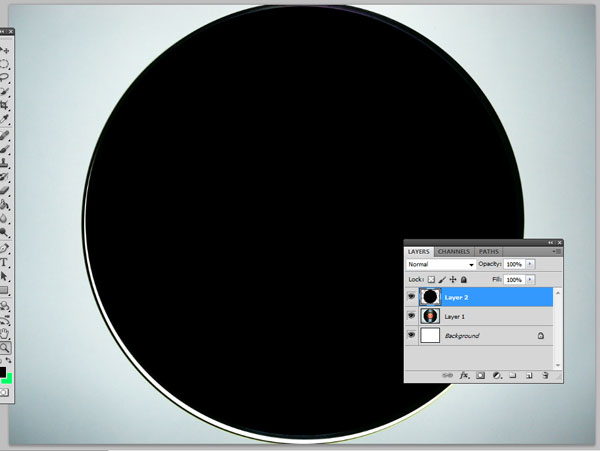
Step 3: Create a Black Ellipse
Using the Elliptical Marquee Tool, make a circle in the middle of the canvas. Then fill the circle with black.
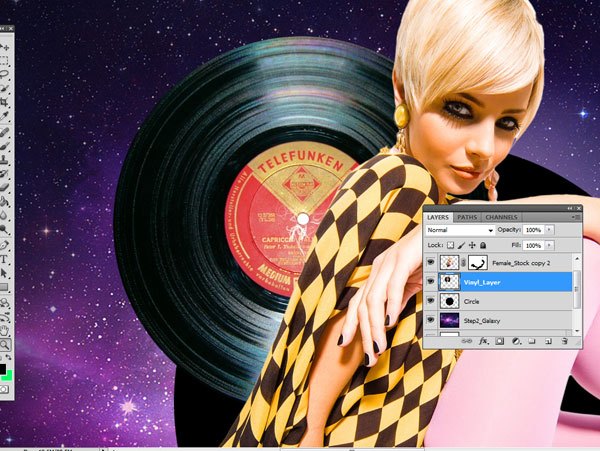
Step 4: Add the Scene’s Subject
Download and open Female Stock 131. Place the subject into our canvas, resize her using Free Transform (Ctrl/Cmd + T), and then locate her in the center of the composition over the black ellipse we created in the previous step. Then add a layer mask on the subject’s layer.
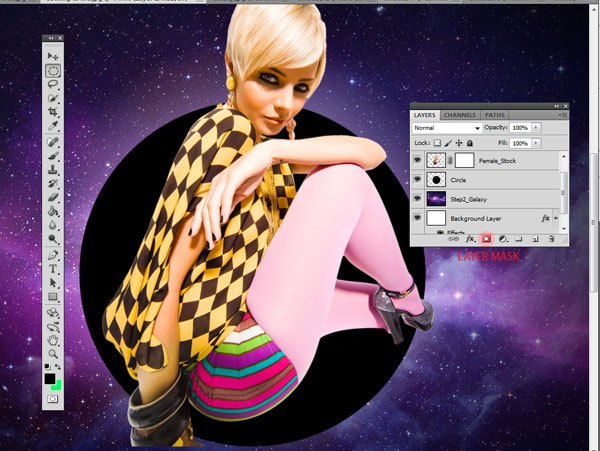
Ctrl-click/Cmd-click on the circle layer to load a selection around the circle. Invert the selection (Select > Inverse) and mask away the parts of the subject’s body that are outside of the circle by going to Layer > Layer Mask > Hide All.
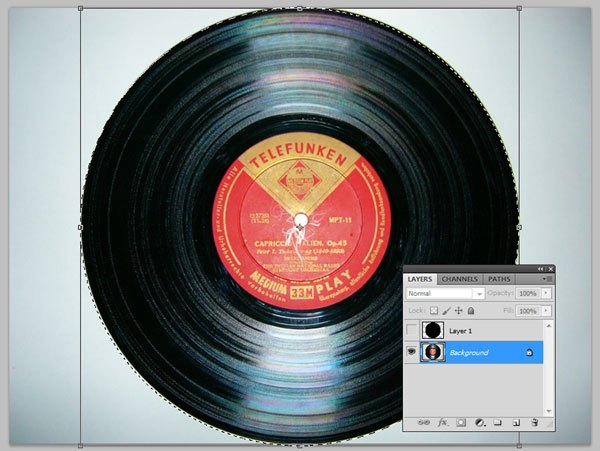
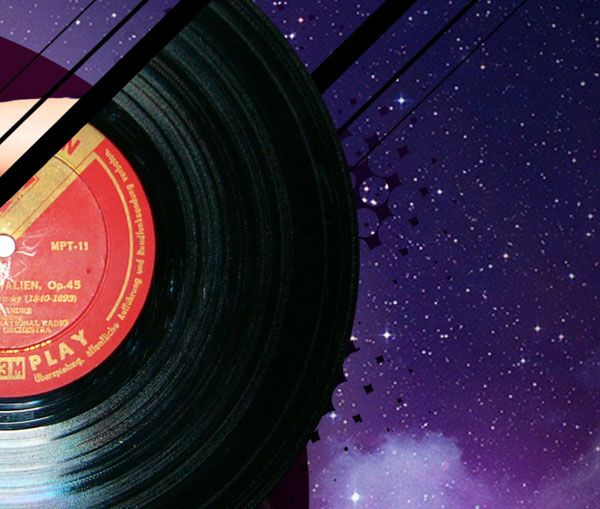
Step 5: Prepare and Add the Vinyl Record
Download and open this vinyl_record image.
We will need to crop this image before placing it into our main document. Using the Elliptical Marquee Tool, make a circle over the record and then, on a new layer, fill the elliptical selection with any color (such as black).
Load a selection around the circle (again, by Ctrl-clicking/Cmd-clicking the thumbnail of the layer in the Layers Panel) and then turn off the visibility of that layer. Click on the vinyl record layer to make it the active layer, and then copy and paste it to our main composition.
Move the vinyl record layer below the subject’s layer, and make it slightly smaller by using Free Transform (Ctrl/Cmd + T) to scale it down.
Step 6: Add More Design Elements
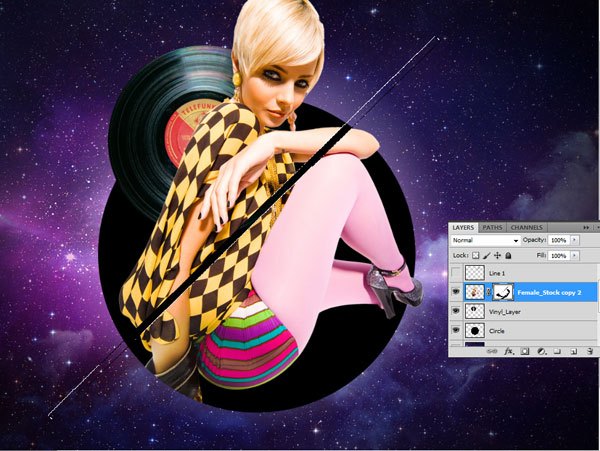
Let’s add more design elements and work on the composition of the piece. Using the Rectangular Marquee Tool (M), make a long, thin rectangle. Create a new layer.
Fill the long, thin rectangle selection with black and then place it at an angle going across the subject.
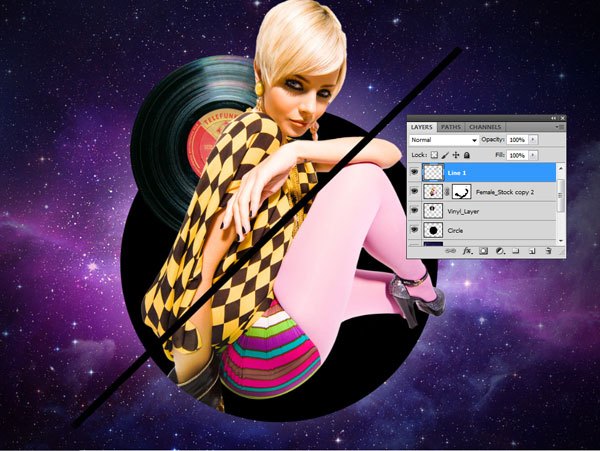
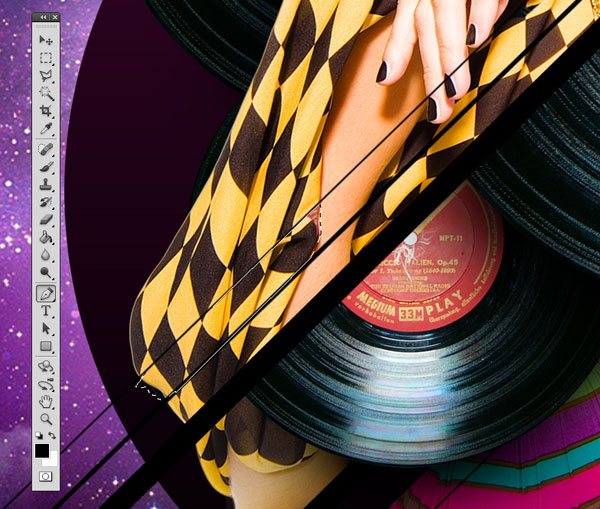
Ctrl-click/Cmd-click on the rectangle layer to make a selection around the rectangle. Turn off the visibility of the rectangle layer. Click on the subject’s layer to make it the active layer.
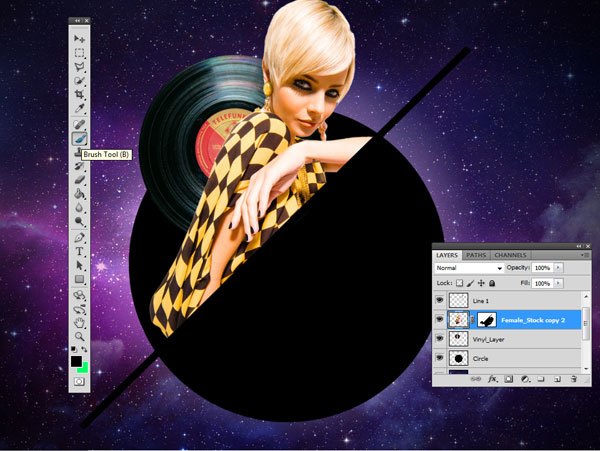
Give the layer a layer mask by clicking on the Add layer mask icon at the bottom of the Layers Panel and then use the Brush Tool (B) with black as your Foreground color to hide parts of the subject within the rectangle selection.
Modify your brush tip so that it has 100% Hardness. Continue to mask the entire lower section of the subject’s body below the line you’ve just made.
Turn on the visibility of the rectangle layer again.
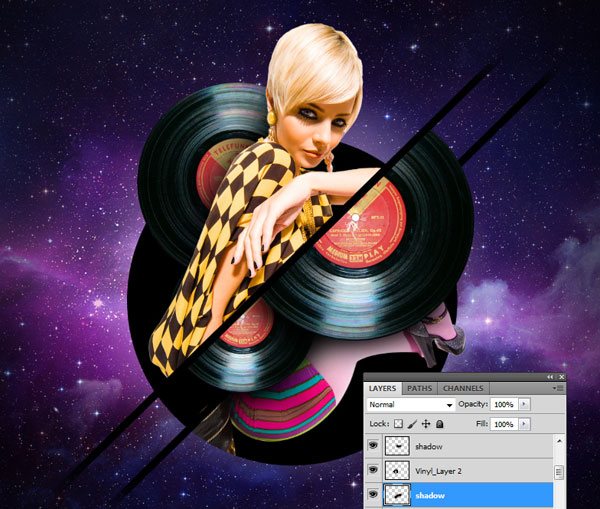
Duplicate the vinyl record layer twice. Place both layers below the subject’s layer. Increase the scale of the first duplicate vinyl record and then mask away the parts above the diagonal rectangle.
Reduce the size of the other duplicate vinyl record layer, then also mask away the top parts of it that go above the diagonal rectangle.
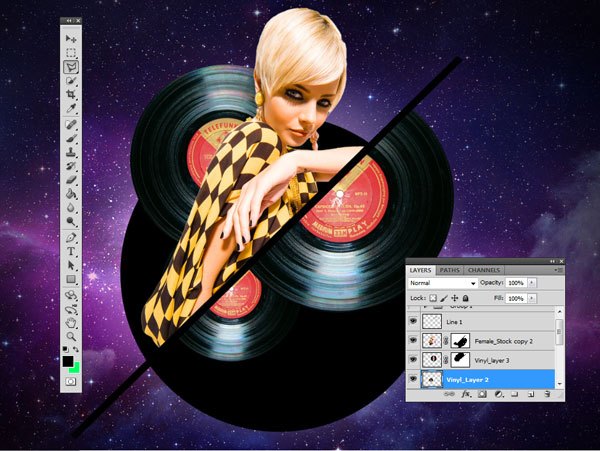
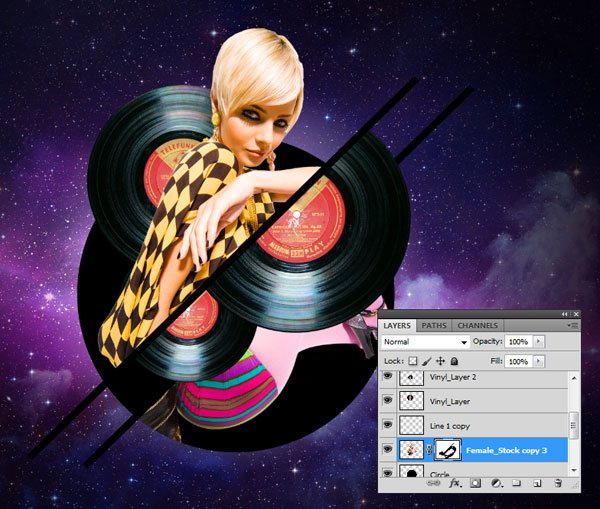
Copy the diagonal rectangle layer and place the copy below the vinyl record layers. Move the duplicate rectangle towards the right (use the image below as a reference). Copy the subject’s layer and the copy below the diagonal rectangle layer.
Add a layer mask on the layer. Use the Brush Tool (B) on the layer mask to hide areas above the diagonal rectangle and to reveal the parts below it. Remember that on layer masks, black hides and white reveals so change the color of your brush depending on what you need to do.
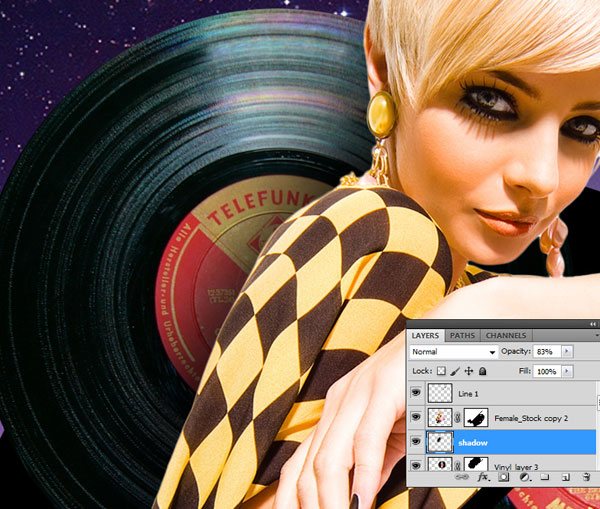
Step 7: Enhance Design Elements
Let’s smoothen the edges of the diagonal rectangles and add a greater sense of depth by giving them shadows.
Use the Eraser Tool (E) with 0% Hardness to erase at the edges of the diagonal rectangles to remove their sharpness.
Afterwards, make a new layer behind the topmost subject layer. Use a brush tip with 0% Hardness and with black as the Foreground color to paint shadows. Do this for the vinyl record layers and anywhere else you think should have shadows.
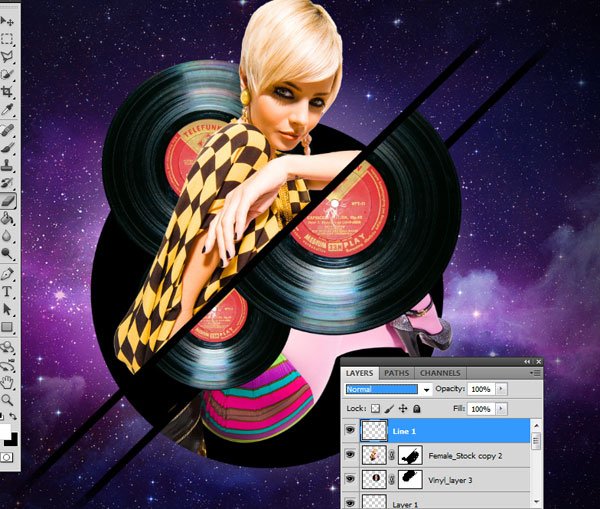
Step 8: Create Diagonal Lines with the Pen Tool
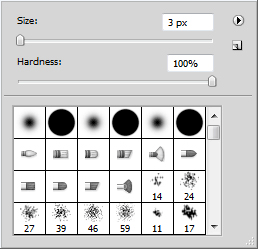
Adjust your brush tip to the following settings:
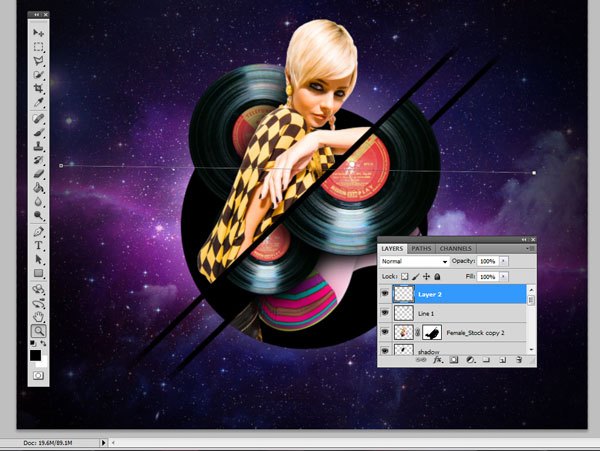
Switch to the Pen Tool (P).
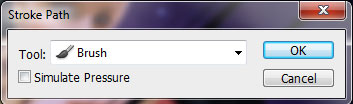
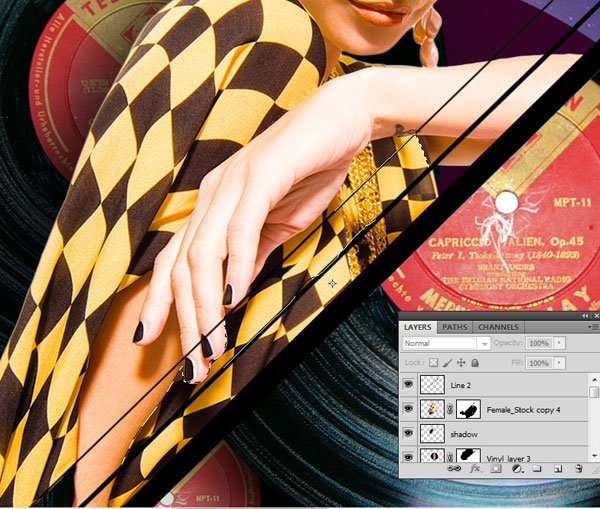
On a new layer, draw a straight horizontal line. Right-click/Control-click on the path, and then choose Stroke Path from the menu that appears. In the Stroke Path window, making sure the Stimulate Pressure option is unchecked and then press OK to stroke the path.
Create a new layer and repeat the process with a brush at 5px size.
Once done, rotate them with Free Transform so that they’re parallel with the black diagonal rectangles.
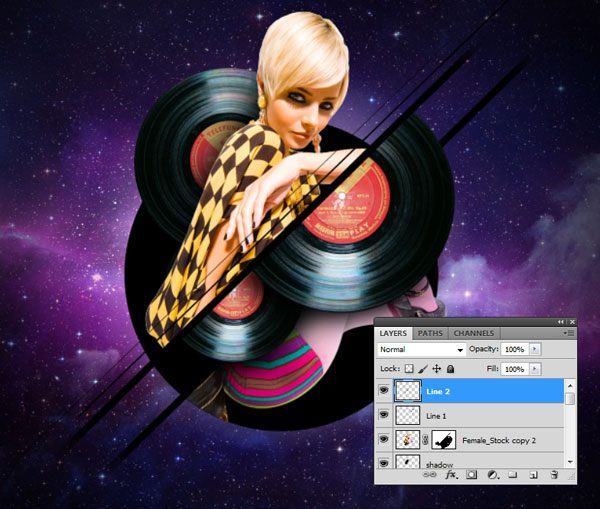
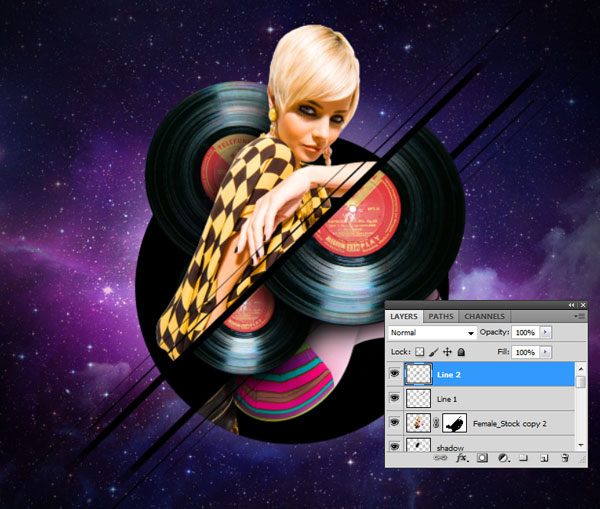
Merge the two line layers by selecting them both in the Layers Panel and then going to Layer > Merge Layers (Ctrl/Cmd + E). Duplicate the merged layer. Adjust the angle of the duplicate as needed and then place it parallel to the diagonal rectangle closest to the bottom of the canvas.
Step 9: Give the Black Circle a Gradient Overlay
To harmonize the black circle we created earlier with its background, let’s give it a gradient overlay with similar colors as the galaxy background.
Add a Gradient Overlay layer style to the black circle layer using #000000 and #380429 for the colors.

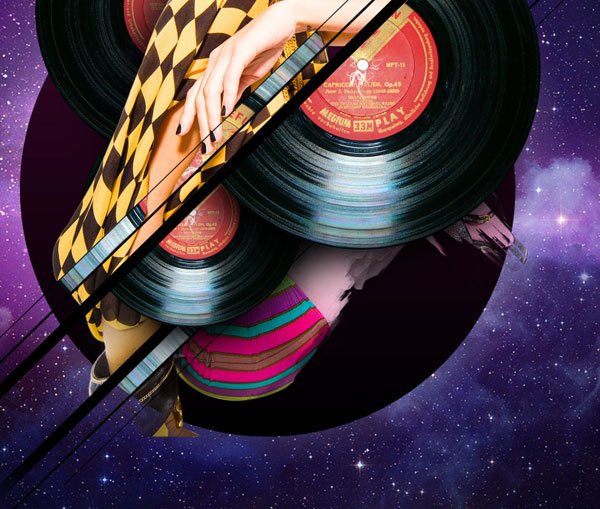
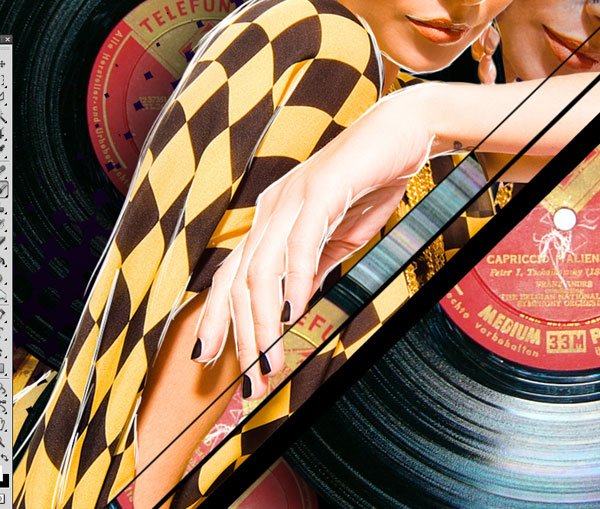
Step 10: Create Intersections
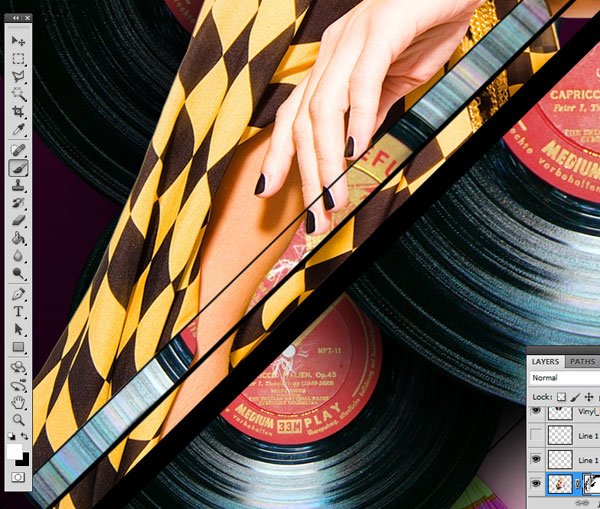
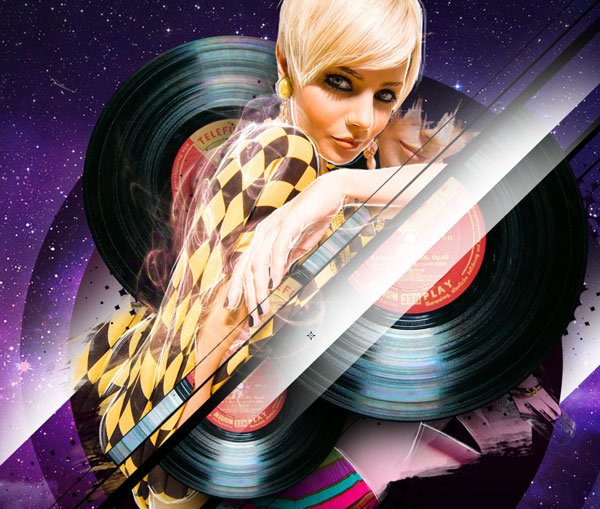
Now we are going to make some interesting intersections among the various design elements. Using the Pen Tool (P), create a path around the subject’s clothing on a layer in between the first set of two lines, making sure not to select her skin. Convert the path into a selection by right-clicking/Control-clicking on it, and then choosing Make Selection from the menu that appears.
Duplicate the vinyl record layer and place this layer below the selected area, making sure to rotate the vinyl record so that the reflective areas can be seen.
Use a layer mask to hide parts of the vinyl record that’s outside of the selection.
Click on the bottommost subject layer (remember that we have multiple layers of her). Using the same process, make a selection around her pants between the first and second lines, making sure to keep the edge out of the circle.

Step 11: Add Textures Using the Brush Tool
Download and install the Hi-Res Watercolor Photoshop Brushes brush library. Make sure that the active layer is still the bottommost subject layer.
Switch to the Brush Tool (B) and set it up by choosing an appropriate paint brush tip. Add a layer mask and use the brush to mask out the bottom areas around her leg. Switch your brush tip color to white to reveal the lower leg, giving it some texture.
You can experiment with different brush tips until you get the effect you like.
Duplicate the topmost copy of the subject layer. Scale it up with Free Transform, and rotate it a bit towards the right.
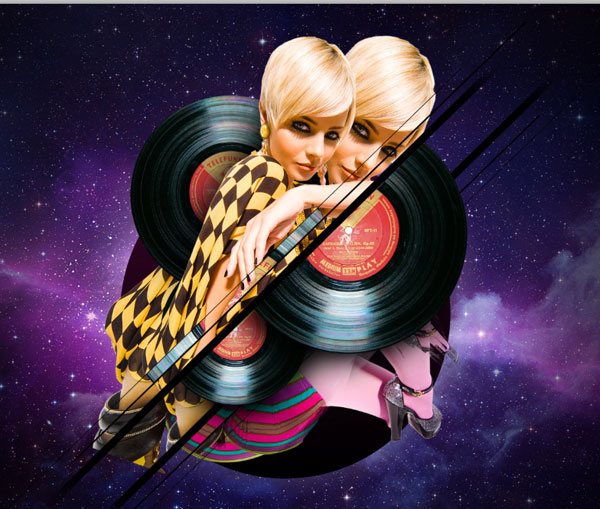
Use the same method above to give this layer a texture.
Step 12: Create Halftone Elements
We will mimic the halftone effect and add it as a design element in this step. Make several new layers under the subject layers and the vinyl record layers for the halftone elements.
Download the Halftone pack and, using a halftone brush, begin adding halftones to the new layers.
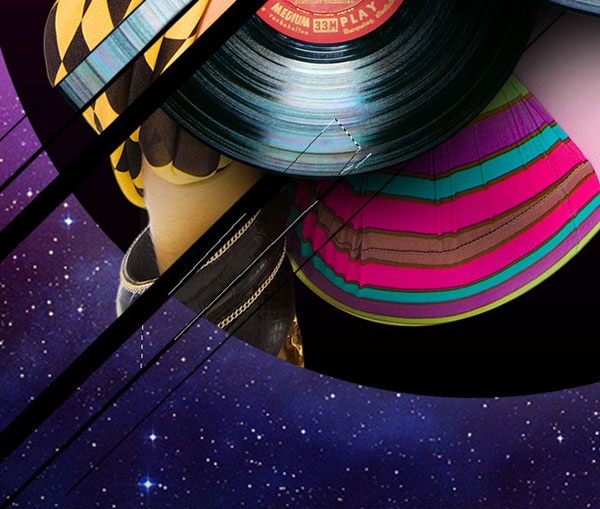
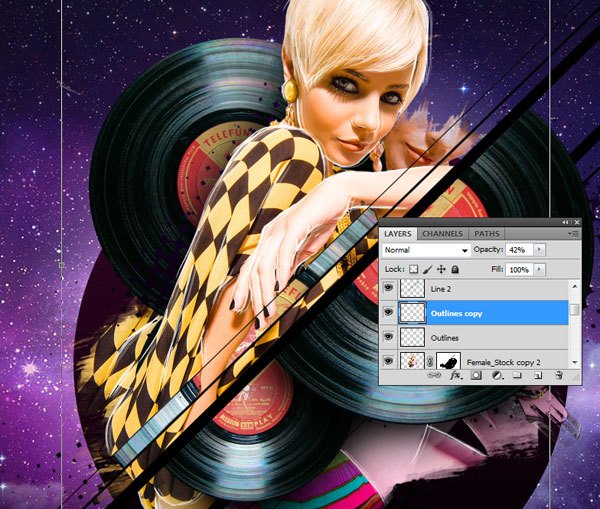
Step 13: Create Sketched Outlines
Create a new layer below the topmost set of lines.
Using the Pen Tool (P), trace outlines around the subject stock layer. What we want to do is give her a sketched, surreal look, so stroke the path with the appropriate brush tip.

Duplicate the outline layer you just created and then use the Move Tool (V) to move the copy to the right. Lower the layer’s Opacity to about 42%.
Step 14: Add Sleek Light Streaks
Now we’ll create some sleek light effects.
Using the Polygonal Lasso Tool (L), make a selection at the center of the canvas as shown below:
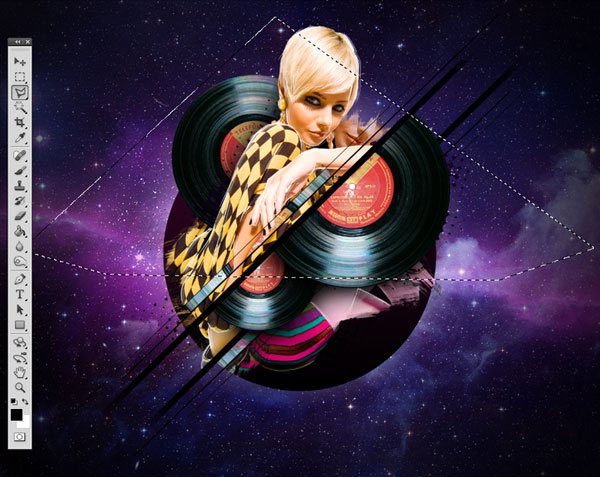
Using a large brush with 0% Hardness and a Foreground color of white, brush along the straight edges of the selection.
Deselect the lasso selection by choosing Select > Deselect (Ctrl/Cmd + D).
Use the Eraser Tool (E) to smoothen out its edges. Place the light streak parallel to the lines you made previously.

Duplicate the light streak and move the copies in various areas around the composition.
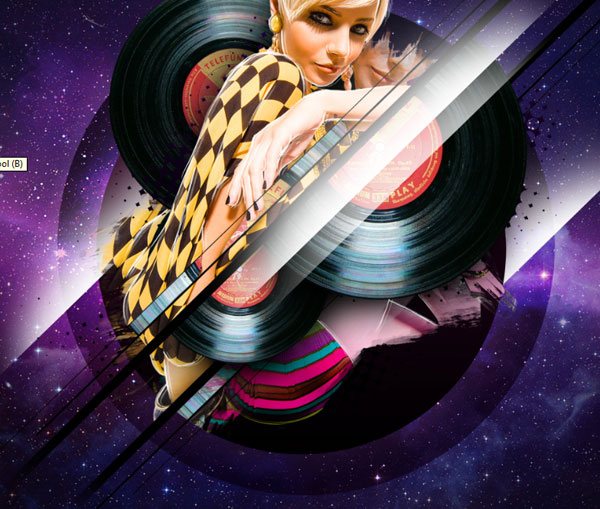
Step 15: Create a Bigger Circle
Duplicate the black circle layer. Make the duplicate black circle larger using Edit > Transform > Scale.
Double-click on the layer to access the Layer Style window to change the Opacity of the layer to 0%.
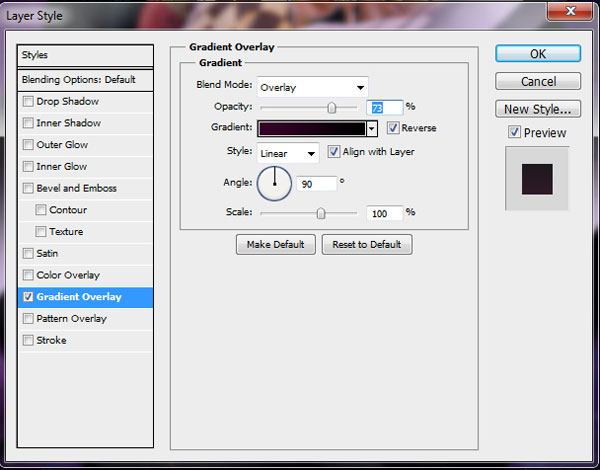
Modify the Gradient Overlay layer effect on this layer; it should already have one because layer styles are automatically copied when you duplicate a layer.
Change the Blend Mode option of the Gradient Overlay to Overlay and check the Reverse option to reverse the gradient.
Step 16: Add Dynamic Light Effects
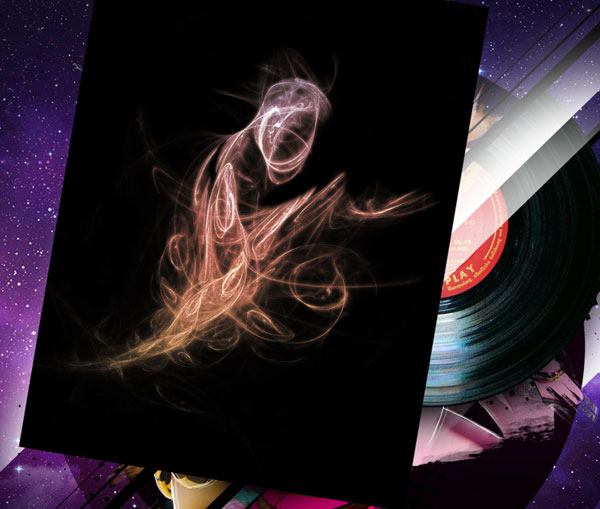
Download and open one of the images from the Wisps Pack. Place the wisp image below the subject’s layer. Change the Blend Mode of the layer to Screen.
Use the Eraser Tool (E) to remove excess edges. What you want to accomplish is to create the illusion that the light is following the outline and contours of the subject’s back.
Open up another image from the Wisps Pack. Place it on the subject’s lower body (leg and upper thigh).
Change the Blend Mode to Screen. Change the hue (Image > Adjustments > Hue/Saturation) to -57. Also erase any excess edges.
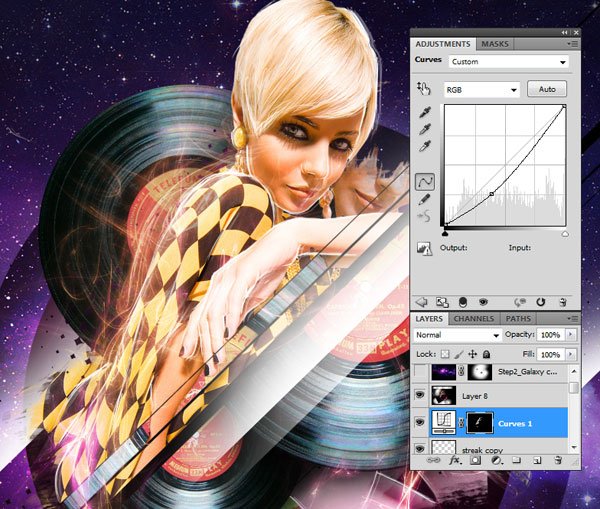
Step 17: Create Dynamic Shadows
Create a new Curves adjustment layer (Layer > New Adjustment Layer > Curves). In the Adjustments Panel, modify the curve in accordance to the image below. What this does is darken the scene a little bit.
Fill the layer mask of the adjustment layer with black. Use a white brush with a low Opacity (30-40%) to paint over the shadows to reveal parts of the adjustment layer on top of them. Change the size of the brush as needed so that your layer masking work is as clean as possible.
Step 18: Create an Atmospheric Vignette Effect
Copy the galaxy layer and place the duplicated layer over all the layers.
Change the Blend Mode of the layer to Screen.
Add a layer mask on the layer and mask away the outer edges of the galaxy to make a sort of vignette effect.
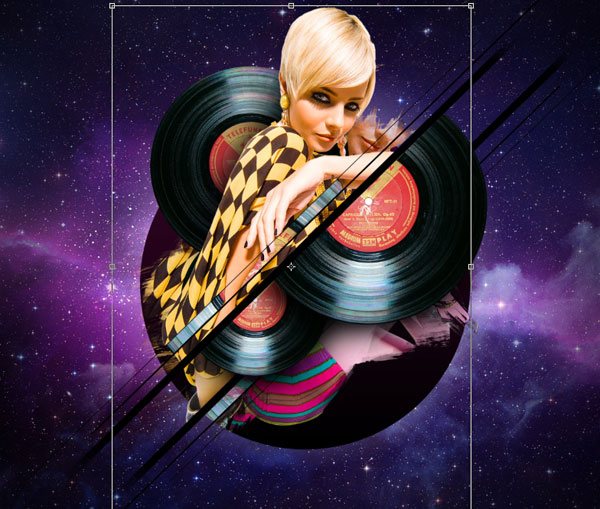
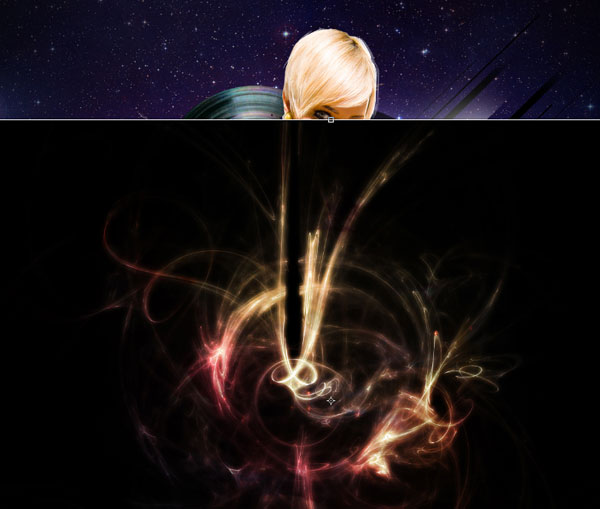
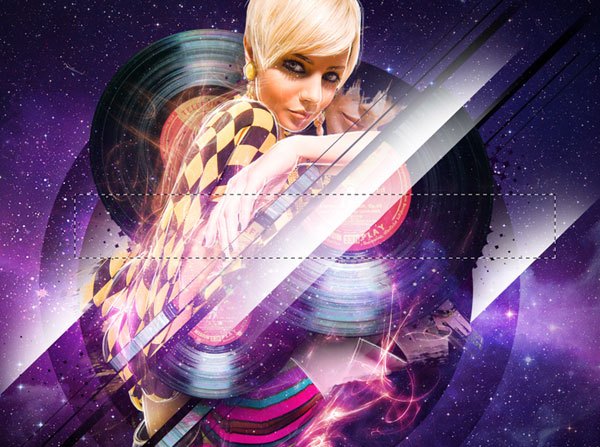
Step 19: Create a “Dimensional Shift” Effect
We are going to create an effect I like to call a “dimensional shift”. To start, create a new layer. Draw a horizontal rectangle at the center of the canvas using the Rectangular Marquee Tool (M).
Fill the rectangular area with black using the Paint Bucket Tool (G).
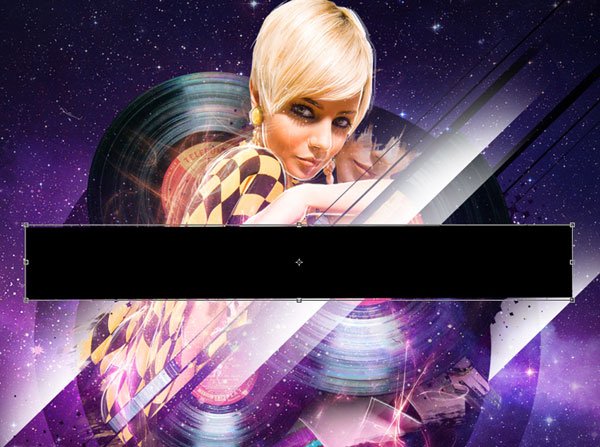
Place the black rectangle layer behind the subject and vinyl record layers.
Using Free Transform, rotate the rectangle parallel to the lines we made earlier.
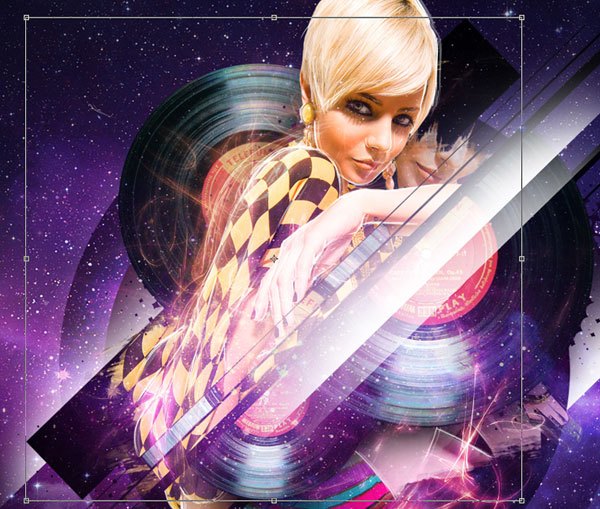
Create a new layer above the black rectangle layer and then choose Image > Apply Image. This merges all the visible layers into the new layer without permanently merging the other layers.
Right-click/Control-click on the merged layer, then choose Create Clipping Mask from the contextual menu. This layer will essentially become a layer mask for the layer below it.
You know a clipping mask is created when there is an arrow on the layer indicating that it’s connected to the layer below it.
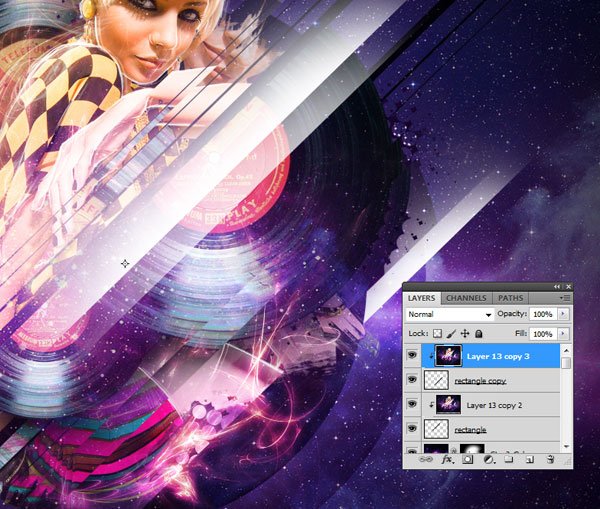
Next, move the clipping mask a little bit to create the “dimensional shift” effect. Once you have achieved a result that you like, use the Eraser Tool to erase the edges of the rectangle.
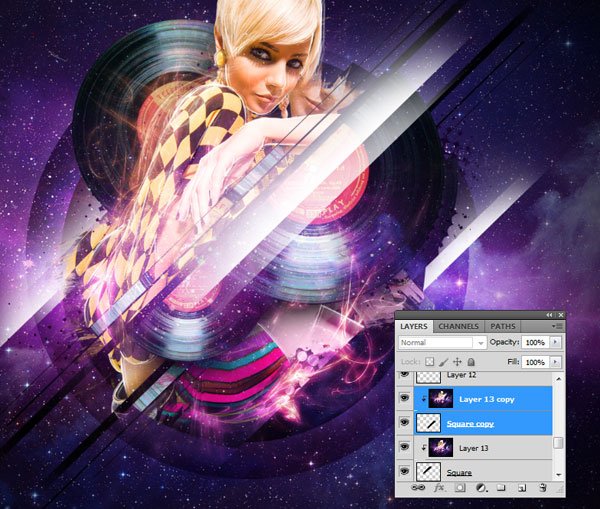
Duplicate the rectangle and the clipping mask and move it to the lower part of the image. Once again, move the clipping mask until the desired result is achieved.
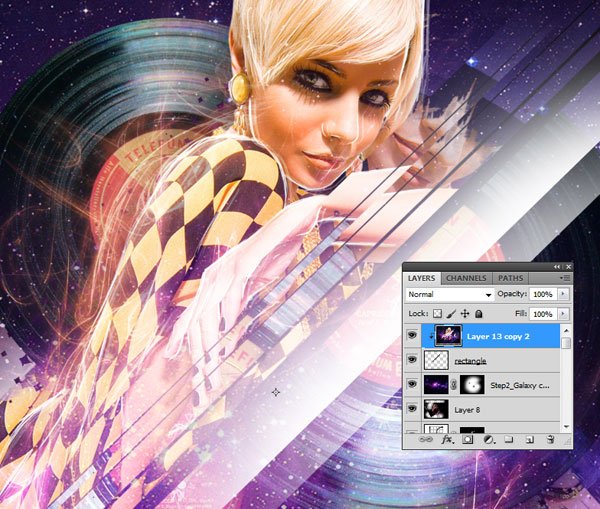
Repeat the process, but this time, create a thinner black rectangle.

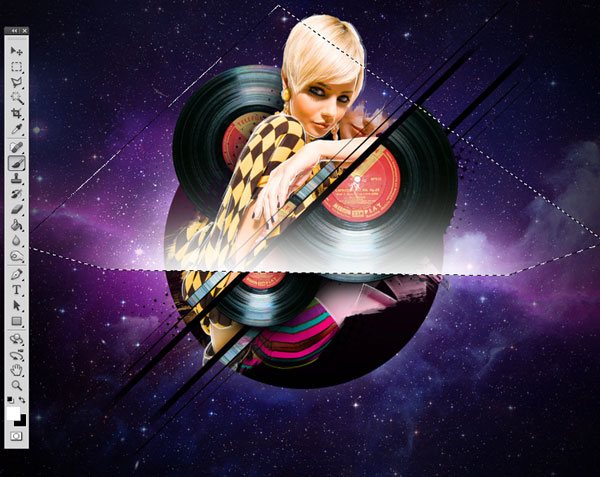
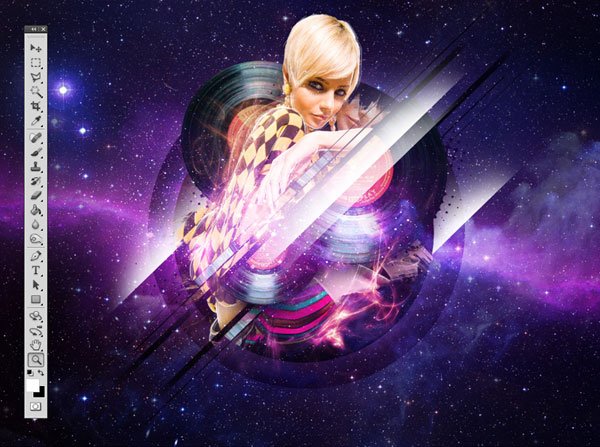
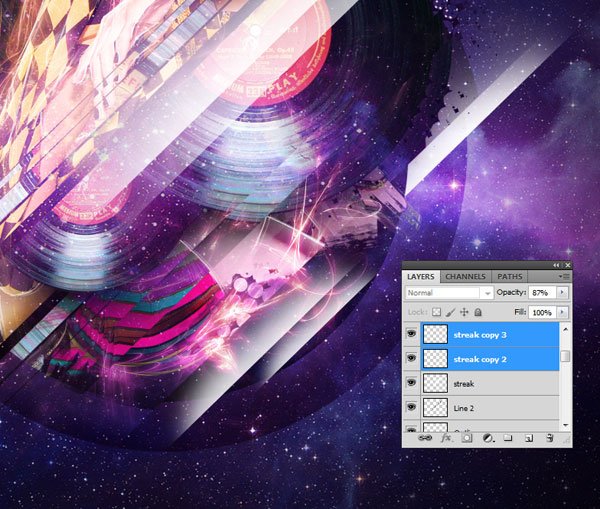
Step 20: Add More Sleek Light Streaks
Use the technique we talked about in Step 14 to create two more sleek light streaks at the bottom of the scene to bring additional balance to the composition.
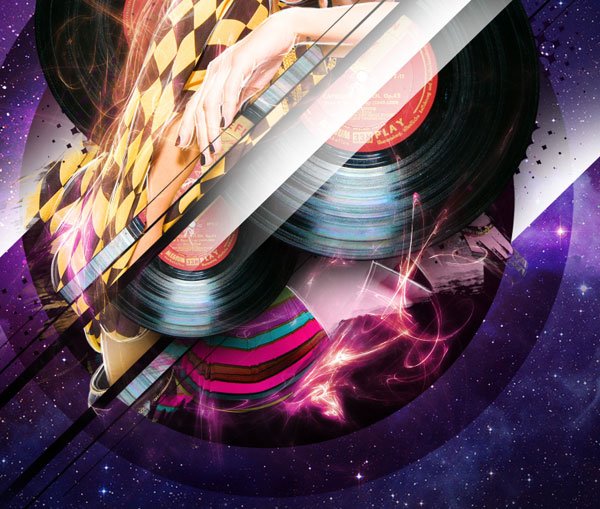
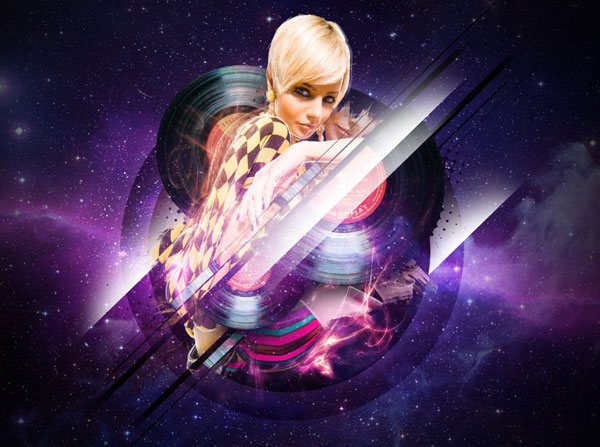
Step 21: Add Orbs
Let us create a sense of depth by using diminishing size and depth of field techniques.
I have included a stock image of black circular orbs which you can download here. You can create these orbs yourself (if you wish) using software that can create 3D objects.
We need to create a selection around the orbs. To make a selection, go into the Channels Panel (Window > Channels) and then click on the Alpha channel.
Click on the Load channel as selection button at the bottom of the panel; it has a dashed circle icon and is the usually the leftmost button. This creates an outline of all the white areas in the channel, which happen to be our orbs.
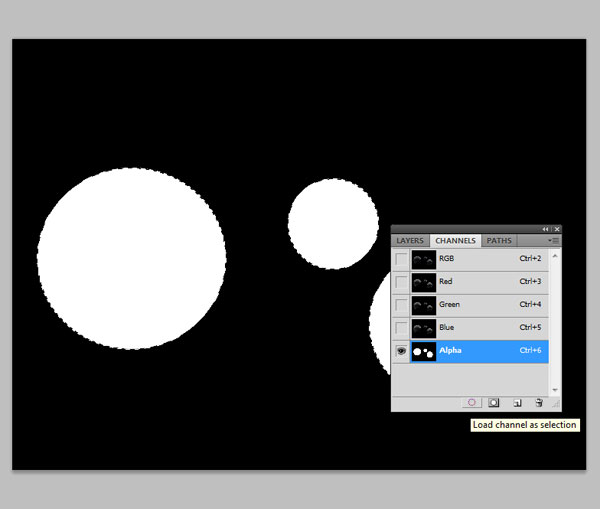
Reselect the RBG channel by clicking on it and make sure the Alpha channel is no longer selected. Switch to the Layers Panel and you should see the selection is still active.
Copy and paste the orbs into our main document.
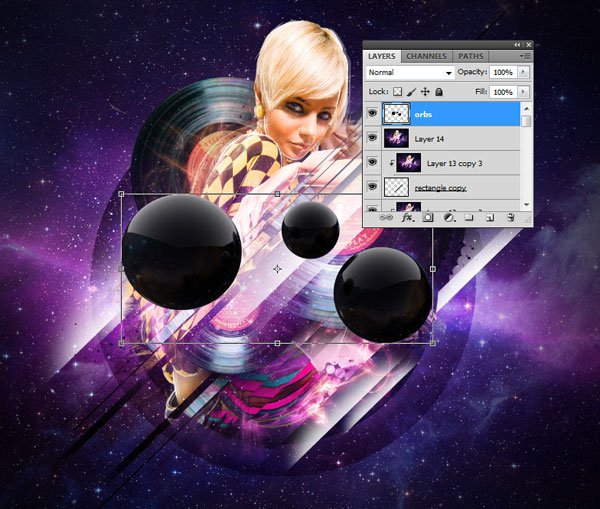
Using the Rectangular Marquee Tool (M), select individual orbs by drawing a rectangle around them, then use the Move Tool (V) to move them to different areas of the scene, making sure to modify their sizes.
Copy and paste the orbs if you want more than three. Arrange them so you have a sense of balance and depth in the composition.
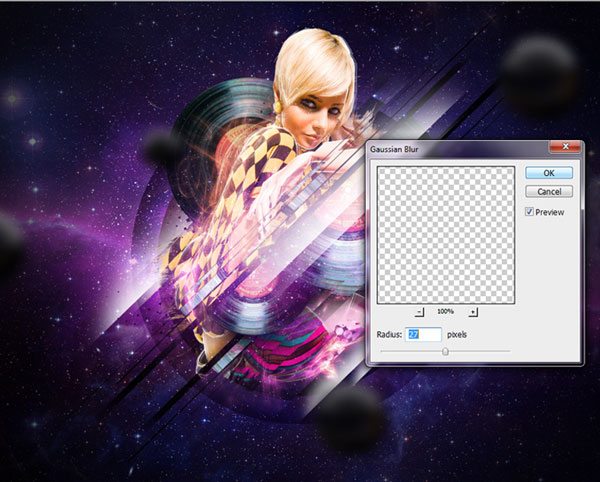
Use a Gaussian Blur (Filter > Blur > Gaussian Blur) with a radius of 27px. This blurs the orbs to give the illusion that the orbs are in the foreground of the image.
Step 22: Improving the Scene’s Lighting
Create a new layer.
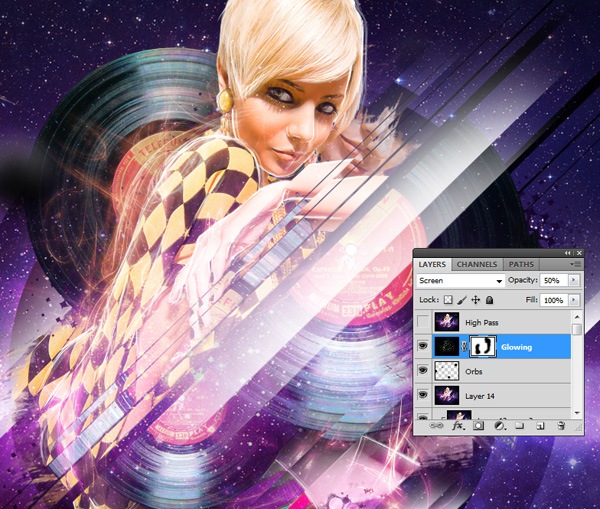
Go to Image > Apply Image to combine all the visible layers into the new layer. Duplicate this layer (Ctrl/Cmd + J). Rename one layer “Glowing” and the other “High Pass” to keep our work organized.
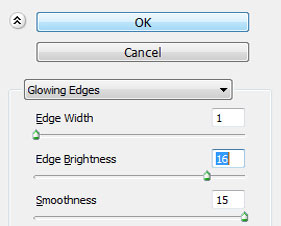
On the “Glowing” layer, choose Filter > Stylize > Glowing Edges.
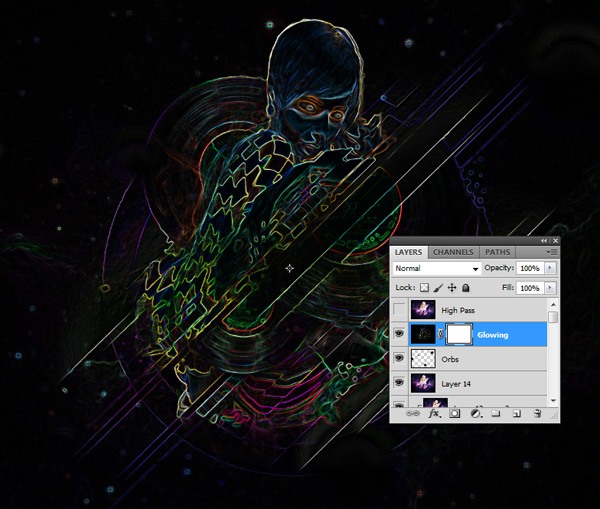
Change the Blend Mode to Screen and reduce the Opacity to 50%.
Create a layer mask and, using a large brush with black as your brush color, mask out areas of the glowing edges that are unnecessary.
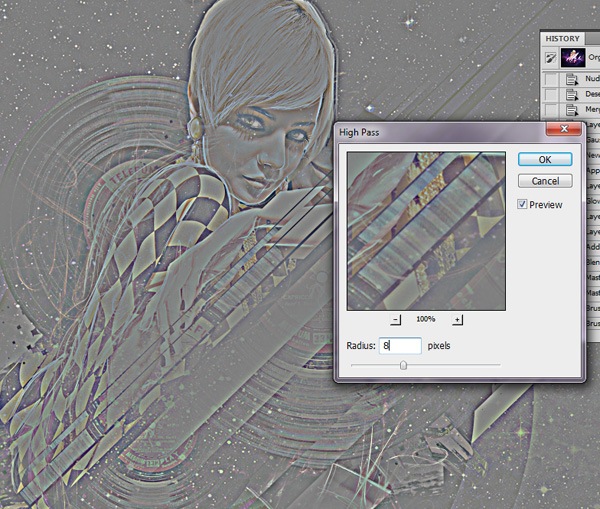
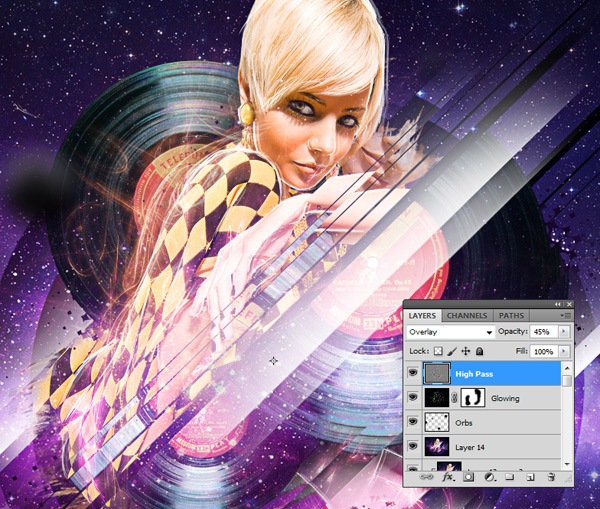
On the “High Pass” layer, choose Filter > Other > High Pass, making sure the Radius of the filter is set to 8px.
Afterwards, reduce the Opacity of this layer to 45%.
Step 23: Create an “RGB Split” Effect
Now we are going to add the (what I like to call) “RGB split” effect. First, save the file as a JPG (File > Save As). Keep the Photoshop document open.
Reopen the JPG file you just saved.
Go into the Channels Panel. Switch to the Move Tool (V). Click on the Red Channel to select it and then move it to the left by pressing the Left Arrow key once.
Click on the Green Channel and move it to the right by pressing the Right Arrow key once. Finally, select the Blue Channel and move it up by pressing the Up Arrow key once.

Step 24: Use a Radial Blur for Improved Depth
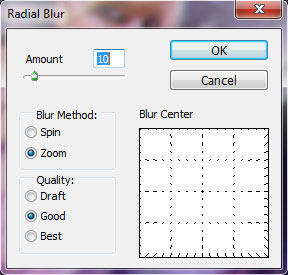
Next, we are going to add a further sense of depth by applying the Radial Blur filter. Still in the JPG version of our work, duplicate the layer that we applied the “RGB split” effect on.
On the duplicate layer, go to Filter > Blur > Radial Blur.
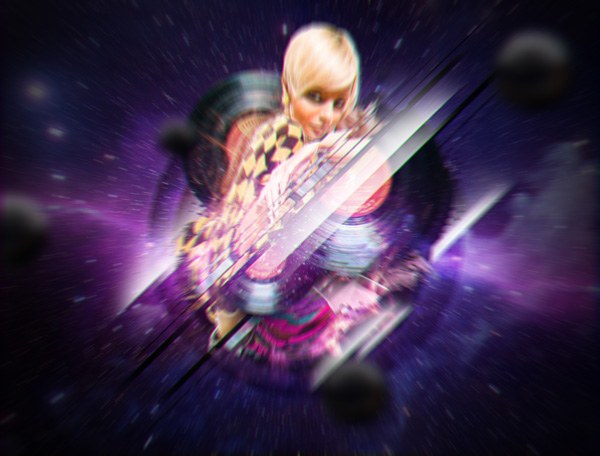
Step 25: Enhance the Focal Point
Let us make sure that our focal point is established; we will make the center of the scene the focal point. Create a layer mask on the layer with the Radial Blur filter. Using a large brush with 0% Hardness and black as your brush color, mask away the center of the Radial Blur until only the edges and a bit of the subject remains blurred.
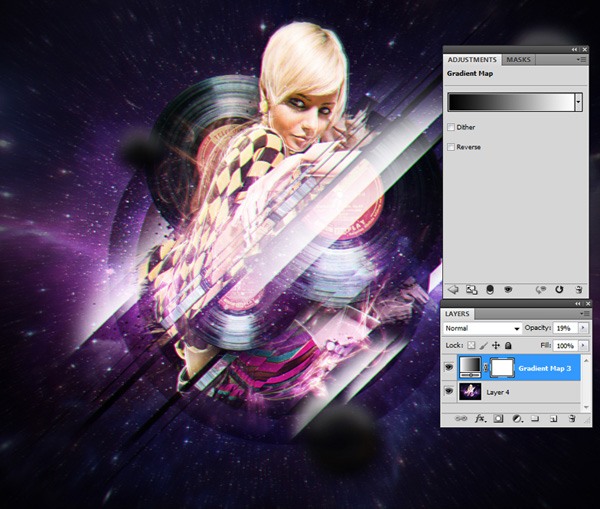
Step 26: Enhance the Color of the Scene
We’ll finish up by enhancing the color of the entire scene.
Add a Gradient Map adjustment layer (Layer > New Adjustment Layer > Gradient Map). Make sure the gradient map colors are black and white. Change the Opacity of the adjustment layer to 19%.
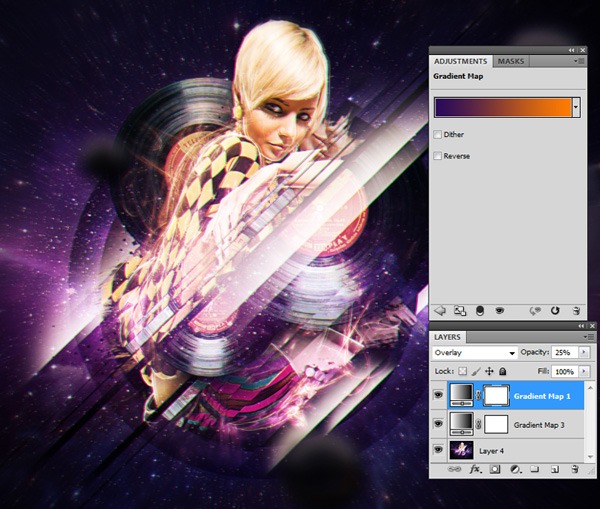
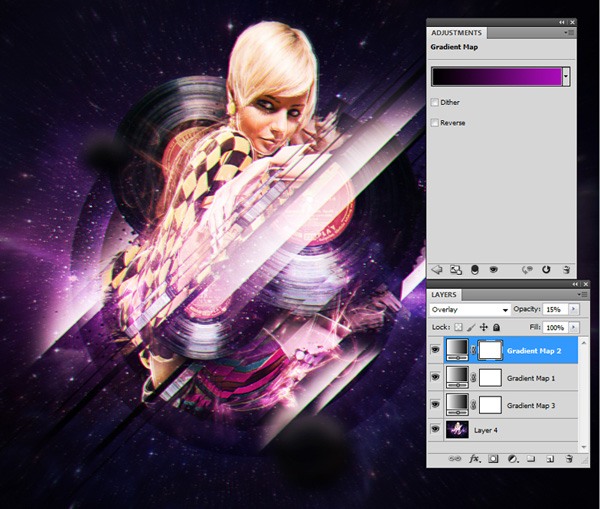
Make another Gradient Map adjustment layer.
Click on the gradient to open up the Gradient Editor window. Choose the Violet, Orange gradient preset.
Make one more Gradient Map adjustment layer using the following colors: #000000 and # a90bb7.
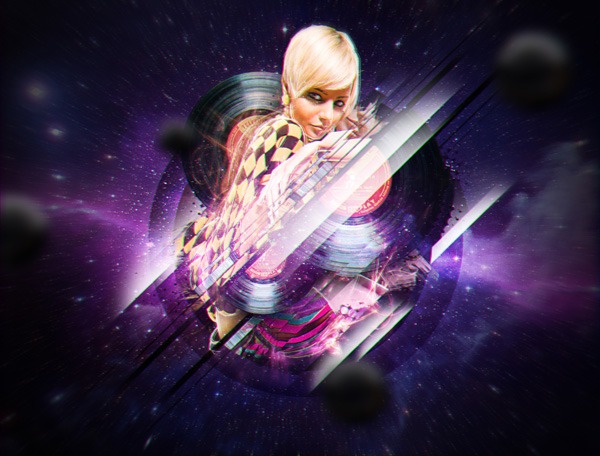
All done!
Tutorial Summary
This Photoshop tutorial covered quite a lot of techniques. If you’re just starting out with Photoshop, then I’m sure your layer masking skills were put to the test!
We created many effects, including the “dimensional shift”, “RGB split” effect, and textures using the Brush Tool. We applied adjustment layers, worked with the Channels Panel to make selections and create interesting effects, added design elements like halftone effects and orbs, and much, much more. I hope you learned a few tricks you can apply in your daily design work.
Download Source Files
- retrospace_scene (ZIP, 218 MB)
-
 Trevin serves as the VP of Marketing at WebFX. He has worked on over 450 marketing campaigns and has been building websites for over 25 years. His work has been featured by Search Engine Land, USA Today, Fast Company and Inc.
 -

WebFX is a full-service marketing agency with 1,100+ client reviews and a 4.9-star rating on Clutch! Find out how our expert team and revenue-accelerating tech can drive results for you! Learn more
Make estimating web design costs easy
Website design costs can be tricky to nail down. Get an instant estimate for a custom web design with our free website design cost calculator!
Try Our Free Web Design Cost Calculator
Table of Contents
- Preview
- Tutorial Resources
- Step 1: Create a Radial Gradient Layer
- Step 2: Add the Galaxy Background
- Step 3: Create a Black Ellipse
- Step 4: Add the Scene’s Subject
- Step 5: Prepare and Add the Vinyl Record
- Step 6: Add More Design Elements
- Step 7: Enhance Design Elements
- Step 8: Create Diagonal Lines with the Pen Tool
- Step 9: Give the Black Circle a Gradient Overlay
- Step 10: Create Intersections
- Step 11: Add Textures Using the Brush Tool
- Step 12: Create Halftone Elements
- Step 13: Create Sketched Outlines
- Step 14: Add Sleek Light Streaks
- Step 15: Create a Bigger Circle
- Step 16: Add Dynamic Light Effects
- Step 17: Create Dynamic Shadows
- Step 18: Create an Atmospheric Vignette Effect
- Step 19: Create a "Dimensional Shift" Effect
- Step 20: Add More Sleek Light Streaks
- Step 21: Add Orbs
- Step 22: Improving the Scene’s Lighting
- Step 23: Create an "RGB Split" Effect
- Step 24: Use a Radial Blur for Improved Depth
- Step 25: Enhance the Focal Point
- Step 26: Enhance the Color of the Scene
- Tutorial Summary
- Download Source Files
Share this article


Web Design Calculator
Use our free tool to get a free, instant quote in under 60 seconds.
View Web Design Calculator
Make estimating web design costs easy
Website design costs can be tricky to nail down. Get an instant estimate for a custom web design with our free website design cost calculator!
Try Our Free Web Design Cost Calculator