Preview
Click the image to see the final result in full size.

Tutorial Resources
- Pattern: Seamless Paper Pattern 2 – Gray by WebTreats (Free)
- Texture: Light Texture by Diellza (Credit Required)
- Texture: Experimental Dirty Texture by Caleb Kimbrough of Lost and Taken (Free)
- Font: Telegrafico Font by Ficod (Personal: Credit Required, Commercial: Donation Requested)
- Texture: Experimental Noise Texture by Caleb Kimbrough of Lost and Taken (Free)
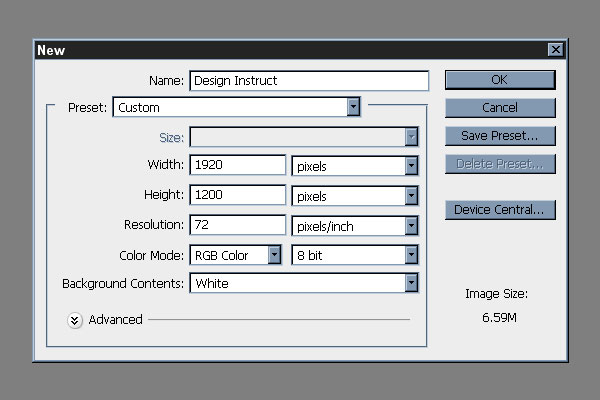
Step 1: Set Up the Photoshop Document
Open Photoshop and create a new document (Ctrl/Cmd + N). We will be making a wallpaper with a common screen resolution that can also be scaled down to accommodate smaller screen resolutions.
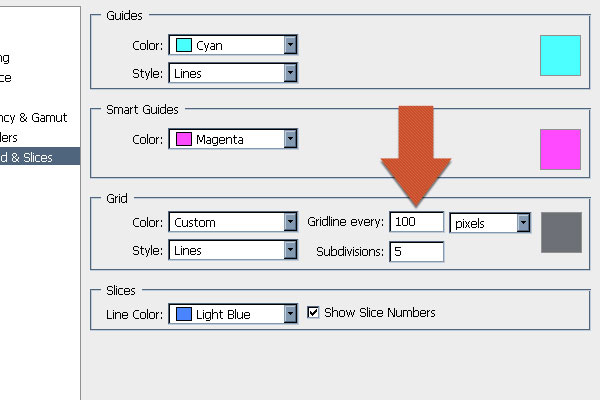
We need to setup our grid settings for the alignment of elements and the creation of our textured grid later on. Open your preferences (Ctrl/Cmd + K) and click Guides, Grid & Slices on the left.
Set the Gridline every option to 100px and the Subdivisions to 5.
Toggle the visibility of your grid (Ctrl/Cmd + ‘) as you need it throughout this tutorial.
Step 2: Add the Textured Paper Background
Download and load the “Seamless Paper Patterns” Photoshop pattern file (webtreats-paper-patterns.pat). Create a new fill layer via the Create new fill or adjustment layer button at the bottom of the Layers Panel. Select the second gray texture from the patterns, as seen below.
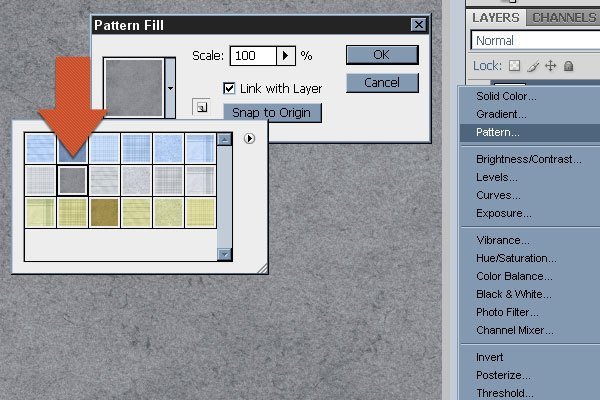
At this point you can delete your default Background layer.
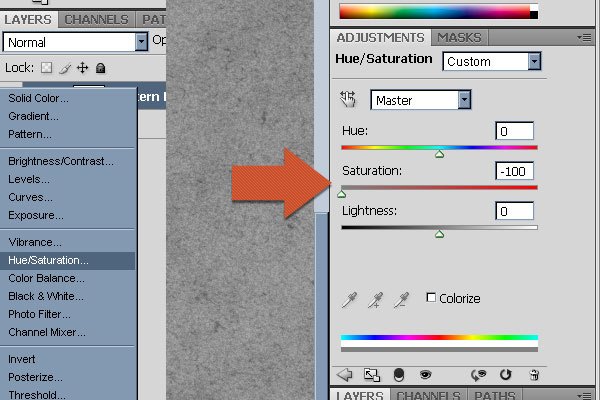
Add a new Hue/Saturation adjustment layer; do this by clicking on the Create new fill or adjustment layer button at the bottom of the Layers Panel and selecting Hue/Saturation.
Set the Saturation to 0. This will remove all color from the pattern.
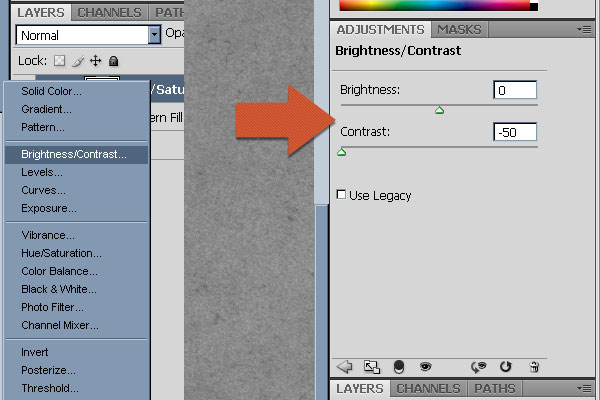
Add a new Brightness/Contrast adjustment layer. Set the Contrast to -50.
Duplicate the Brightness/Contrast adjustment layer twice by selecting it and pressing Ctrl/Cmd + J (or right-clicking and selecting Duplicate Layer from the menu that shows up).

Step 3: Add In the Light Texture
Download and open the Light Texture file (listed in the Tutorial Resources section above).
Press Ctrl/Cmd + A to make a selection around the entire canvas. Press Ctrl/Cmd + C to copy the texture.

Return to the original document, make sure the top layer is selected in the Layers Panel, and press Ctrl/Cmd + V to paste in the light texture above it.
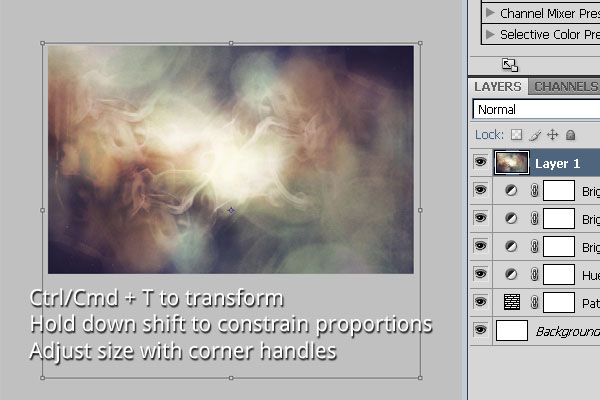
The texture will be way too big for our canvas.
Press Ctrl/Cmd + T to transform the texture. While holding Shift to constrain proportions, grab the corner handles of the texture and drag inwards to resize it to about the size of our document. The burst of light should be roughly in the center.
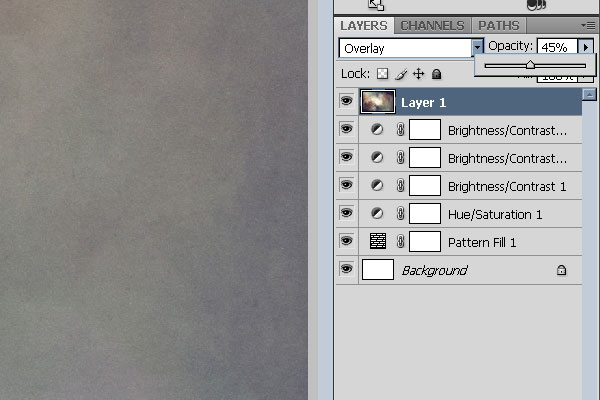
Set the Blend Mode of the light texture layer to Overlay.
Drop the Opacity down to 45%.
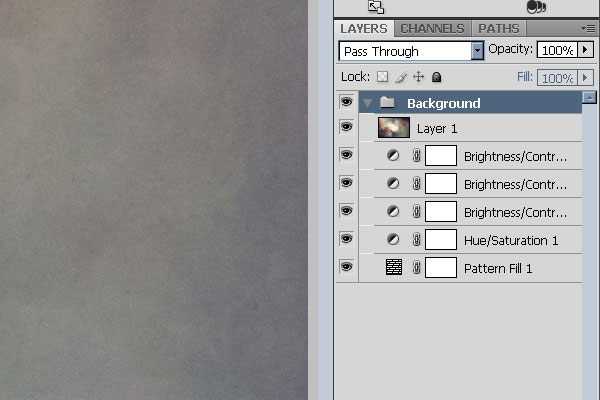
Select all of your layers in the Layers Panel and press Ctrl/Cmd + G to group them. Name the group “Background”.
Step 4: Create a Visible Grid
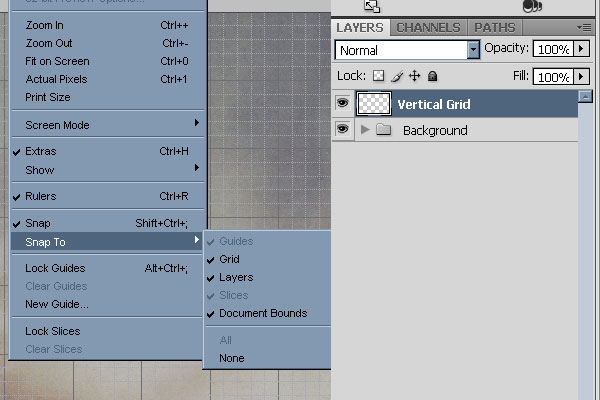
Press Ctrl/Cmd + ‘ to toggle the visibility of our grid. Select View > Snap to turn on snapping.
Make sure that Grid is checked on through View > Snap To as well.
Collapse the “Background” layer group by clicking the arrow on its left, and press Shift + Ctrl/Cmd + N to create a new layer above it. Name the new layer as “Vertical Grid”.
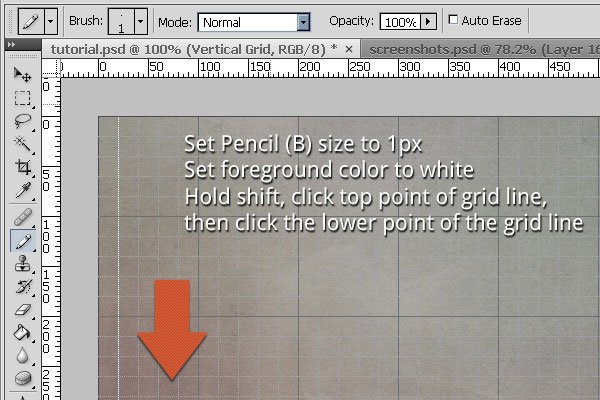
Select the Pencil Tool (B), set the size to 1px, and set your Foreground color to white.
Navigate to the top left of the canvas. While holding Shift, click the top point of the far left vertical grid line, then click the bottom point of the same line at the very bottom of the canvas.
This will give us a perfectly straight line that matches our Photoshop grid.
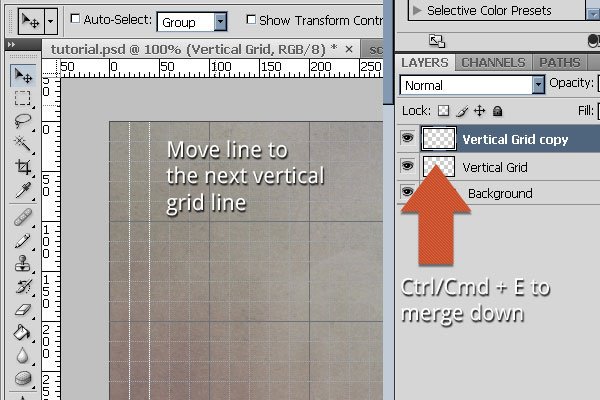
Press Ctrl/Cmd + J to duplicate the “Vertical Grid” layer. With the Move Tool (V), hold down Shift and drag this new layer to the right so that it sits right on top of the next vertical grid line.
Once in place, press Ctrl/Cmd + E to to merge down the new layer with the “Vertical Grid” layer below it.
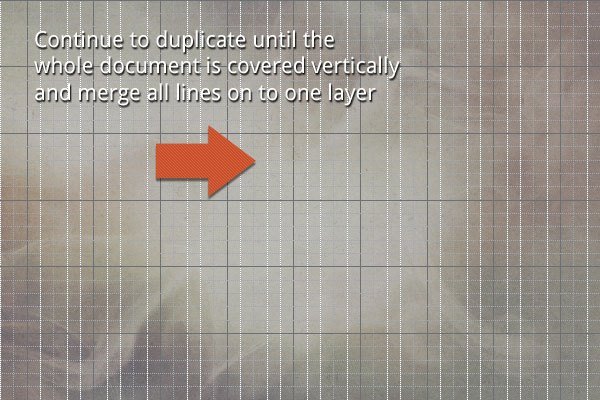
Continue to duplicate the vertical lines and merge them into one layer.
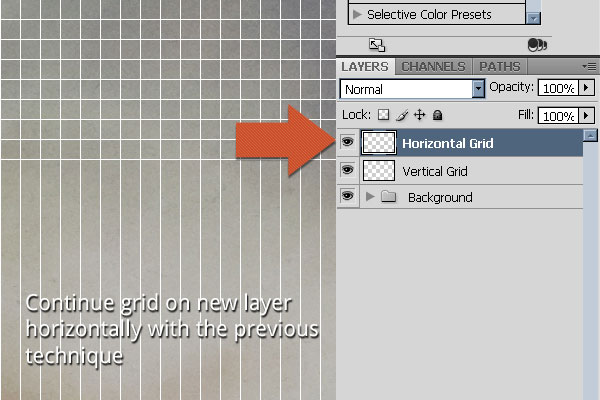
Press Shift + Ctrl/Cmd + N to create a new layer named “Horizontal Grid”. Use the previous technique to complete the grid horizontally. Once finished, make sure all of the horizontal lines are on one layer.
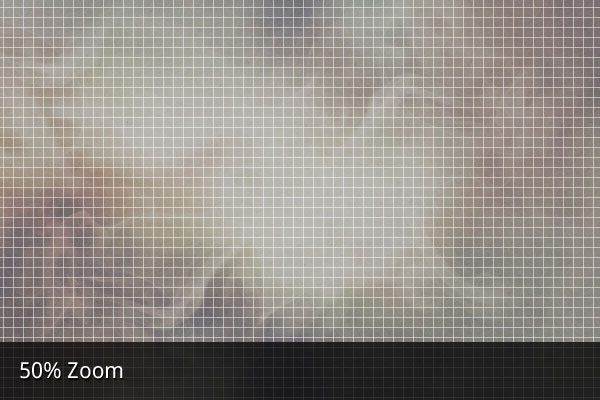
When finished, your grid should look like the following image.
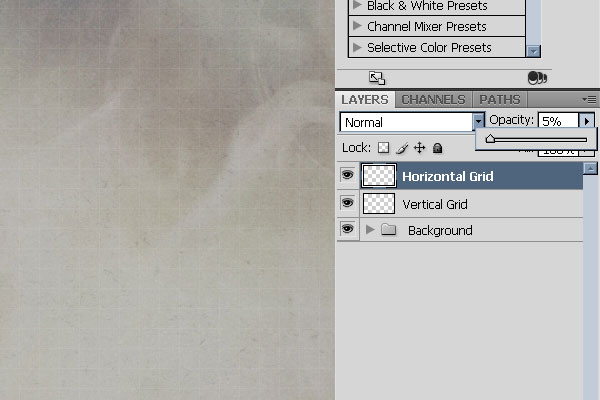
Set the Opacity of vertical and horizontal grids to 5%.
Step 5: Distress the Grid
We are now going to distress the grid lines using layer masks.
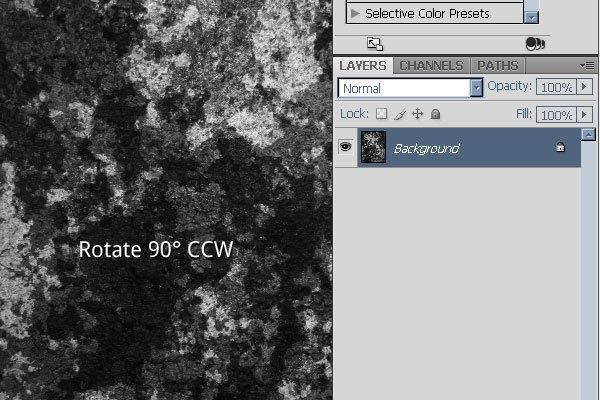
Download and open the Experimental Dirty Texture (listed in the Tutorial Resources section above).
Once open, choose Image > Image Rotation > 90o CCW.
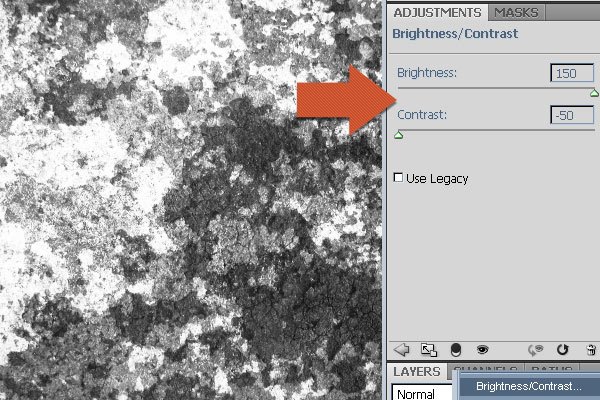
Add a new Brightness/Contrast adjustment layer. Set the Brightness to 150 and the Contrast to -50.
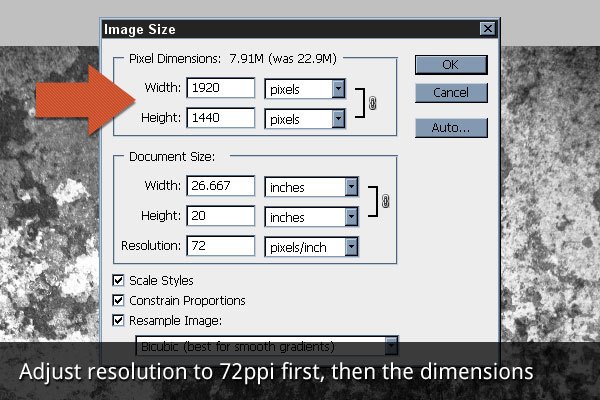
Press Ctrl/Cmd + Alt/Opt + I to open the Image Size dialog window. Set the Resolution to 72ppi, the width to 1920px, and the height to 1440px.
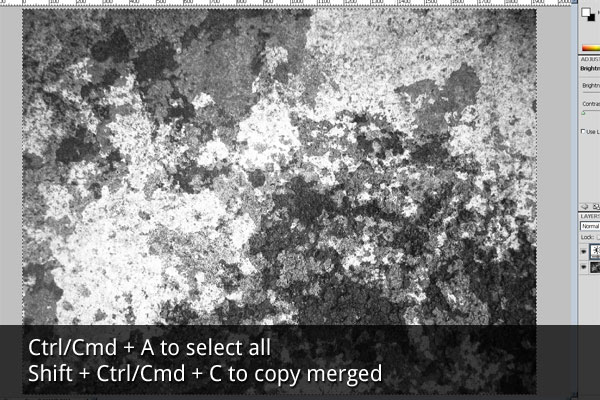
Press Ctrl/Cmd + A to select all, then press Shift + Ctrl/Cmd + C to copy merged.
Copy merged will place a flattened version of all visible layers onto your clipboard.
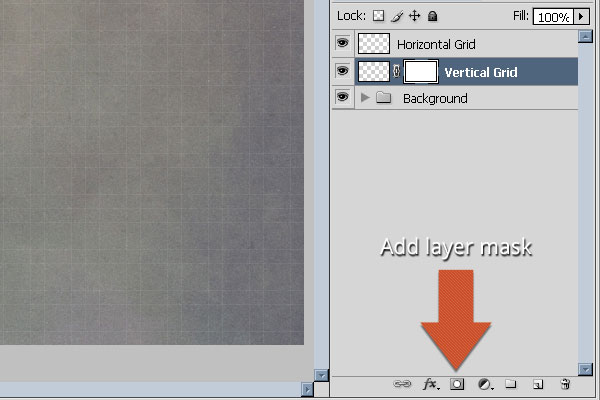
Return to the original document, select the “Vertical Grid” layer, and click the Add layer mask button at the bottom of the Layers Panel.
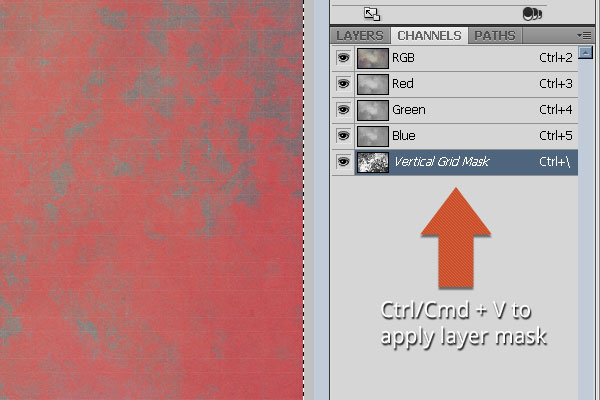
With mask thumbnail selected, click over to the Channels Panel, which is located (by default) right next to the Layers Panel.
Click the eye icon next on the “Vertical Grid Mask” layer to make it visible. Then press Ctrl/Cmd + V to paste in our textured mask.
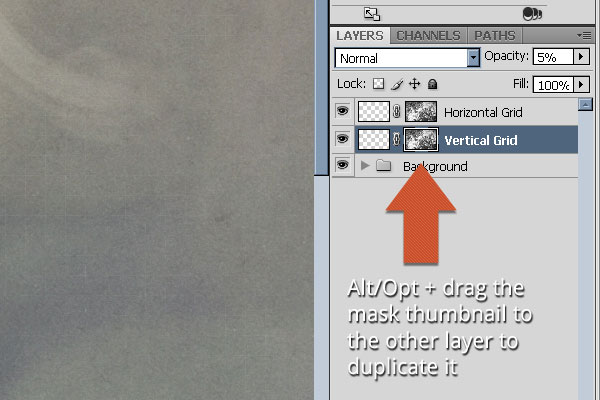
Return to the Layers Panel and select the “Horizontal Grid” layer. Press Ctrl/Cmd + D to make sure that everything is deselected.
Then hold down Alt/Opt and drag the mask thumbnail from the “Vertical Grid” layer to the “Horizontal Grid” layer. This will duplicate the mask and apply it to the other layer.
Step 6: Create Glowing Diagonal Lines
Press Shift + Ctrl/Cmd + N to create a new layer.
Name it “Lines 1”. Select the Brush Tool (B), set the Master Diameter of the brush to 1px and the Foreground color to black.
Make sure that snapping is still activated and that your grid is Photoshop grid is visible.
Zoom in on the lower right hand corner of the canvas. Starting from the right edge of the document at 20 grid boxes from the bottom (400px), hold down Shift and click from that point to the bottom of document at 1 grid box from the right (20px).
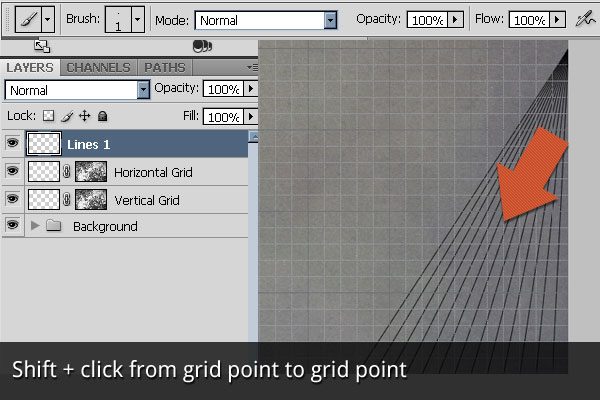
Continue to make lines from the same starting point, but move over one grid box each time on the bottom. Repeat until you reach the lower left hand corner of the canvas.
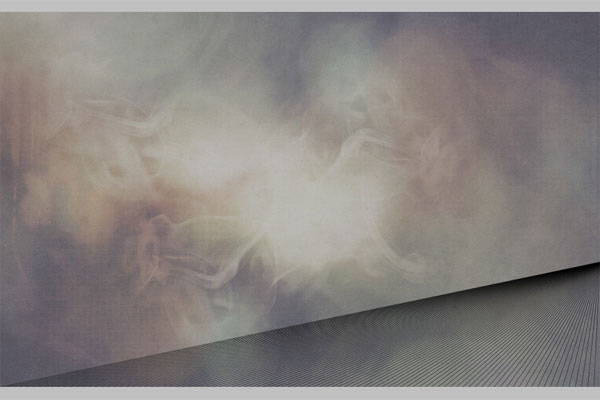
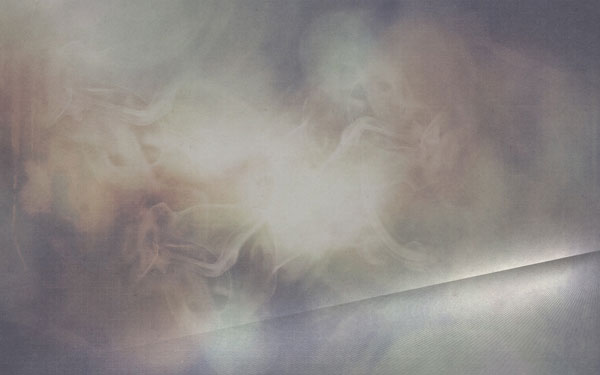
Once finished, your document should look like this:
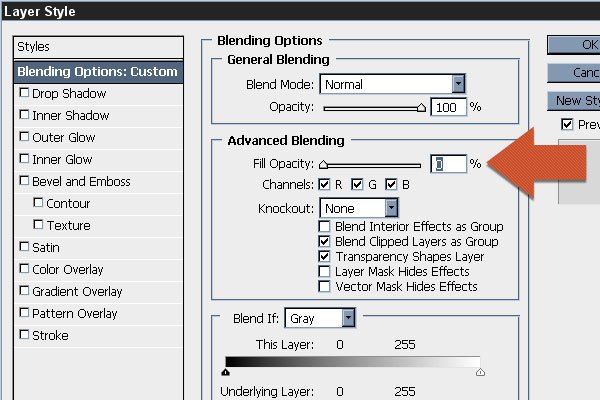
Double-click the thumbnail of the “Lines 1” layer to open the Layer Style options.
In the Blending Options section, set the Fill Opacity to 0%.
With the Layer Style options still open, click Outer Glow (the Outer Glow color is white).
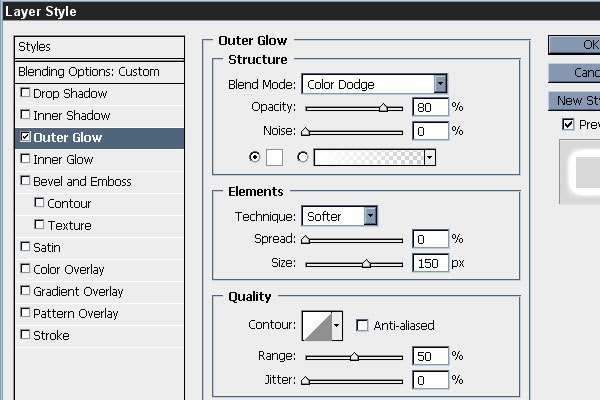
Your image should now look like this:
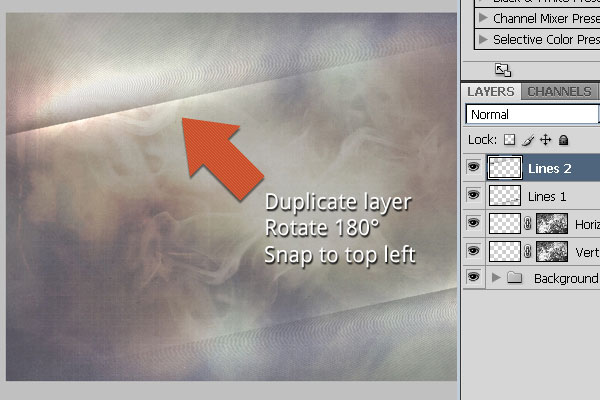
Select the “Lines 1” layer and press Ctrl/Cmd + J to duplicate it. Rename the duplicated layer “Lines 2”.
Rotate this layer 180° by going to Edit > Transform > Rotate 180°.
Now, make sure that Document Bounds snapping is on by choosing View > Snap To > Document Bounds.
Drag the “Lines 2” layer to the top of the canvas until it snaps into the top left corner. It will basically mirror the lines below.
Select all of your layers except for the “Background” group and press Ctrl/Cmd + G to group them.
Name the group “Lines”.
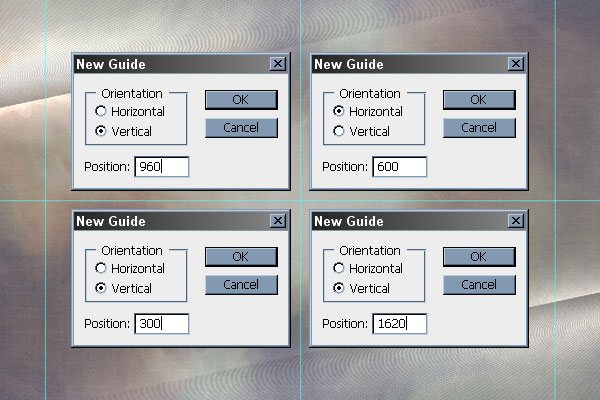
Step 7: Set Up Guides
Select View > New Guide and create one at 960px Vertical. Do this again for 600px Horizontal, 300px Vertical, and 1620px Vertical. These will be the main guides for the creation of our shapes and type.
Guides can be toggled on and off by pressing Ctrl/Cmd + ;.
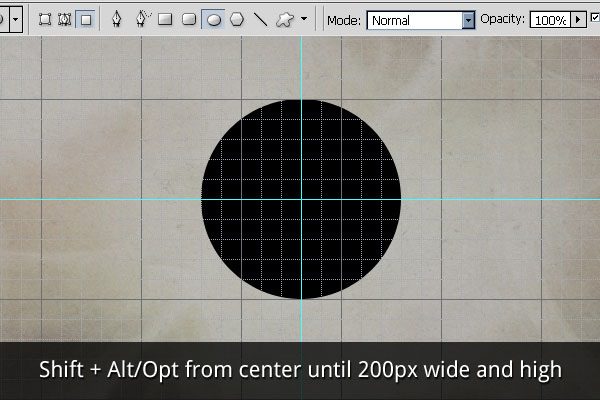
Step 8: Create Center Circle
Press Shift + Ctrl/Cmd + N to create a new layer. Select the Ellipse Tool (U), set your Foreground color to black, and click the Fill pixels option in the Ellipse Tool’s Option Bar.
While holding Shift + Alt/Opt, drag out your circle from the center of document until it is 10 grid boxes (200px) wide and high.
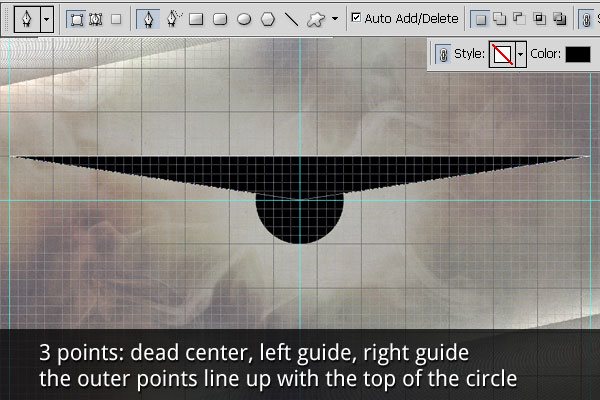
Step 9: Create Triangles
Select the Pen Tool (P), set your Foreground color to black, and make sure that the Shape layers option is selected from the Pen Tool Option Bar.
The shape will need 3 points. Start off at the dead center of the canvas, then go to the left guide at the height of the circle, then to the right guide at the height of the circle, then close the shape at the center.
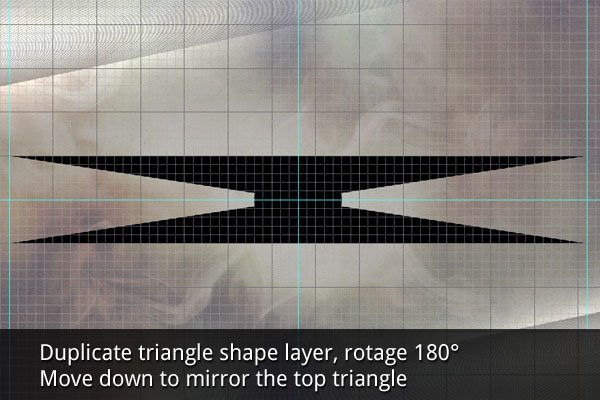
With the new triangle shape layer selected, press Ctrl/Cmd + J to duplicate it.
Select Edit > Transform > Rotate 180° and move the new triangle down so that it mirrors the top triangle.
The top of the triangle will be at the center of the canvas.
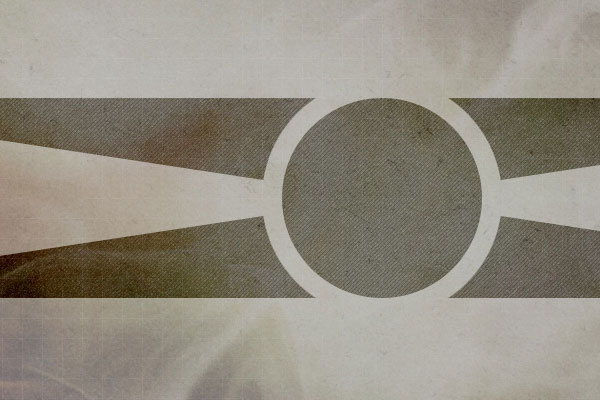
With both of the triangle shape layers selected, press Ctrl/Cmd + E to merge them. These shapes were originally vectors, but merging them will rasterize them — which is what we want.
With the new merged triangle layer selected, select the Elliptical Marquee Tool (M). While holding Shift + Alt/Opt, drag out from the center of the canvas until you pass the center circle by 1 grid box.
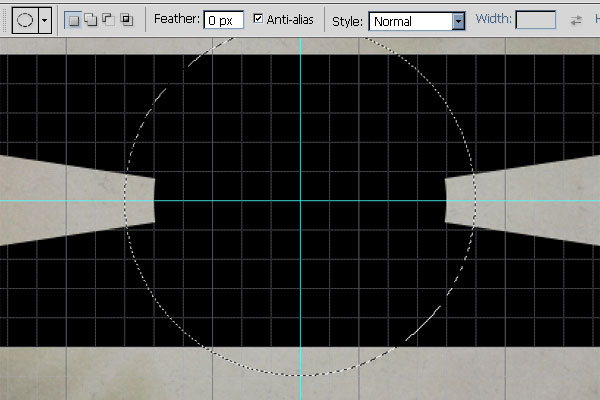
Press Delete to get rid of the selected area.
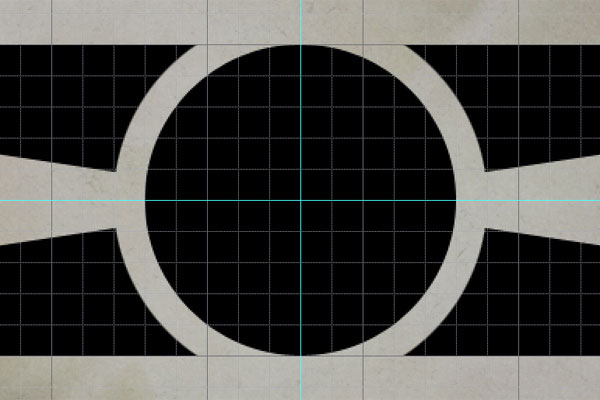
Select the triangle layer and the circle layer, then press Ctrl/Cmd + E to merge them together.
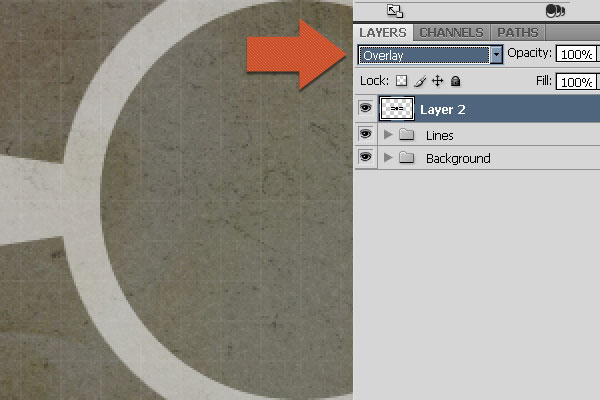
Step 10: Style the Shapes
With the shape layer selected, set its Blend Mode to Overlay.
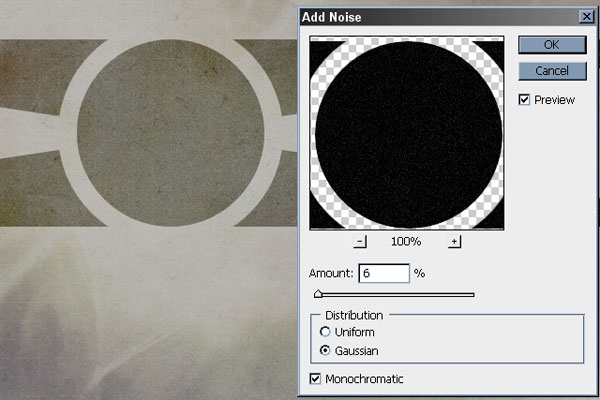
Select Filter > Noise > Add Noise and use the settings below to give the shapes some subtle texture.
Now we are going to create our own pattern that will blend with our shapes to create some more texture.
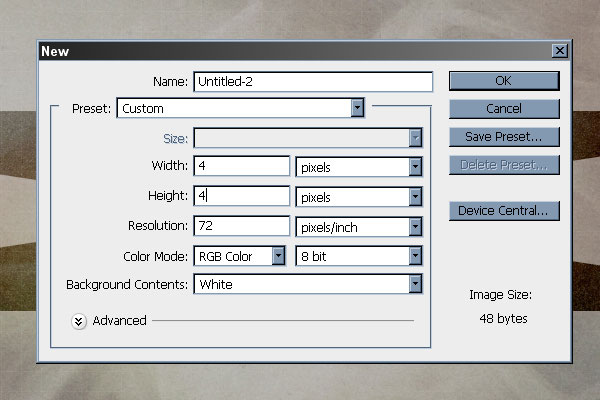
Press Ctrl/Cmd + N to create a new document for our pattern. Use the following settings:
Press Shift + Ctrl/Cmd + N to create a new layer in the new document. Delete the default Background layer.
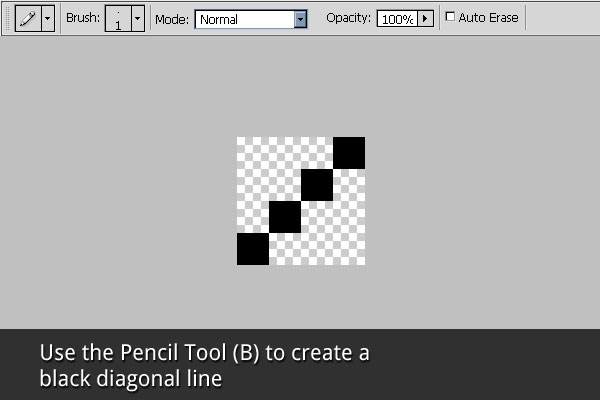
Select the Pencil Tool (B), set your Foreground color to black, and set the Pencil Tool’s Brush size to 1px.
Zoom in and create 4 black pixels that go from the bottom left to the top right.
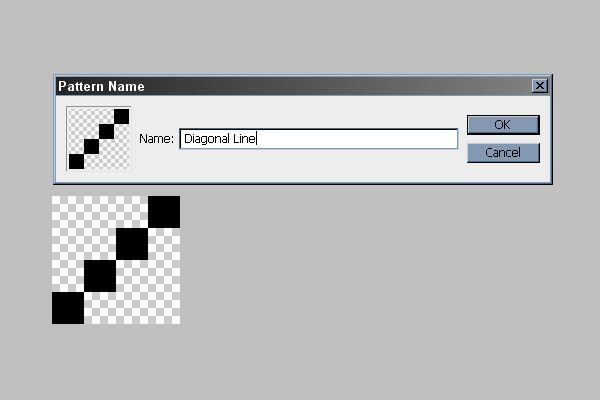
Choose Edit > Define Pattern and name it “Diagonal Pattern”.
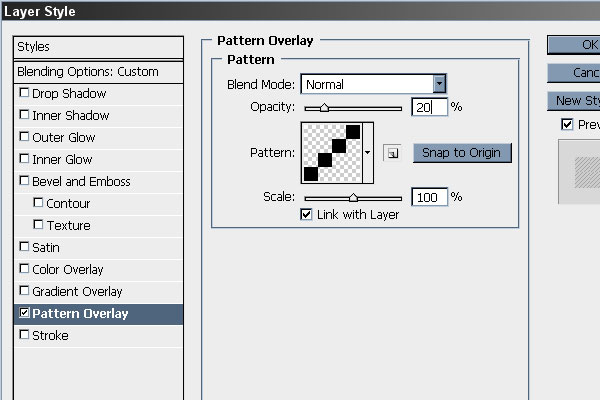
Return to the original document and select the shapes layer. Double-click the thumbnail to access the Layer Style options. Click on Pattern Overlay on the left to and use the following settings to apply our custom pattern.
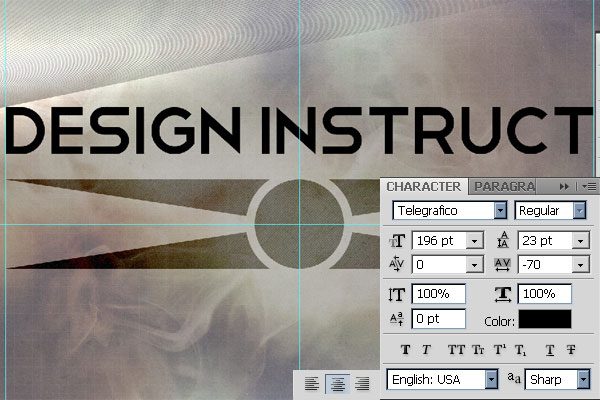
Step 11: Create the Type
Download and install the Telegrafico Font or use a font that gives your work a futuristic theme.
Select the Horizontal Type Tool (T) and click on the vertical center guide, a little bit above the shapes.
Choose the Center text alignment option from the Paragraph Panel (Window > Paragraph).
Open the Character Panel (Window > Character) and use the settings below, then type “Design Instruct” with the Horizontal Type Tool.
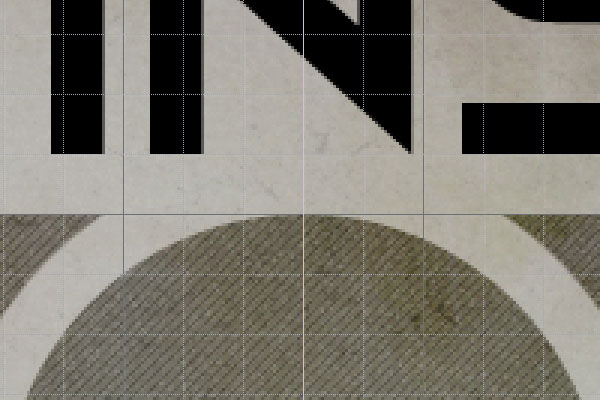
Adjust the vertical position of the type so that the bottom of the letters are exactly one grid box (20px) away from the shapes.
Now we need to match the look of the type with the look of the shapes.
We need to repeat some of the sub-steps from Step 10. Perform these steps to the text layer (refer back to Step 10 for a refresher):
- Set blending mode to Overlay
- Add Noise (Ctrl/Cmd + F to apply last used filter)
- Add the diagonal pattern overlay

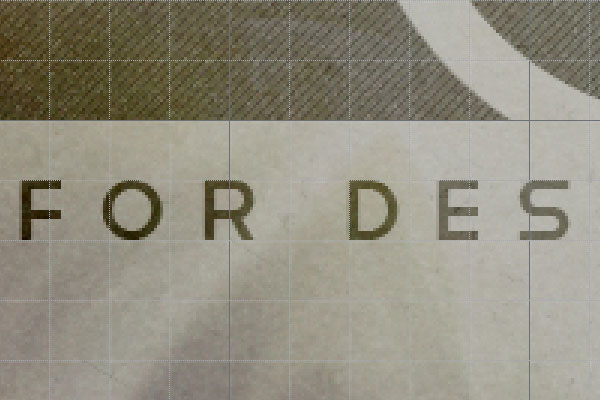
Now we will create the tagline text. Select the Horizontal Type Tool (T) and click on the vertical center guide, a little bit below the shapes. Choose the “Center text” alignment from the type options.
Open the character panel (Window > Character) and use the settings below. Type “A Web Magazine For Designers And Digital Artists”.
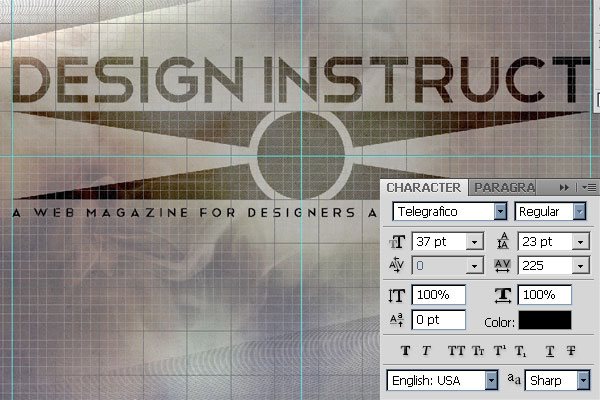
Adjust the vertical position of the tagline type so that the top of the letters are exactly one grid box (20px) away from the shapes.
Once again, use the same styling for this text. Apply all of the same changes to the tagline layer:
- Set blending mode to Overlay
- Add Noise (Ctrl/Cmd + F to apply last used filter)
- Add the diagonal pattern overlay

Step 12: Add One More Big Triangle
To finish off our center logo section, we are going to add one more triangle.
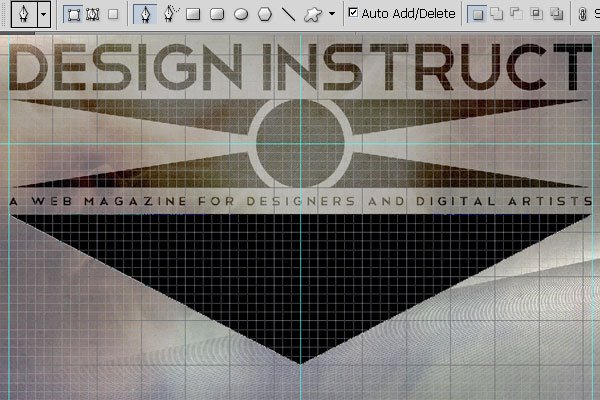
Select the Pen Tool (P), set your Foreground color to black, and make sure that the Shape layers option is enabled on the Pen Tool (P) Options Bar.
Like before, the shape will need 3 points. The top edge of the triangle will be 1 grid box (20px) below the tagline type. The point at the bottom of the triangle will be dead center and 5 grid boxes (100px) away from the bottom of the canvas.
You guessed it: We now need to style the big triangle the same way we did the rest.
Tip: If all of your shapes and text are planned out ahead of time, you can of course wait until the end, merge your layers, and apply the settings just one time.
Apply all of the same changes to the big triangle (refer back to Step 10 if you need a refresher):
- Set blending mode to Overlay
- Add Noise (Ctrl/Cmd + F to apply last used filter)
- Add the diagonal pattern overlay

Step 13: Distress the Wallpaper with a Noise Texture
Download and open the Experimental Noise Texture (listed above in the Tutorial Resources section).
Press Ctrl/Cmd + A to select the entire canvas. Press Ctrl/Cmd + C to copy the texture.
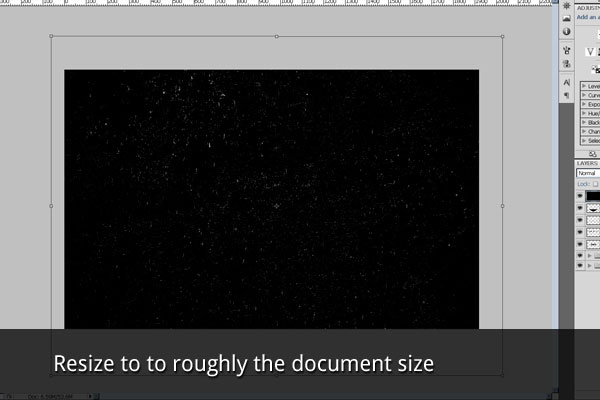
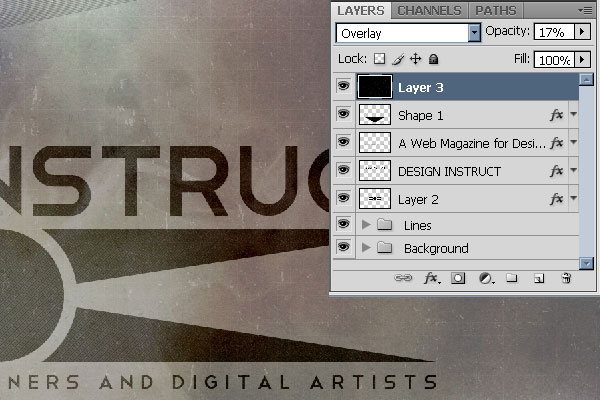
Return to our main document, make sure the top layer is selected, and press Ctrl/Cmd + V to paste in the noise texture.
The texture will be way too big for our canvas. Press Ctrl/Cmd + T to transform the texture.
While holding Shift to constrain proportions, grab the corner handles of the texture and drag to resize it to about the size of our document.
Set the blending mode of the noise layer to Overlay and the Opacity to 17%.
Step 14: Add Linear Dodge Glow Lines
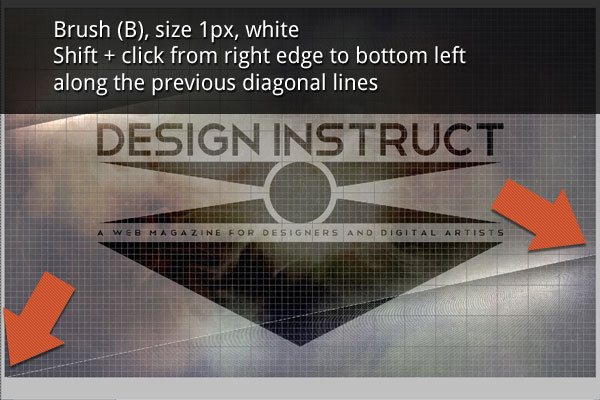
Press Shift + Ctrl/Cmd + N to create a new layer. Select the Brush Tool (B), set the brush size to 1px, and set your Foreground color to white.
With the Photoshop grid and snapping on, hold down Shift and click from the right edge of the canvas to the bottom left. This line will go right along the edge of our previous diagonal lines.
With our new layer selected, double-click its thumbnail to open the Layer Style options.
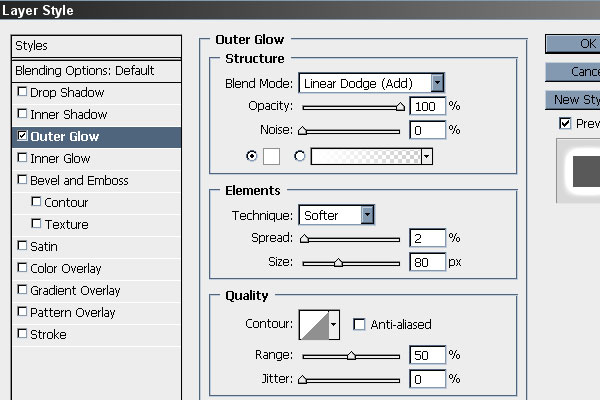
Click on Outer Glow and use the following settings:
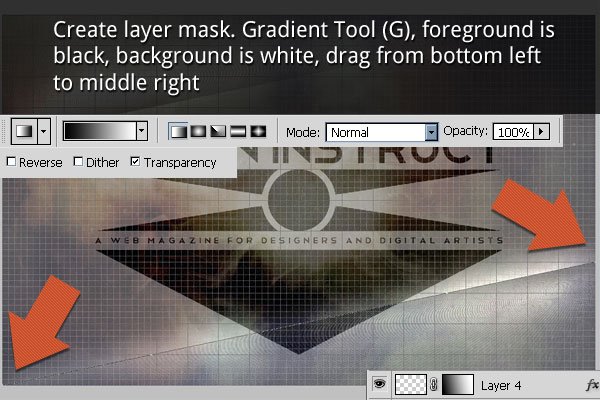
To make our new glowing line a little more subtle, we are going to add a layer mask with a gradient that goes from black to white. With our new layer still selected, click the Add layer mask button at the bottom of the Layers Panel.
Select the Gradient Tool (G), set the Foreground color to black the Background color to white (press D as a shortcut) and set the Gradient Tool’s style to Linear Gradient.
Click and drag from the bottom left to the middle right, along the same glowing line that you just made.
With the same layer still selected, press Ctrl/Cmd + J to duplicate it.
Then select Edit > Transform > Rotate 180°.
Move the duplicated layer to the top until it snaps into position along the edge of the upper diagonal lines.
Step 15: Create a Mosaic Overlay
We are now going to add a mosaic overlay that will mimic our grid. It will create subtle, pixelated effect.
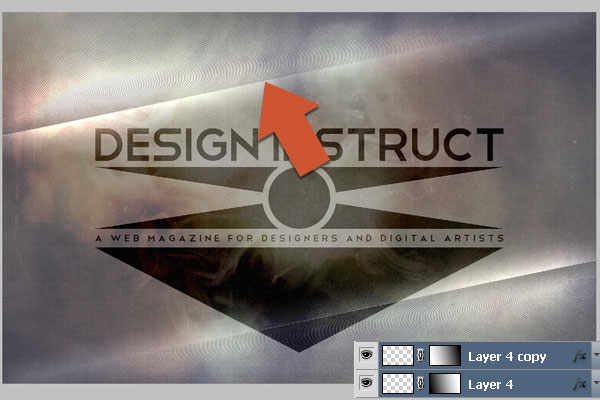
Press Ctrl/Cmd + Alt/Opt + Shift + E to copy all of the visible layers on to a new layer.
This will basically flatten what we have so far, but put it on a new layer so that the other layers are still editable.
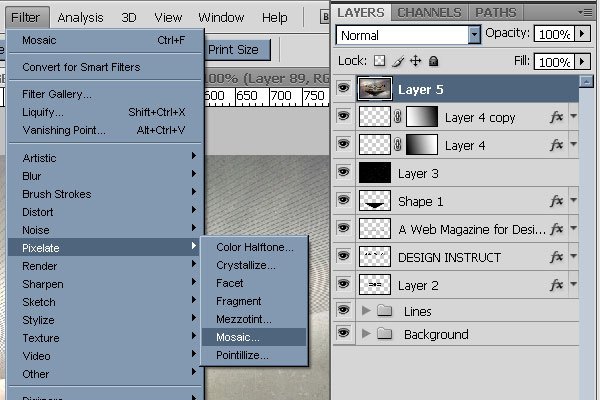
With our new layer selected, select Filter > Pixelate > Mosaic.
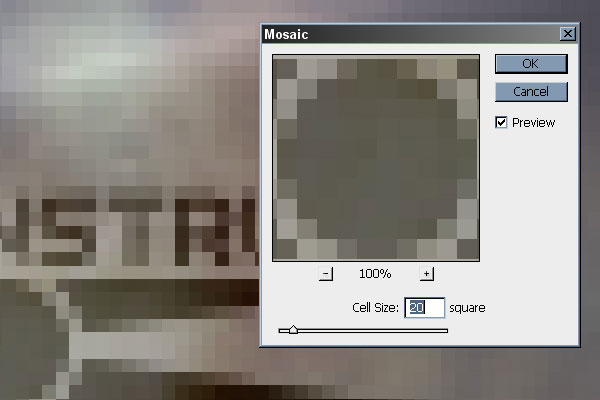
Since our grid boxes are 20×20, the size of our mosaic tiles will also be 20×20. With Mosaic filter options up, use the following settings:
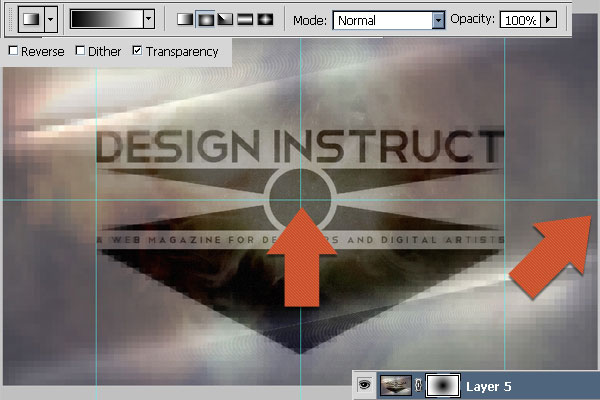
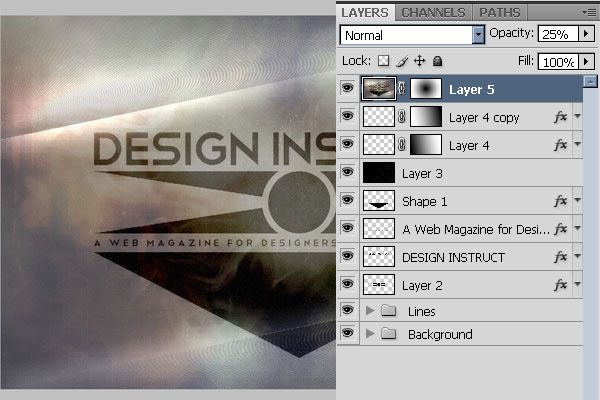
To remove some of the mosaic in the center, we will use a layer mask with a radial gradient. With the mosaic layer selected, click the Add layer mask button at the the Layers Panel.
Select the Gradient Tool (G), set the Foreground color to black, the Background color to white, and set the Gradient Tool’s style to a Radial Gradient. Click and drag from center to right edge of the canvas.
Our mosaic layer is still pretty strong strong, so change the Opacity of the layer to 25%.
Step 16: Create a Gaussian Blur Overlay
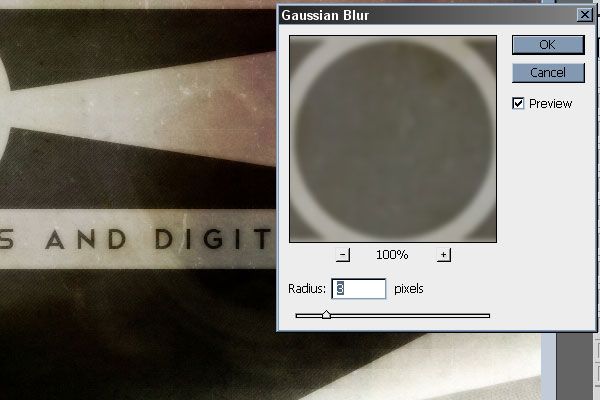
Lastly, we are now going to copy all of our visible layers again, blur it, and blend it on top of the rest to give the whole wallpaper a glow.
Press Ctrl/Cmd + Alt/Opt + Shift + E to copy all of the visible layers on to a new layer.
Set the layer’s blending mode to Overlay.
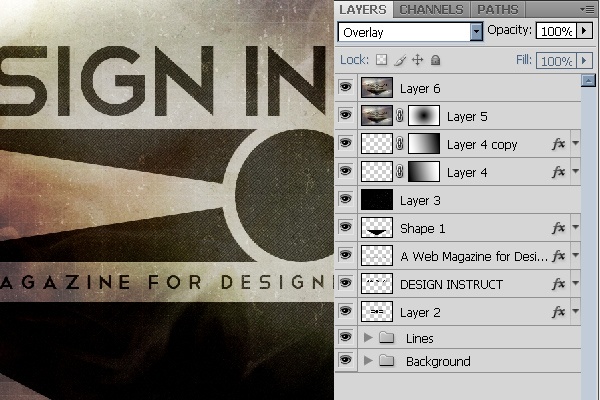
With this new layer selected, go to Filter > Blur > Gaussian Blur. Set the blur radius to 3 pixels.
Tutorial Summary
The futuristic wallpaper is now complete!
In this tutorial we utilized a grid, guides, blending modes, textures, custom patterns, filters, and Photoshop styles to reach our final wallpaper.
Using multiple textures and blending modes can create many different feels. All of the color in our wallpaper came from the “Light Texture” in step 3.
I encourage you to experiment with Hue/Saturation layers to get the exact color you want.
Download Source Files
- futuristic_textured_wallpaper (ZIP, 24.60 MB)
-
 Trevin serves as the VP of Marketing at WebFX. He has worked on over 450 marketing campaigns and has been building websites for over 25 years. His work has been featured by Search Engine Land, USA Today, Fast Company and Inc.
 -

WebFX is a full-service marketing agency with 1,100+ client reviews and a 4.9-star rating on Clutch! Find out how our expert team and revenue-accelerating tech can drive results for you! Learn more
Make estimating web design costs easy
Website design costs can be tricky to nail down. Get an instant estimate for a custom web design with our free website design cost calculator!
Try Our Free Web Design Cost Calculator
Table of Contents
- Preview
- Tutorial Resources
- Step 1: Set Up the Photoshop Document
- Step 2: Add the Textured Paper Background
- Step 3: Add In the Light Texture
- Step 4: Create a Visible Grid
- Step 5: Distress the Grid
- Step 6: Create Glowing Diagonal Lines
- Step 7: Set Up Guides
- Step 8: Create Center Circle
- Step 9: Create Triangles
- Step 10: Style the Shapes
- Step 11: Create the Type
- Step 12: Add One More Big Triangle
- Step 13: Distress the Wallpaper with a Noise Texture
- Step 14: Add Linear Dodge Glow Lines
- Step 15: Create a Mosaic Overlay
- Step 16: Create a Gaussian Blur Overlay
- Tutorial Summary
- Download Source Files
Share this article


Web Design Calculator
Use our free tool to get a free, instant quote in under 60 seconds.
View Web Design Calculator
Make estimating web design costs easy
Website design costs can be tricky to nail down. Get an instant estimate for a custom web design with our free website design cost calculator!
Try Our Free Web Design Cost Calculator