
 The rise of jQuery, MooTools, and JavaScript frameworks has given many web designers a new lease on life, adding more unique functionality into their sites. Most notably among the various cool and interesting features you can find being injected into a design is the humble lightbox (modal window). If you’ve ever come across a link or image which — upon clicking — increases in size and where the rest of the screen gets “shaded” to focus on the content, you’ll know what I’m talking about.
This tutorial aims to showcase a method of displaying content based on the lightbox, which is web accessible and (excluding Internet Explorer) will require no scripting at all. Sound like fun? Well, let’s explore the subject further!
Demonstration
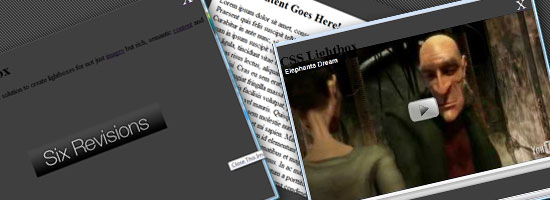
Click the preview image below to see a live demonstration. 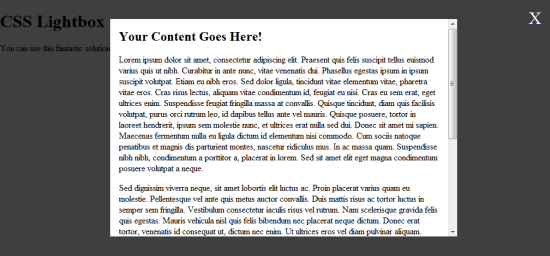
What About Scripting?
There’s a lot to be said about the benefits of using client-side scripting for this. While we are certainly not in the cut-and-paste era that leads to the kind of crimes against JavaScript many coders would like to see punished, we do, to this day, still have an uncomfortable reliance on scripts and frameworks in order for our websites to function.
Perhaps it seems a little hypocritical in this instance for me to critique the use of scripting (as Internet Explorer users will require scripting enabled to use this functionality), but like all things, we sometimes need to compromise our code to ensure compatibility (especially with that browser)!
Why Not Just Use JavaScript?
In the sense of the current scripting frameworks, I’m not going to say that they are inherently bad because the likes of jQuery often gracefully degrade with good levels of success — you guys can put away the knives and flame-lit torches now! However, the sad facts are that, due to security issues, widespread abuse and the intrusive potential of client-side scripting, it’s quite easy to understand why a large number of people do not (or cannot) make use of scripting.
Therefore, a solution is required. And hopefully for you CSS3 fans, you’ll find this simple, easy-to-use code to be a welcome improvement.
Browser Support of this CSS Lightbox
To give you a quick introduction before we begin producing the code itself, it’s worth mentioning that I’ve tried the code in a variety of browsers and can say for sure that it works in all recent versions of Mozilla Firefox, Google Chrome, Apple Safari and Opera (which is all great news).
With a little bit of unobtrusive scripting that replicates the CSS3 techniques, it’ll also run smoothly within IE 6, 7 and 8. The other fantastic news is that current test versions of IE9 support CSS3, so this may very well be the best JavaScript-free solution there is in the near future.  Internet Explorer is the usual culprit when it comes to lacking in standards support.
Magic Markup!
To begin our quest for a much more compatible lightbox, the first thing we need is some general HTML markup. Much of the below won’t surprise you in the slightest as it’s pretty standard.
However, for this example, and to showcase how durable this cool method is, we’ll produce three individual lightboxes. One will be for an image, one will be for a block of scrollable content and the final one will hold a YouTube video. What more could you ask for?
To begin, let’s create the basics and have three fragment links which will go to the correct lightbox (you’ll learn how a bit later on).
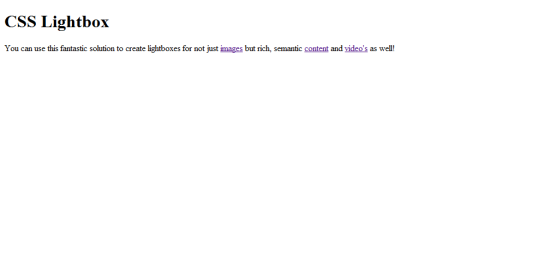
<!DOCTYPE html PUBLIC "-//W3C//DTD XHTML 1.0 Strict//EN" "http://www.w3.org/TR/xhtml1/DTD/xhtml1-strict.dtd"> <html lang="en"> <head> <meta http-equiv="content-type" content="text/html; charset=utf-8" /> <title>CSS Lightbox</title> </head> <body> <h1>CSS Lightbox</h1> <p>You can use this fantastic solution to create lightboxes for not just <a href="#image" title="Image Lightbox">images</a> but rich, semantic <a href="#content" title="Content Lightbox">content</a> and <a href="#video" title="Video Lightbox">video's</a> as well!</p> </body> </html>
 Not much going on at this stage, a simple HTML document with extra links. So far, things are pretty simple; you have a heading and paragraph with some links that, upon clicking, will currently do nothing. The next stage in the process, however, is all important.
We need to add the container for each lightbox to appear within and give them their appropriate values. To give you an idea as to how each of the three lightboxes work, you’ll need to examine (and add) the code into your source code editor. To better understand how it works, let’s talk about each item individually.
<div class="lightbox" id="image"> <div class="w300 h60"> <img alt="Six Revisions" height="98" width="255" src="logo.jpg /> </div> <p class="close"><a href="#" title="Close This Image Lightbox">Close <span>X</span></a></p> </div>
Each lightbox you wish to provide will require a div element container that contains the id attribute you wish to link too. That id will reference what you’ll need to attach to the href anchor to start the navigation process, not forgetting you’ll also need the lightbox class value on each you include. Are you with me so far?
Good! Once you have the container that references the lightbox, you’ll need to include both a div (which will hold the lightbox content and will have the width and height declared through class values like in the above) and a paragraph with an anchor to act as the “shader”. Using the above source code, you should find yourself with a working lightbox that contains an image. In this example, I used the Six Revisions logo. You can indeed link to any image of any size, taking into account the viewport space available.
A Little Bit More About the “Shader”
To better understand how this gets its visual appearance, the secondary div layer works independently from the close anchor which filters in the background. It’s essentially a cascading/tiling effect at work. 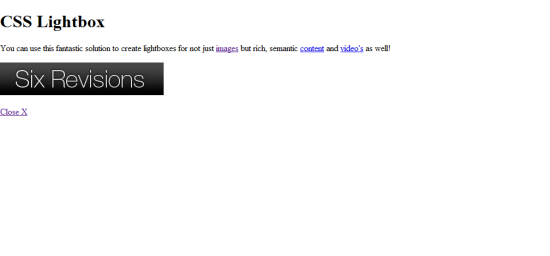 The first lightbox has appeared, and it contains an image. If you look at any modern lightbox, the most common characteristic you will see is that you have a semi-transparent layer which covers over the rest of the page drawing focus to the lightbox content.
Upon clicking on this layer, it will return you to the page. This is the very reason why each lightbox requires a closing anchor.
What Should the href Value Be?
The great thing is that you could even link the href to another lightbox if you wanted it to do something other than close (using the null fragment link).
What Can the divs Contain?
As for what’s inside the div, it’s entirely up to you. You can use any block or inline elements (the lightbox will house any HTML element). In the first example, we had an image; let’s add some content within the code:
<div class="lightbox" id="content"> <div class="w60p h400 scroll"> <h2>Your Content Goes Here!</h2> <p>Lorem ipsum dolor sit amet, consectetur adipiscing elit. Praesent quis felis suscipit tellus euismod varius quis ut nibh. Curabitur in ante nunc, vitae venenatis dui. Phasellus egestas ipsum in ipsum suscipit volutpat. Etiam eu nibh eros. Sed dolor ligula, tincidunt vitae elementum vitae, pharetra vitae eros. Cras risus lectus, aliquam vitae condimentum id, feugiat eu nisi. Cras eu sem erat, eget ultrices enim. Suspendisse feugiat fringilla massa at convallis. Quisque tincidunt, diam quis facilisis volutpat, purus orci rutrum leo, id dapibus tellus ante vel mauris. Quisque posuere, tortor in laoreet hendrerit, ipsum sem molestie nunc, et ultrices erat nulla sed dui. Donec sit amet mi sapien. Maecenas fermentum nulla eu ligula dictum id elementum nisi commodo. Cum sociis natoque penatibus et magnis dis parturient montes, nascetur ridiculus mus. In ac massa quam. Suspendisse nibh nibh, condimentum a porttitor a, placerat in lorem. Sed sit amet elit eget magna condimentum posuere volutpat a neque.</p> <p>Sed dignissim viverra neque, sit amet lobortis elit luctus ac. Proin placerat varius quam eu molestie. Pellentesque vel ante quis metus auctor convallis. Duis mattis risus ac tortor luctus in semper sem fringilla. Vestibulum consectetur iaculis risus vel rutrum. Nam scelerisque gravida felis quis egestas. Mauris vehicula nisl quis felis bibendum nec placerat neque dictum. Donec erat tortor, venenatis id consequat ut, dictum nec enim. Ut ultrices eros vel diam pulvinar aliquam. Phasellus non nisi vitae ligula imperdiet dapibus eleifend sed neque. Morbi gravida dignissim turpis eu auctor. Morbi pellentesque urna vitae nunc dictum elementum. Aliquam erat volutpat. Aenean urna nibh, pretium ut accumsan ut, luctus eget nibh. Nulla sollicitudin fermentum turpis eget rutrum. Integer dignissim dui turpis. Morbi metus libero, suscipit blandit dignissim aliquam, sodales non mi. Proin id augue odio, sit amet gravida mauris.</p> <p>Proin a dignissim orci. Nam nec urna nisi, in blandit lorem. Nulla cursus ornare rhoncus. Nunc lectus orci, tristique et aliquet sed, venenatis et felis. Nullam sodales orci at est pharetra nec aliquam risus scelerisque. Nullam varius, nisi ut sagittis scelerisque, nulla mauris tempus magna, quis pellentesque sem erat a diam. Cras lectus est, dictum ut consequat ut, adipiscing sit amet sapien. Curabitur tincidunt varius gravida. Quisque augue sem, commodo sed molestie venenatis, cursus vehicula lorem. Praesent scelerisque, tortor a euismod malesuada, ipsum ligula semper odio, ultricies molestie sapien metus condimentum felis. Vivamus hendrerit gravida interdum. Fusce at purus eu orci laoreet lobortis. Aliquam cursus mi at tellus fringilla dictum. Sed nec libero dolor. Integer nec neque at mi malesuada tincidunt.</p> </div> <p class="close"><a href="#" title="Close This Content Lightbox">Close <span>X</span></a></p> </div>
 For all whom understand the value of dummies, some Lipsum content is added.
Add a YouTube Video
And to round things off even further, let’s add a YouTube video into the mix:
<div class="lightbox" id="video"> <div class="w640 h386"> <object type="application/x-shockwave-flash" width="640" height="385" data="http://www.youtube.com/v/bsGEWHNJ3s8"><param name="movie" value="http://www.youtube.com/v/bsGEWHNJ3s8" /></object> </div> <p class="close"><a href="#" title="Close This Video Lightbox">Close <span>X</span></a></p> </div>
 Video on demand, that’ll work in the lightbox too!
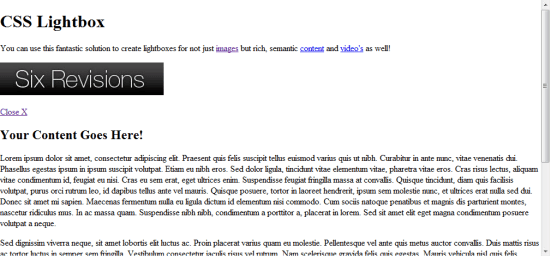
Pretty cool isn’t it? At this stage, we have completed the entire HTML file that this demonstration will use. If you want to preview the results in your web browser, you’ll notice that as well as the heading and paragraph, there will now be the three pieces of information on the page (the image, the content block and the video), each with a “Close” link right below it.
Right on :target
At this stage, you’re probably wondering how we’re going to ensure that only the right content appears when it’s needed.
And that’s a good question! We are going to use a cool CSS3 pseudo-selector called :target (which styles based on the anchor). Perhaps you’ve come across the :target selector before, perhaps not.
Basically, it cleverly allows you to apply specific style to an element if its id matches the fragment identifier, which is the hash (#) symbol followed by text usually found in page bookmarks. For example: index.html#content (you’ll see it in the address bar). So, without any further ado, it’s time we began formatting our lightbox to perform the required task whenever this fantastic selector is activated.
You now know why we give the three links in the first piece of code those unique URLs (and gave each div a matching id).  Fragment links are best indicated by the # (hash) character at the end of a URL. For the following piece of code, I’ll provide everything you need using a
 style element within the <head> of the document. Generally, this is considered bad practice because all CSS styles should be separated from the structure.
However, as this is simply an example and it works unobtrusively, you can easily place all of the stylistic code in an external file. For simplicity, I’ll keep it in-line. To begin, we’ll start by adding in the easy-to-follow snippets of code such as removing the padding and margins from the document.
Also, we’ll hide the lightboxes off-screen until they’re required using some absolute positioning and negative margins.
<style type="text/css"> html, body { height: 100%; overflow: hidden; width: 100%; margin: 0; padding: 0; } body { overflow-y: auto; } .lightbox { left: -999em; position: absolute; } </style> Note: It is entirely possible for you to hide your three lightboxes when they’re not in use using the property display: none. However, as this can affect how some screen reading software will interact with your page, I’ve used negative positioning to get the same effect.
 With lightboxes offset, things disappear. Upon refreshing your browser at this stage, you’ll notice that the three previously visible lightboxes will be hidden, which is great. However, when you click on the links, nothing happens! Don’t worry, your lightbox isn’t broken.
All we need to do is add in the code to activate the two layers (the “close this” lightbox anchor, that gives the fade effect and the lightbox content itself).
.lightbox:target { bottom: 0; left: 0; right: 0; top: 0; position: absolute; } .lightbox:target .close a { background: rgba(0, 0, 0, 0.75); bottom: 0; left: 0; right: 0; top: 0; position: absolute; z-index: 1; } .close span { color: #FFFFFF; font-size: 2em; text-indent: 0; position: absolute; right: 0.5em; top: 0.5em; } .close {text-indent: -999em;} Keeping things simple, the above code will span the lightbox to every corner of the browser viewport using absolute positioning. The second line of code will reinforce this code on the anchor itself and will give it a z-index (for priority over the other stuff on the page) and a background which makes use of opacity in browsers that natively support CSS3 alpha transparency.
The third line will use the span element on the “close” button to give it some emphasis for people to know that clicking in the anchor closes the lightbox. The last line will hide the text in the faded section (for full effect). Note: It’s worth pointing out that if your content scrolls and you wish the lightbox to follow the scroll action, you can replace position: absolute with position: fixed, however IE6 will not support it.
For the example, I’ve used absolute positioning for simplicity and to showcase its potential usage. 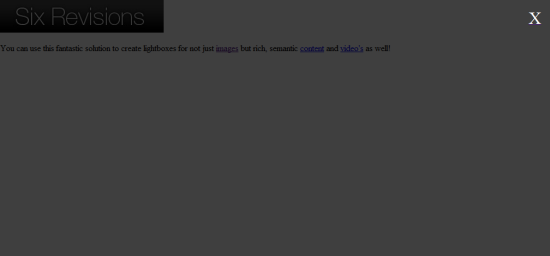 Now when you click on a lightbox link, the transparency effect flourishes. If you refresh your browser with the above code, you’ll notice upon clicking any element that you get that amazing faded effect which will span the entire content. And you should also have a neat little “X” button in the top-right corner just to help reinforce the effect upon clicking outside of the lightbox.
The problem now is we need to get the lightbox contents itself positioned correctly and looking great on the screen. So below, you’ll find the last bits of CSS to align the content and offset it based on the width of the contents specified.
.lightbox:target div { background: #FFFFFF; position: absolute; left: 50%; top: 50%; z-index: 99; } .w60p { margin-left: -30%; width: 60%; } .w300 { margin-left: -150px; width: 300px; } .w640 { margin-left: -320px; width: 640px; } .h60 { height: 60px; margin-top: -30px; } .h400 { height: 400px; margin-top: -200px; } .h386 { height: 386px; margin-top: -193px; } .scroll { overflow-y: scroll; padding: 0 1em; } If you refer back to the HTML code, you’ll see that each lightbox container has class values such as w300 (for width 300px) or h400 (for height 400px) or w60p (for width 60%).
The values for each lightbox were simply calculated by measuring the width and height of the contents required and then setting the container width and height to match the dimensions. Take for example the image we used: As that had specific width and height needs, a specific width and height was applied to the lightbox container, and for each, a negative margin for half that value was given to give it accurate centering. Note: You may have noticed that a scroll class was also added to match the width and height classes for each lightbox.
Simply put, if you have lots of content within the container and you give it a fixed width and height, the scroll mechanism will allow it to overflow with scroll bars attached. Lovely! 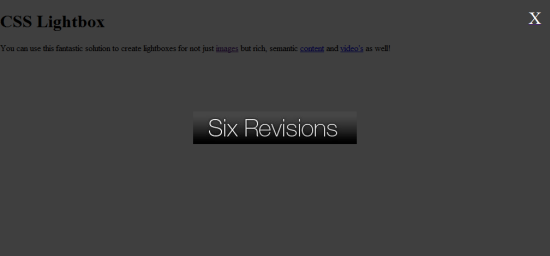 Adding the next bundle of code will properly align the lightboxes content. Now try refreshing the page again and — Voila!
— just like magic, whenever you click one of the links, its content will load in a container, in the center of the screen. And the fantastic thing is, it will look and function like any other lightbox. Clicking inside the lightbox will act normally, but clicking outside of it will restore the main screen (and thereby hide the lightbox contents as they’re not the fragment).
If you use Firefox, Chrome, Safari or Opera, this code will work perfectly and is a 100% pure CSS way of implementing a lightbox. But for Internet Explorer, we (as usual) have compatibility issues to deal with! Tip: Just imagine what you can do with these target lightboxes: You could have anything from the content shown above, right through to setting the width and height of the container to 100% and have a literal different “page” appear with overflow enabled on a single page web design.
Woot!
Compatibility Crisis
Without going into a great deal of detail, the below JavaScript code has been produced to deal with Internet Explorer’s lack of support for :target (this could well be the first effective and simple solution for this issue). As with the style, I’ve attached the content inline using <script> tags in the header, but it’s entirely graceful and can appear in an external file.
As long as the script is placed below the <style> element, you shouldn’t encounter any issues in regards to the emulation of the code.
<script type="text/javascript"> <!-- /*@cc_on @if (@_jscript_version > 5.6) function bootup(){ var tds = document.getElementsByTagName("a"); lightbox(); for( var x=0; x < tds.length; x++ ){tds[x].onclick = function(){setTimeout(lightbox, 1);};} } function lightbox(){ var counted = document.getElementsByTagName("div"); for( var x=0; x < counted.length; x++ ){ if ( counted[x].className == "boxfocus" ) { counted[x].className = "lightbox"; } } if (location.hash.substr(1) == "") {} else { document.getElementById(location.hash.substr(1)).className = "boxfocus"; } } window.onload=bootup; @end @*/ // --> </script> Keeping the above code as simple as possible, it makes use of conditional comments (for JavaScript) to ensure you are using Internet Explorer (hence why it references Jscript) thereby ensuring the code will not interfere with good browsers which render correctly. When IE is verified, and the page loads, the bootup function monitors whenever an anchor is clicked.
When this event is triggered, the lightbox function is activated and it simply applies a set of classes to the div that matches the hash (#) in the address bar (fragment link), while restoring all other lightbox instances back to the default. Essentially it says “You’re using IE? OK.
You clicked a link or loaded a page? OK. The link clicked references a lightbox?
OK, let’s set that in motion and reset any others which may be active”. If you’re not too JavaScript-savvy, it may not make a lot of sense, but the code requires no user maintenance and if you use the code, you’ll just have to trust me that it’ll do the job. Except for those classes to be applied, which have the alternative to the :target stuff, we’ll need to add these into the style in the header. And to overcome IE’s lack of opacity support, we’ll add a transparent repeating PNG image in its place.
.boxfocus { bottom: 0; left: 0; right: 0; top: 0; position: absolute; } .boxfocus div {background: #FFFFFF; position: absolute; left: 50%; top: 50%; z-index: 99; } .boxfocus .close a { background-image: url('trans.png'); bottom: 0; left: 0; right: 0; top: 0; position: absolute; z-index: 1; } Those of you with eagle eyes may have noticed that the properties of the boxfocus classes, which sit in place of those using the :target pseudo, contain mostly the same properties and values as their counterparts. So you may well ask: Why not group them together? While it may seem like a smart idea to reduce repeating code, unfortunately the default behaviour for IE and other browsers is that unknown or invalid code (as it would appear to IE) should be totally ignored and deleted.
Which means, if grouped, it wouldn’t work, so we need the repeated CSS as a separate entity. 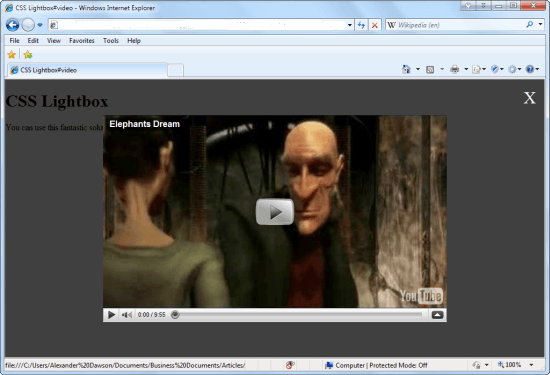 With a bit of caring JavaScript, Internet Explorer will work like any other browser. If you now refresh the page again and open it in Internet Explorer, you will find that the lightbox should now work properly in that browser. It may not be a perfect solution to require extra CSS and some conditional JavaScript to work the mojo, but alas, this isn’t a perfect world, so we must use it to keep things as compatible as possible.
On the bright side of things, Internet Explorer 9 has full support for target so in the future, none of that extra code will be needed.
Setting Standards
And on that note, the example is complete.
- It’s totally semantic: with
divcontainers and the use of any HTML elements you wish within the container - It’s accessible: it’ll work with screen readers
- It’s not as dependent on scripting as the jQuery solutions and you can bookmark their behaviour
- And — all things considered — it’s more graceful in that the future looks good for the selectors’ widespread browser support without the need of any scripting
Get Involved with CSS3. Please.
Hopefully this tutorial will inspire you to get involved in testing modern standards like CSS3 because many of these elements already have basic native support. While there is a real need at this time to make things gracefully degrade (and this option certainly can achieve that), it’s worth highlighting that the potential for the :target pseudo-class goes far beyond lightboxes: It could remove the future need for JavaScript in single-page websites, content swapping, and other process-intensive functions. While the need for workarounds (like the JavaScript we needed to use) won’t disappear overnight, the future of web standards is pretty bright!
Download
- css-light-box (ZIP, 0.007 MB)
Related Content
-
 President of WebFX. Bill has over 25 years of experience in the Internet marketing industry specializing in SEO, UX, information architecture, marketing automation and more. William’s background in scientific computing and education from Shippensburg and MIT provided the foundation for RevenueCloudFX and other key research and development projects at WebFX.
 -

WebFX is a full-service marketing agency with 1,100+ client reviews and a 4.9-star rating on Clutch! Find out how our expert team and revenue-accelerating tech can drive results for you! Learn more
Make estimating web design costs easy
Website design costs can be tricky to nail down. Get an instant estimate for a custom web design with our free website design cost calculator!
Try Our Free Web Design Cost Calculator
Share this article


Web Design Calculator
Use our free tool to get a free, instant quote in under 60 seconds.
View Web Design Calculator
Make estimating web design costs easy
Website design costs can be tricky to nail down. Get an instant estimate for a custom web design with our free website design cost calculator!
Try Our Free Web Design Cost Calculator
What to read next