Preview

Step 1: Create the Reference Shape of the Hat
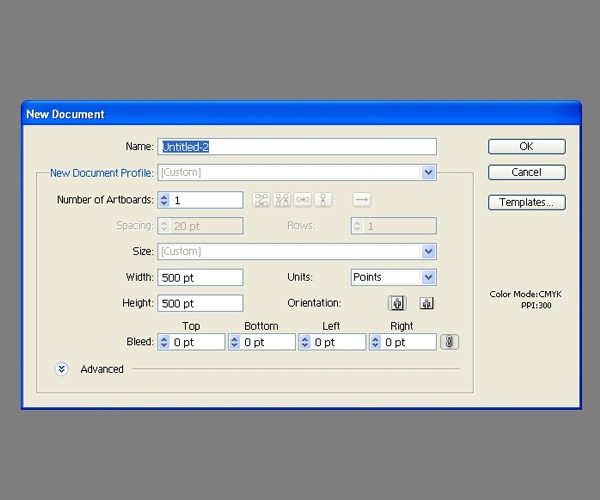
Fire up Illustrator, create a new document (Ctrl/Cmd + N), and let’s set the artboard to 500x500px in size.
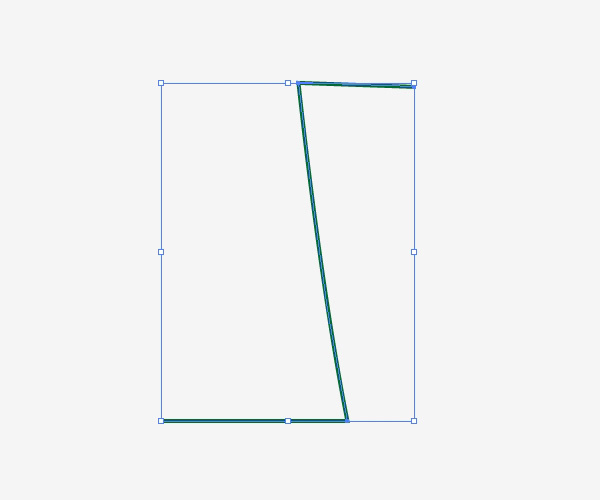
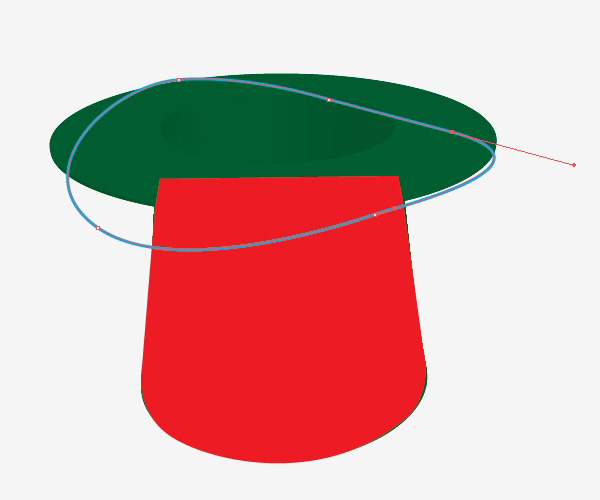
First, we need to create a vector path which we will use for the 3D Revolve effect. Grab the Pen Tool (P) and draw the path shown below.
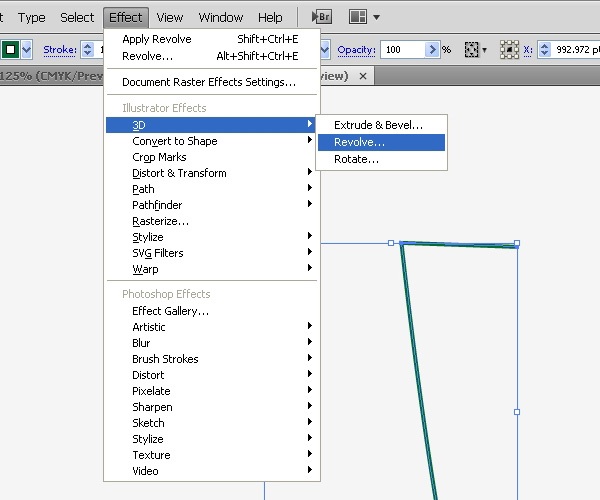
Go to Effect > 3D > Revolve. In the Revolve option window, we can adjust the settings for the shape of the hat.
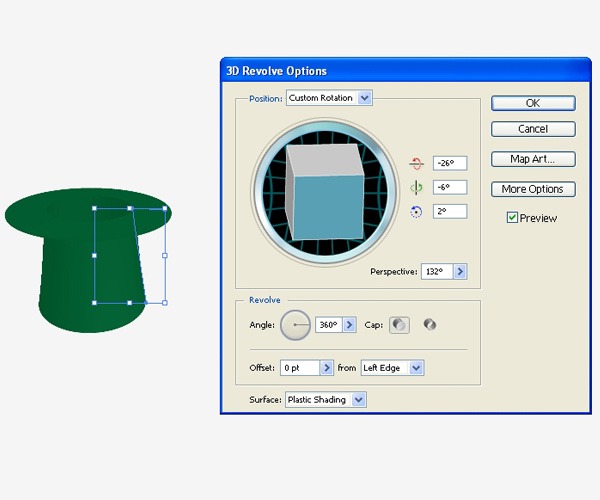
Play around with the settings until you are satisfied with the result.
Once satisfied, press OK to apply the effect.
We need to make edits to the shape, so go to Object > Expand Appearance.
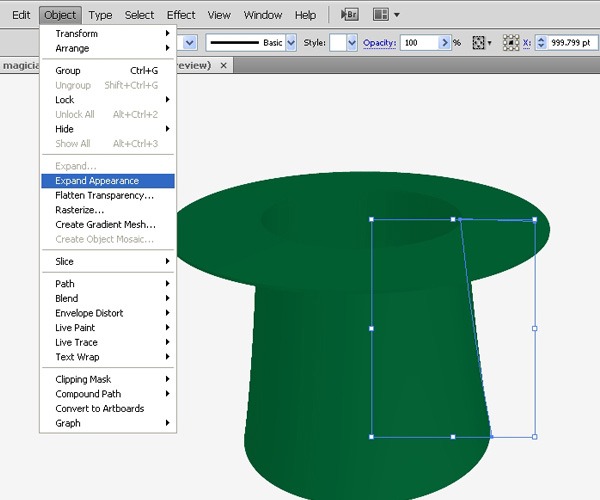
We will actually just use this shape as a reference; we need to trace it with the Pen Tool. If you take a look at our reference object, you will notice lots of anchor points and areas we actually don’t need.
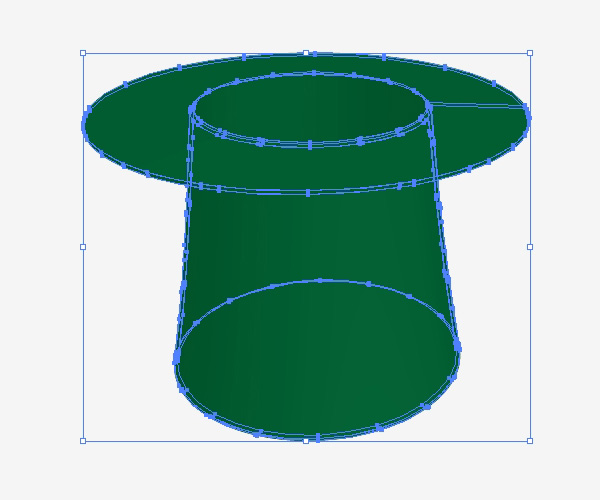
Instead of cleaning it up, it will be much easier to just create a new shape based on it. This also gives us more control with our illustration; we can make changes on-the-fly and let our creativity drive the process.
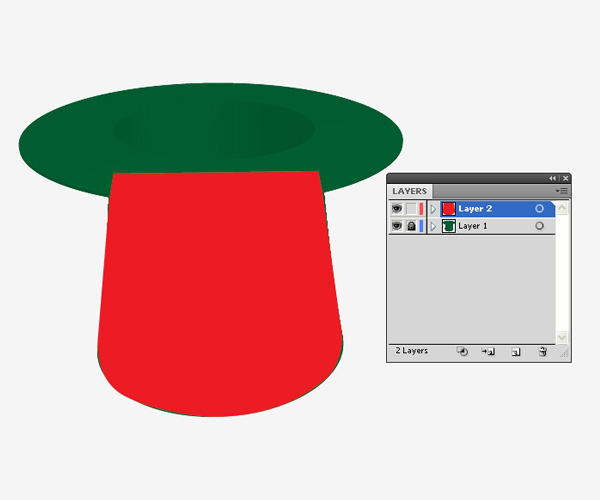
Step 2: Lock the Reference Shape
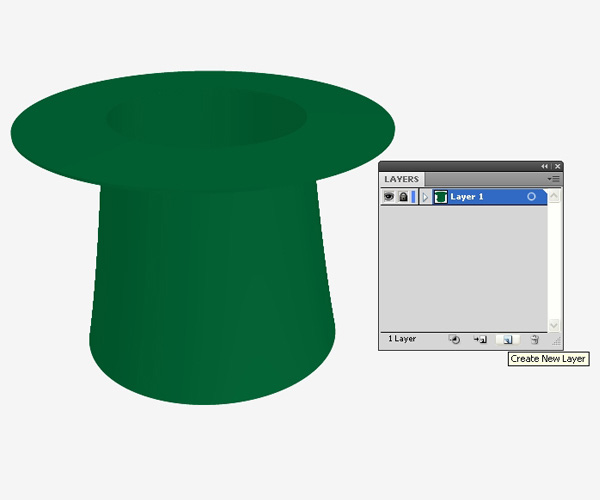
In the Layers Panel, lock the layer with the reference 3D hat so that we don’t accidentally move it.
Then, create a new layer above it.
This layer is where we will draw the actual hat.
Step 3: Draw the Lower Part of the Hat
Grab the Pen Tool (P) from the Tools Panel and start drawing the lower part of the hat (this part of a hat is often called the crown).
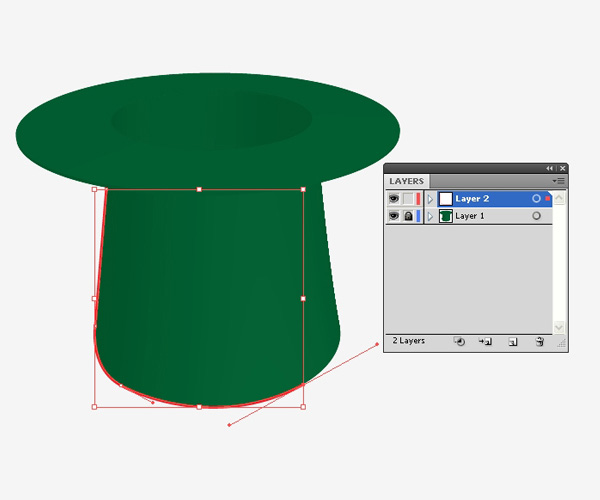
As you can see above, I wasn’t perfect with the tracing. That is alright.
Step 4: Draw the Upper Part of the Hat
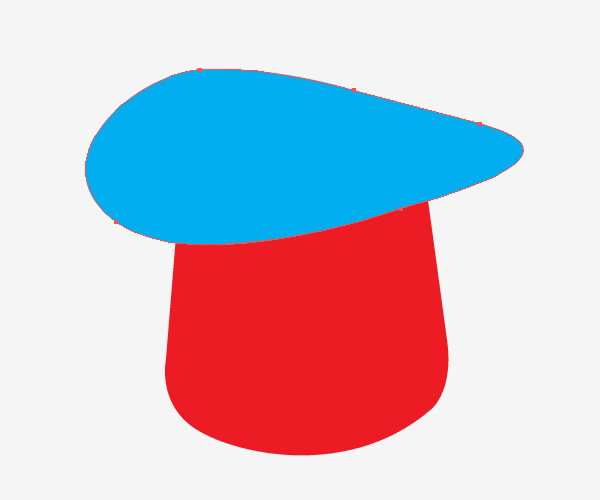
Now we will create the upper part of the hat (in hat lingo, it’s called the brim). We’ll make a few changes in order to create the proper perspective.
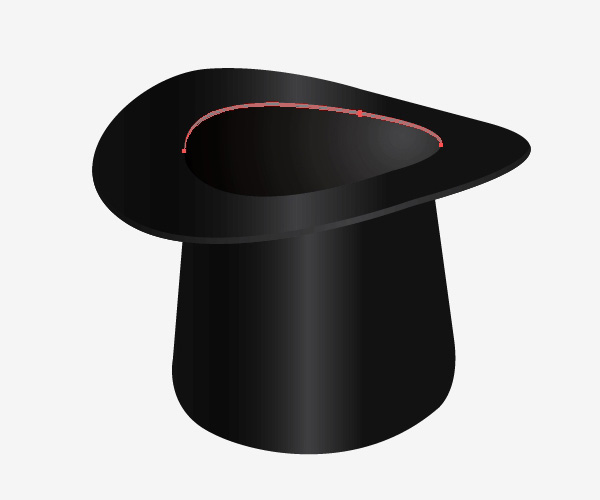
With the Pen Tool (P), create the shape of the brim of the hat. As you draw this shape, don’t forget that the angle with respect to the viewer’s perspective is quite important.
Choose the Direct Selection Tool (A) and manually adjust the anchor points of the brim until you achieve edges that look smooth.
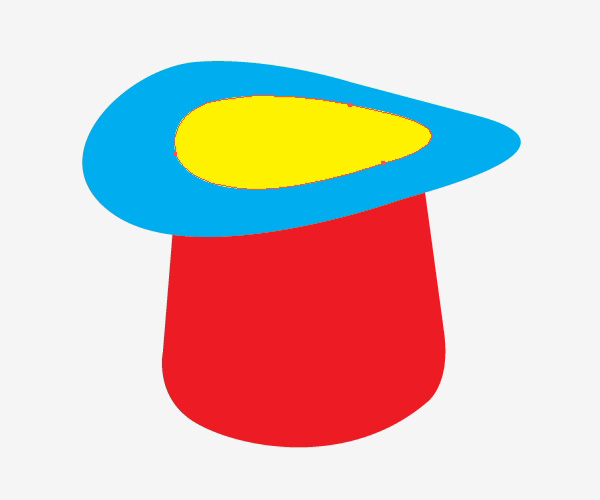
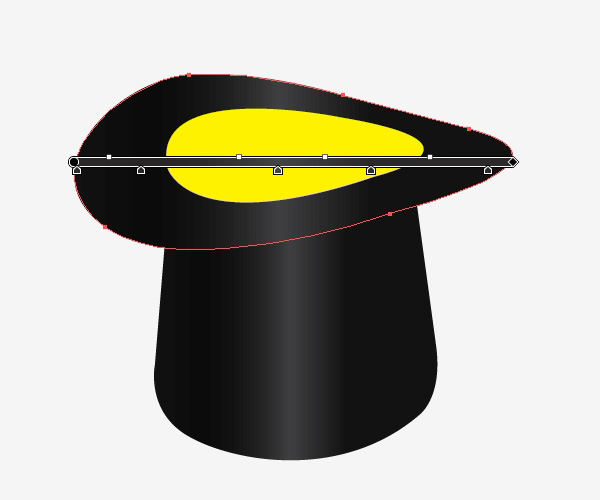
We also need a hole so the magician can wear the hat! Draw a yellow shape on top of the brim.
I chose yellow just to make it easier to see (but we’ll change this color later).
At this point, you can delete the reference object we’ve created in Step 1. Our imagination and creativity allowed us to create a shape that is more interesting.
Step 5: Applying Color Gradients
It is time to add color to our magician’s hat. Color gradients will help us do that. To start, make sure your Gradient Panel is open (Window > Gradient).
Since magician’s hats are often lined with felt fabric, we have to try to simulate a felt fabric surface look.
To the lower part of the hat, we will apply a dark linear gradient.
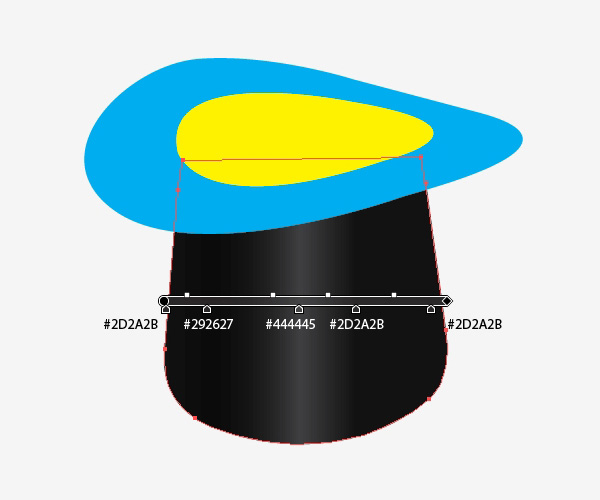
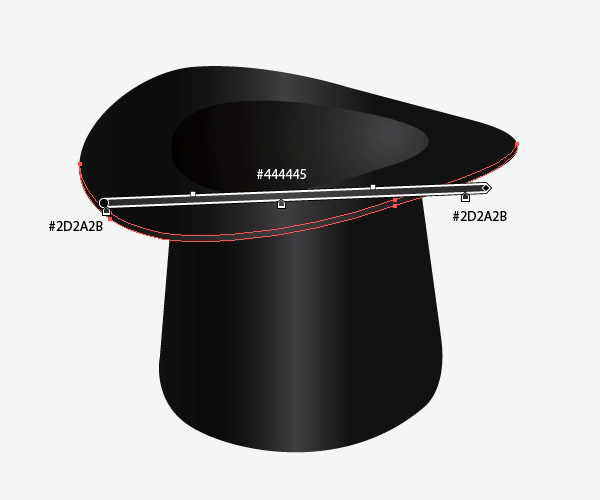
For the brim of the hat, use the same dark linear gradient. The highlight on the brim should be almost on the same place as it is on the lower part of the hat (we offset it a little bit to give it a sense of realism).
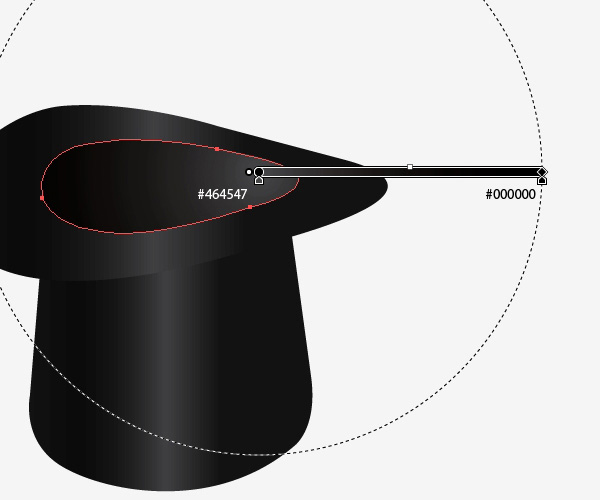
For the hole, we will use a radial gradient. The light gray part of the gradient will simulate the effect of the light reflecting off the fabric’s silky surface.
Step 6: Create an Edge on the Brim
Our magician’s hat is progressing nicely, but it’s looking quite flat.
There is no depth and it looks quite boring. We’ll take care of that in the next few steps.
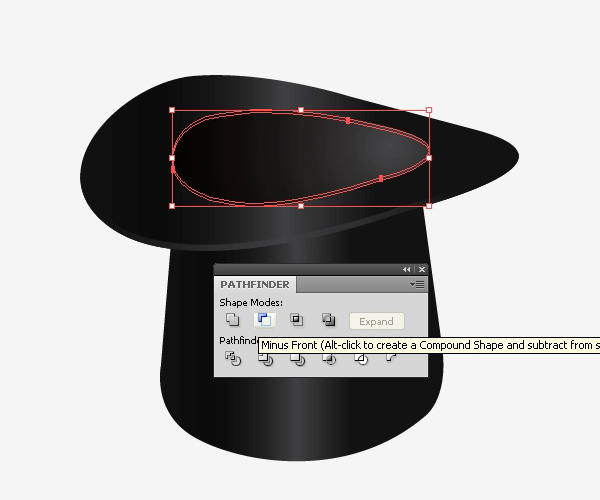
First, let’s create the edge on the hat’s brim. Duplicate (Ctrl/Cmd + C, Ctrl/Cmd + F) the brim twice and nudge one of the copies upward a pixel or two.
Select both copies and, under the Pathfinder Panel, hit the Minus Front button.

Apply the linear gradient to the resultant shape.
Step 7: Add a Gradient in the Hole
The light is causing a highlight on almost every edge. This is the reason why we should repeat the previous step (Step 6) for the inner part of the hat.
Select the hole of the hat with the Selection Tool (V) and duplicate it (Ctrl/Cmd + C, Ctrl/Cmd + F) twice.
Nudge one of the copies downward a pixel or two. Select both copies and, under the Pathfinder Panel, hit the Minus Front button.
Set the Fill color for the inner highlight to a gray color (#666666).
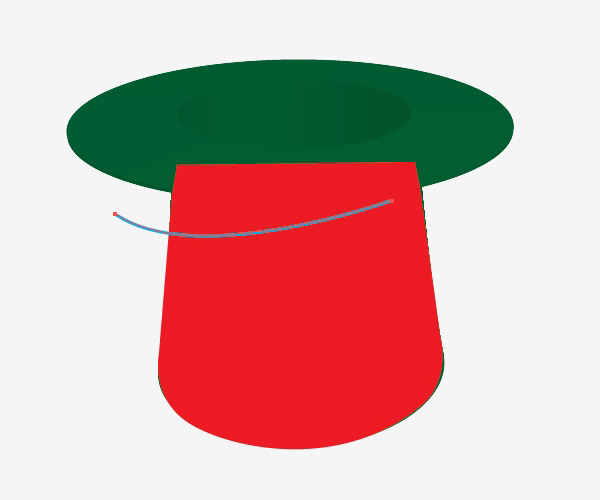
Step 8: Creating the Ribbon
This element will enhance the complexity of our illustration. It is also quite simple to make.
All we have to do is create a shape of the ribbon and apply a gradient to it. In this tutorial, we will apply a gray color gradient, but feel free to use any other color (purple, blue, red — anything you like).
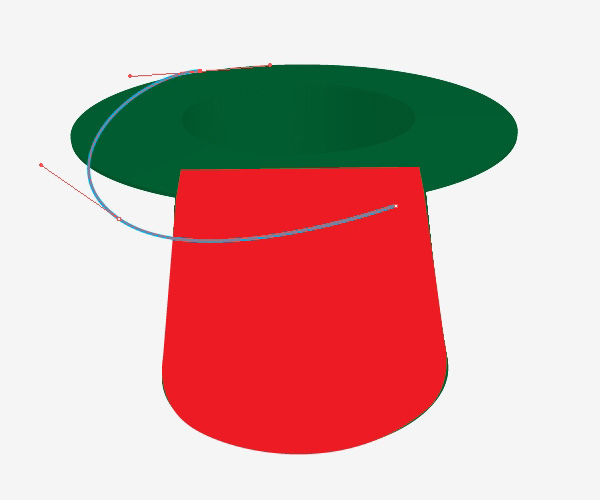
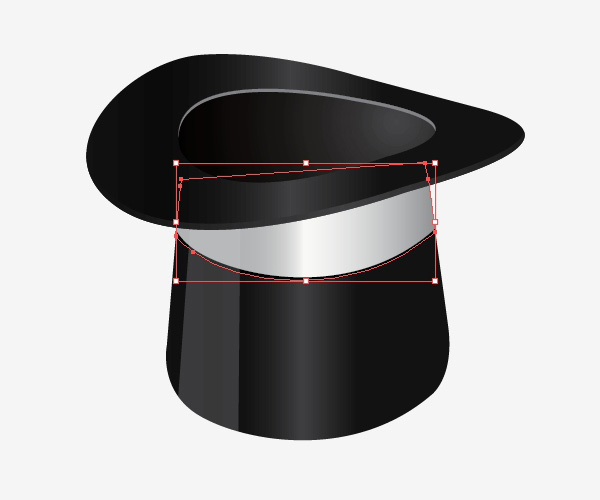
Grab the Pen Tool (P) from the Tools Panel. Try to follow the lower edge of the hat while drawing the shape of the ribbon.
Don’t worry, you can draw it bigger then you actually need because we will crop it to fit our hat. You should end up with something like this:

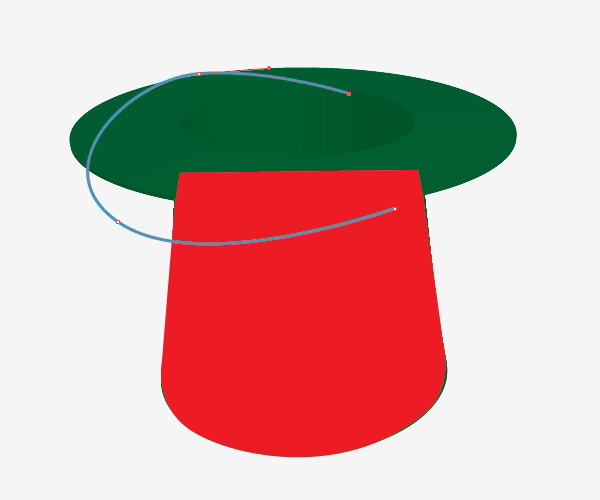
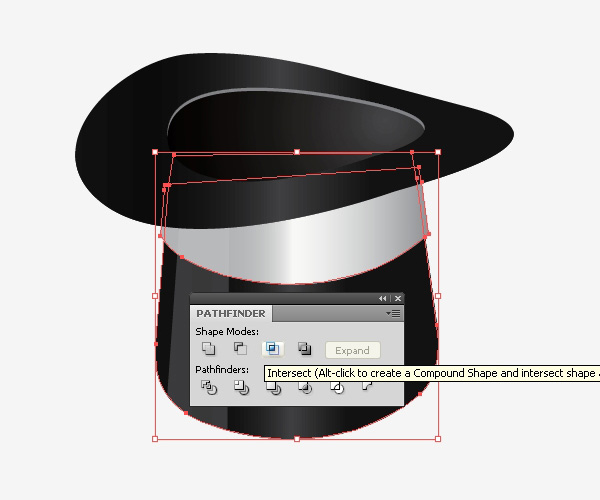
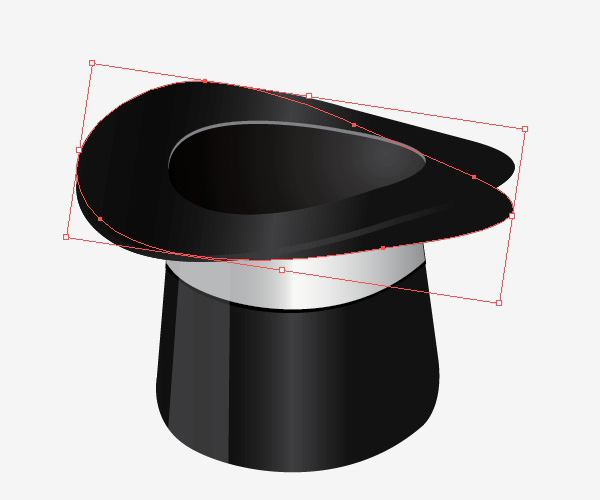
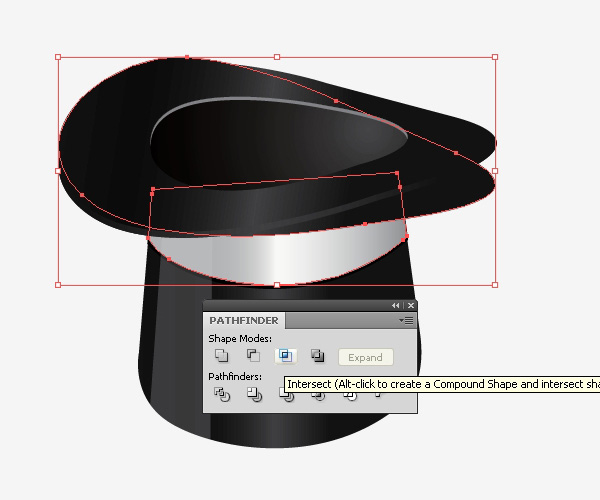
Duplicate the lower part of the hat (the crown). Select the duplicate and the red shape we drew.
Under the Pathfinder Panel, hit the Intersect button.
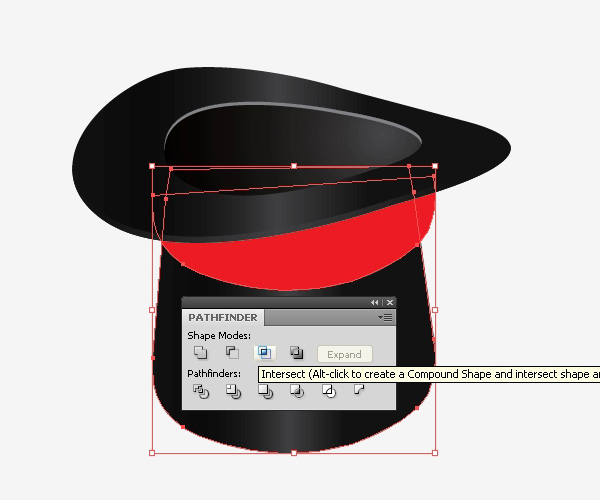
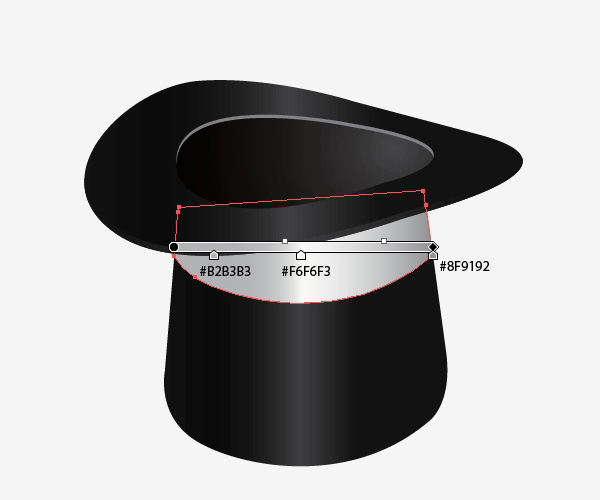
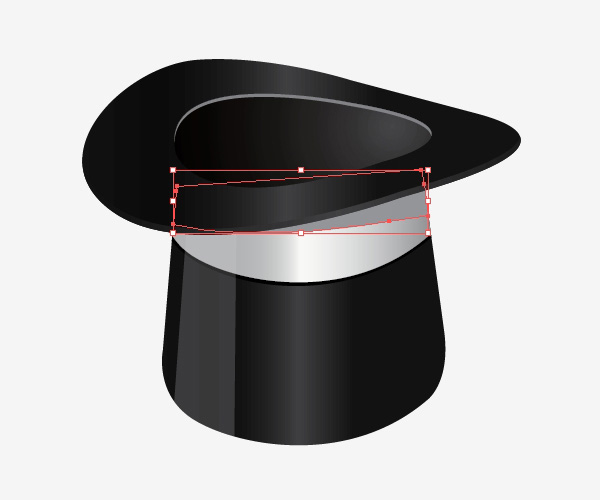
Apply a linear gradient (in this case, it is a gray gradient). If you want to use any other color, that’s fine, just don’t forget to create a highlight in the middle (the highlight should correspond to the highlight on the lower part of the hat).
Step 9: Create Light Reflections on the Hat
There are few more things we could add to make our illustration more interesting. One of them is a light reflection on the hat.
There are many techniques to go about this; I’ll show you one of them.
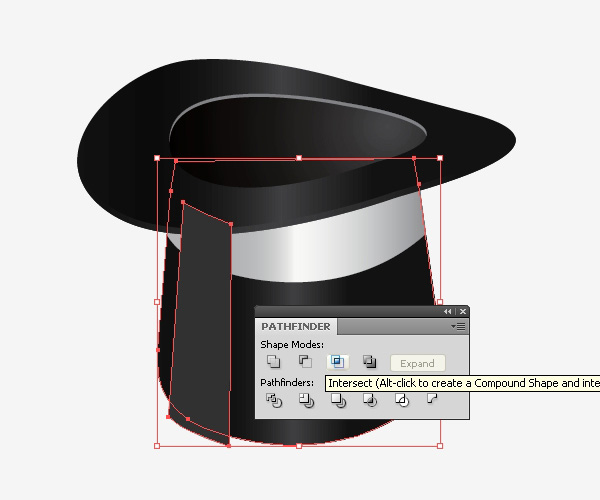
Select the Pen Tool (P) from a Tools Panel and create the shape shown below.
Duplicate the lower part of the hat. Select the copy and the shape we drew and, under the Pathfinder Panel, hit the Intersect button.
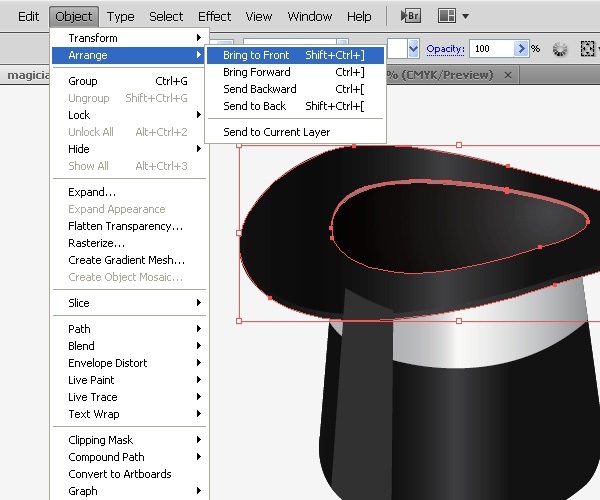
Select all parts of the brim and then go to Object > Arrange > Bring to Front (Shift + Ctrl/Cmd + ]).
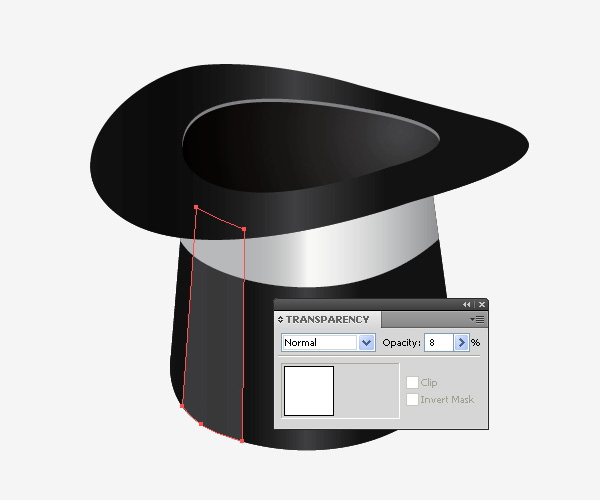
Set the Fill color for the reflection to white and lower the Opacity to 8.
Step 10: Create Shadows for the Hat
Duplicate both the ribbon and the lower part of the hat. Nudge the copy of the ribbon 1px downward and scale it up slightly.
Select both copies and, under the Pathfinder Panel, hit the Intersect button.
Set the Fill color of the shadow to black. Choose Object > Arrange > Send Backward (Ctrl/Cmd + [).
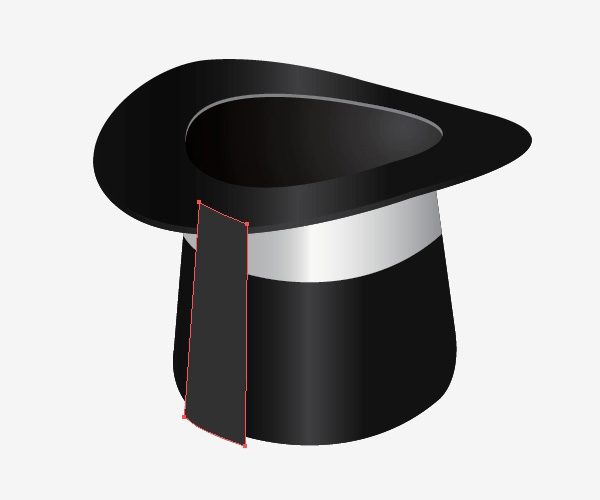
Since the brim should also be casting a shadow, we will need to create one more shadow.
Select the hat’s brim, duplicate it and rotate the duplicate.
Duplicate the gray ribbon. Select the copy of the ribbon and the copy of the brim that we just rotated and, under the Pathfinder Panel, hit the Intersect button.
Set the Fill color of the shadow to #808080.
Step 11: Creating a Magic Stick
We’re done with that hat.
But a magician’s hat isn’t really complete without a magic stick (after all, this is something every magician needs).
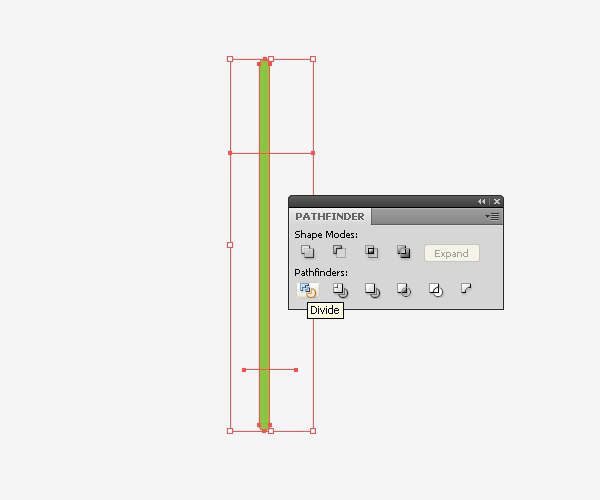
Select the Rounded Rectangle Tool from the Tools Panel and create the shape of the magic stick.

Switch to the Line Tool (/) and create two horizontal lines that we will use to divide the shape we’ve just created. Use the Divide command in the Pathfinder Panel to divide the magic stick shape.
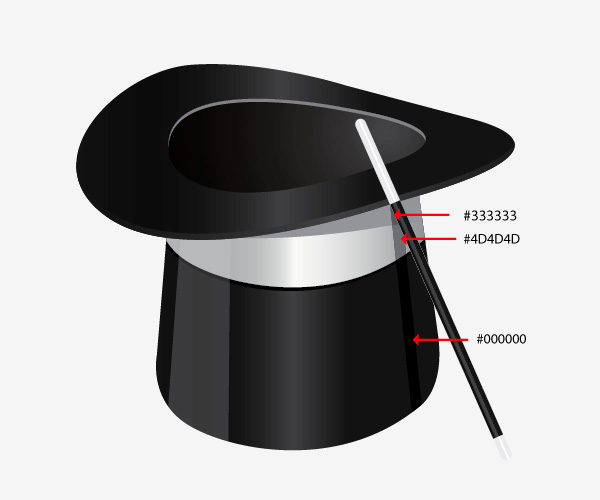
Ungroup (Shift + Ctrl/Cmd + G) the shape and then apply linear gradients to each part.

After applying the gradients, select all parts of the magic stick and group them again (Ctrl/Cmd + G).
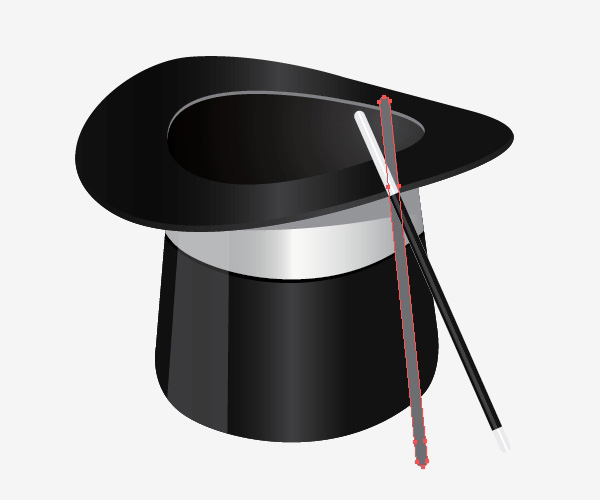
Rotate the magic stick a little bit and then place it as though it was leaning against the hat.

Let’s give the magic stick a shadow as well. Duplicate the magic stick. Ungroup the copy of the stick and, under the Pathfinder Panel, hit the Unite button.
Place the shape in such a way that it looks like the shadow of the magic stick.
Duplicate the lower part of the hat. Select the copy of the lower part and the shadow shape, and, under the Pathfinder Panel, hit the Intersect button.
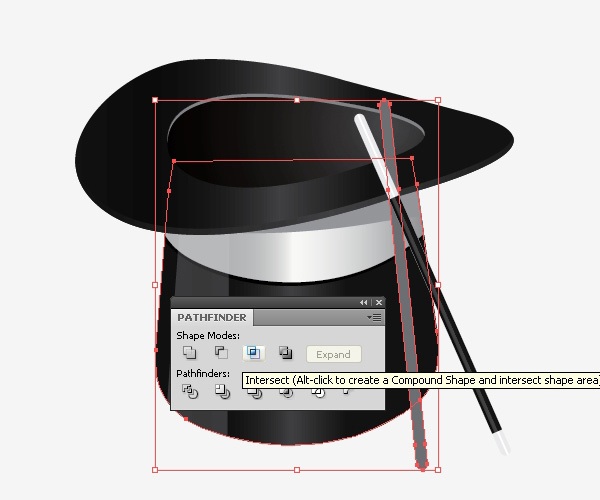
You should end up with something like this:
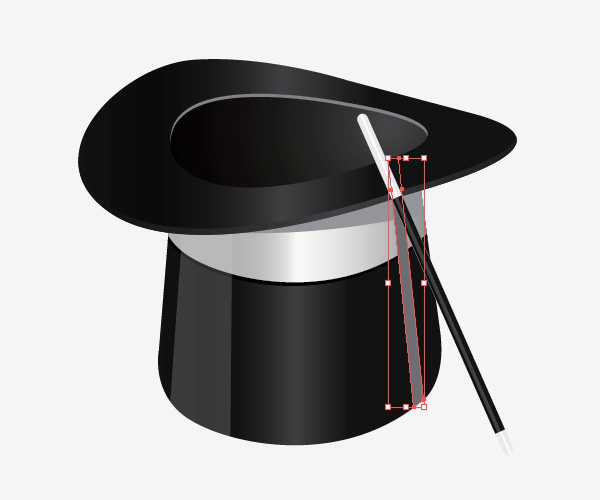
The shadow falls on different colors. That is the reason we need to create a part of the shadow for each of those colors.
Duplicate the shadow and combine those copies with other parts of the hat with the Intersect command in the Pathfinder Panel.
Grab the Pen Tool (P) and draw the shadow on the ground.

Step 12: Create a Shadow on the Floor
There is one more thing to do: draw a shadow on the floor of the composition. Select the Ellipse Tool (L) and then draw a circle. Set the Fill color of the circle to a gray color (#999999) and place it underneath the hat.
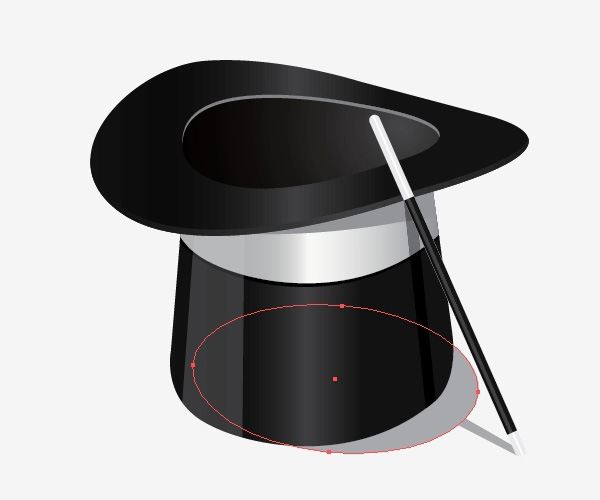
And we are done!
Well done! Looks quite nice, don’t you think?
Tutorial Summary
In this Illustrator tutorial, we had an opportunity to play around with the 3D Revolve effect. 3D effects are a good way to create 3D objects, but they are also good for creating reference objects if you are the type who likes to manually draw objects in Illustrator.
Sometimes it is much easier to draw objects with the Pen Tool, but we just need an idea how something should look. 3D effects can help us with that.
Besides 3D effects, we had a little practice with the Pathfinder Panel, which is one of the best features of Adobe Illustrator.
I encourage you to experiment with colors and gradients. It’s great fun.
Don’t forget to post some of your results and ideas in the comments!
Thank you for following along with me.
Download Source Files
- magician_hat_illustrator (ZIP, 0.95 MB)
-
 Trevin serves as the VP of Marketing at WebFX. He has worked on over 450 marketing campaigns and has been building websites for over 25 years. His work has been featured by Search Engine Land, USA Today, Fast Company and Inc.
 -

WebFX is a full-service marketing agency with 1,100+ client reviews and a 4.9-star rating on Clutch! Find out how our expert team and revenue-accelerating tech can drive results for you! Learn more
Make estimating web design costs easy
Website design costs can be tricky to nail down. Get an instant estimate for a custom web design with our free website design cost calculator!
Try Our Free Web Design Cost Calculator
Table of Contents
- Preview
- Step 1: Create the Reference Shape of the Hat
- Step 2: Lock the Reference Shape
- Step 3: Draw the Lower Part of the Hat
- Step 4: Draw the Upper Part of the Hat
- Step 5: Applying Color Gradients
- Step 6: Create an Edge on the Brim
- Step 7: Add a Gradient in the Hole
- Step 8: Creating the Ribbon
- Step 9: Create Light Reflections on the Hat
- Step 10: Create Shadows for the Hat
- Step 11: Creating a Magic Stick
- Step 12: Create a Shadow on the Floor
- Tutorial Summary
- Download Source Files
Share this article


Web Design Calculator
Use our free tool to get a free, instant quote in under 60 seconds.
View Web Design Calculator
Make estimating web design costs easy
Website design costs can be tricky to nail down. Get an instant estimate for a custom web design with our free website design cost calculator!
Try Our Free Web Design Cost Calculator