
Preview

Step 1: Create the Illustrator Document
Open up Adobe Illustrator. Press Ctrl/Cmd + N to create a new document; let’s make the artboard 500x500px in size (though as you know, with vector illustration, we can resize our artwork to any size we want later on). 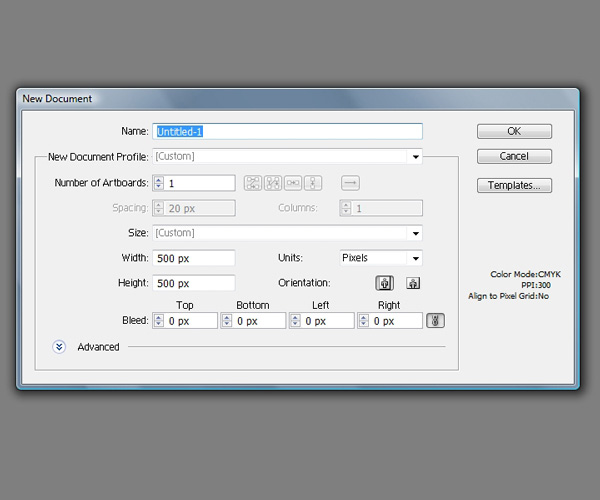
Step 2: Create the Basic Shape of the Cone
Now we have to figure out how to create the shape of the cone.
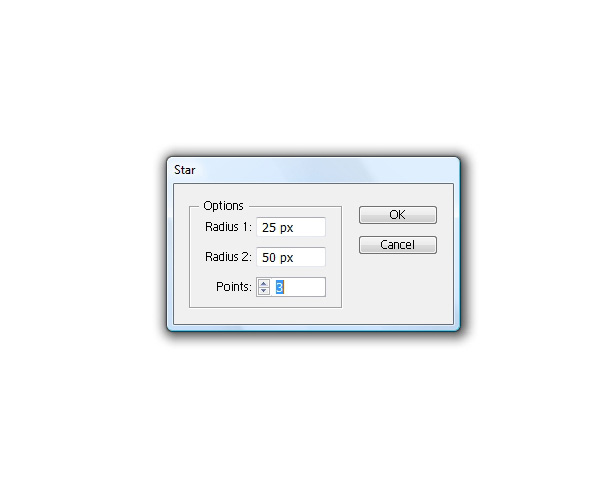
Let’s start with the upper part (the cone) and then we’ll create a stand for it later. Grab the Star Tool from the Tools Panel and click anywhere on the artboard to bring up the Star Tool dialog window. Set the Points to 3 — that way, we will create a triangle.
 We have to modify the shape of the triangle a little bit to make it taller. Switch to the Selection Tool (V), select the triangle, and then drag the upper middle transform control of the selection box upwards a bit.
 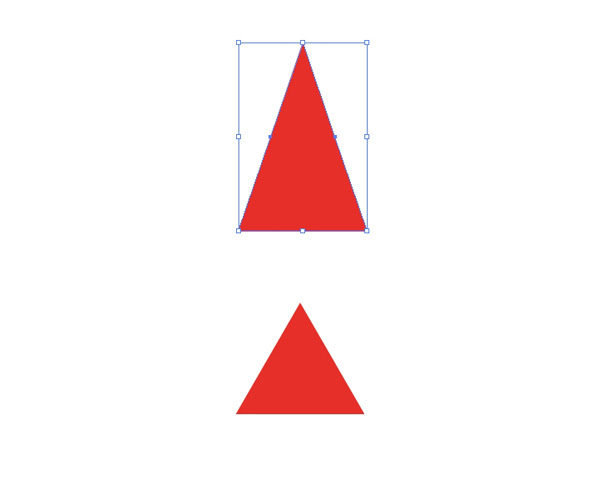 Next, we have to cut out the bottom and top ends of the triangle to make the triangle shaped more like a cone.
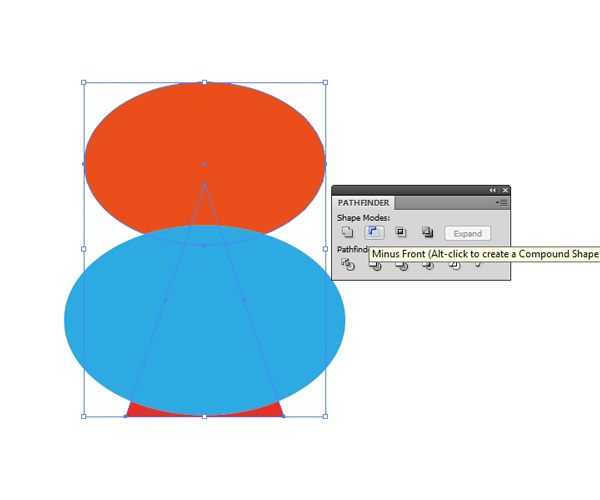
Grab the Ellipse Tool (L) and create two ellipses as shown below. Make sure to center them by selecting all three objects (the triangle and two ellipses), then, in the Align Panel (Window > Align), clicking on the Horizontal Align Center button. 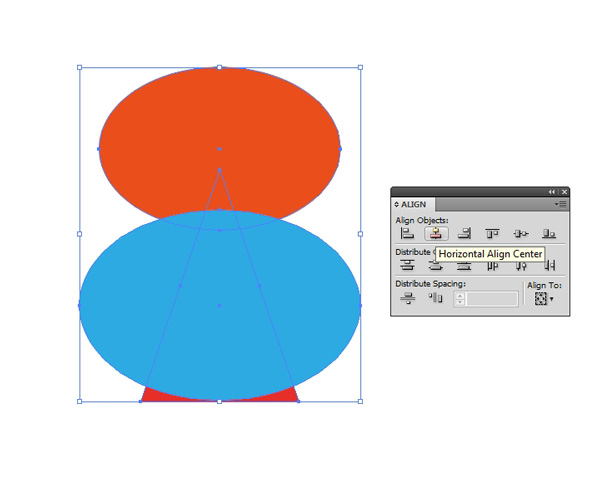 Select the triangle and the upper ellipse and, using the Minus Front button in the Pathfinder Panel (Window > Pathfinder), remove the top end of the triangle.
 Select the resultant shape we just made above and the ellipse at its bottom, then, in the Pathfinder Panel, hit the Intersect button.
 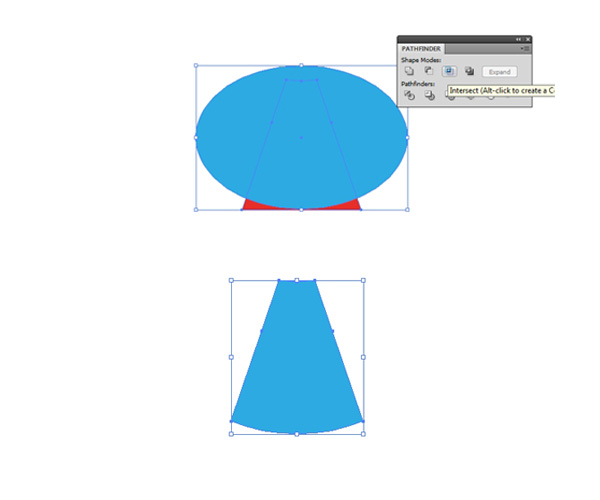 We now have the basic shape of the cone, but there is lots of work ahead to make it look like a real traffic cone.
Step 3: Create the Cone Stripes
Now we need to make the stripes.
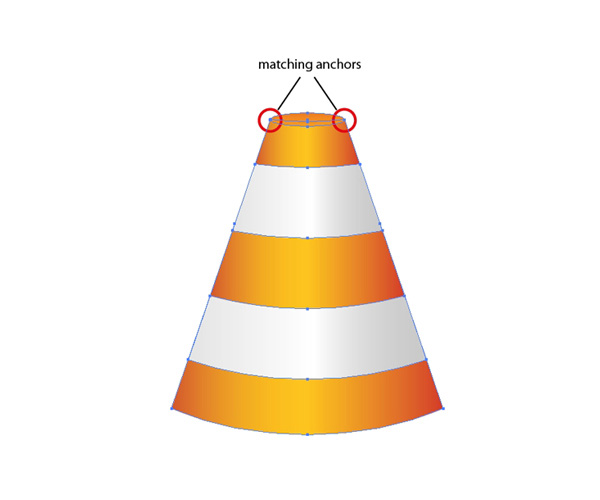
Hold down Shift + Alt/Option, then click-and-drag the cone shape upwards; holding down Shift keeps the movement straight, and holding down Alt/Option creates a copy of the object you are moving. Create a few more copies.  Copy the first original shape (Ctrl/Cmd + C), and paste it in front (Ctrl/Cmd + F).
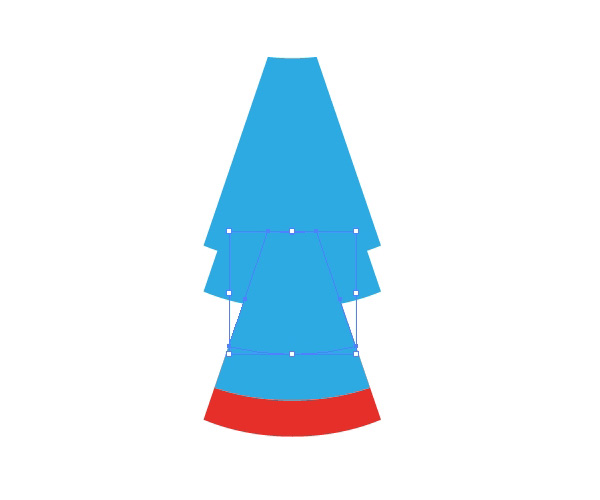
Select the copy and the shape above it. Use the Intersect button in the Pathfinder Panel to create a new shape. 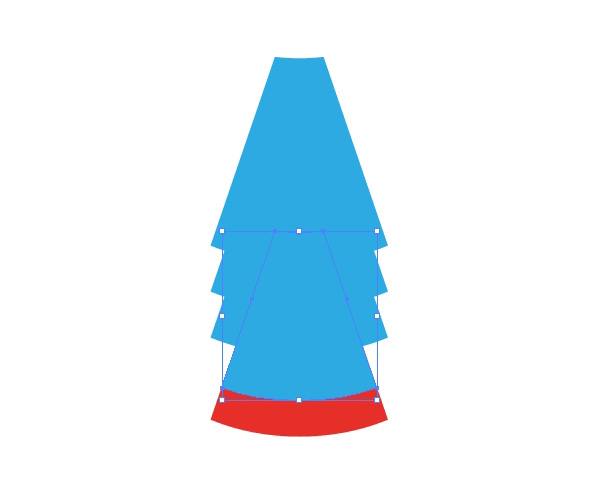 Make a copy of the new shape (Ctrl/Cmd + C and then Ctrl/Cmd + F) and use it to create a similar shape for the other objects.
 Apply gradients to the stripes in alternating fashion.
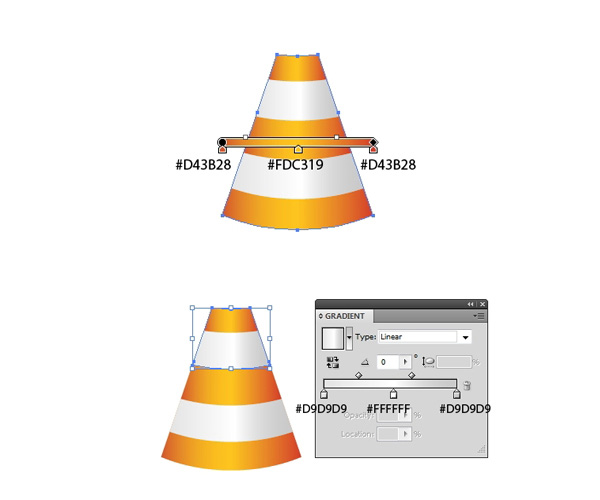
Step 4: Create the Top End of the Cone
With the Ellipse Tool (L), create a small ellipse and place it at the top end of the traffic cone. Use the Zoom Tool (Z) to zoom in so that you can adjust the size of the ellipse in such a way that the anchor points align precisely.
 Select the ellipse and then go to Object > Path > Offset Path; set the Offset to -1. This will create another ellipse so that we now have two ellipses.
 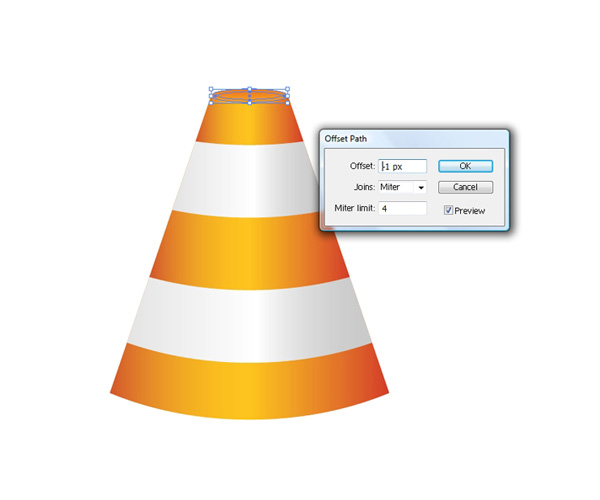 Apply a linear gradient to the inner ellipse.
 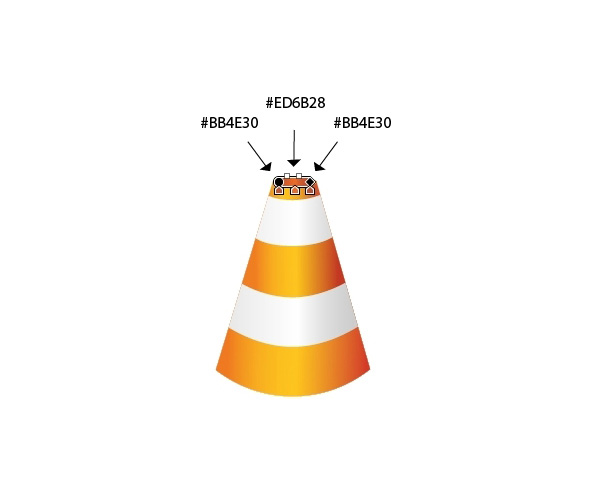 Before moving onto the next step, select all the objects we’ve created so far and group them (Ctrl/Cmd + G).
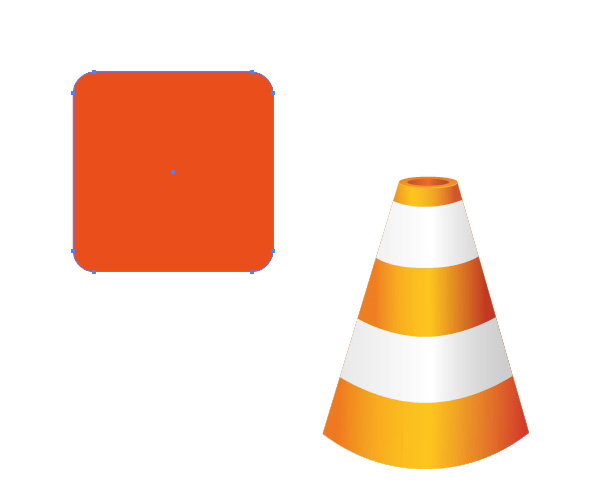
Step 5: Creating the Stand for the Cone
Let’s create the stand for the traffic cone. To do so, we have to (again) create and combine a few different shapes and use a few tricks with gradients. Grab the Rounded Rectangle Tool and, holding Shift to maintain proportions, create a square with rounded corners.
 Now we have to rotate it. Select the square and then go to Object > Transform > Rotate; set the Angle to 45o.
 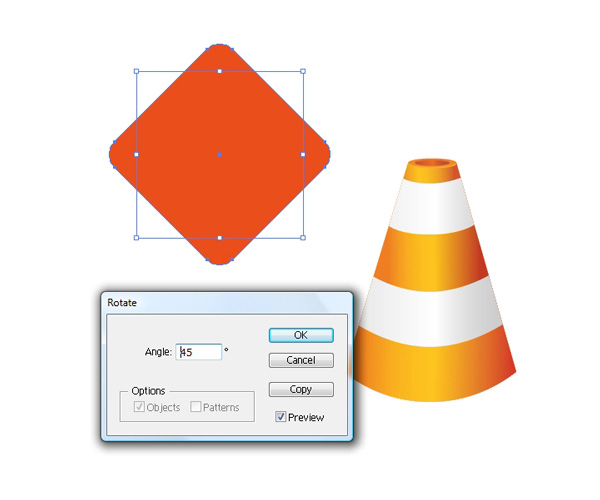 With the square still selected, in the Transform Panel (Window > Transform), lower the value for height.
I set the value to 50px, but you must figure out this value for your particular case. 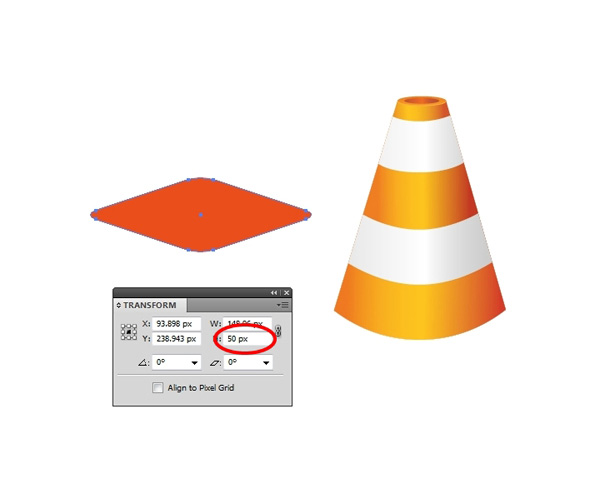 Place the stand underneath the cone (right-click/Control-click on the stand, then choose Arrange > Send to Back in the contextual menu). Align the stand with the cone using the Horizontal Align Center button in the Align panel.
Give it a linear gradient as shown below. 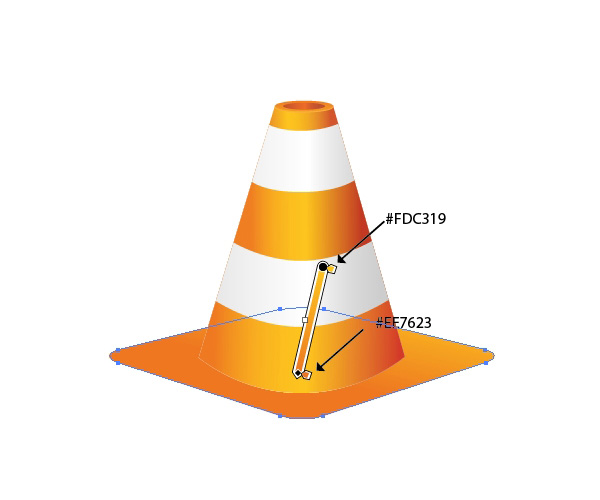 Our stand is not ready yet; we have to give it a thickness. Copy the shape (Ctrl/Cmd + C) and paste it at the back (Ctrl/Cmd + B).
Use your Arrow keys to nudge the copy 2-3px downwards.  The endpoints don’t match at all and we need to correct that. Grab the Rounded Rectangle Tool and draw the shape at the left side of the stand, as shown below.
It might help to zoom in to make sure they align perfectly.  Select both shapes and hit the Unite button in the Pathfinder Panel.
 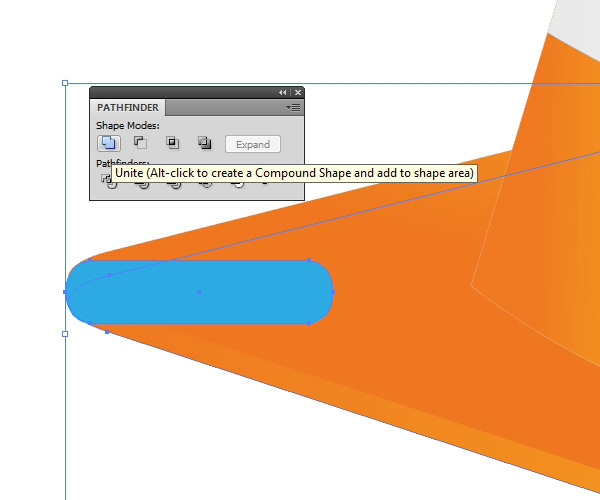 Repeat the process on the right side of the stand.
Then, apply a nice linear gradient to the stand. 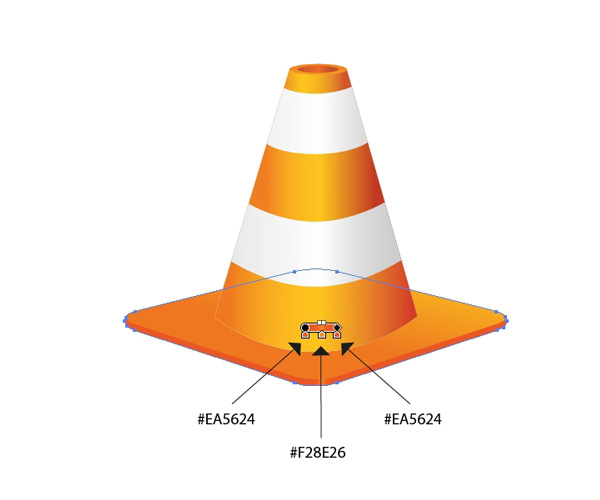
Step 6: Give the Cone a Shadow
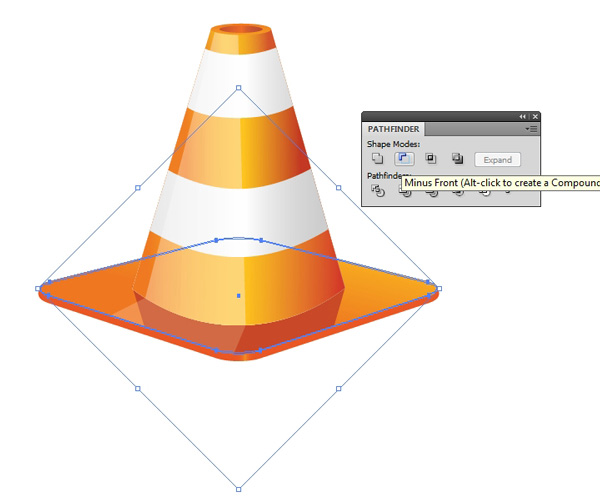
Select the cone (which we grouped in a previous step) and then go to Object > Transform > Reflect. For the Axis of the reflection, choose Horizontal.
Hit the Copy button instead of the OK button to make a reflected copy of the cone group.  Select the reflected cone and ungroup it (Shift + Ctrl/Cmd + G). Combine all the ungrouped parts into one object by hitting the Unite button in the Pathfinder Panel.
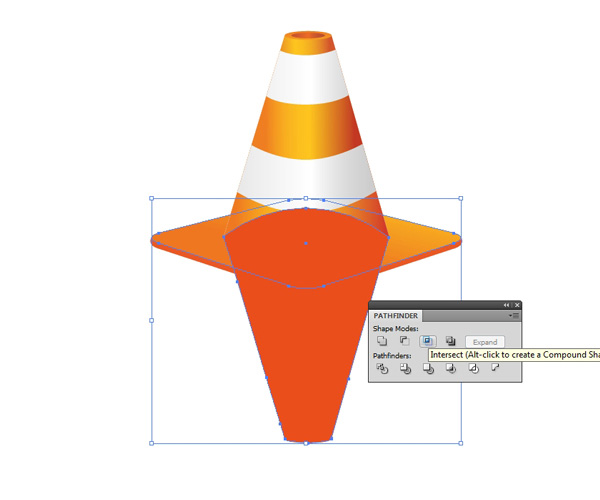
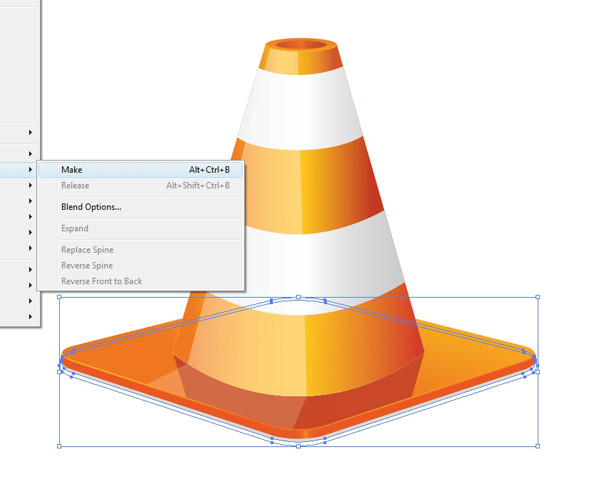
 Select the upper part of our stand and duplicate it (Ctrl/Cmd + C and then Ctrl/Cmd + F). Select the copy and the reflected cone shape we created previously. Under the Pathfinder Panel, hit the Intersect button.
 Right-click/Control-click on the resultant shape and choose Arrange > Send Backward.
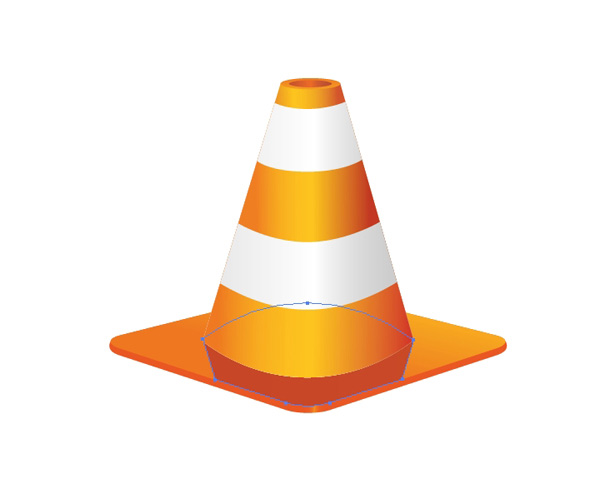
Step 7: Creating a Light Reflection
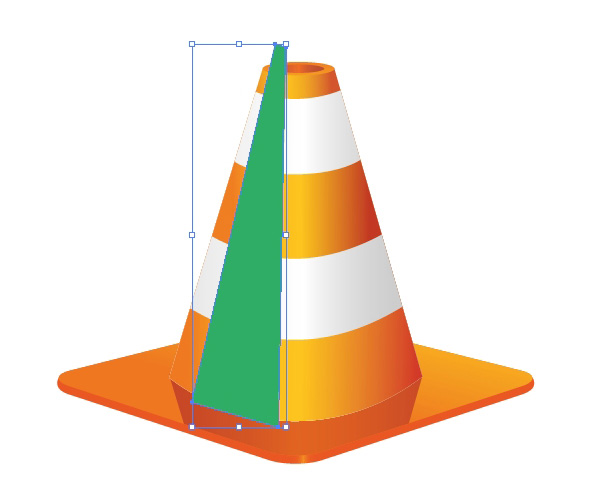
Let’s create a surface light reflection on the traffic cone to give the surface a realistic-looking, plastic look. Grab the Pen Tool (P) from the Tools Panel and draw the shape shown below.
 Select the cone and duplicate it in front. Ungroup the duplicate (Shift + Ctrl/Cmd + G). Unite the parts of the ungrouped duplicate by hitting the Unite button in the Pathfinder Panel.
Select the cone and the new shape and then click on the Intersect button in the Pathfinder Panel. 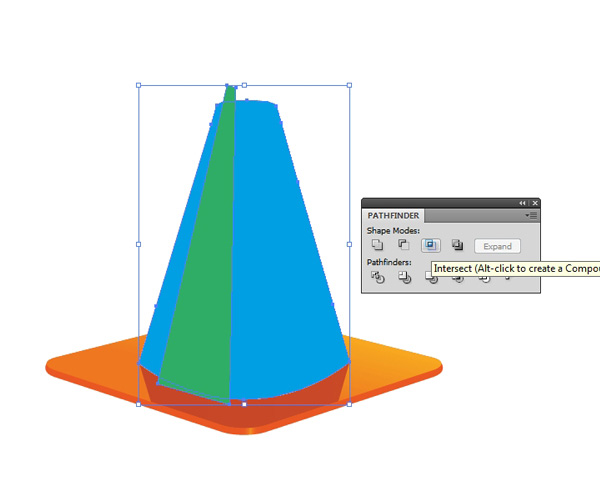 Change the Fill color of the object to white and then lower its Opacity to 19%. Ungroup the cone so that you can select both the ellipses on the top end.
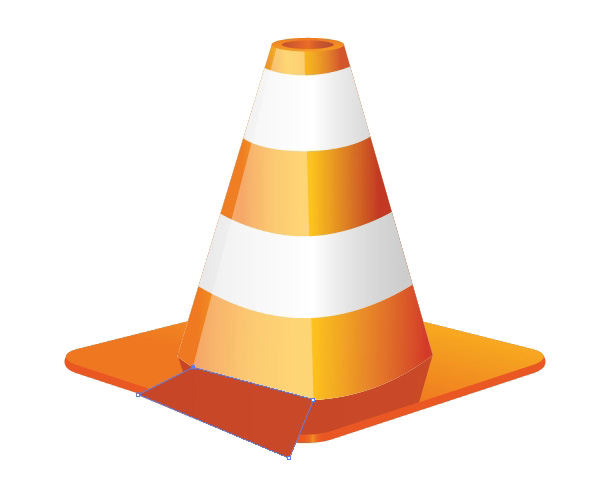
Send the two ellipses to the front (Object > Arrange > Bring to Front). 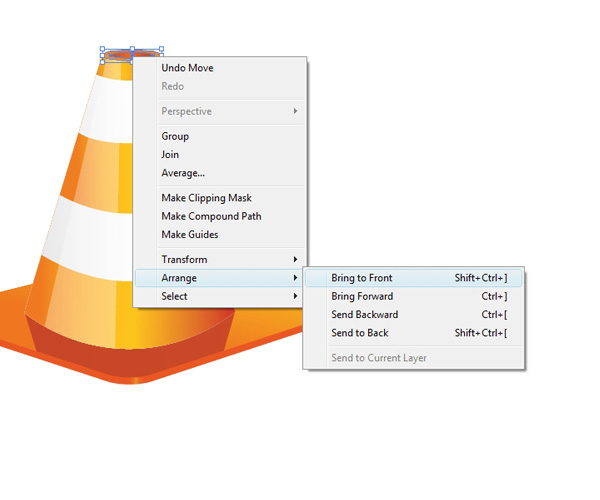 Now we need another reflection that matches the one we’ve just created. Grab the Pen Tool (P) and draw the shape shown below.
 Select the upper part of the stand and duplicate it in front. Use the Intersect button in the Pathfinder Panel to create a reflection for the stand. Change its Fill color to white and lower the Opacity to 19%.

Step 8: Adding Edge Highlights
Select the upper part of the stand and duplicate it in front twice. Nudge the topmost duplicate up by 1px. Select both duplicates and hit Minus Front in the Pathfinder Panel.
 Do the same thing for the top end of the traffic cone.
Step 9: Create a Drop shadow
In the final step, we just need to draw a shadow underneath the traffic cone. Select the lower part of the stand and duplicate it in front twice.
Move the topmost duplicate down 1px, then set its Fill color to gray. Move the other duplicate 2px down, set its Fill color to white, and send it back (Object > Arrange > Send to Back). Select both copies then go to Object > Blend > Make (Alt/Option + Ctrl/Cmd + C).
 Adjust the size of the shadow until it matches with the traffic cone.
Tutorial Summary
In this drawing tutorial, we illustrated an orange traffic cone, much like the ones you see around road construction projects and parking lots. We used basic shape tools (such as the Star Tool, for example) to draw a rather surprisingly elaborate illustration.
We used a variety of techniques, relying heavily on gradients and the Pathfinder Panel to get the exact look we wanted. I hope you achieved very nice results. Thank you for following along!
Download Source Files
- traffic_cone_illustrator (ZIP, 1.19 MB)
-
 Trevin serves as the VP of Marketing at WebFX. He has worked on over 450 marketing campaigns and has been building websites for over 25 years. His work has been featured by Search Engine Land, USA Today, Fast Company and Inc.
 -

WebFX is a full-service marketing agency with 1,100+ client reviews and a 4.9-star rating on Clutch! Find out how our expert team and revenue-accelerating tech can drive results for you! Learn more
Make estimating web design costs easy
Website design costs can be tricky to nail down. Get an instant estimate for a custom web design with our free website design cost calculator!
Try Our Free Web Design Cost Calculator
Table of Contents
- Preview
- Step 1: Create the Illustrator Document
- Step 2: Create the Basic Shape of the Cone
- Step 3: Create the Cone Stripes
- Step 4: Create the Top End of the Cone
- Step 5: Creating the Stand for the Cone
- Step 6: Give the Cone a Shadow
- Step 7: Creating a Light Reflection
- Step 8: Adding Edge Highlights
- Step 9: Create a Drop shadow
- Tutorial Summary
- Download Source Files
Share this article


Web Design Calculator
Use our free tool to get a free, instant quote in under 60 seconds.
View Web Design Calculator
Make estimating web design costs easy
Website design costs can be tricky to nail down. Get an instant estimate for a custom web design with our free website design cost calculator!
Try Our Free Web Design Cost Calculator