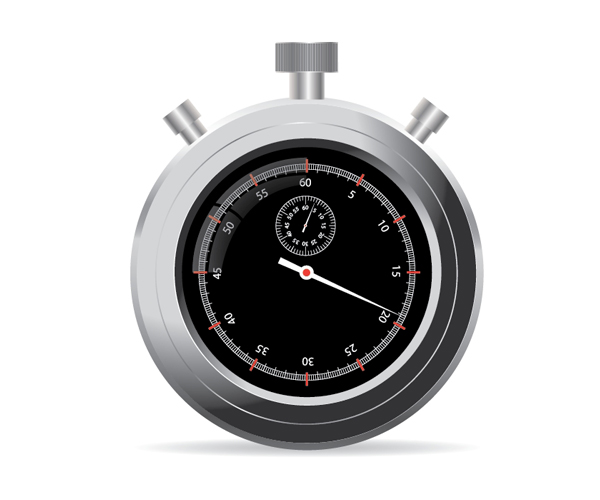
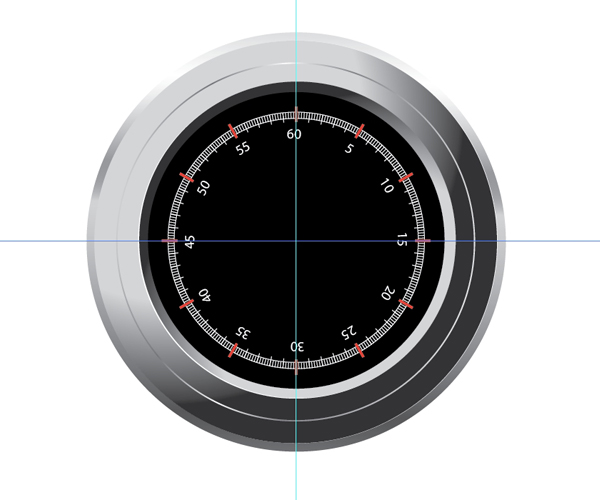
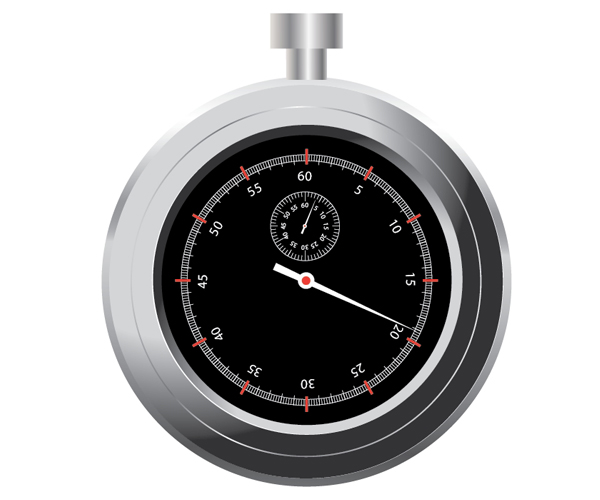
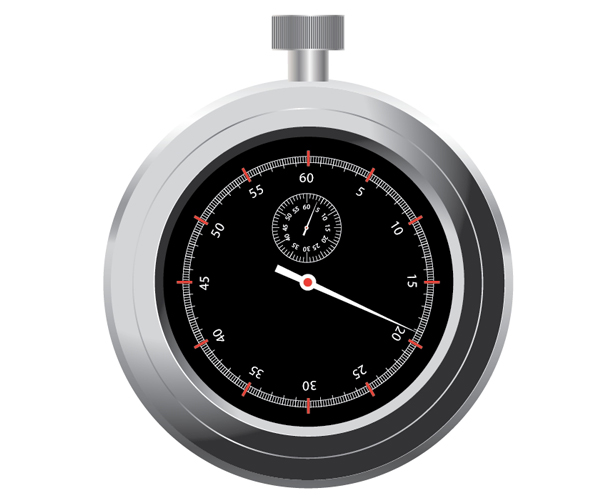
Preview
Step 1: Create the Metal Casing
Set up the Illustrator artboard so that it is 500x500px in size.

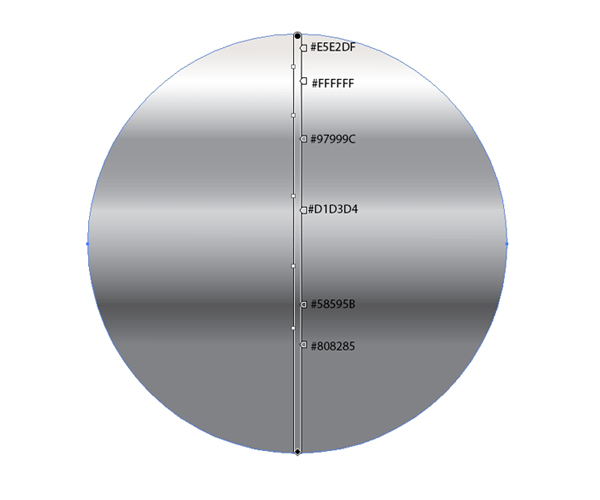
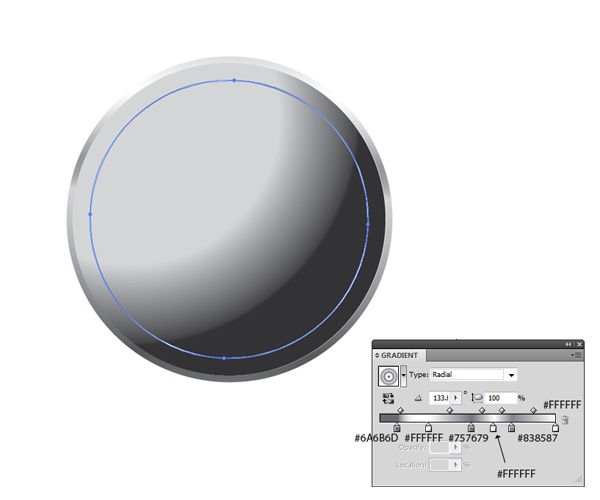
Select the Ellipse Tool (L) from the Tools Panel. Hold Shift and drag out a circle.
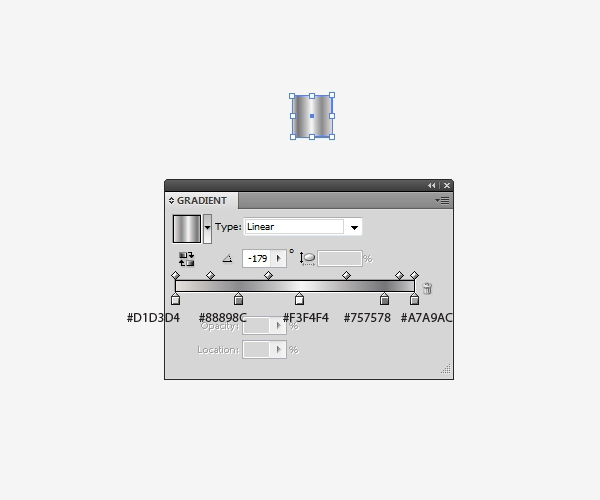
Apply the linear gradient as shown below.
Now we need a smaller, white circle. Copy the first circle (Ctrl/Cmd + C) and then paste in front (Ctrl/Cmd + F).
Scale the copy down a bit and then set the Fill color to white.
Duplicate (Ctrl/Cmd + C and then Ctrl/Cmd + F) the circle from the previous step. Scale it down a little bit and apply the radial gradient as shown below.
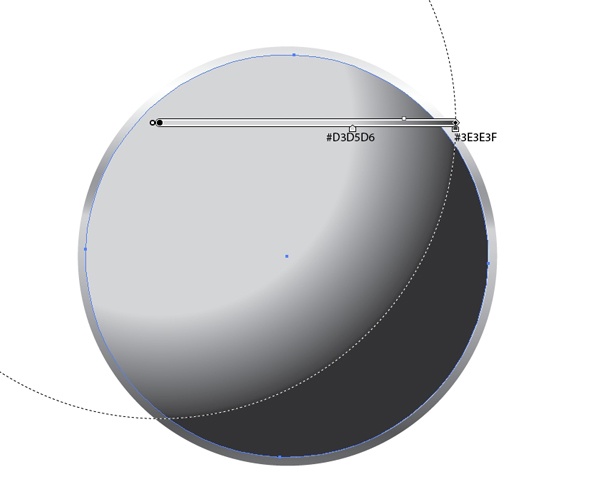
Move the gradient 1px to the left, which will create a small edge highlight on the right.
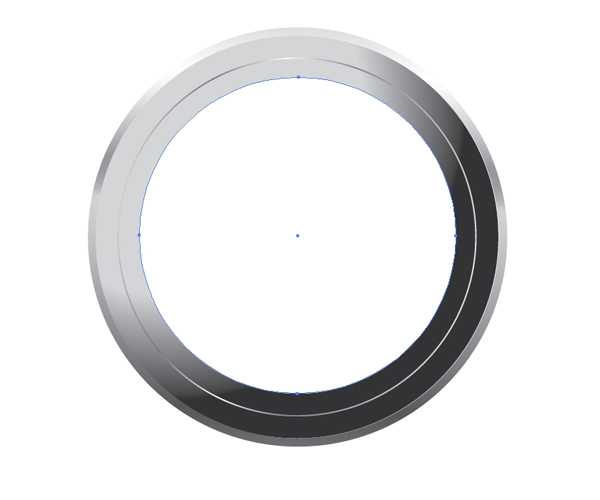
Copy the inner circle and paste in front.
Scale it down a little bit, remove the copy’s Fill color and then set its Stroke Weight to 2pt.
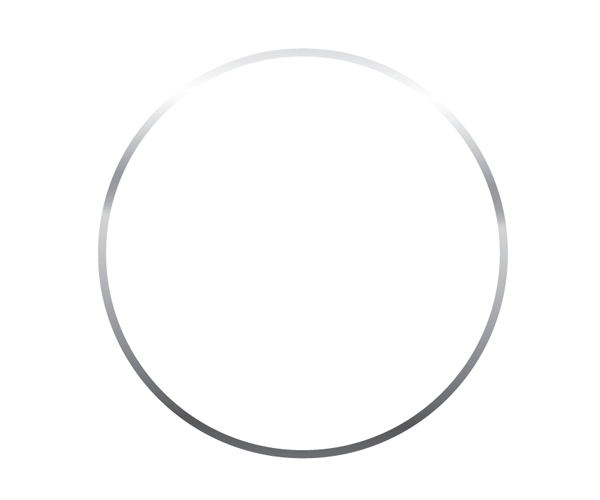
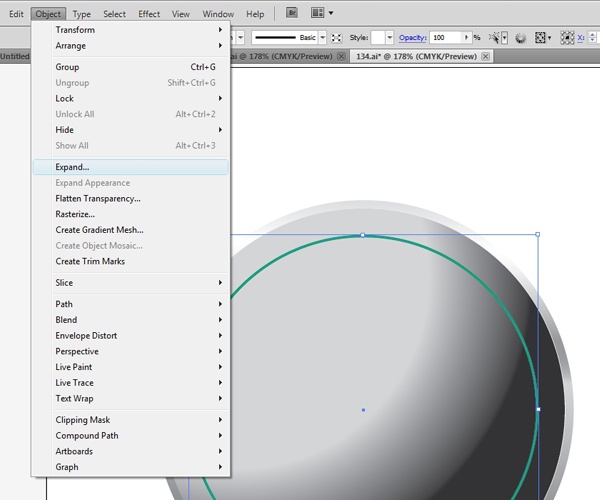
Now we have to expand the path in order to apply a radial gradient onto the object. Select the circle and go to Object > Expand.
Apply the radial gradient as shown below. This part is going to be a shiny edge on the metal casing and the white parts of the gradient are highlights caused by our light source.
We need a smaller circle that has a white Fill color.
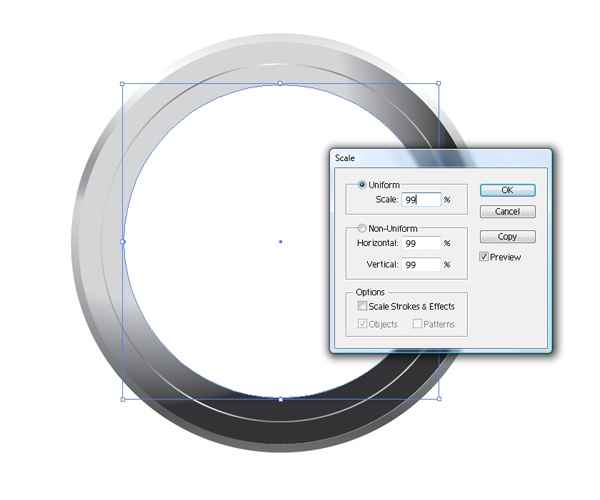
Copy the innermost circle and paste it in front, then use the image below as a reference in order to scale it down to the appropriate size.
Make sure you still have the white circle selected, and then go to Object > Transform > Scale. In the Scale dialog window, set the Scale to 99% and then press the Copy button. This way, we will create a circle that’s slightly smaller.
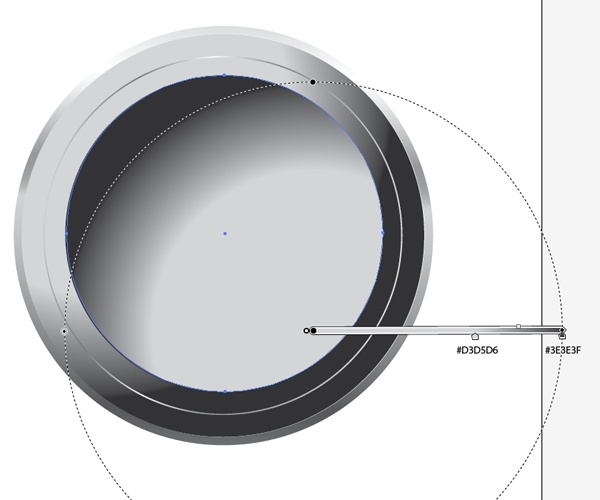
Apply the radial gradient shown below to the new circle.
Duplicate the last circle we’ve just made and scale it down a bit.
Set the Fill color of the duplicate to a very dark gray (#231F20).
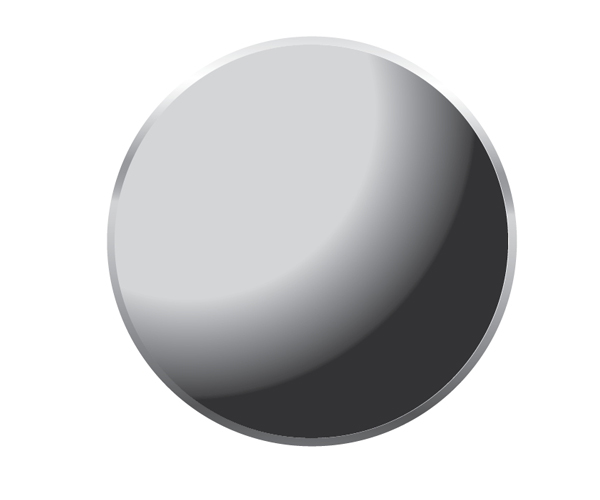
Group all the elements we’ve made so far by selecting them and then going to Object > Group (Ctrl/Cmd + G).
Step 2: Create the Stopwatch’s Increments
With the stopwatch’s case finished, we can move on to the analog display of the stopwatch. The first thing we will create are the increments on the stopwatch that tells its user the time.
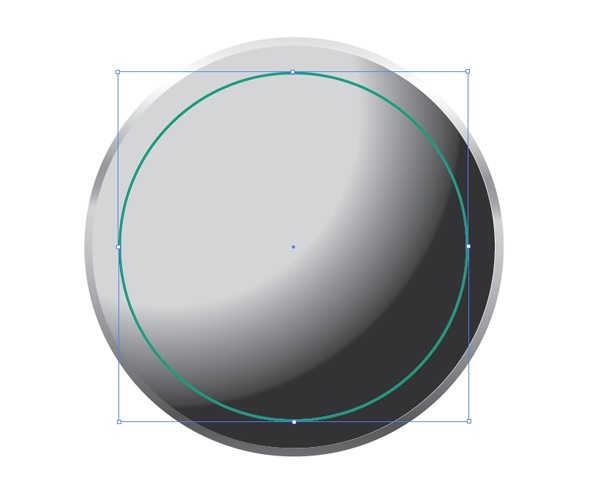
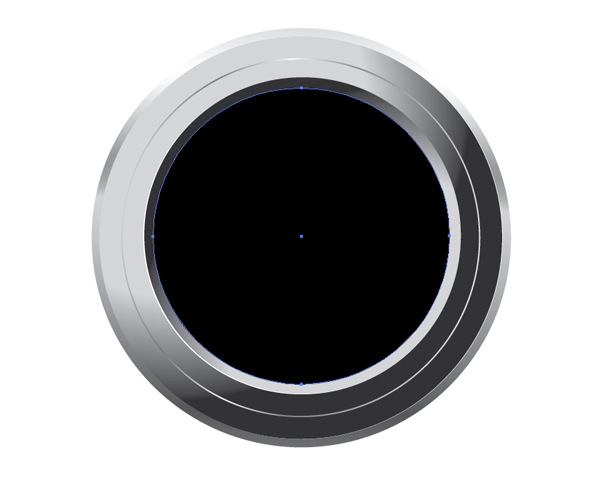
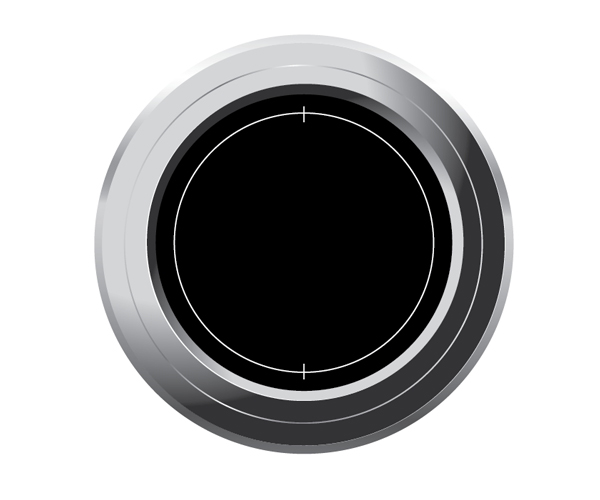
Create a circle that is a little bit smaller than the circle from the previous step. Remove the Fill color and set the Stroke color to white.
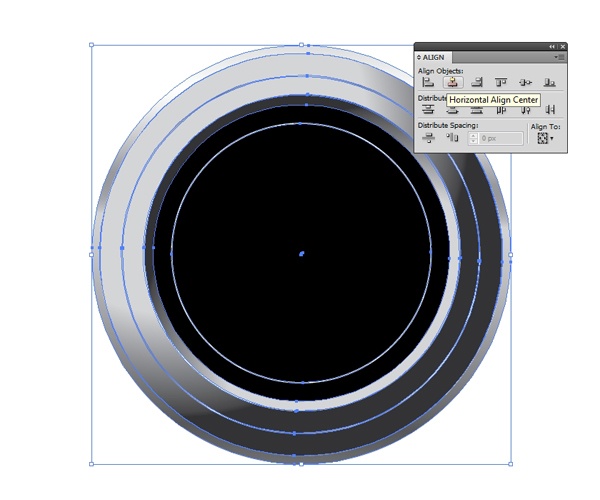
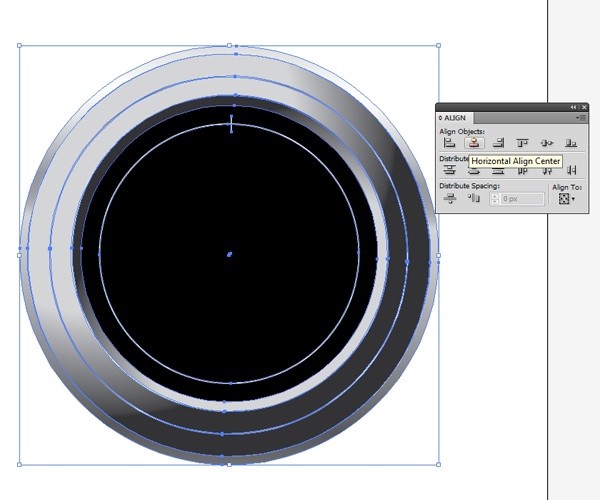
Properly align this circle using the Align Panel (Window > Align) to align it vertically and horizontally.
We need to create 12 increments to start; these will be the major increments. Grab the Line Tool (/) from the Tools Panel and create a small vertical line. Align the line with the rest of the stopwatch through the Align Panel using the Horizontal Align Center button.
Hold down Alt/Option + Shift, select the small line we’ve just created, and drag it downwards to make a copy of it.
Move the copy to the desired location.
Select both lines and group them (Ctrl/Cmd + G). Go to Object > Transform > Rotate.
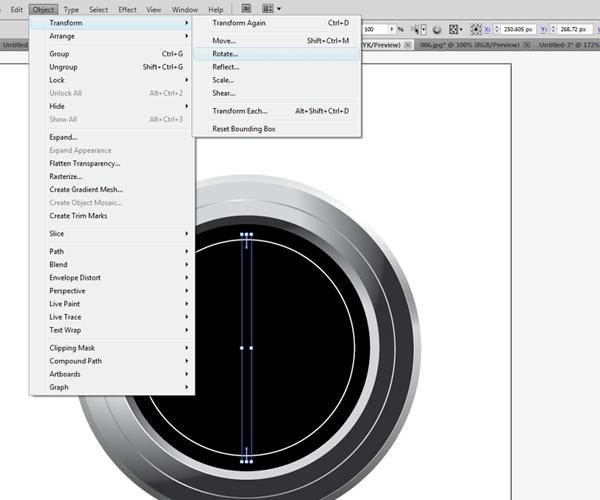
Since we need 12 increments, we have to calculate the angle for the rotation.
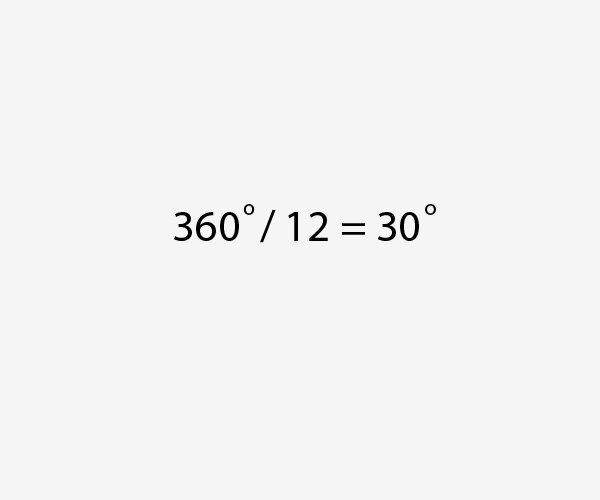
In the Rotate dialog window, set the Angle to 30o and then press the Copy button. It will make a new set of lines, but rotated 30o from the original angle.
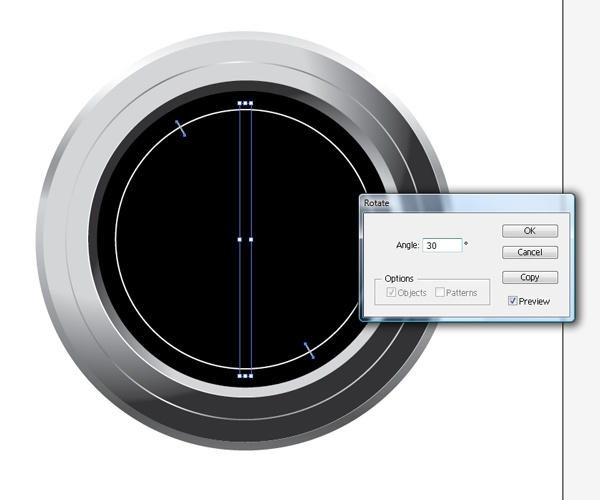
Repeat the exact same rotation transform by going to Object > Transform > Transform Again (Ctrl/Cmd + D).
Repeat this transform until you create all 12 increments.
Now we need smaller increments for each second on the stopwatch. The process is quite similar; we just need to make a few changes in the size of the lines and the rotation angle.
Since one minute has a 60 seconds, it means we need 60 smaller increments for each second.
Let’s ungroup (Shift + Ctrl/Cmd + G) the first pair of lines we created. Now duplicate the upper line and make the duplicate slightly smaller by scaling it down.
Hold down Alt/Option + Shift and drag downwards to duplicate the smaller line. Group both lines (Ctrl/Cmd + G) and then go to Object > Transform > Rotate. Set Angle to 6o and hit the Copy button.
If you hit Ctrl/Cmd + D 28 times, you will complete the whole circle.
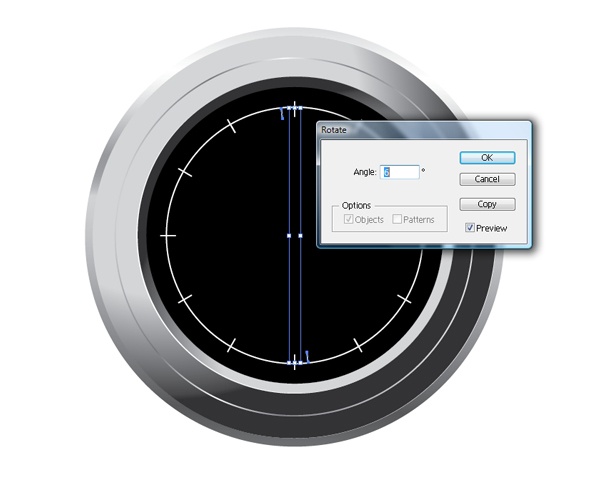
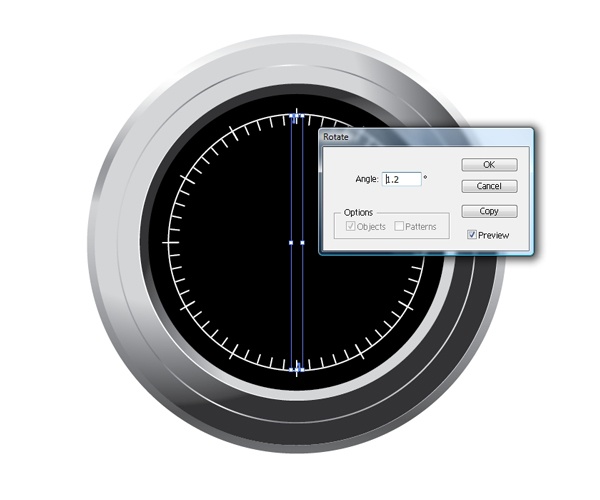
Now we need even smaller increments.
Since the number of increments we need is 300 we have to calculate the angle of rotation again, which comes out to be 1.2o.
Repeat the previous process, but make the line shorter and reduce the Stroke Weight to 0.5pt to make it thinner.
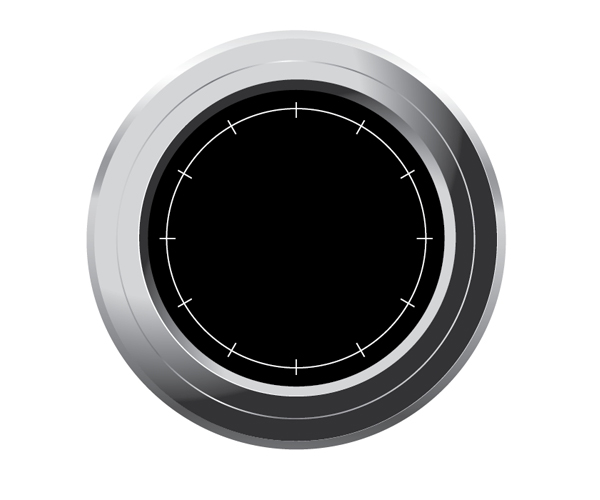
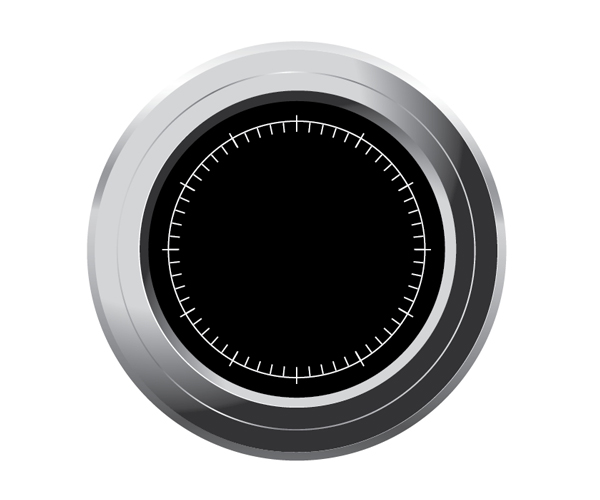
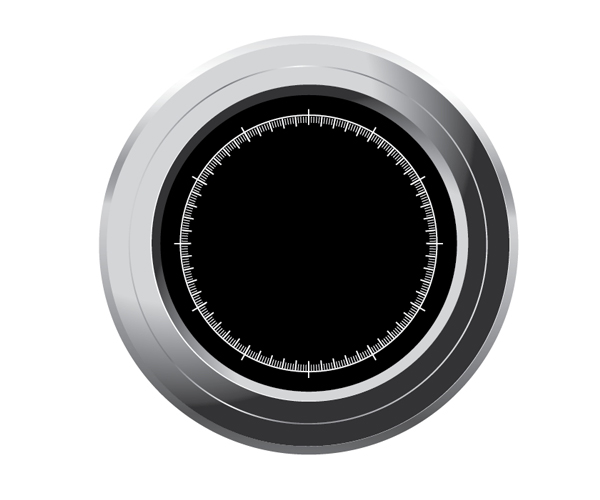
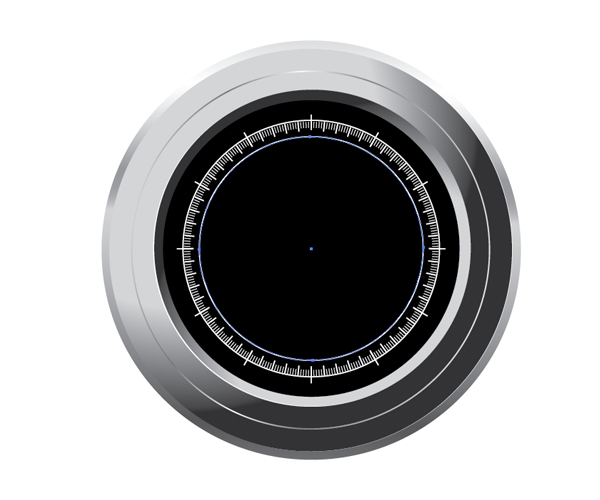
Once complete, this is what the increments should look like:
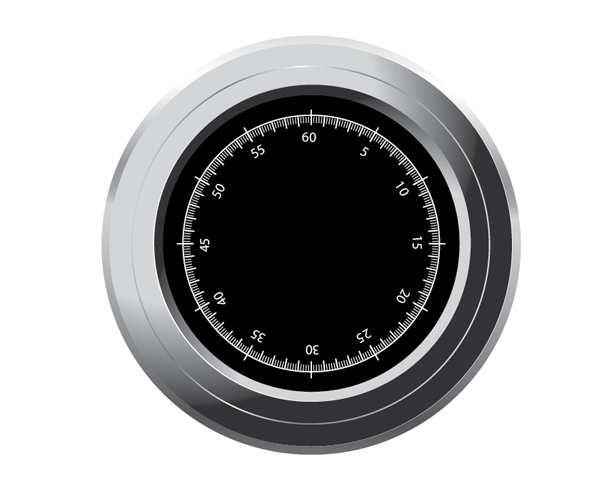
Step 3: Creating Numbers on the Stopwatch
Now we have to add numbers for the increments to make the stopwatch more readable to the user.
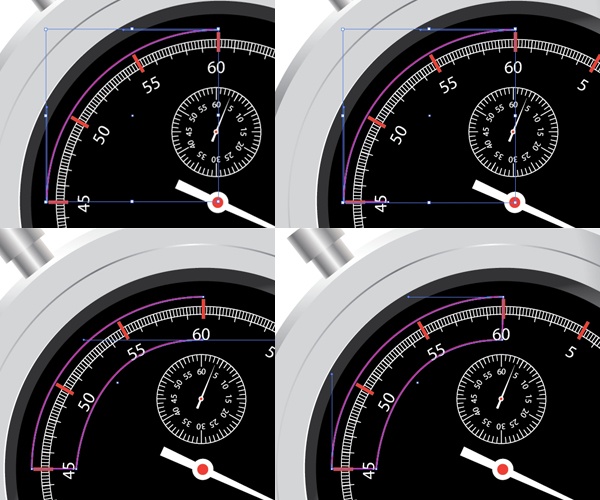
Select the circle with the white stroke and duplicate it. Scale down the copy a little bit.
Grab the Type on a Path Tool, which you can find by clicking-and-holding down on the Type Tool in the Tools Panel. Click on our path and type numbers representing seconds.
Align them with the major increments.
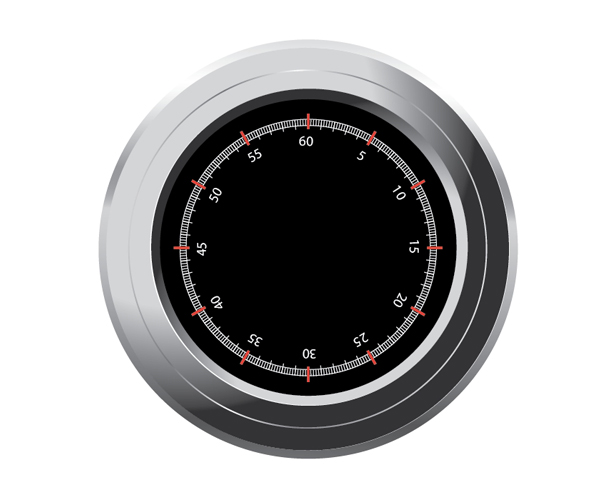
To add some flare to our stopwatch, you can select the lines of the major increments, set their Stroke to 2pt and change their colors to orange.
Feel free to try different looks for the stopwatch. Change the colors and add (or remove) some elements.
Step 4: Create the Needle
Now it’s time to create a needle that tells us the time.
First, we need to establish the center of the stopwatch. To do that, we will need rulers, so go to View > Rulers > Show Rulers (Ctrl/Cmd + R) to turn them on if they’re not enabled yet.
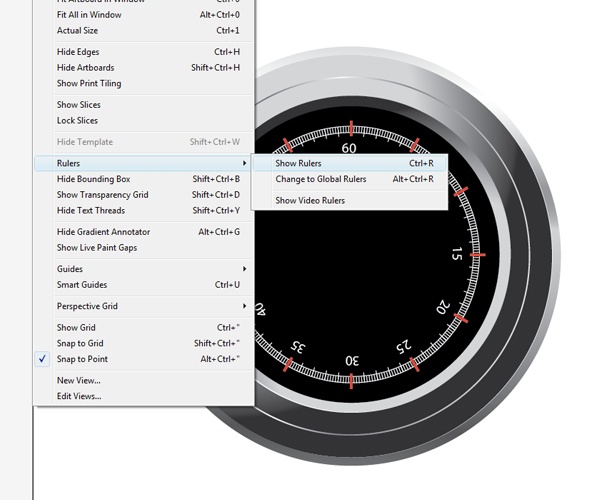
Click-and-hold on the rulers at the edge of your workspace and then drag your mouse towards the center of the stopwatch to create guides (as shown below). This would be easier and more precise if you had Smart Guides turned on (go to View > Smart Guides to enable the feature).
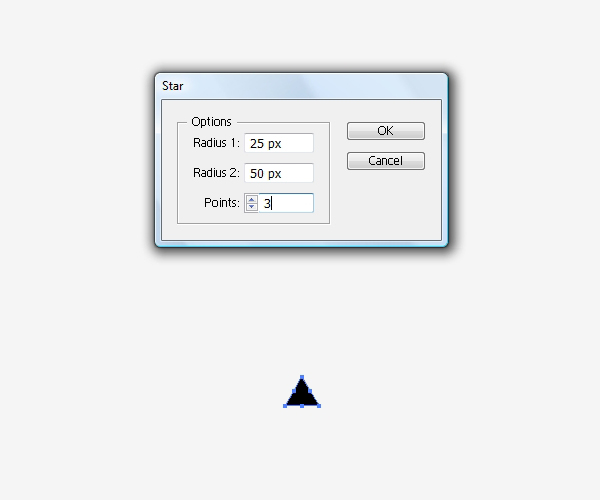
Now we have to draw the needle.
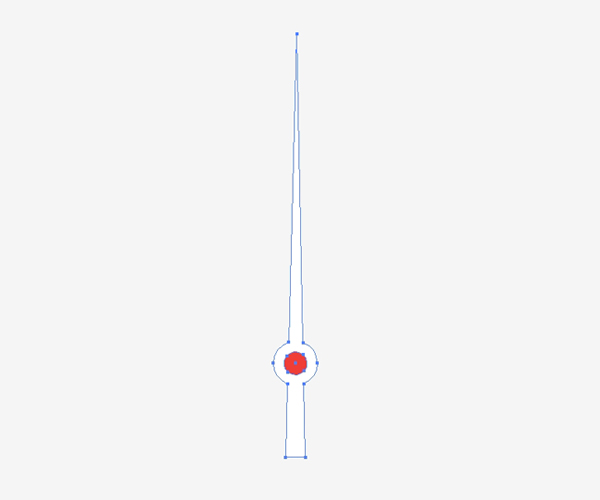
Grab the Star Tool from the Tools Panel and click once on the artboard to reveal the Star dialog window. In the Star dialog window, set Points to 3 to create a triangle.
Switch to the Direct Selection Tool (A) from the Tools Panel, hold down Shift, select the upper anchor point of the triangle, and drag upwards. Use the Delete Anchor Point Tool (-) to remove the anchor points as shown below.
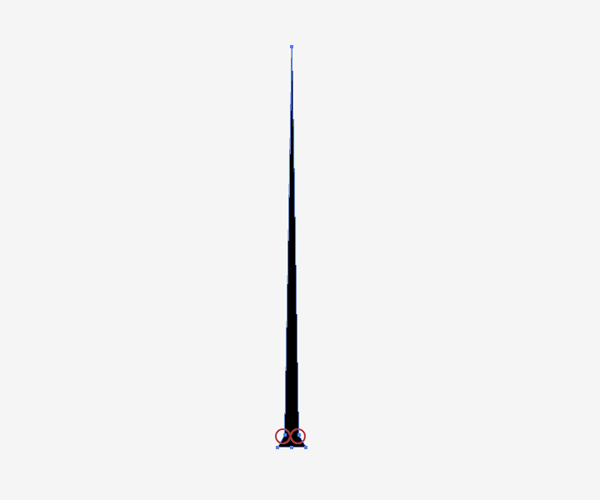
With the Ellipse Tool (L), create a small circle and place it over the needle.
Align the circle and the needle using the Horizontal Align Center command in the Align Panel.
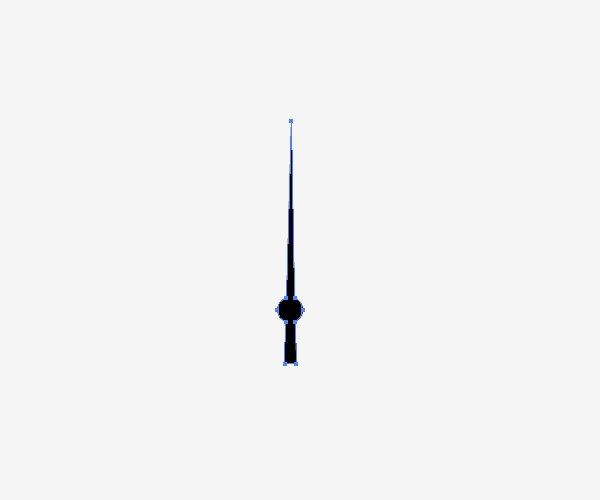
Change the Fill color of the needle to white. Create a smaller circle and place it perfectly at the center of the first circle.
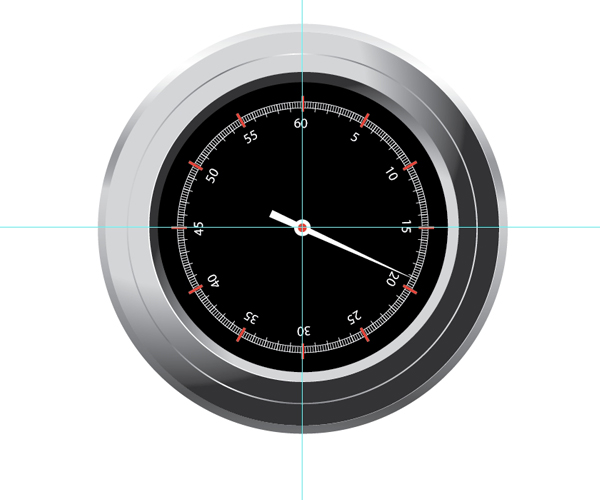
Now we need to place the needle at the center of the stopwatch and that is the reason we had to establish the center of stopwatch using guides earlier on.
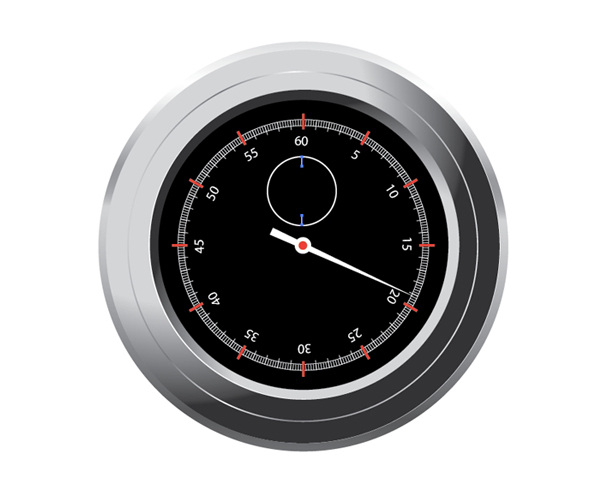
Step 5: Creating a Smaller Timer
Let’s create another timer, but this time, a smaller one. The process is similar to Step 3 and 4. Create a circle with a white stroke. Place it on the black surface. Create the increments.
Add the numbers.
You can create a timer with various kinds of increments. Just calculate how many long and short increments you need. Then you have to calculate the angle of rotation.
Don’t forget to create a needle for this timer as well.
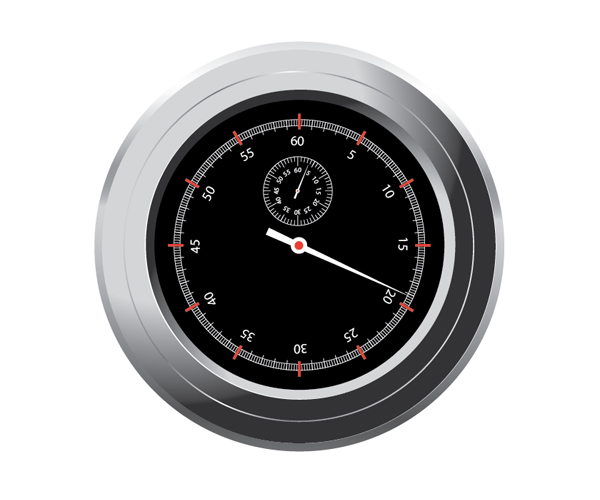
Group all the objects we’ve made once you are finished.
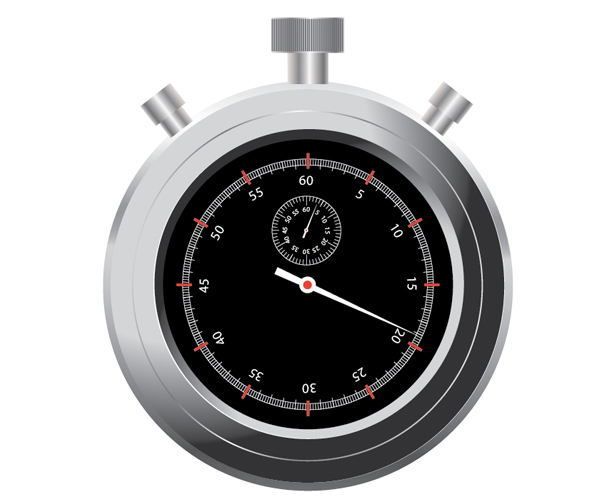
Step 6: Creating the Buttons
Grab the Rectangle Tool (M) and create a rectangle. Apply a linear gradient to the rectangle as shown below.
Create another rectangle and apply the same linear gradient. Align both rectangles using the Horizontal Align Center command in the Align Panel.
Select both rectangles and group them (Ctrl/Cmd + G). Duplicate the group. Scale up the duplicate and then place it on the top of the stopwatch.
Align it with stopwatch using the Horizontal Align Center command in the Align Panel.
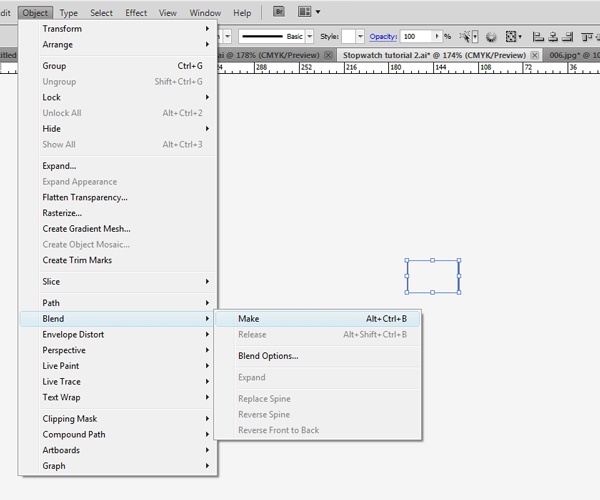
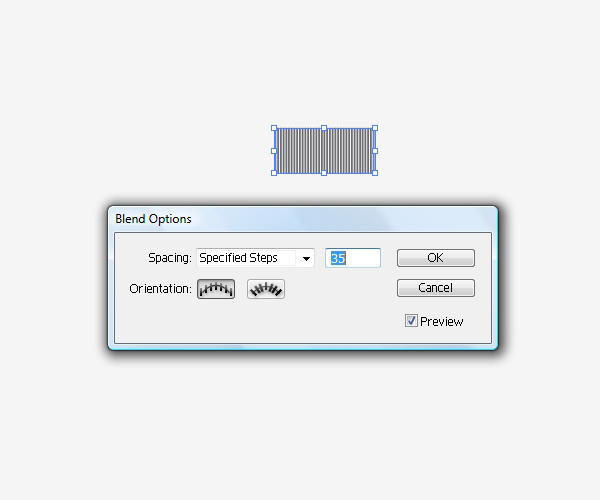
Switch to the Line Tool (/) and draw 2 vertical lines. Select them both then go to Object > Blend > Make.
In the Blend dialog window set Specified Steps to 35 and then press the OK button.
Place the lines on top of the new object.
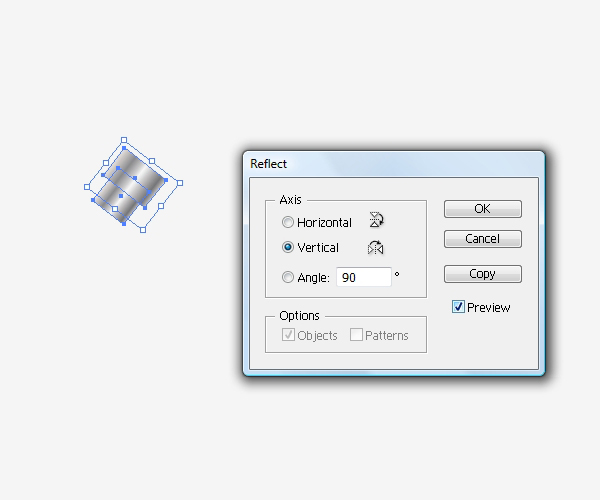
Select the other copy of the object we made. Go to Object > Transform > Rotate and rotate it 45o.
Choose Object > Transform > Reflect, select Vertical in the dialog window, and then press the Copy button.
Move the rotated copy to the right side.
Select both objects, group them (Ctrl/Cmd + G) and place them on our stopwatch.
Step 7: Creating the Glass Reflection
We are almost done. Now we just need a reflection of a window on the glass cover. It is very simple to create.
For this step, we have to ungroup our stopwatch because we need to duplicate one of the circles we made earlier.
Select the black circle and duplicate it.
Remove the Fill color and set the Stroke color to pink (or something else, it doesn’t really matter which color, just so long as we can see it).

Grab the Direct Selection (A) Tool from the Tools Panel and remove the anchor points as shown in the following image. Switch to the Pen Tool (P) and draw the shape of the window reflection.
Deselect the shape (Select > Deselect) and draw the two paths shown below.
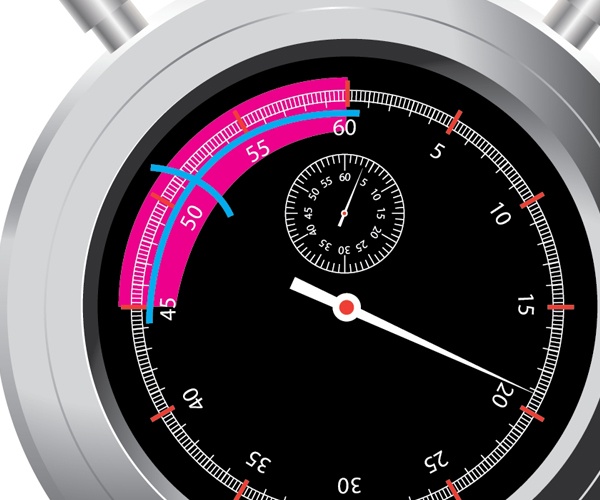
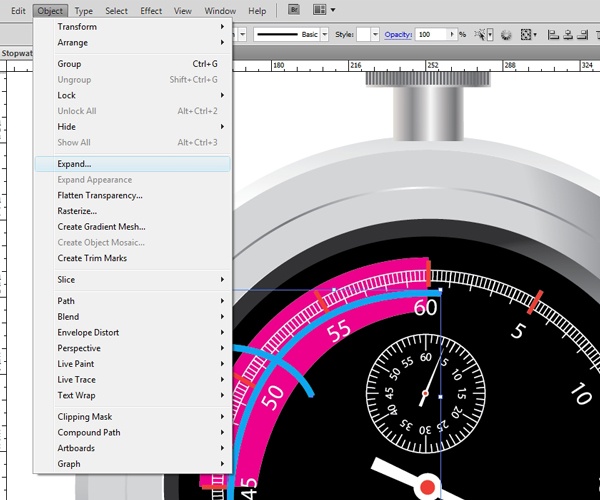
Select both paths and then go to Object > Expand.
Now select all objects associated with the glass window reflection and, in the Pathfinder Panel, press the Minus Front button.
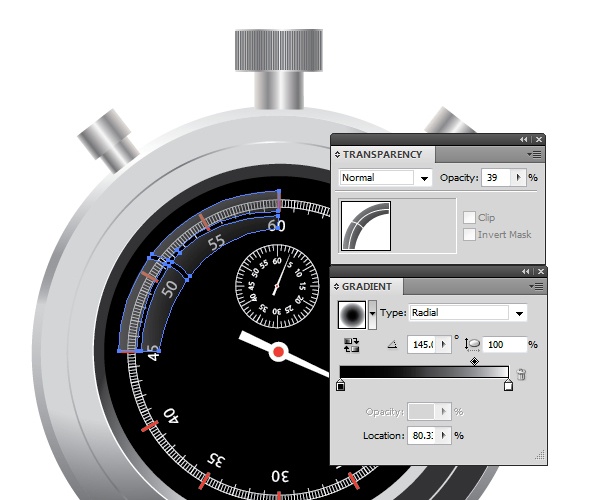
Apply the radial gradient shown below to the window reflection and lower the layer’s Opacity to about 39%.
Tutorial Summary
This concludes our tutorial. We used fundamental Illustrator techniques such as using the shape tools to draw objects, using its powerful transform commands, and taking advantage of the high level of control it gives us when making color gradients and object blends.
Feel free to get creative and try other looks for the stopwatch.
Change the colors and shapes, for example. You can achieve great results using the techniques described in this tutorial. Thanks for reading!
Download Source Files
- stopwatch_illustrator (ZIP, 0.99 MB)
-
 Trevin serves as the VP of Marketing at WebFX. He has worked on over 450 marketing campaigns and has been building websites for over 25 years. His work has been featured by Search Engine Land, USA Today, Fast Company and Inc.
 -

WebFX is a full-service marketing agency with 1,100+ client reviews and a 4.9-star rating on Clutch! Find out how our expert team and revenue-accelerating tech can drive results for you! Learn more
Make estimating web design costs easy
Website design costs can be tricky to nail down. Get an instant estimate for a custom web design with our free website design cost calculator!
Try Our Free Web Design Cost Calculator
Share this article


Web Design Calculator
Use our free tool to get a free, instant quote in under 60 seconds.
View Web Design Calculator
Make estimating web design costs easy
Website design costs can be tricky to nail down. Get an instant estimate for a custom web design with our free website design cost calculator!
Try Our Free Web Design Cost Calculator