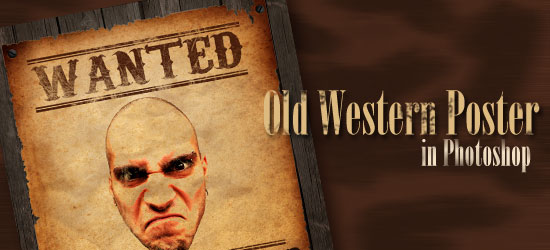
 In this graphic design tutorial, you’ll learn how to create a stylish Old Western themed Wanted poster using some excellent Photoshop techniques such as how to weather paper, how to create realistic nail heads, and more.
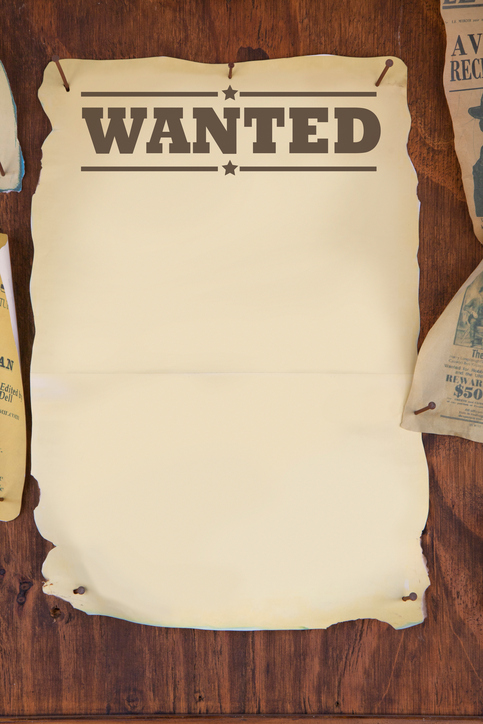
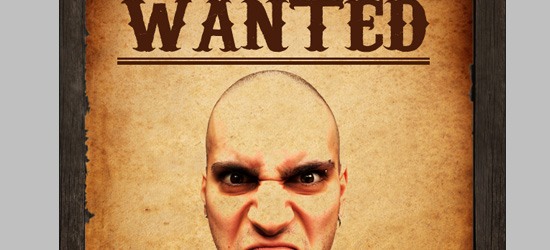
Final Result
Below, you will see a preview of what we’re about to create together. Click on the image below to see the full-scale version. 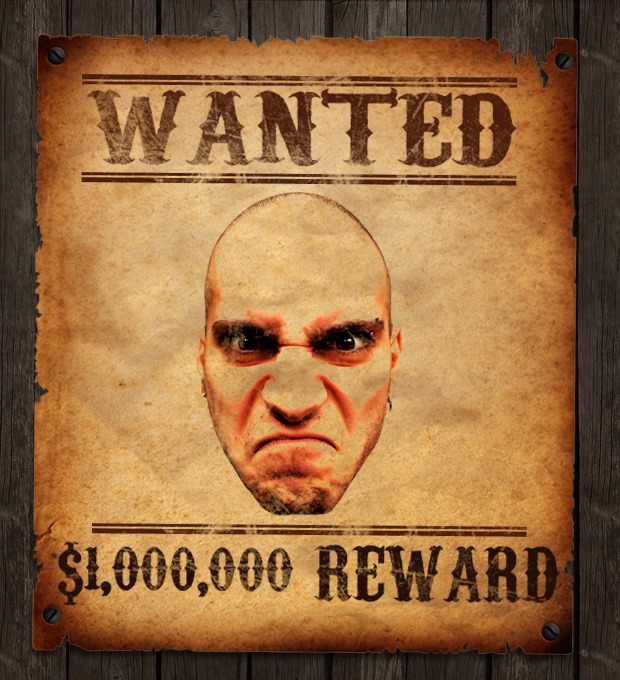
Setting up the Photoshop document
1 Create a new document in Photoshop, File > New (Ctrl + N).
Set the dimensions of the canvas to 620px x 680px. If you intend this to be a large poster, you may want to consider changing the size of the document. 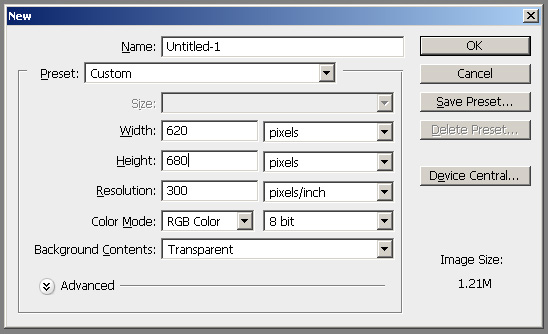
Making the wooden background
2 Download the tileable wood texture by ftourini isis on deviantArt.
This texture is free for personal and commercial usage provided that you credit the author in your designs. 3 After downloading the texture, open it in Photoshop, File > Open (Ctrl + O). 4 Let us rotate our texture so that the wooden boards are oriented vertically.
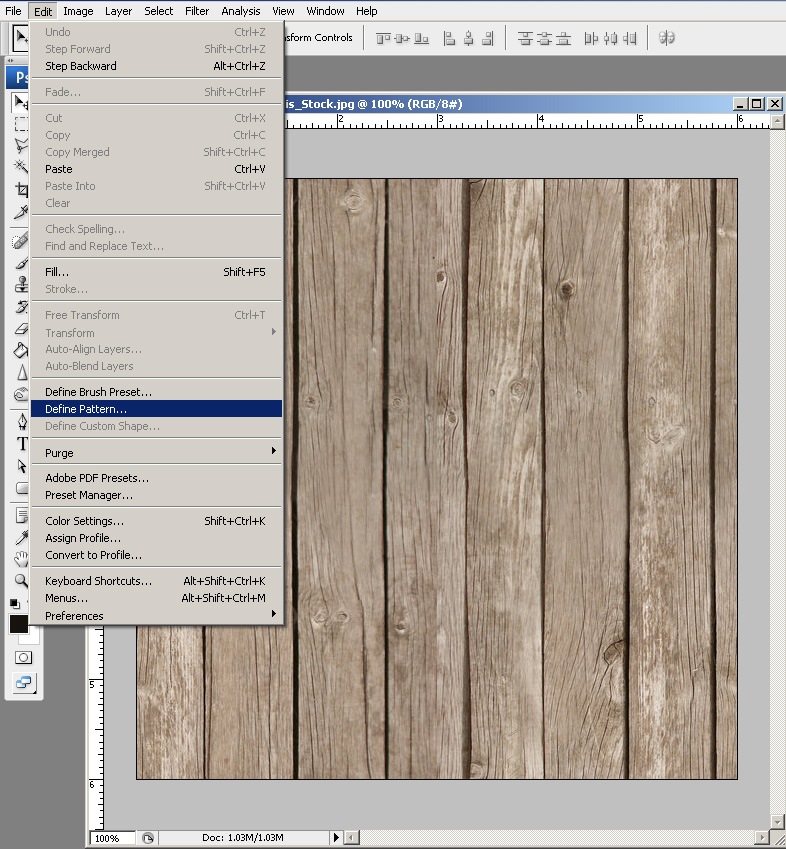
To rotate the image, choose Image > Rotate Canvas > 90° CCW. 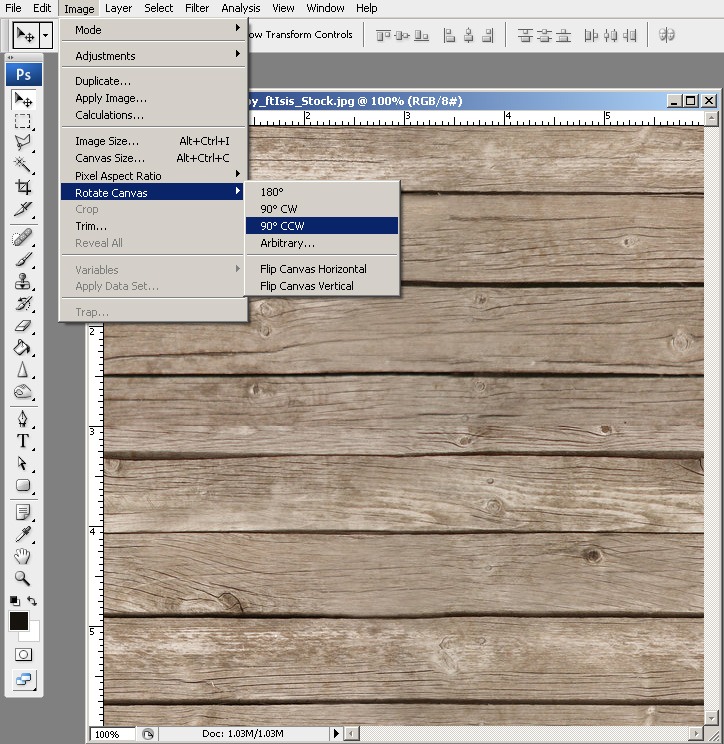 5 Let us convert this texture into a pattern by choosing Edit > Define Pattern; this will open the Pattern name dialog box. Type in a name for your pattern (or leave it as the default), and click OK.
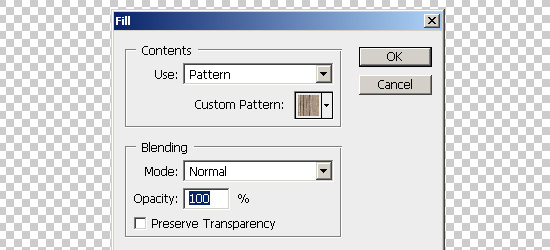
 6 Go back to the main Photoshop document, and fill our new empty layer with the pattern we just created. With the Background layer active in the Layers Panel, choose to Edit > Fill > Custom Pattern and select the pattern we created. Then press OK to confirm.
 You should now have something like this:
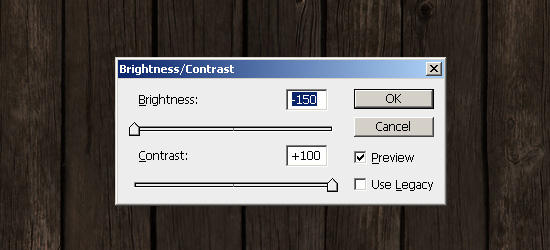
 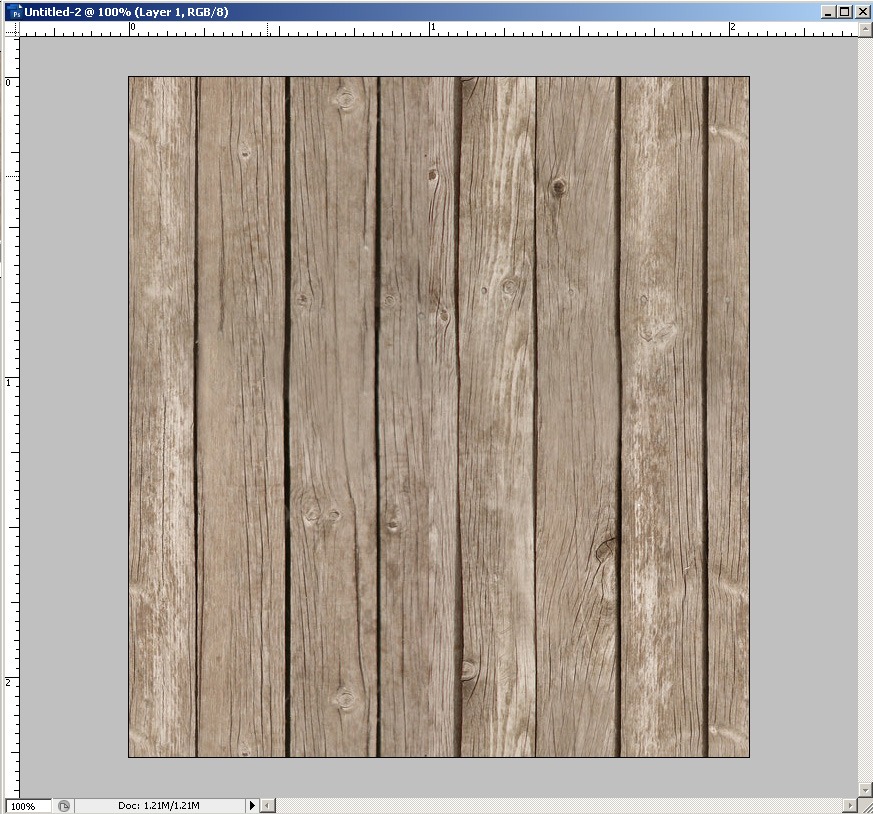 7 Our wood texture seems a little too bright so we will adjust its color to achieve a darker look for our Old Western-style poster. Choose Image > Adjustments > Brightness/Contrast to open up the Brightness/Contrast image adjustment dialog box. Use the settings shown in the following figure to get the effect we need.
Creating the Wanted Poster Paper background
8 Let us now create the actual Wanted poster. First, we need a stock image from sxc.hu called paper by Andrew C.. Download this stock image and then open the paper texture in Photoshop, File > Open (Ctrl + O).
9 We want to extract the paper from its white background, to do so, start by choosing the Magic Want Tool (W) from the Tools Panel. Click on the white background to make a selection around it. 10 Next, invert the Magic Wand selection by choosing Select > Inverse (Shift + Ctrl + I).
Now, the marquee selection should be around the paper. 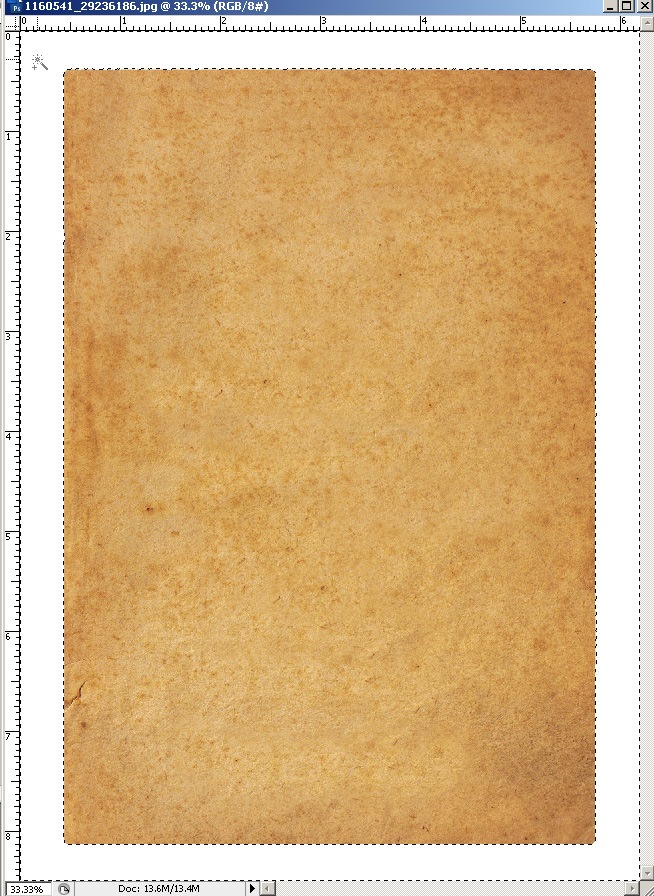 11 With the paper texture selected, copy the paper by choosing Edit > Copy (Ctrl + C). After copying the selection, switch back to our main Photoshop document and paste it by choosing Edit > Paste (Ctrl + V).
12 Let us resize the paper by choosing Edit > Free Transform (Ctrl + T) and dragging the transform controls on the side of the paper texture so that it covers almost the entire size of the Photoshop canvas. View the following figure as a guideline. 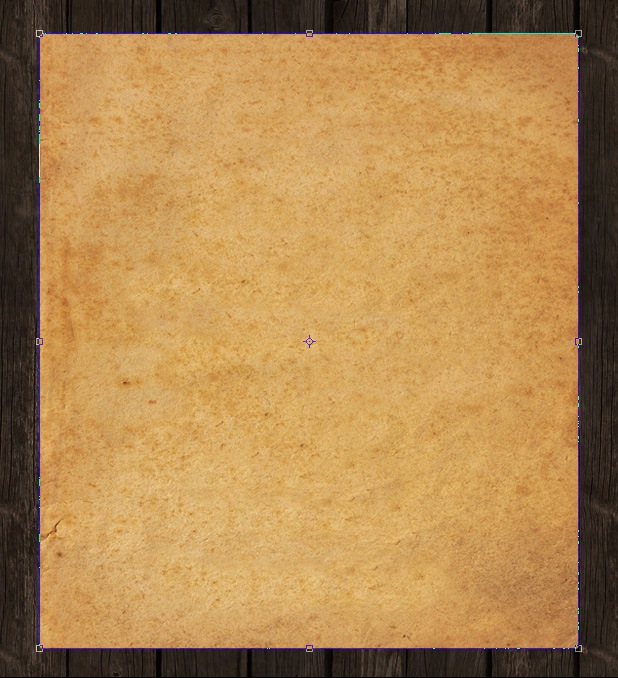 13 Notice that the paper looks a bit too smooth on the edges.
Let’s roughen up its edges a little bit. To make this easier, first zoom into our canvas with the Zoom Tool (Z), and then choose the Polygonal Lasso Tool from the Tools Panel. 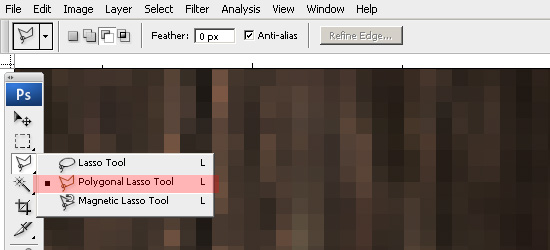 14 Make an irregular-looking selection on the edges of the textured paper (just like the figure shown below), and then choose Edit > Clear (or hit the Del key) to remove the parts of it below the selection.
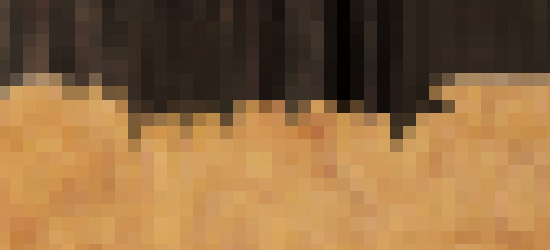
Repeat this step around the edges of our paper. 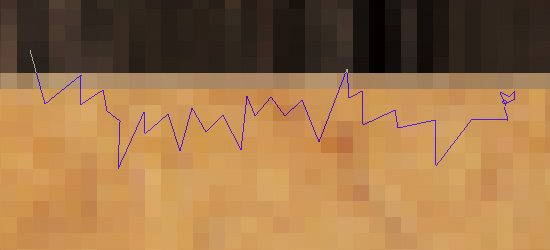
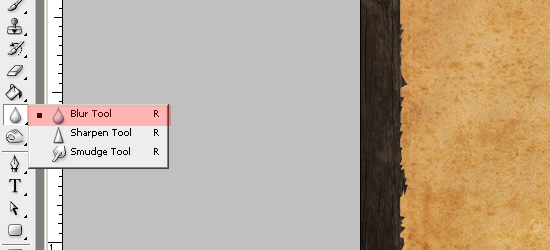
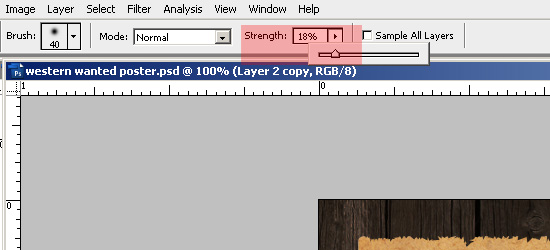
 15 Now, we should soften the torn edges of our poster because they look a bit too sharp. To do this, choose the Blur Tool (R) from the Tools Panel and set its Strength option to around 18%.
 16 Choose a Soft Round brush tip with a Diameter set to around 90px and brush over the edge of our paper to unsharpen it.
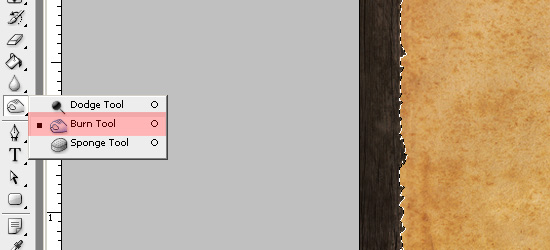
 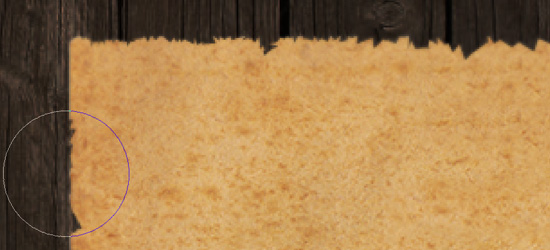 17 Now, select the textured paper by Ctrl + clicking on the paper layer in the Layers Panel. 18 Select the Burn Tool (O) from and set its Exposure option to 80%.
 19 Once again, make use of a Soft Round brush tip with a Diameter set to 200px, and brush over the paper’s edges to give it a burnt look around its edges.
 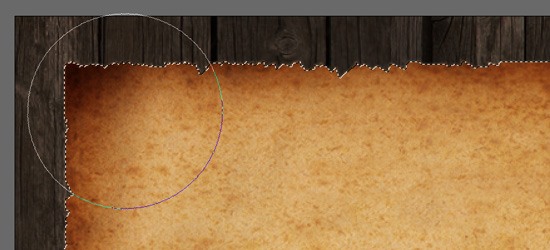 20 Do not deselect the selection yet. Let us adjust the color of the textured paper by choosing Image > Adjustments > Levels (Ctrl + L).
Use the following figure for the image adjustment settings. 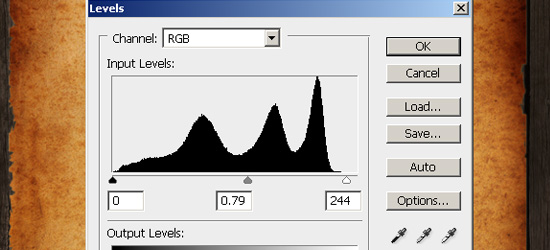 21 After that, deselect the selection by choosing Select > Deselect (Ctrl + D). 22 Create a new layer by choosing Layer > New > Layer (Shift + Ctrl + N).
23 Choose the Brush Tool (B) from the Tools Panel, and select a Soft Round brush tip with its Diameter set at around 600px. Click once on the canvas with the newly created layer active on the Layers Panel, and you should end up with something like the following figure. 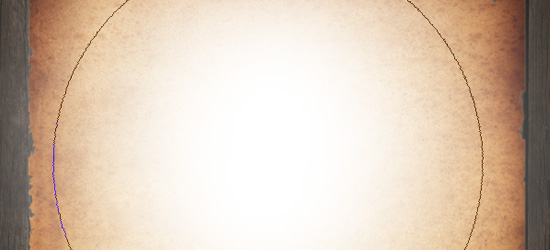 24 Change this layer’s Blend Mode to Soft Light.
This will create a sort of subtle highlight or spotlight effect. 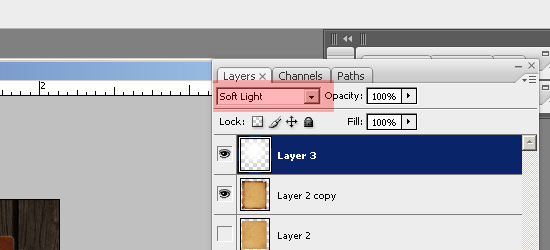 25 On the Layers Panel, Double-click on the paper texture layer to open the Layer Style dialog box. We’ll add a Drop Shadow with the following settings:
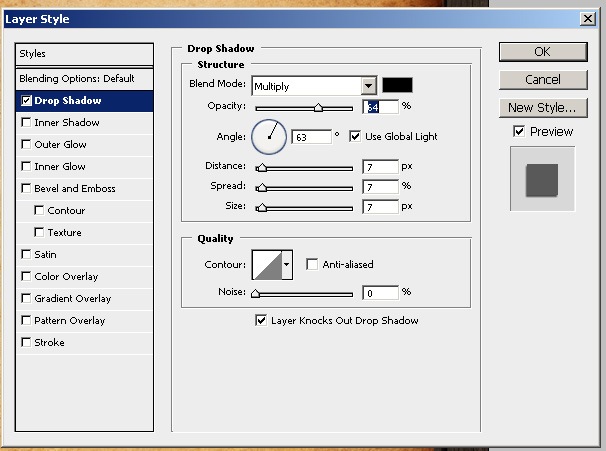
Adding the text onto the canvas
26 Now, it’s time to add some text to our poster.
First we need to download an Old Western themed font; this tutorial uses the CarnivaleE FreakshoW font, but if you have a font that you’d rather use, feel free to do so. After you’ve downloaded the CarnivaleE FreakshoW font, install it so that you can access it through Photoshop. 27 Create a new layer (Shift + Ctrl + N).
28 Using the Horizontal Type Tool (T) with the font of your choice selected, click on the canvas and type the word “WANTED” on the upper area of the paper. The color of the font should be set to #471D0B. 
Adding lines and borders
29 We will now be adding a line above the word “WANTED”.
To start, create a new layer (Shift + Ctrl + N). 30 Using the Rectangular Marquee Tool (M), make a thin rectangular selection above the Wanted text. 31 Set the Foreground color to #471D0B.
32 Using the Paint Bucket (G) tool, fill the selection with the Foreground color by clicking inside it. Our work should now look like the following figure.  33 Duplicate the line layer and move the second line below the first line.
34 Use the Free Transform Tool, Edit > Free Transform (Ctrl + T), to resize this second line to make it appear thinner compared to the first.  35 Merge the two line layers by choosing Layer > Merge Down (Ctrl + E) with the top line layer selected in the Layers Panel. 36 Duplicate this merged layer and move it down the canvas, below the word “WANTED”, using the Move Tool (V).
37 Now we’ll flip the two lines vertically by choosing Edit > Transform > Flip Vertical. 
Adding the Wanted person
38 Choose a photo as your subject. In this tutorial, I have used this stock image called Getting Angry by Emiliano Spada on sxc.hu.
If you would like to use this photo, make sure you contact the author if you intend to use it for public/commercial work. First, download this stock image and open it in Photoshop, File > Open (Ctrl + O). 39 Next, use the Magic Wand Tool to quickly select just the face area.
Copy just the face without the black background, onto our main Photoshop document. 40 Change the Blending Mode of the face layer to Darker Color. 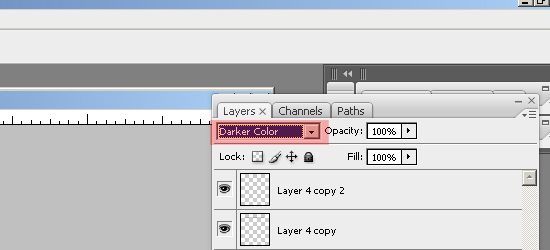 The photo should now look like the following figure.
 41 Hold the Ctrl key and click on the face layer to make a selection around the face. Choose Image > Adjustments > Levels (Ctrl + L) and apply the following settings.
 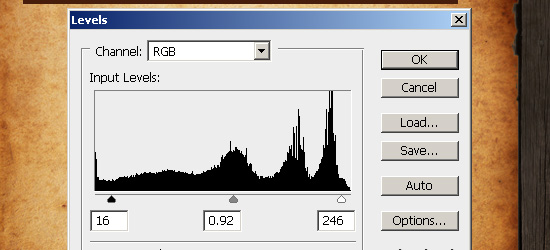 42 Next — if you don’t already have one — download and install a grungy Photoshop brush library like this one or this one (or find one that you like on a site that features free Photoshop brush libraries like Brusheezy).
43 Choose the Eraser Tool (E) from the Tools Panel and select any of the brushes from the brush set you chose from the previous step. Slightly erase off some areas of the face to give it a worn-out effect. You could also do the same to the lines layers and “WANTED” layers.
To erase off some areas on the “WANTED” text, make sure you rasterize it by right-clicking on the layer in the Layers Panel and choosing Rasterize Type. 
Adding the text at the bottom of the poster
44 Duplicate the second line layer and move it below the photo. 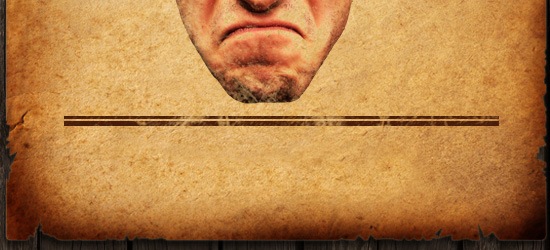 45 Below this line, use the Horizontal Type Tool (T) and type “$1,000,000 REWARD”.
Once again, set this text’s color to #210F07 and erase off some areas of the text just like what we did in Step 43. 
Creating the nails that hold up the poster
46 Now we proceed on creating the nails. To start, create a new layer. 47 Let us zoom in to the upper right corner area of our canvas using the Zoom Tool (Z).
48 Select the Elliptical Marquee Tool from the Tools Panel and make a round selection using the tool. Hold down the Shift key while dragging your mouse to create a perfect circle. 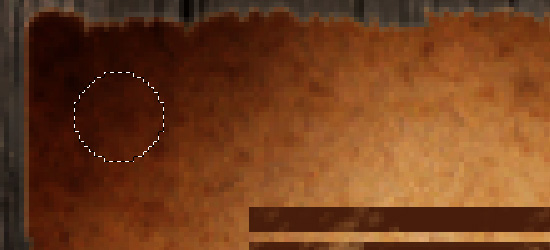 49 Let us set our Foreground color to #434343 and our Background color to #000000.
Using the Gradient Tool (G) with Radial Gradient selected in the Options bar, fill the selection with this kind of gradient. 
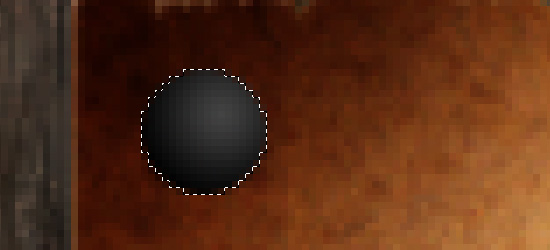 50 Choose the Pencil Tool (B) from the Tools Panel, set its Diameter to 2px, and draw a black diagonal line over the gradient circle we just created.
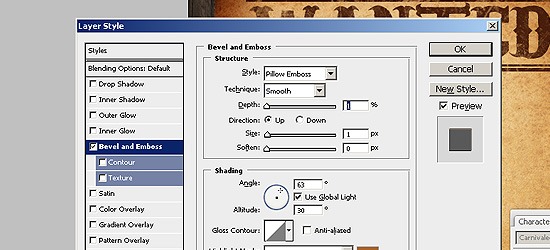
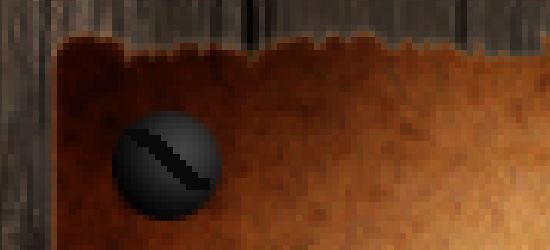 51 Let us add an embossed effect to our nail layer.
Double-click on the nail layer in the Layers Panel to open the Layer Style dialog box. Check Bevel and Emboss and apply the settings shown in the following figure. Make sure the Highlight Mode color is set to #AD6326 and Shadow Mode color is set to #000000.
 52 Duplicate the nail layer three times (by right-clicking on it and choosing Duplicate Layer) and move them to each corner of the paper using the Move Tool (V).
Performing the final touches
53 Let us add some finishing touches to our paper. It looks a bit too stretched out right now.
Create a new layer on top of our paper layer. Download and install the Creases and Folds Brush Set by Dave on deviantART. 54 Choose the Brush Tool (B) and set the Foreground color to #491504 and Background color to #DDB16D.
In the Options bar, set the brush’s Opacity to 33% and choose one of the brush tips we just downloaded. Click on the canvas to add some creases to our paper. 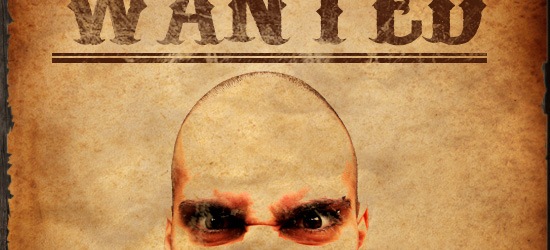 55 Finally, let us select all layers except for our wood background by holding down Ctrl and clicking on them in the Layers Panel.
Choose the Move Tool (V) from the Tools Panel, and tilt our poster a few degrees to the right using one of the transform controls on the corner of our artwork. 
Congratulations, we’re done!
If you followed along the tutorial, you should have something like the following figure (click on the preview image to see the full scale version).
Let’s see your work
If you’ve followed along this tutorial, don’t hesitate to share your own version of the tutorial in the comments by leaving a link to it.
Related Content
-
 President of WebFX. Bill has over 25 years of experience in the Internet marketing industry specializing in SEO, UX, information architecture, marketing automation and more. William’s background in scientific computing and education from Shippensburg and MIT provided the foundation for RevenueCloudFX and other key research and development projects at WebFX.
 -

WebFX is a full-service marketing agency with 1,100+ client reviews and a 4.9-star rating on Clutch! Find out how our expert team and revenue-accelerating tech can drive results for you! Learn more
Make estimating web design costs easy
Website design costs can be tricky to nail down. Get an instant estimate for a custom web design with our free website design cost calculator!
Try Our Free Web Design Cost Calculator
Share this article


Web Design Calculator
Use our free tool to get a free, instant quote in under 60 seconds.
View Web Design Calculator
Make estimating web design costs easy
Website design costs can be tricky to nail down. Get an instant estimate for a custom web design with our free website design cost calculator!
Try Our Free Web Design Cost Calculator