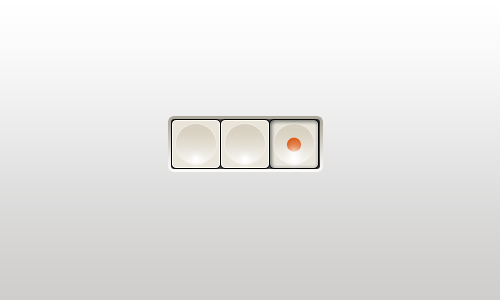
Tutorial Preview
Step 1: Create the Background
Open up Photoshop. Create a new Photoshop document with a canvas size of 500x300px.
Unlock the default Background layer by first double-clicking on it in the Layers panel, which will open up the New Layer dialog window, and then pressing OK in the New Layer dialog window.
Next, to give the unlocked Background layer a gradient background, open the Layer Style dialog window of the layer by again double-clicking it in the Layers panel.
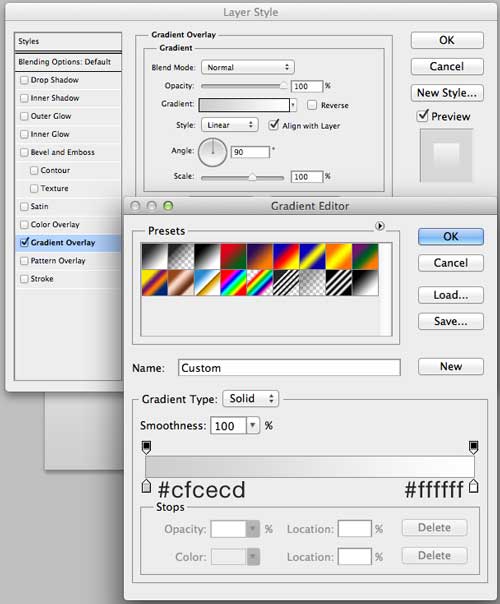
Give the layer a Gradient Overlay layer effect with the settings shown below.
Step 2: Create the Buttons Holder
Click on the Rounded Rectangle Tool (U) in the Tools panel. In the Options bar of the Rounded Rectangle Tool (located at the top of Photoshop), make sure that the Shape layers option is selected, and then set the Radius option to 3px and the Color option to a very dark gray color (#262427).
With the Rounded Rectangle Tool properly set up, draw a dark rectangle shape as shown below.

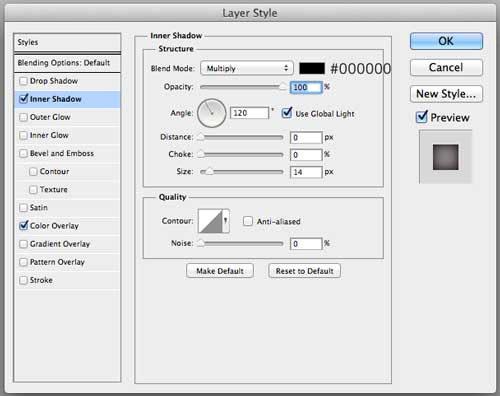
In the Layers panel, double-click on the “buttons holder” layer to open up the Layer Style dialog window.
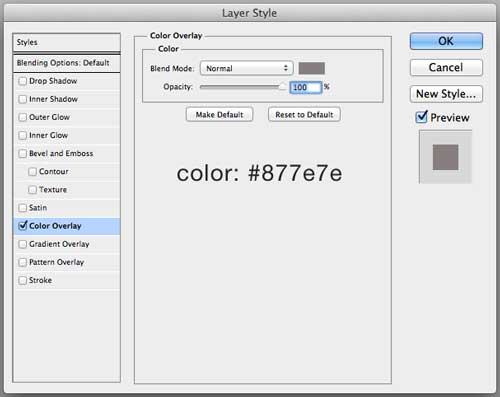
We’ll give this layer a Color Overlay, Inner Shadow and Stroke. Below are the settings for each of these layer effects.
Color Overlay

Inner Shadow
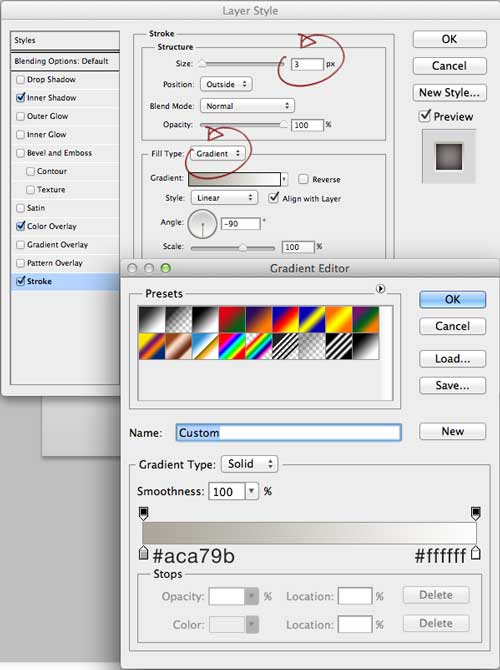
Stroke
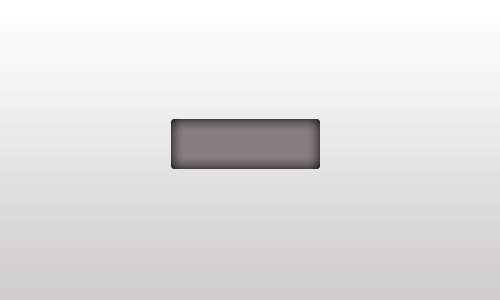
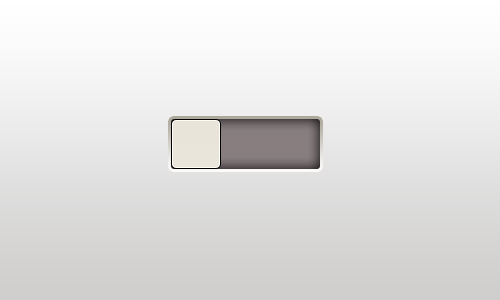
This is what we have after applying the layer effects:

Step 3: Create the Button’s Base Shape
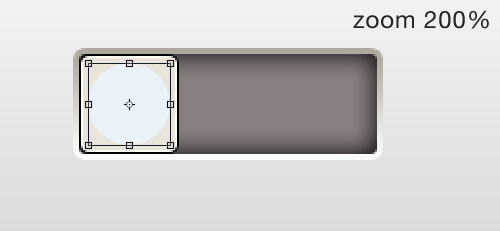
Zoom in closely with the Zoom Tool (Z) (e.g., zoom in by 200%). This will make it easier for us to work precisely.
Set up the Rounded Rectangle Tool (U) so that it has a Radius of 3px and a color of white (#ffffff).
Then draw a white square shape that will be the base shape of our buttons.

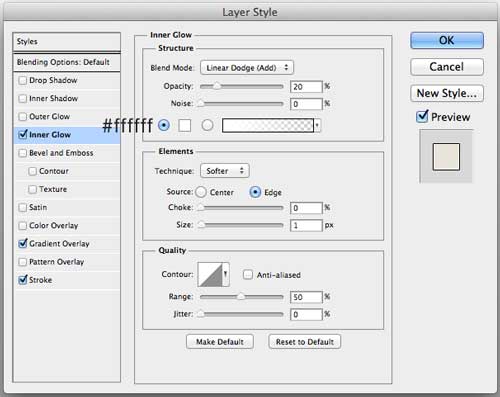
In the Layers panel, double-click on our newly created shape layer to open up the Layer Style dialog window. We will give this shape the following layer effects: Inner Glow, Gradient Overlay and Stroke. Use the images below as a reference.
Inner Glow
Gradient Overlay
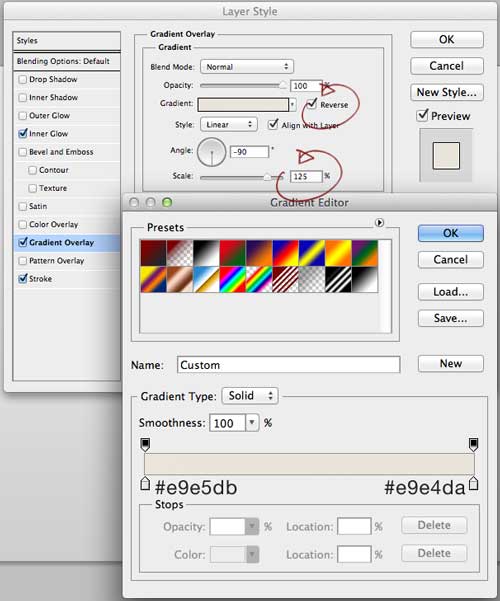
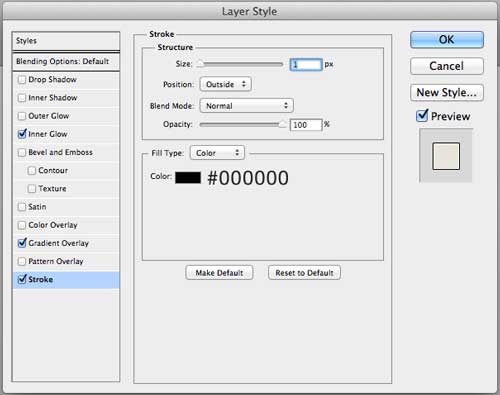
Stroke
Let’s take a look at our button’s base now:
Step 4: Add a Circle in the Middle
Switch to the Ellipse Tool (U) and then draw a white circle in the middle of button’s base.
Hold down Alt + Shift (Mac users: Option + Shift) while drawing with the Ellipse Tool to constrain proportions.
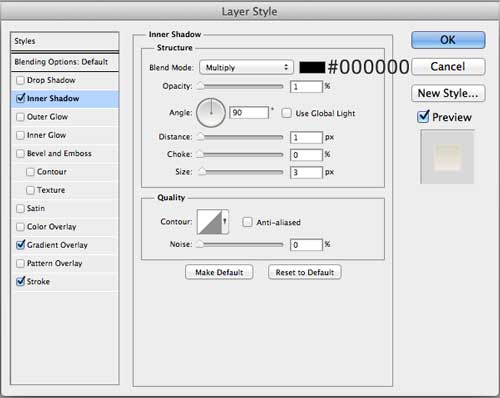
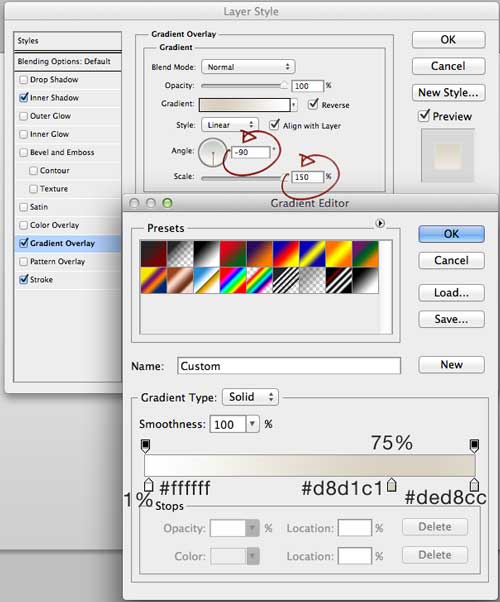
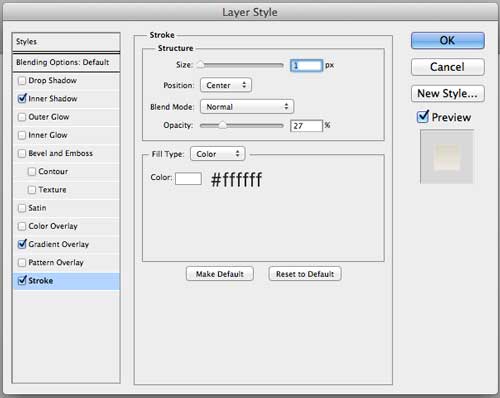
Open the Layer Style dialog window and give the circle shape an Inner Shadow, Gradient Overlay, and Stroke layer effect. The settings for these layer effects are shown below.
Inner Shadow
Gradient Overlay
Stroke
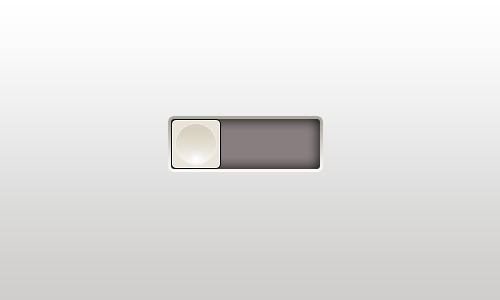
Here’s the preview of our progress thus far:

Create a new layer. Switch to the Brush Tool (B) and choose a soft, round brush with the Size set to 15px.
Paint a white (#ffffff) spot close to the bottom of the circle to add a lighting effect to our button.

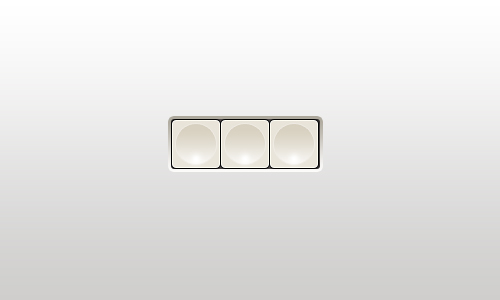
The button is finished. Let’s take a look at it:
In the Layers panel, select the button base, the circle and the light layer and then put them in a layer group that you can call “Button.”
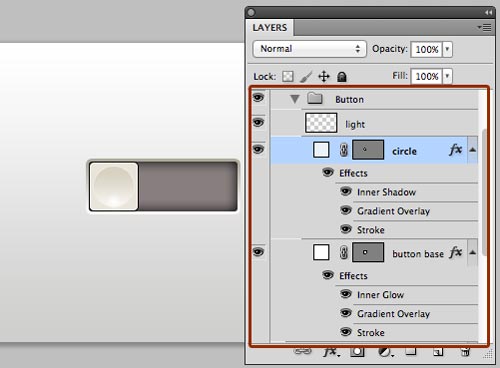
Step 5: Creating the Other Buttons
Duplicate the “Button” group twice and then use the Move Tool (V) to move the duplicates like on the image below.
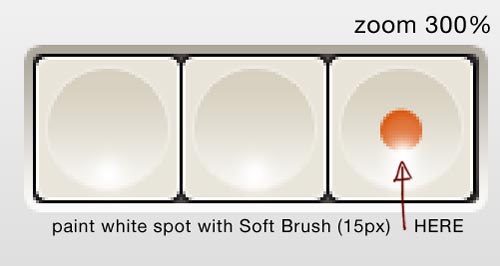
On the last button (the one on the farthest right), use the Ellipse Tool (U) to add an orange (#df7237) circle.
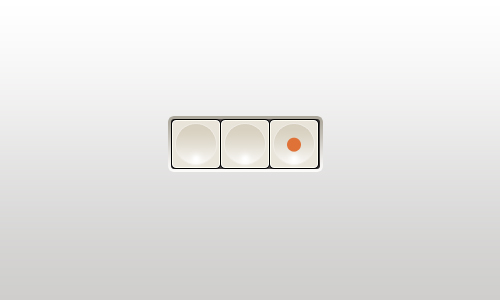
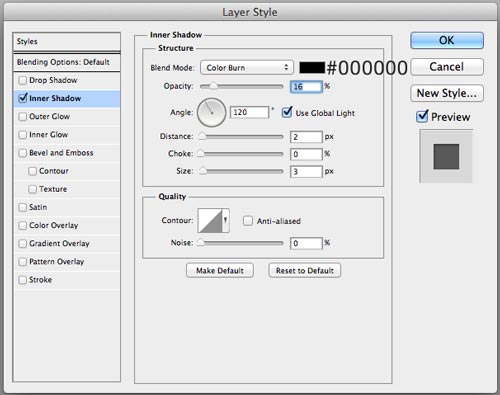
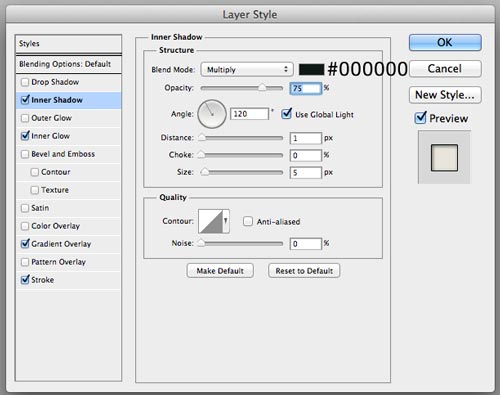
Open the Layer Style dialog window for the orange circle layer and give it an Inner Shadow layer effect.
Create a new layer on top of the orange circle (PC users: Ctrl + Shift + N Mac users: Command + Shift + N).
Switch to the Brush Tool (B) and set it up so that it has a soft, round brush and Size of 15px. On the new layer, paint a small white spot over the bottom of the orange circle.
Then lower the Opacity of this layer to 70%.
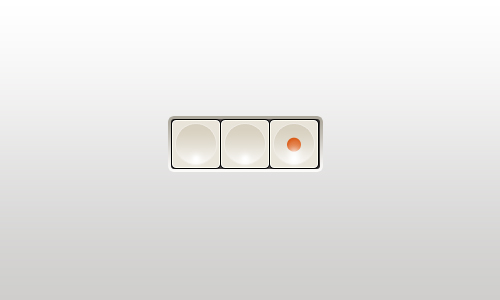
Now let’s make the rightmost button appear as though it was pushed down.
In the Layers panel, double-click on the “button base” layer of the rightmost button to open the Layer Styles dialog window. Give this layer an Inner Shadow to make this button looks like it’s pressed.
That’s it!
Tutorial Summary
We have created a simple yet beautiful set of user interface buttons inspired by Braun products from the 60’s. You may be surprised to find out that we only used basic Photoshop features like shape tools, the Brush Tool and layer styles.
I hope you have learned something new and useful by following along with this tutorial.
Thanks for reading!
Download Source Files
- square_push_buttons_photoshop (ZIP, 0.02 MB)
-
 Trevin serves as the VP of Marketing at WebFX. He has worked on over 450 marketing campaigns and has been building websites for over 25 years. His work has been featured by Search Engine Land, USA Today, Fast Company and Inc.
 -

WebFX is a full-service marketing agency with 1,100+ client reviews and a 4.9-star rating on Clutch! Find out how our expert team and revenue-accelerating tech can drive results for you! Learn more
Make estimating web design costs easy
Website design costs can be tricky to nail down. Get an instant estimate for a custom web design with our free website design cost calculator!
Try Our Free Web Design Cost Calculator
Share this article


Web Design Calculator
Use our free tool to get a free, instant quote in under 60 seconds.
View Web Design Calculator
Make estimating web design costs easy
Website design costs can be tricky to nail down. Get an instant estimate for a custom web design with our free website design cost calculator!
Try Our Free Web Design Cost Calculator