
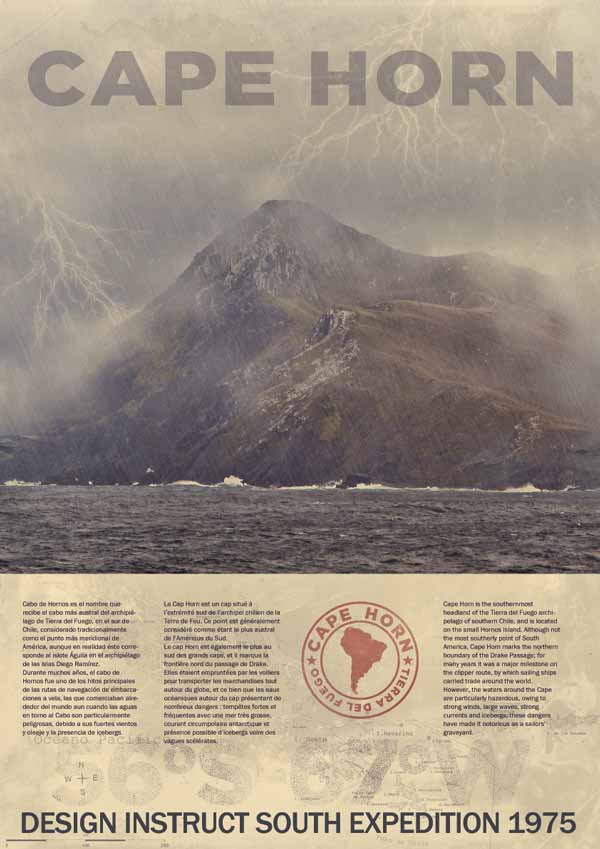
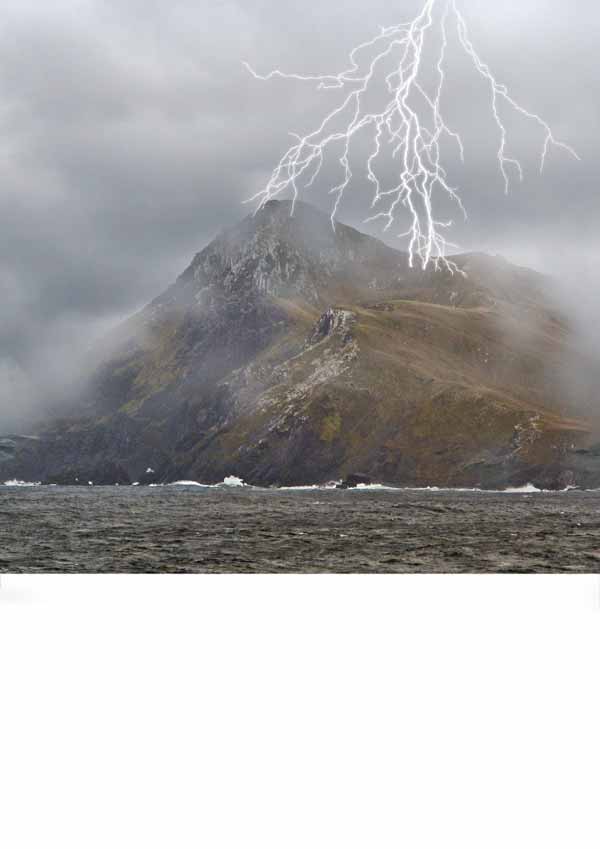
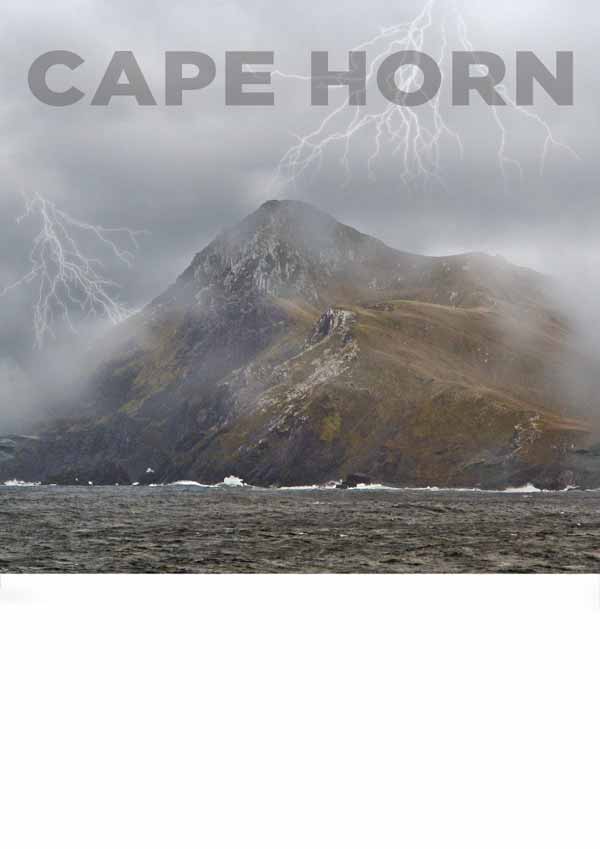
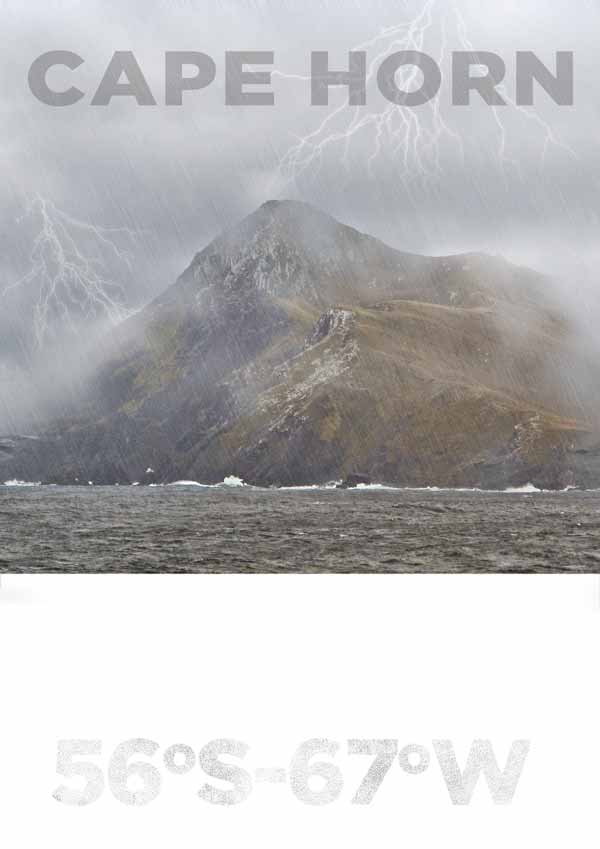
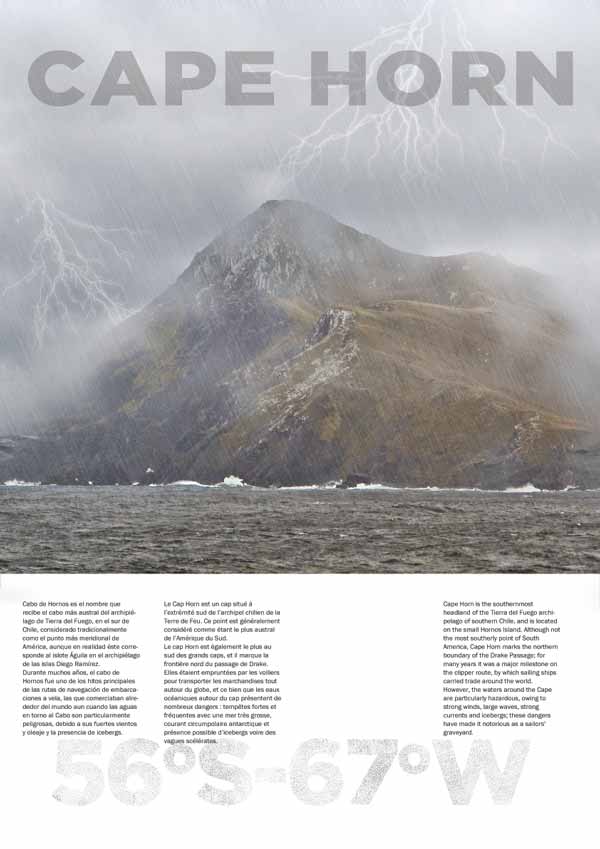
Preview
Click the preview image to see the final result in full size.

Tutorial Resources
- Image: “Cape Horn on a quiet day” (Course for Adventure)
- Image: “Storm brewing at Cape Horn, 2008.” (John Delaney)
- Brush Library: Subtle Grunge Photoshop Brush Set 3
- Vector: Lightning vector from Free Vector Pack 10 Sampler (GoMediaZine)
- Vector: South America map (Iryna Volina)
- Image: “Strait of Magellan, Chile” (Wikimedia Commons)
- Texture: Film texture (Unsigned Design)
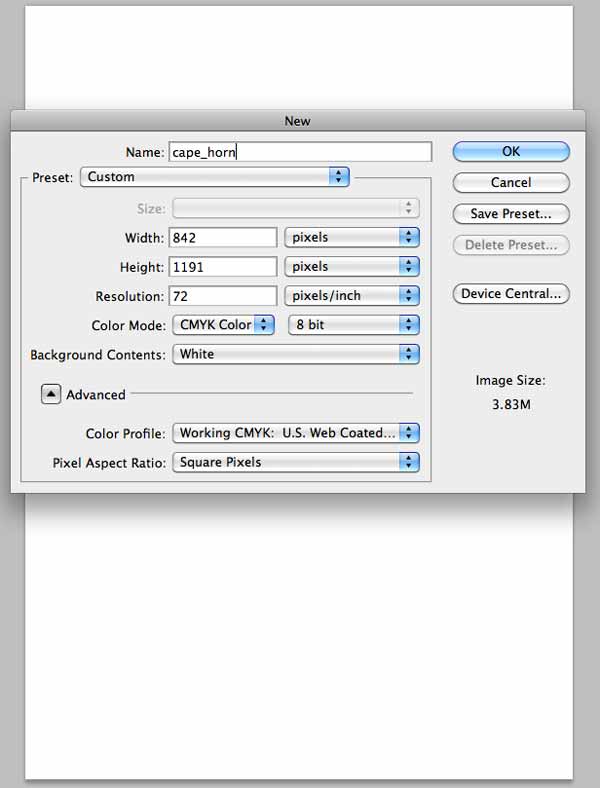
Step 1: Create the Photoshop Document
Open Photoshop and create a new document. Because I’m only designing for screen viewing, I’ll use the International Paper – A3 document preset set to CMYK color mode and 72 dpi resolution.
If your work will be printed, you’ll need a much higher resolution — at least 300 dpi.
Set your Background color to White.
Step 2: Add the Cape Horn Photo
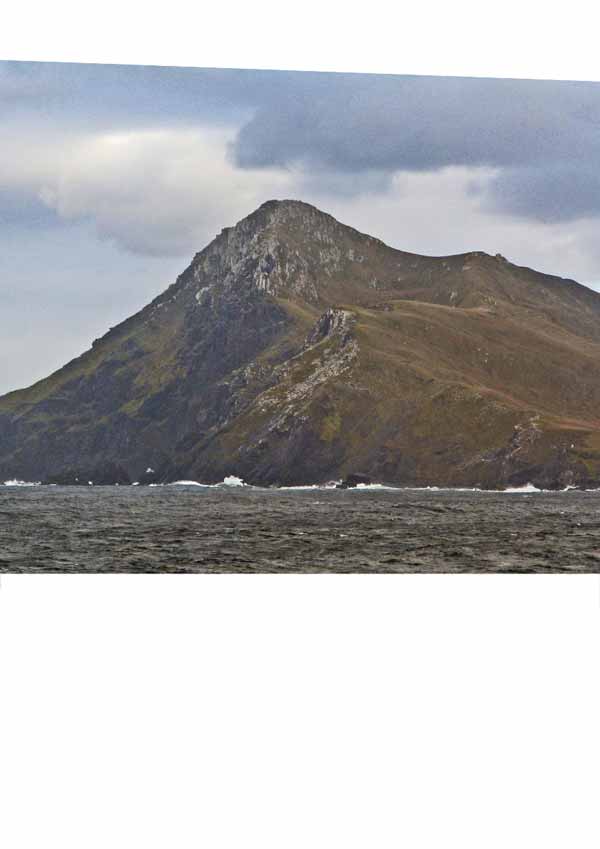
Download “Cape Horn on a quiet day” and place it in our canvas. Scale it down and rotate it using Free Transform (Cmd/Ctrl + T).
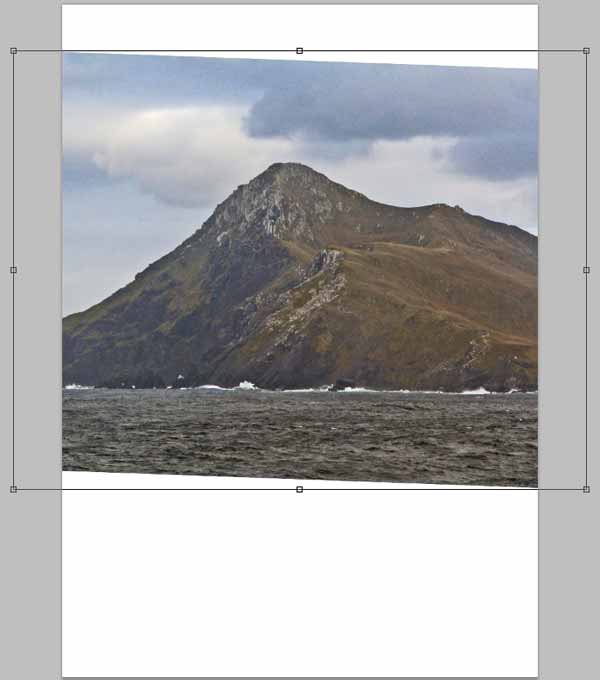
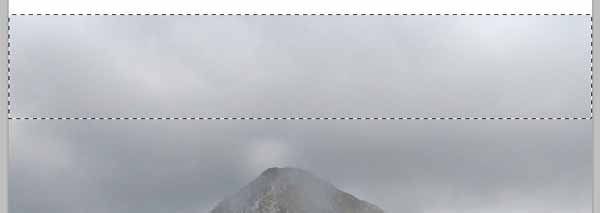
Switch to the Rectangular Marquee Tool (M) and make the selection shown below.
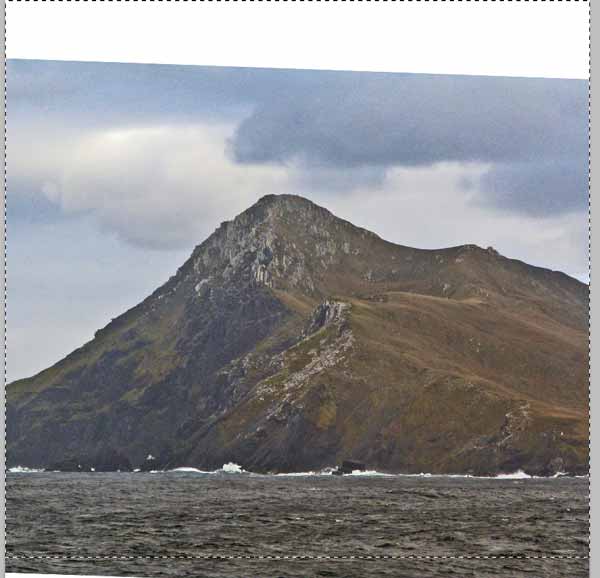
Then, create a layer mask on the Cape Horn layer by choosing Layer > Layer Mask > Reveal Selection.
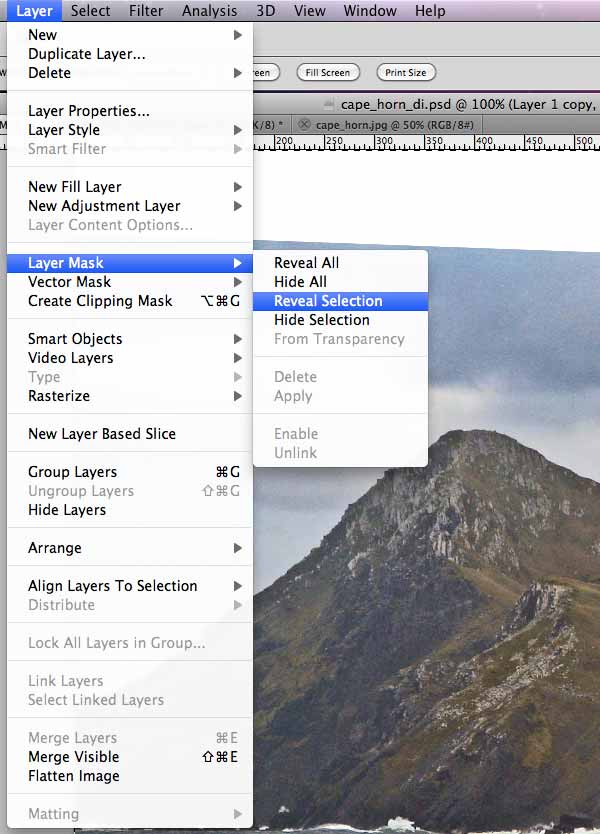
The layer mask will hide any areas of the layer that wasn’t selected.
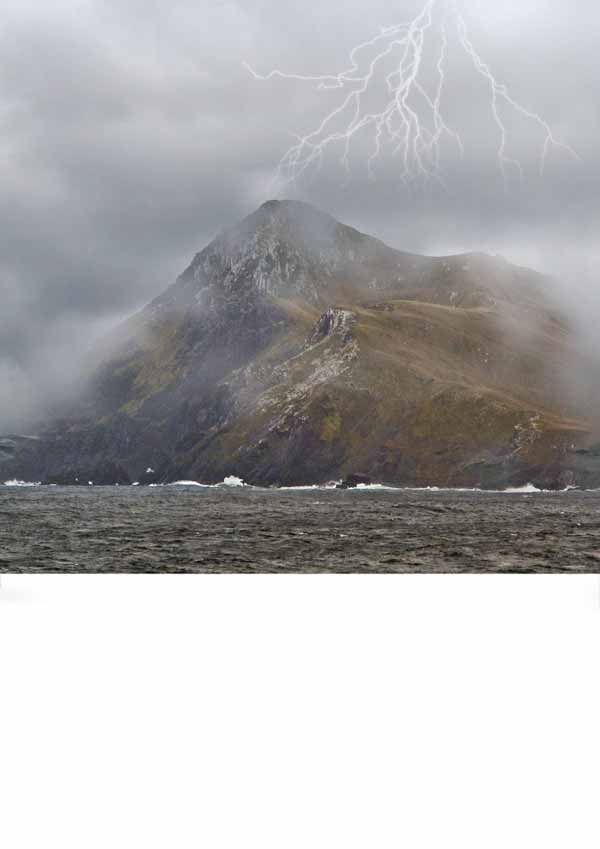
Step 3: Add Clouds to the Scene
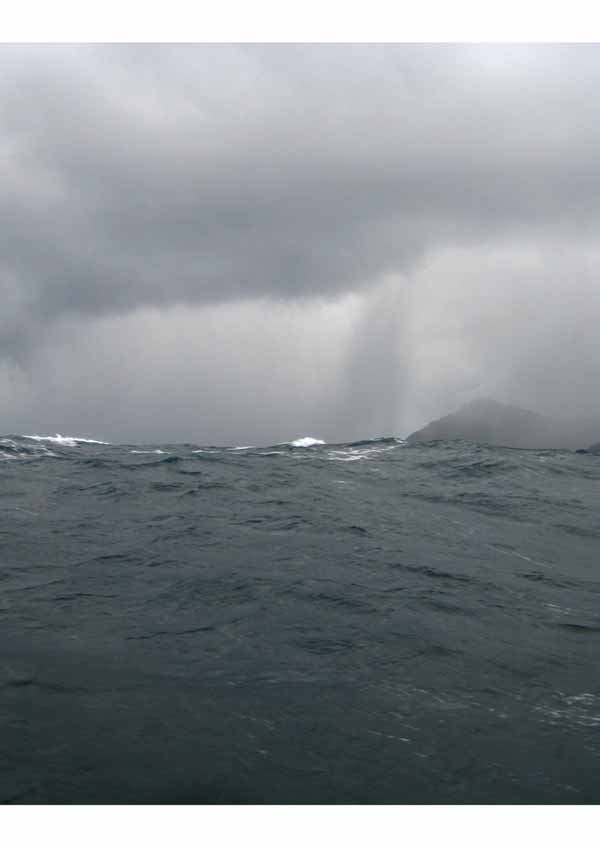
Next, download and place the “Storm brewing at Cape Horn, 2008” photo into the canvas.
Then, scale it down using Free Transform (Cmd/Ctrl + T).
Create a layer mask on the layer by going to Layer Mask > Layer > Reveal All. In the Layers Panel, click on the layer mask thumbnail to make the layer mask the active layer.
Note: Remember that in layer masks, black will hide areas you paint over and white will reveal them.
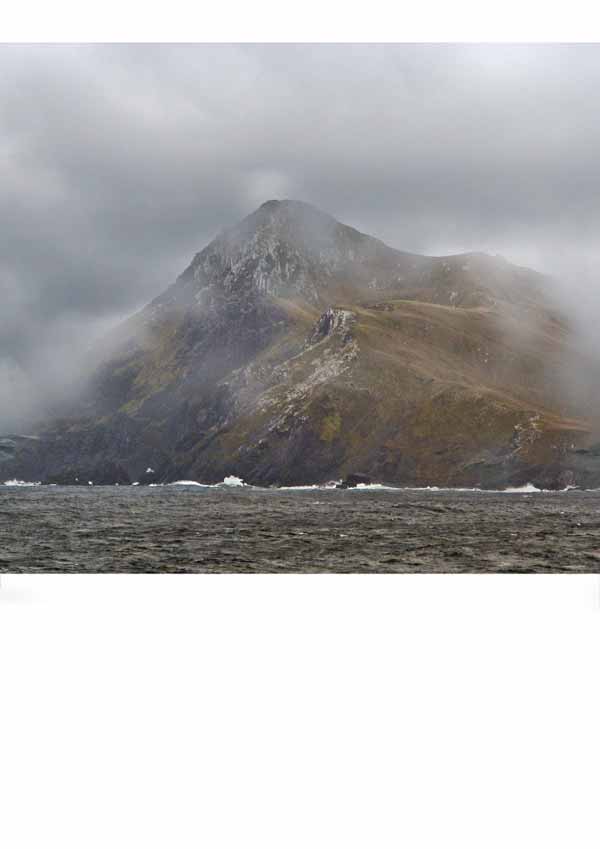
On the layer mask, use the Brush Tool (B) with a soft, black brush to start erasing some parts of the photo in such a way that the heavy storm clouds are only over and around Cape Horn. Change the brush size and opacity while doing this to achieve a better and more realistic result.
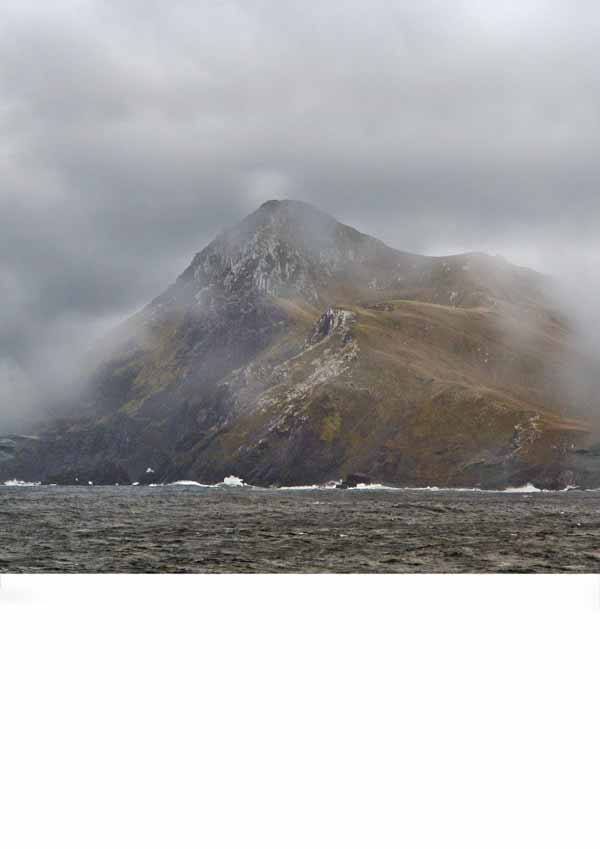
After you finish with the masking, you should have something similar to this:
We need to fill that white space on top.
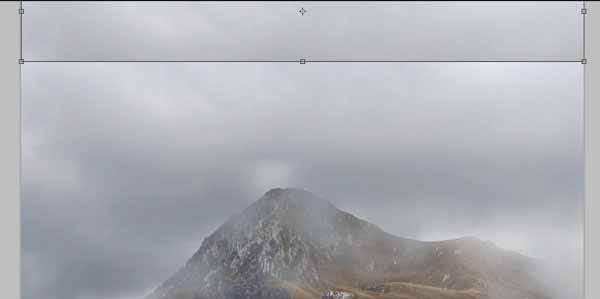
Grab the Rectangular Marquee Tool (M), make sure you are on the storm layer and then create the selection shown below.
Copy (Cmd/Ctrl + C) and paste (Cmd/Ctrl + V) the selection in a new layer. Use the Move Tool (V) to move the rectangle up so that it covers the empty area, making sure there’s a bit of overlap at the bottom so that it’s seamless.
Add a layer mask on the layer by clicking the Add layer mask button at the bottom of the Layers Panel. With a soft, black brush — size around 80px and Opacity set to 30% — paint on the layer mask to blend the layer with the storm layer below it.
Step 4: Add Thunder and Lightning
For this step, you will need Adobe Illustrator.
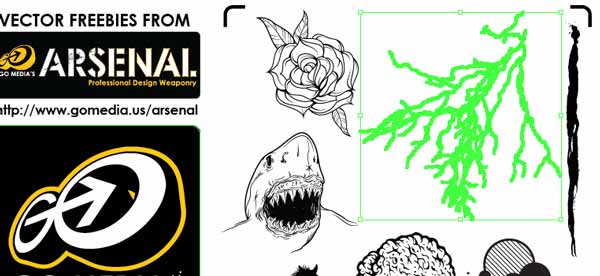
Download and open the Free Vector Pack 10 Sampler in Illustrator. Select the Lightning vector (highlighted in green below), copy (Cmd/Ctrl + C) it and paste (Cmd/Ctrl + V) it in our Photoshop document as a Smart Object.
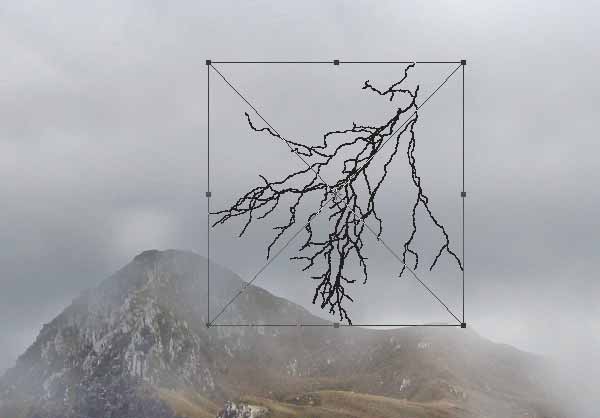
Make the Lightning vector bigger using Free Transform.
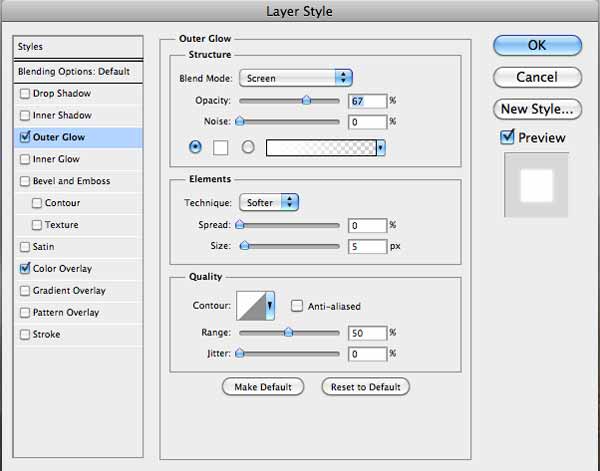
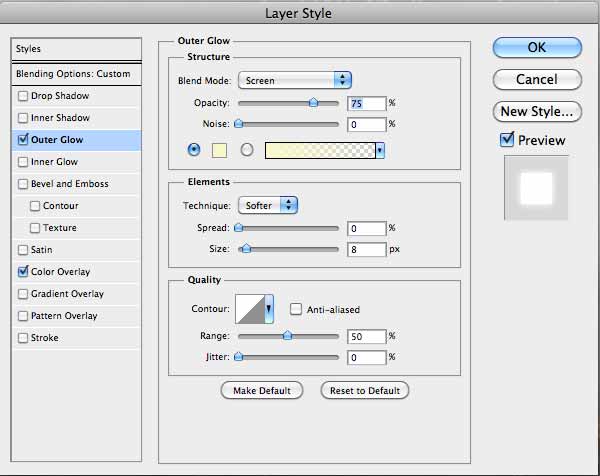
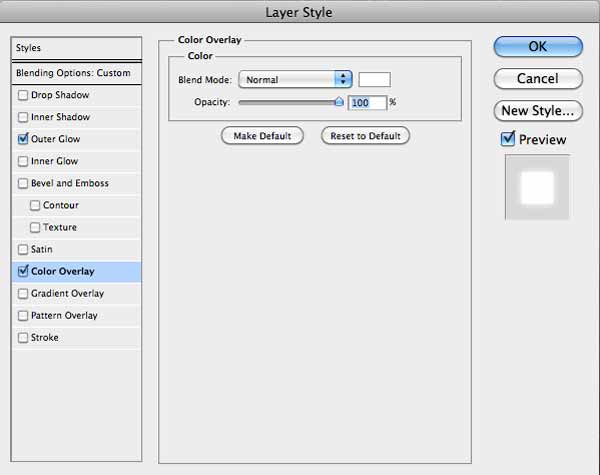
Next, double-click on the lightning layer in the Layers Panel to open the Layer Style dialog window where you will be able to add an Outer Glow and Color Overlay on the layer.
Outer Glow
Color Overlay
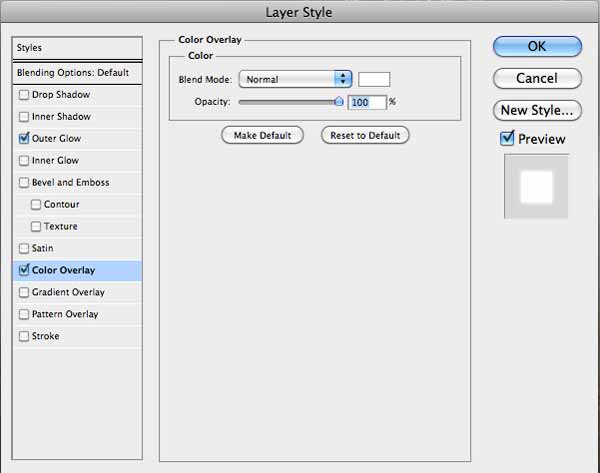
The Outer Glow and Color Overlay gives the Lightning vector a more realistic appearance (as shown below).
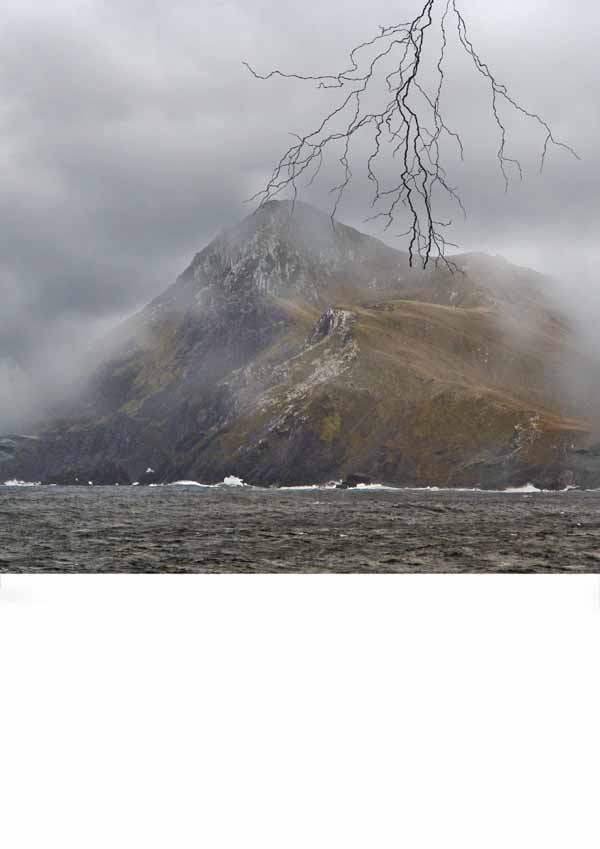
Add a layer mask to the lightning layer and erase some parts of it with a soft, black brush. To give it added realism, lower the Opacity of the layer to 70% so that the stormy clouds show through it a little bit.
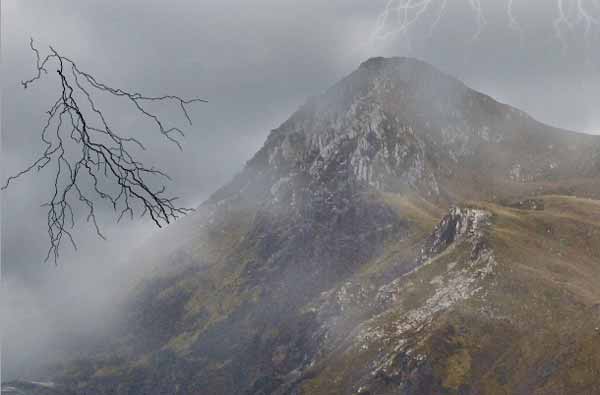
Use the same process to add lightning on the left of the Cape Horn scene.
We want to create some variation between the two, so we will have slightly different settings for its Outer Glow, Color Overlay and Opacity (which we will set a little higher at 50%).
Outer Glow
Color Overlay
Here’s what the lightning on the left should look like:

Step 5: Add the “Cape Horn” Heading
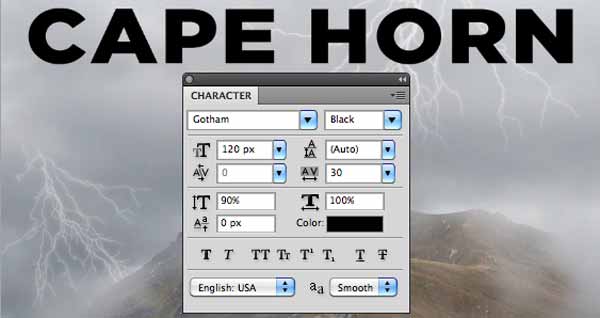
Grab the Horizontal Type Tool (T) and type “CAPE HORN” using a bold sans serif font like Gotham.
Step 6: Create a Custom Photoshop Pattern
Now we need to create a diagonal pattern that we will apply on the heading.
Tip: If you’re not familiar with Photoshop patterns, learn all about them by reading the following guide here on Design Instruct: Photoshop Patterns: Ultimate Guide.
Create a new, 10x10px document that has a transparent background.
Set the Foreground color to #000000 and then use the Line Tool (U) to draw a diagonal line from the top-right corner to the bottom-left corner of the canvas.
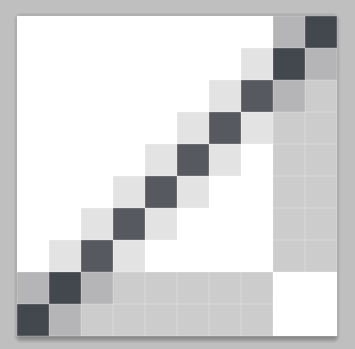
Go to Edit > Define Pattern. Name the new pattern any way you want, press OK and you will have a very cool diagonal pattern.
Step 7: Apply the Diagonal Pattern
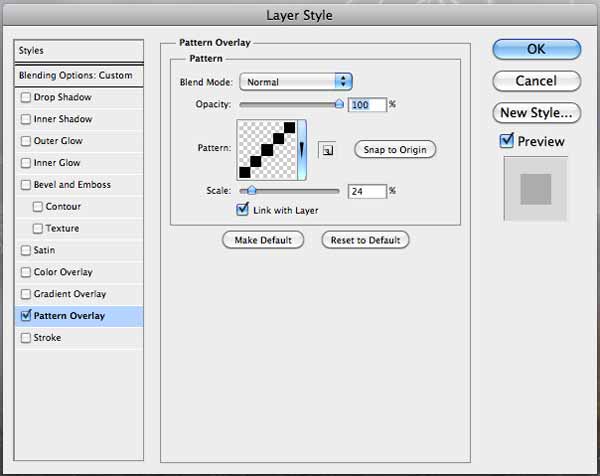
Back to our design. Double-click on the “Cape Horn” text layer to open the Layer Style dialog window.
Add a Pattern Overlay layer effect using the pattern we created.
In the Layers Panel, change the Blend Mode of the layer to Multiply and set the Fill option to 0%.
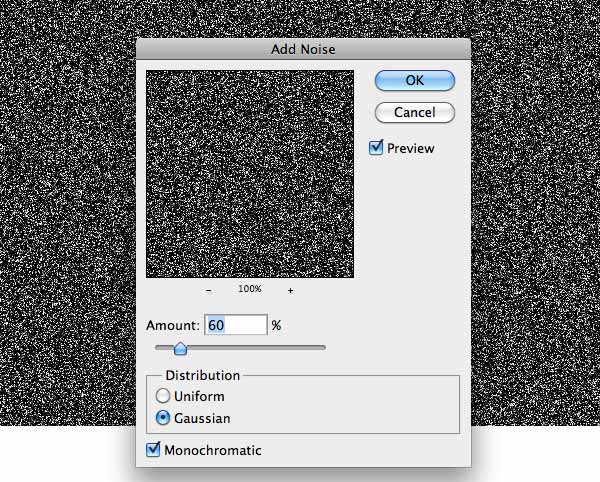
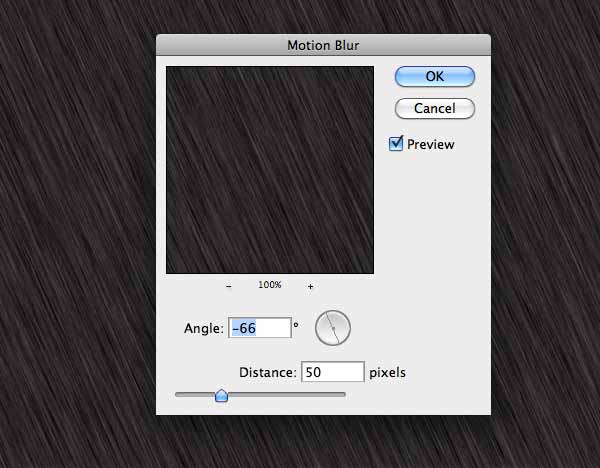
Step 8: Rain Effect
Next, we will make a super simple rain effect. To start, create a new layer (Cmd/Ctrl + Shift + N) at the very top of the layer stack.
With the Rectangular Marquee Tool (M), create a selection that covers the Cape Horn scene and, on the new layer we just created, fill the selection with black.

Go to Filter > Noise > Add Noise and use the settings shown below.
Go to Filter > Blur > Motion Blur and use the settings shown below.
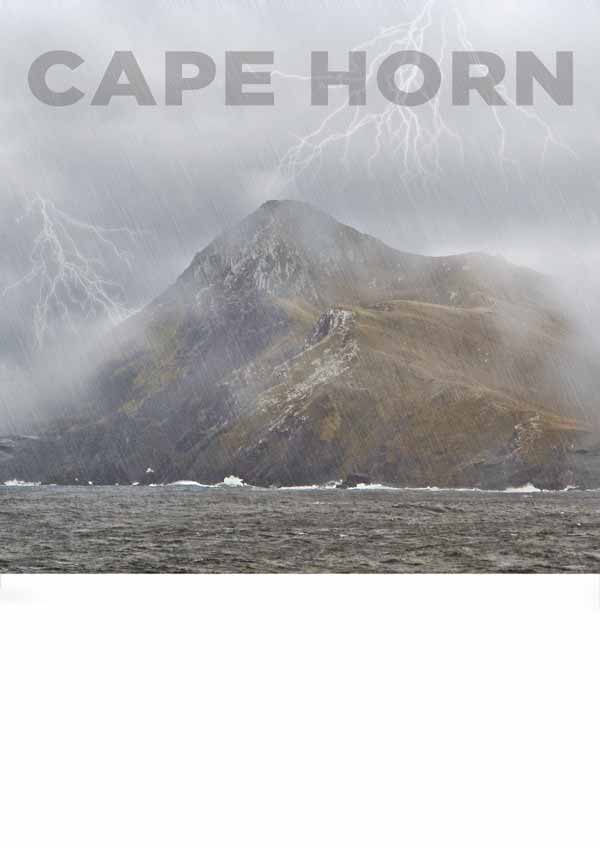
Set the Blend Mode of the layer to Screen and lower the layer’s Opacity to 60%.
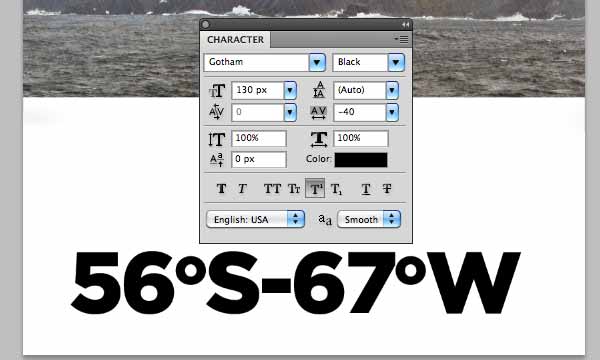
Step 9: Add More Text
Next, we will add more text onto our poster.
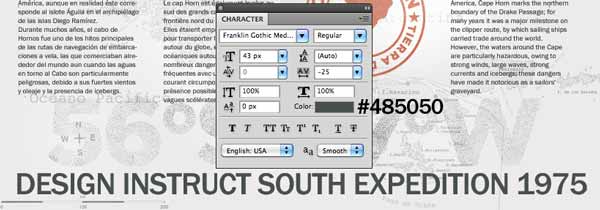
With the Horizontal Type Tool (T), type Cape Horn’s geographic coordinates.
Cmd-click/Ctrl-click on the text layer’s thumbnail to create a selection around the text. Afterwards, create a new layer above the text layer and then hide the text layer.
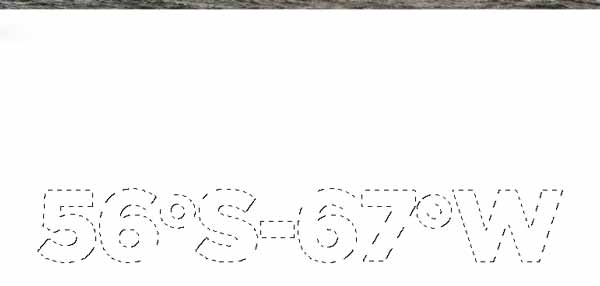
Download and install the Subtle Grunge Photoshop Brush Set 3, switch to the Brush Tool (B), choose one of the brushes from the brush library we just installed and then paint over the newly created layer.
The selection around the text will confine your paint strokes within the areas selected.
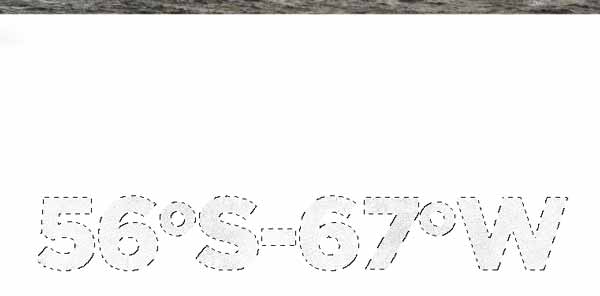
Deselect the selection (Cmd/Ctrl + D), duplicate the layer (Cmd/Ctrl + J) and set the duplicate layer’s Blend Mode to Multiply.
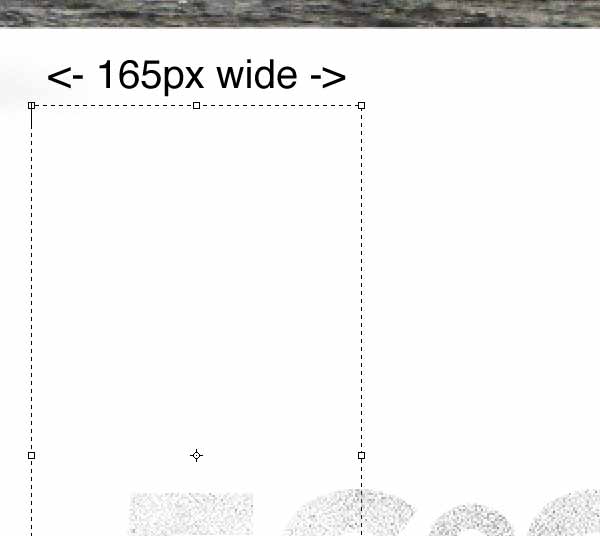
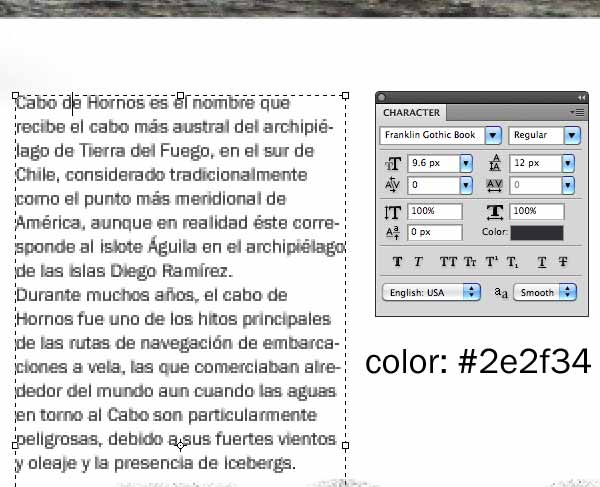
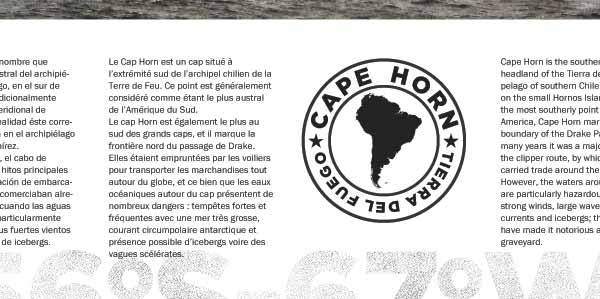
We are going to add more text to poster design. With the Horizontal Type Tool (T), click-hold-and-drag to create a text box that’s about 165px wide. Doing this ensures the text we type will remain inside the text box.
Type some text — I used the Spanish description of Cape Horn from Wikipedia.
Add short descriptions in French and English (or any other language you prefer) using the same method.
Step 10: Create a Circular Badge Logo in Illustrator
Let us switch to Adobe Illustrator again to create a circular badge logo for our poster.
It is a popular design trend right now.
Create a large circle. Set the Fill color of the circle to None, the Stroke color to black, and the Stroke width to 9pt.

Copy (Cmd/Ctrl + C) the circle and paste it in front (Cmd/Ctrl + F). Scale down the copy while holding Alt + Shift to constrain the proportion of the object and to make its center the transform origin.
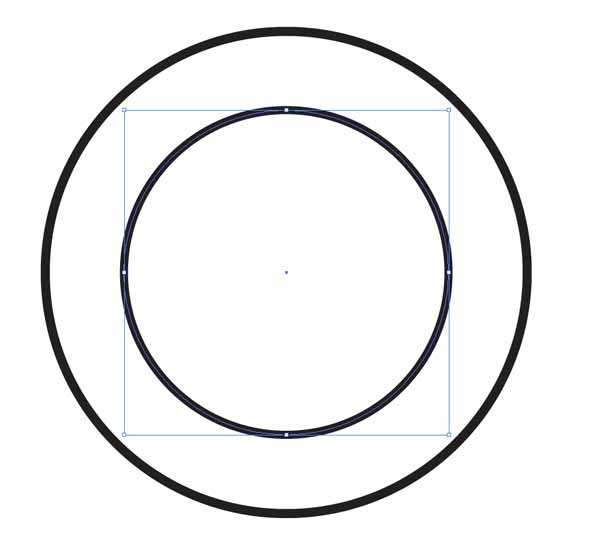
Copy and paste the smaller circle, scale up the copy so that it’s bigger than the original, and then remove its fill and stroke.
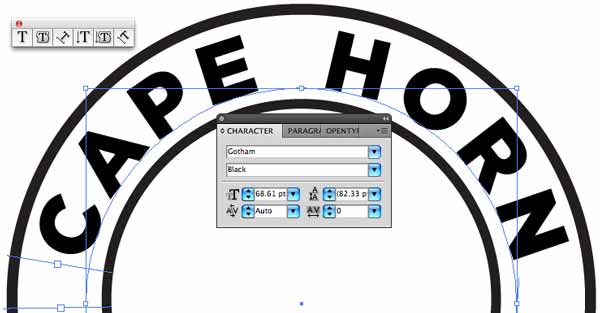
Click on the Type on a Path Tool in the Tools Panel and then click on the circle that has no fill and stroke.

Type the words “CAPE HORN” using a bold sans serif font like Gotham.
The text should conform with the path of the circle.
Go to Type > Type on a Path > Type on a Path Options to adjust the Spacing option.
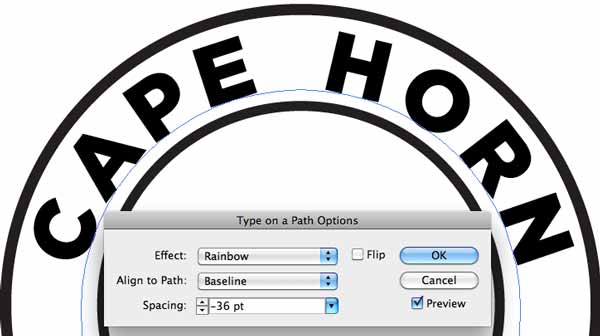
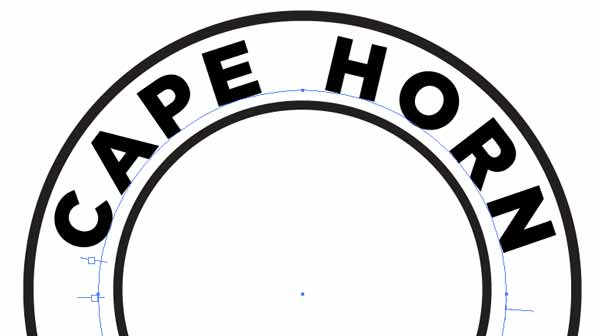
Use the Direct Selection Tool (A) to adjust the anchor points in so that the text is centered.
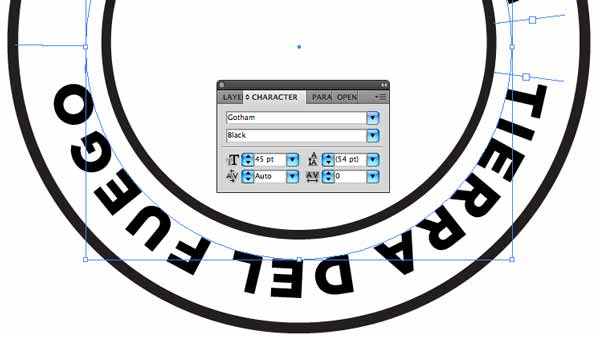
Copy and paste the text. Replace the text with “Tierra Del Fuego”. Make tweaks to the size and position to make sure the text is centered.
Use the Star Tool to create stars that will act as separators between the two sets of text.
Scale and position one star into place. Copy and paste the star, and then drag the copy across to the other site while holding Shift to constrain the movement horizontally.

Download and open South America map in Illustrator. Copy and paste the map in our badge.
Scale it down and place it inside the inner circle.
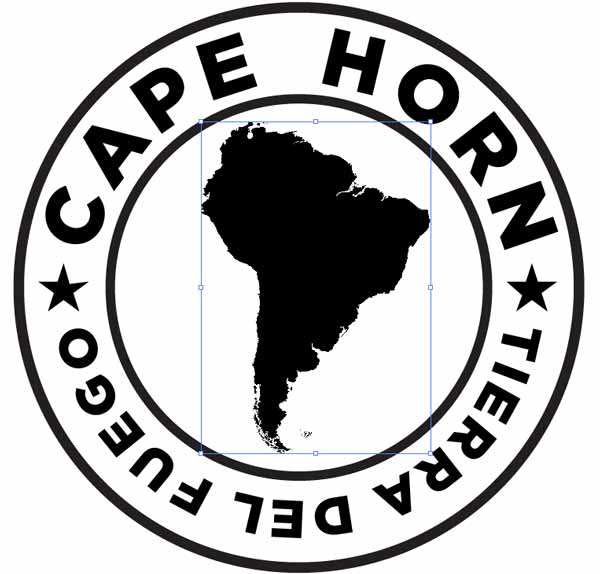
Select the entire badge, copy it, switch to Photoshop, and paste it in our poster design as a Smart Object. Scale it down as necessary, position it between the two columns of text and lower the badge layer’s Opacity to 85%.
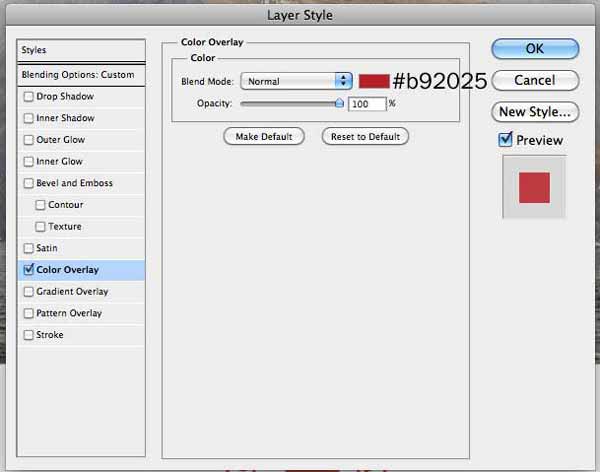
Double-click on the badge layer to open the Layer Style dialog window. Give the layer a red (#b92025) Color Overlay.
Create a new layer above the badge layer and then place a selection around the badge by Cmd-clicking/Ctrl-clicking on the badge layer’s thumbnail in the Layers Panel.
Switch to the Brush Tool (B), choose one of the subtle grunge brushes we installed earlier, set your Foreground color to white (#FFFFFF) and add some grunge strokes over the badge to distress and stylize it.
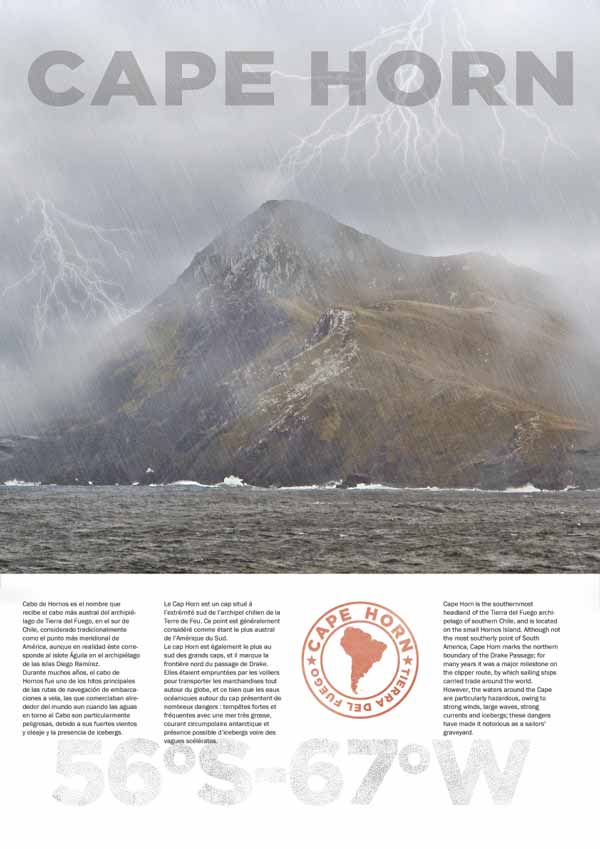
Step 11: Add a Map
Download and open the “Strait of Magellan, Chile” photo in Photoshop, desaturate it (Cmd/Ctrl + Shift + U) and then copy it into our canvas.
Use Free Transform (Cmd/Ctrl + T) to scale it down using the image below as a reference.
Change the layer’s Blend Mode to Multiply and Opacity to 40%.
Add a layer mask on the layer and, with a soft, black brush, erase areas of the map on top that overlaps with the Cape Horn photo.
Step 12: Finishing Touches
This is the last step in the tutorial, and here, we’ll add a few final additions to the piece.
First, let’s add another line of text using the Horizontal Type Tool (T).
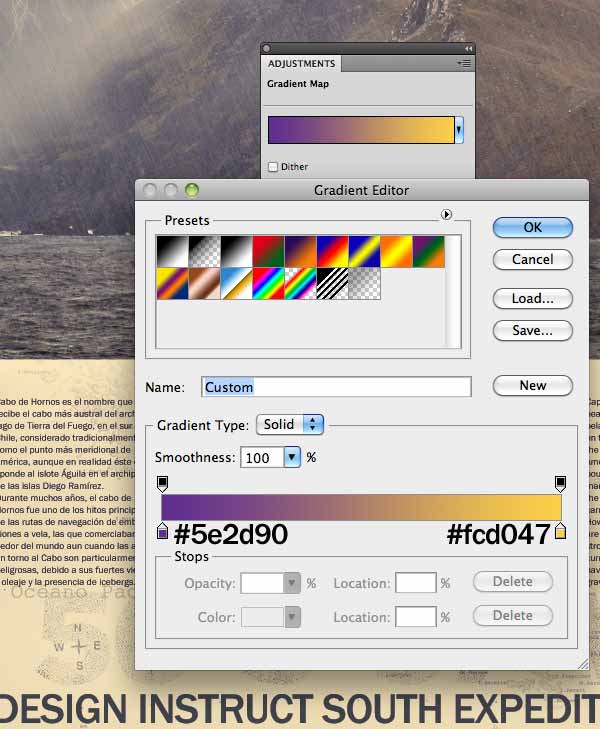
Then we will use an adjustment layer to give our entire composition the vintage-inspired color theme we are going for. Go to Layer > New Adjustment Layer > Gradient Map to add an adjustment layer above all the other layers.
Set the gradient so that it goes from #5e2d90 to #fcd047. Afterwards, lower the Opacity of the Gradient Map adjustment layer to 35% and set its Blend Mode to Multiply to give our design a vintage feel.
Finally, let’s add a texture to our composition to make it look a little aged. Download and place this Film texture into our design. Resize it to fit our canvas.
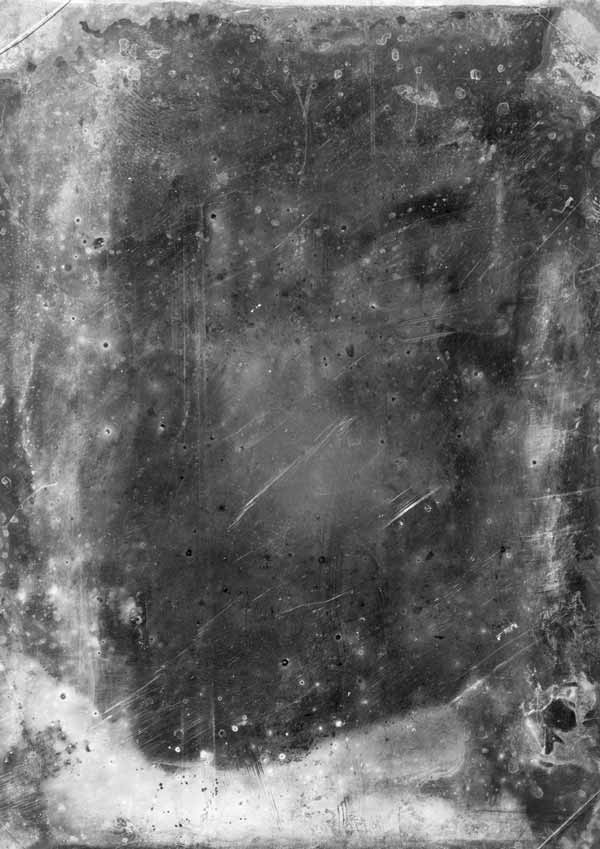
Change the layer’s Blend Mode to Multiply and Opacity to 10%.
And we are done!
Tutorial Summary
In this Photoshop tutorial, I walked you through the process of creating a vintage-themed memorabilia poster.
We used simple but powerful Photoshop tools such as layer styles, layer masks, Free Transform, filters, an adjustment layer and more. We also used Adobe Illustrator to create stylish badge logo.
Download Source Files
- vintage_memorabilia_poster (ZIP, 41.0 MB)
-
 Trevin serves as the VP of Marketing at WebFX. He has worked on over 450 marketing campaigns and has been building websites for over 25 years. His work has been featured by Search Engine Land, USA Today, Fast Company and Inc.
 -

WebFX is a full-service marketing agency with 1,100+ client reviews and a 4.9-star rating on Clutch! Find out how our expert team and revenue-accelerating tech can drive results for you! Learn more
Make estimating web design costs easy
Website design costs can be tricky to nail down. Get an instant estimate for a custom web design with our free website design cost calculator!
Try Our Free Web Design Cost Calculator
Table of Contents
- Preview
- Tutorial Resources
- Step 1: Create the Photoshop Document
- Step 2: Add the Cape Horn Photo
- Step 3: Add Clouds to the Scene
- Step 4: Add Thunder and Lightning
- Step 5: Add the "Cape Horn" Heading
- Step 6: Create a Custom Photoshop Pattern
- Step 7: Apply the Diagonal Pattern
- Step 8: Rain Effect
- Step 9: Add More Text
- Step 10: Create a Circular Badge Logo in Illustrator
- Step 11: Add a Map
- Step 12: Finishing Touches
- Tutorial Summary
- Download Source Files
Share this article


Web Design Calculator
Use our free tool to get a free, instant quote in under 60 seconds.
View Web Design Calculator
Make estimating web design costs easy
Website design costs can be tricky to nail down. Get an instant estimate for a custom web design with our free website design cost calculator!
Try Our Free Web Design Cost Calculator


