Preview
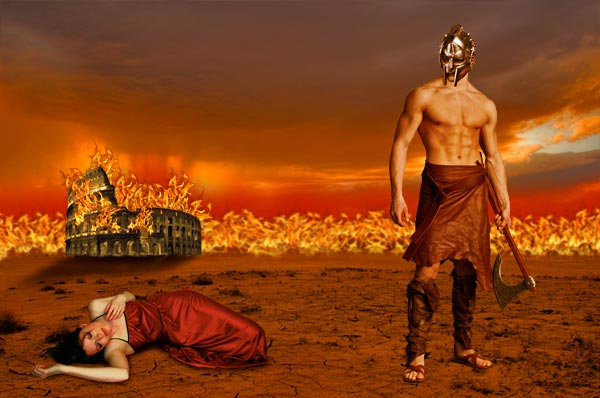
Click the preview image to see the final result in full size. 
Tutorial Resources
- Image: Storm Cell at Sunset by Sandy Redding (free)
- Image: quiet desert from Stock.XCHNG (free)
- Image: Colosseum by Irina Hernandez (free)
- Image: Fire Flames from Stock.XCHNG (free)
- Image: Red Dress Stock 3 by chamberstock (free; credit required)
- Image: Barbarian Warrior J – 11 by mjranum-stock (free)
- Image: Legionary soldier ready for a war from Pixmac (Not Free, Commercial)
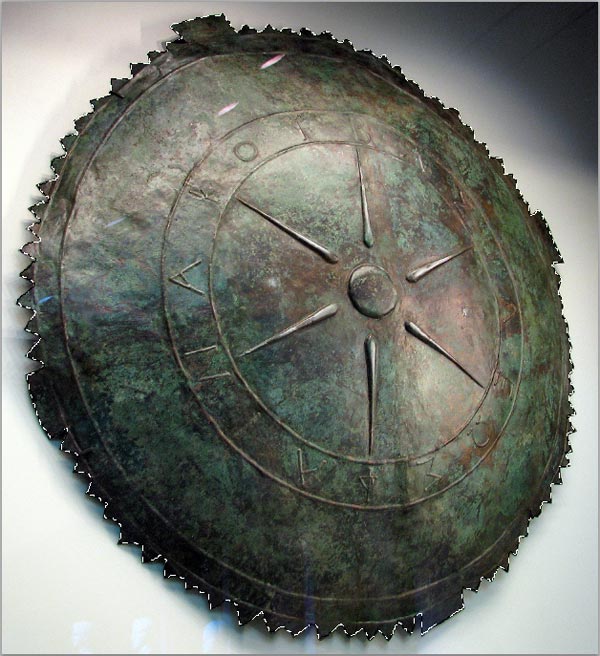
- Image: Shield of King Pharnakes by Taifighta (free)
- Texture: canvas from Stock.XCHNG (free)
Step 1: Creating the Background
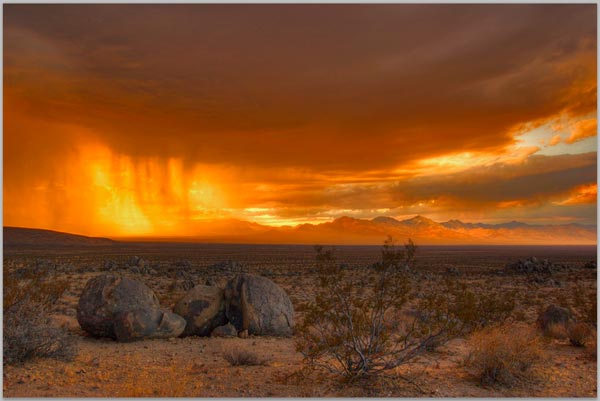
Fire up Adobe Photoshop and open the Storm Cell at Sunset image. The Photoshop canvas size will depend on which image size you’ve downloaded. For this tutorial, I used the large version of the stock image (1024x679px).
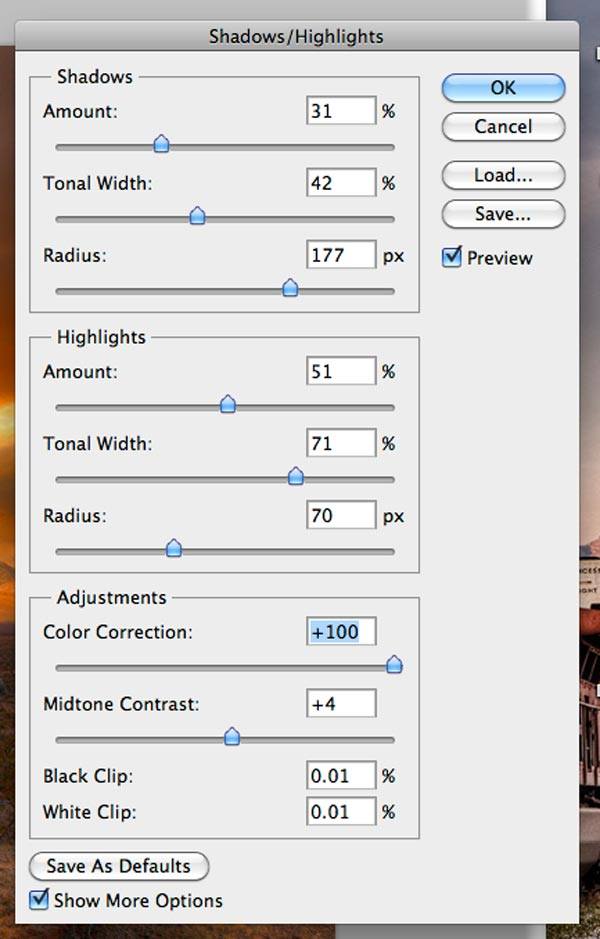
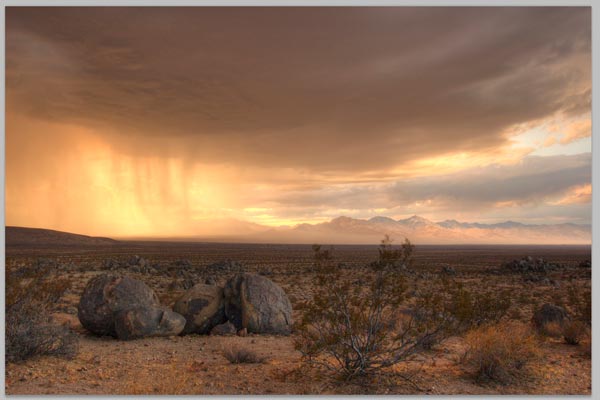 This photo is excellent, but I want to make it more dramatic. To do this, go to Image > Adjustments > Shadows/Highlights, make sure that Show Me More Options is checked, and make some corrections to the image.
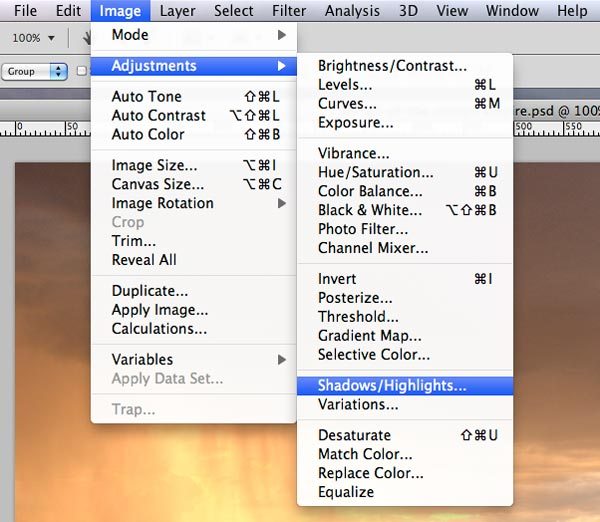
 Here is preview of image after the shadows/highlights image adjustment.
 Download quiet desert image. Paste the image onto the main canvas, resize it a bit and adjust the perspective (Cmd/Ctrl + T).
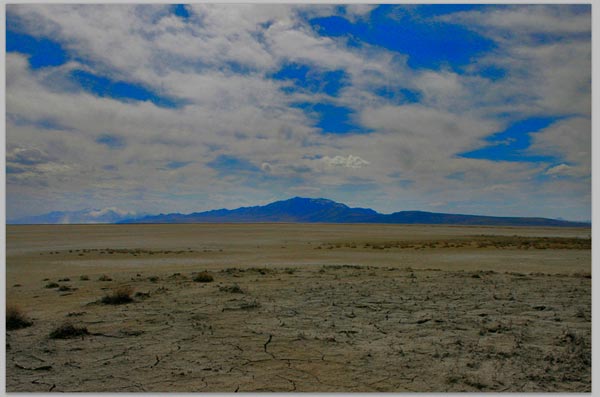
 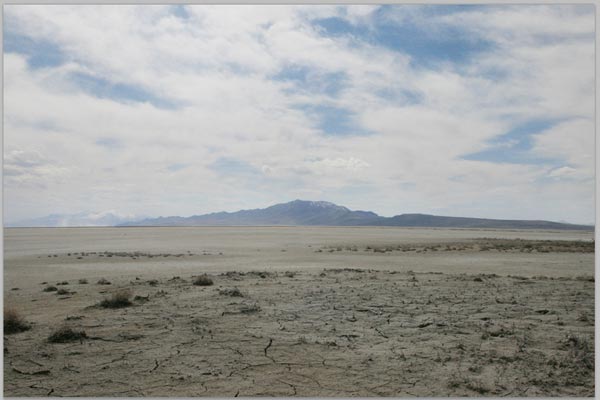 Again, go to Image > Adjustments > Shadows/Highlights and use the same settings as shown previously.
 Give the layer a Color Overlay layer style (see the following image for the settings).
 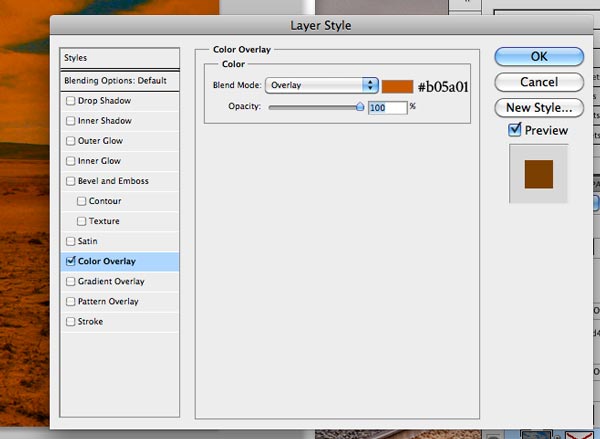 Here’s a preview of what we have now:
 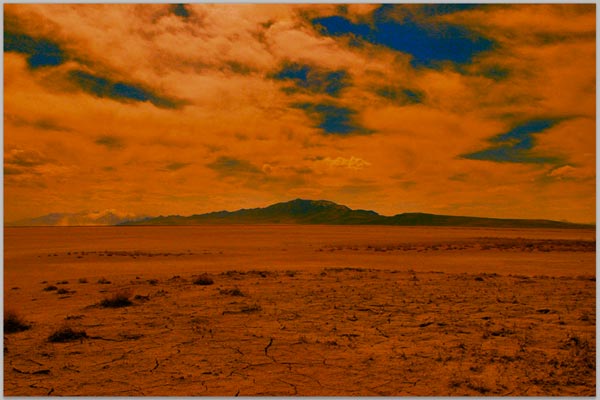 Since we are only going to need the sand from this image for the background, place this layer at the bottom of the Layers Panel. With the Pen Tool (P), make a selection on the top layer as shown on the image below:
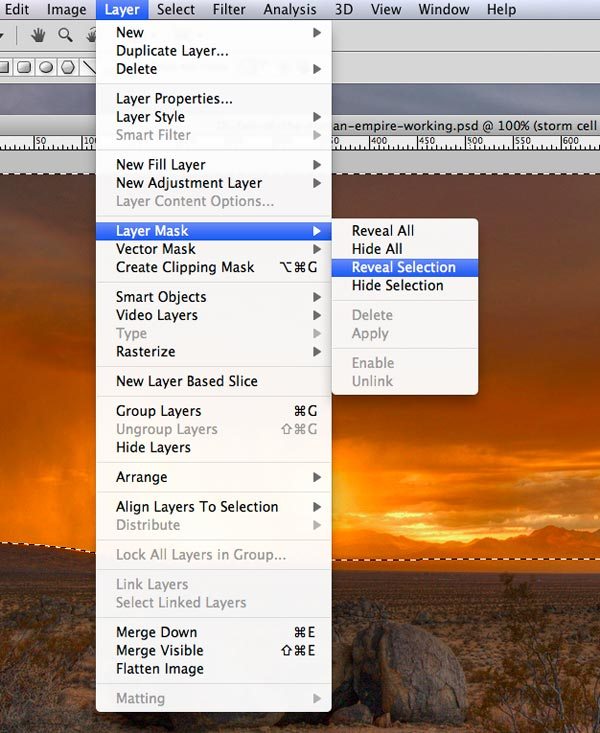
 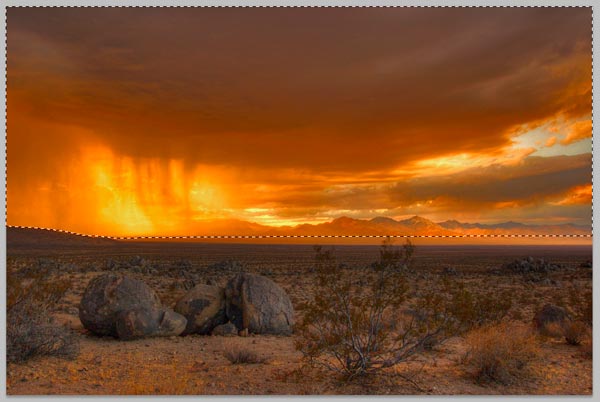 To remove the ground from the top layer, go to Layer > Layer Mask > Reveal Selection.
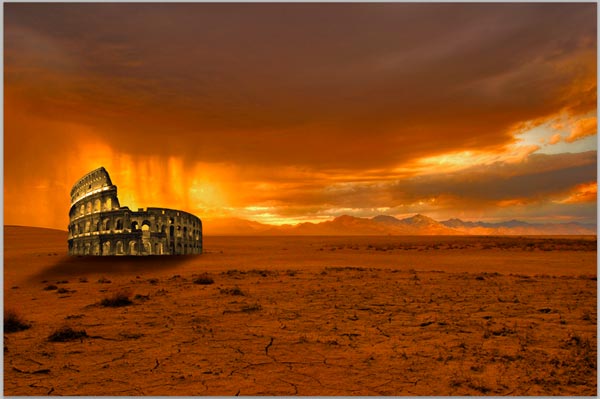
 You can see how our landscape has changed. With this, we’ve finished our backdrop. Here’s where we are so far:
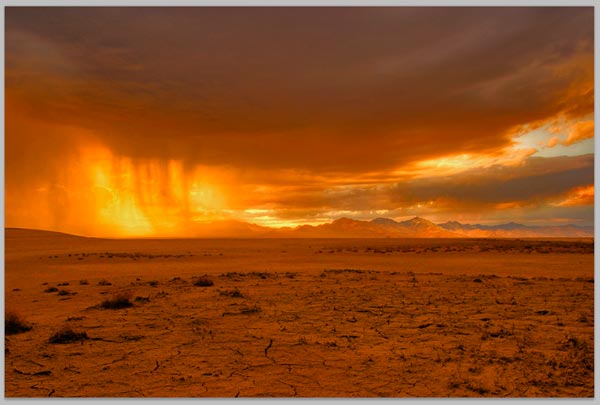
Step 2: Extract and Place the Colosseum in the Scene
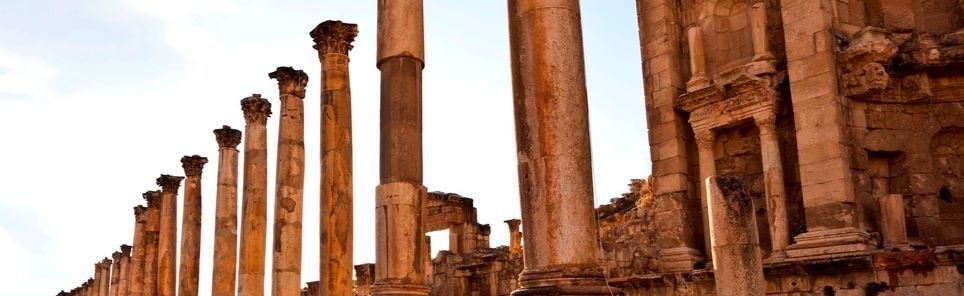
Download the Colosseum stock image and open it in Photoshop.
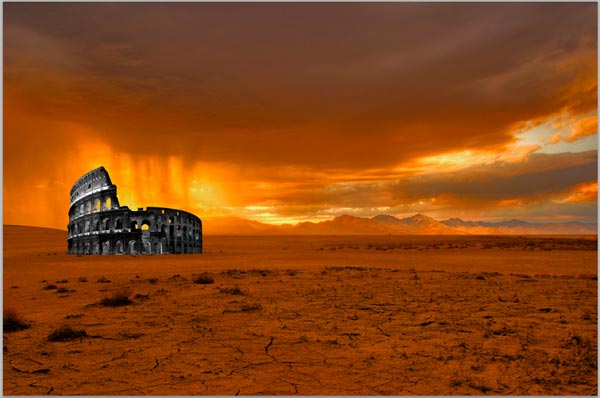
Extract the Colosseum using the Pen Tool (P). 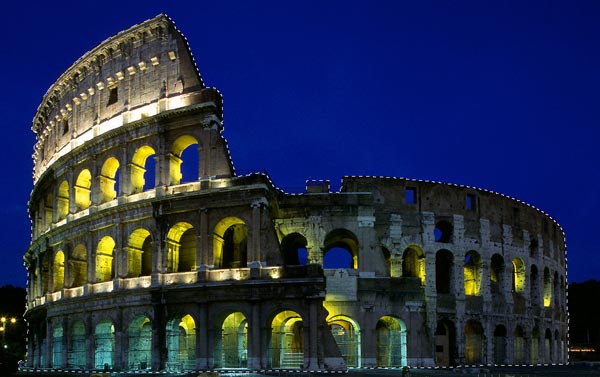 Place the Colosseum into our composition (don’t worry if you get a dialog window informing you about a paste profile mismatch, just click OK and continue working). Desaturate the Colosseum layer (Image > Adjustments > Desaturate) and scale it down with Free Transform (Cmd/Ctrl + T).
 Next, we need to adjust the Colosseum to fit our scene. To do that, we need 2 adjustment layers. Cmd/Ctrl + click on the Colosseum layer to load a selection around it; this way, the adjustment layer will only be applied to the Colosseum, not the entire canvas.
Next, create a Photo Filter adjustment layer (Layer > New Adjustment Layer > Photo Filter). 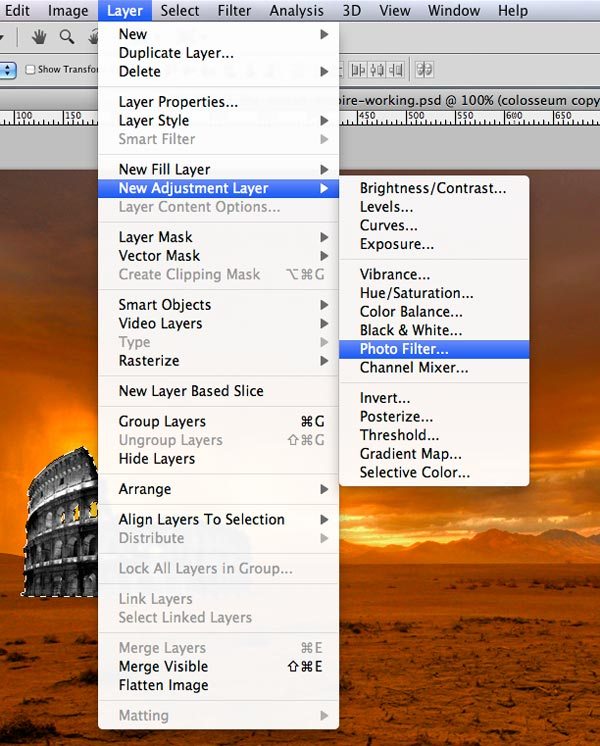 Use the following settings for the Photo Filter adjustment layer:
  Again, Cmd/Ctrl + click on the Colosseum layer to create selection, click on the Photo Filter adjustment layer to make it the active layer, and then create a new Hue/Saturation adjustment layer (Layer > New Adjustment Layer > Hue/Saturation). Below are the settings I used for Hue/Saturation adjustment layer:
 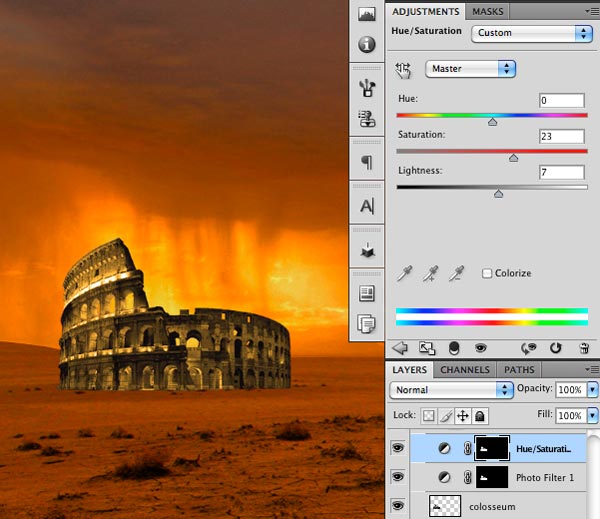 It’s time to add a shadow to the Colosseum.
Create an ellipse with the Ellipse Tool (U), fill it with black, position it below the Colosseum, and then rasterize this layer by right-clicking on it and choosing Rasterize Layer. 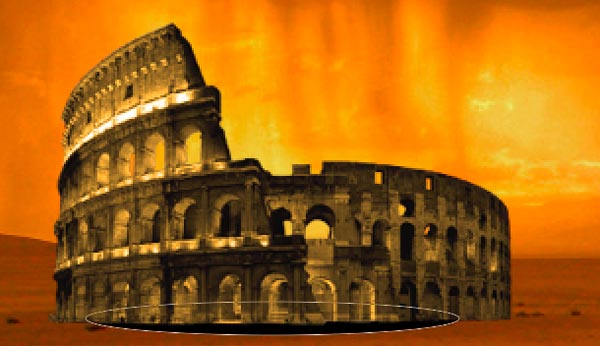 Go to Filter > Blur > Gaussian Blur and apply the blur with a Radius of 10px. Give the layer a descriptive name such as “colosseum close shadow” to keep our work organized.
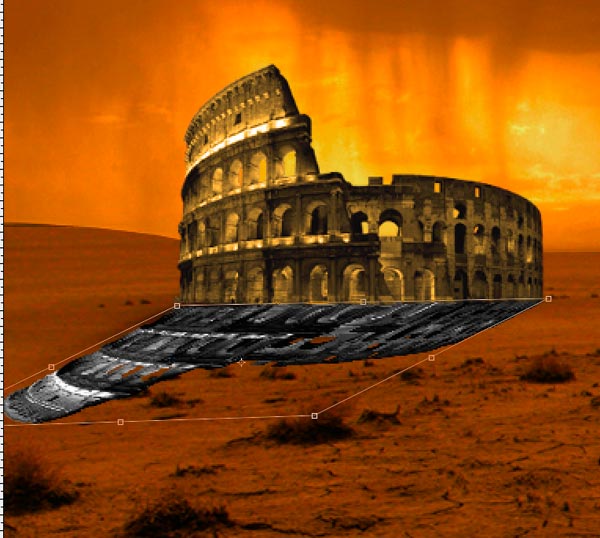
 To improve the shadow, duplicate the Colosseum layer (Cmd/Ctrl + J), invoke Free Transform (Cmd/Ctrl + T), hold down Cmd/Ctrl and squeeze down the Colosseum like on the image below.
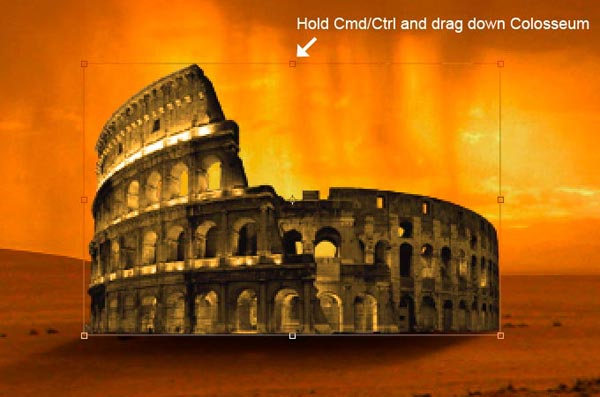
 Drag this duplicated and transformed layer below the Colosseum and above “colosseum close shadow” layer, press D to reset your Foreground and Background colors to black (#000000) and white (#ffffff), and then press Alt/Option + Backspace to fill this layer with your Foreground Color.
 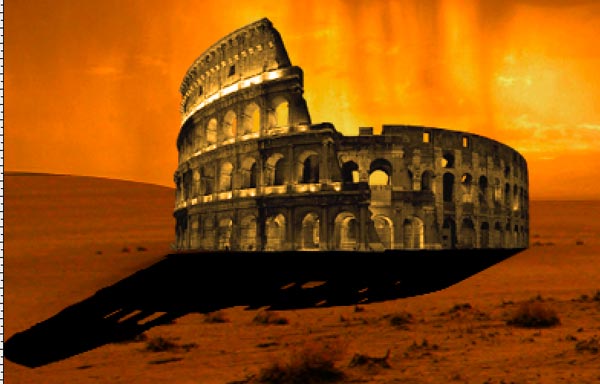 Apply a Gaussian Blur with 5px Radius.
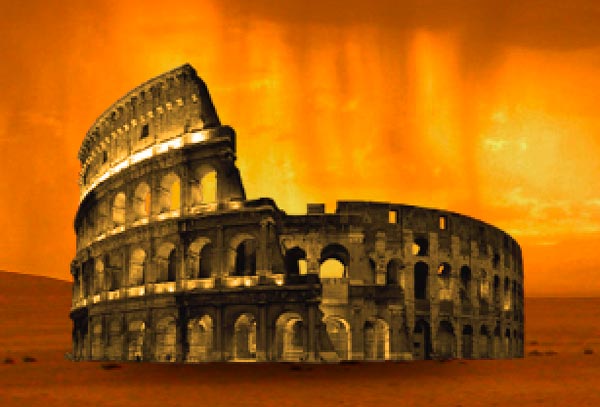
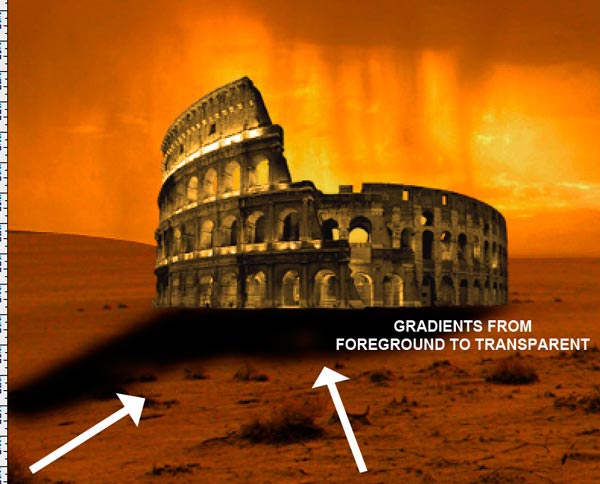
Name this layer “colosseum wide shadow”. 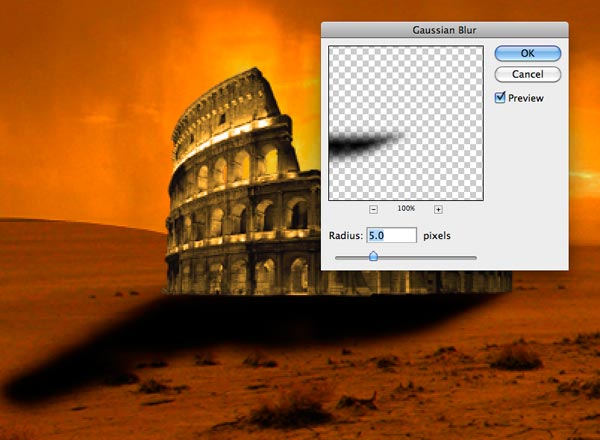 Go to Layer > Layer Mask > Reveal All to apply a layer mask to the “colosseum wide shadow” layer. Make sure that your Foreground Color is set to black (#000000), choose the Gradient Tool (G), select the Foreground to Transparent preset in the Gradient Editor, and then draw some gradients to soften the shadow edges. When you are done with that, lower the Opacity of the layer to 60%.
 Select all Colosseum layers in the Layers Panel (“colosseum”, “colosseum close shadow”, “colosseum wide shadow” and the adjustment layers) and group them into a layer group (Cmd/Ctrl + G). Call the group something descriptive like “Colosseum”.
Step 3: Extract the Flames
Download Fire Flames image and open it in Photoshop. 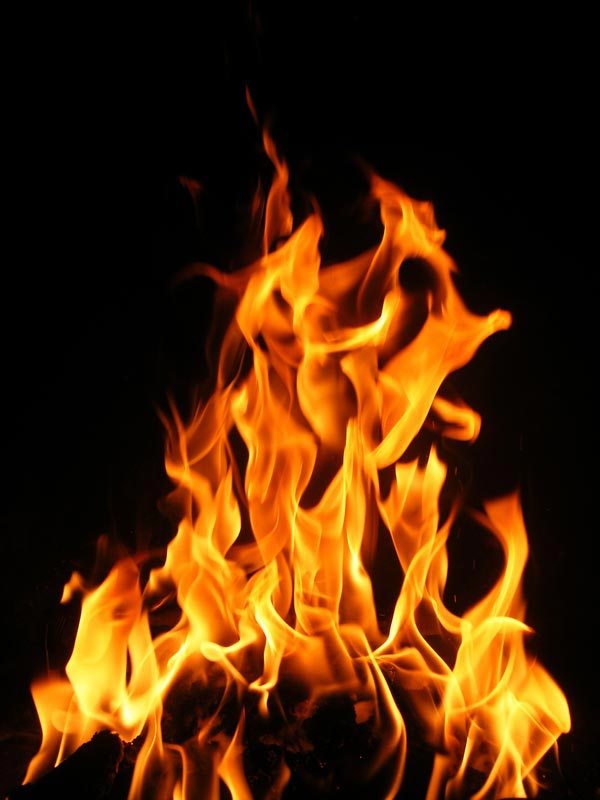 To extract the flames from this photo, open the Channels Panel (Window > Channels), hold down Ctrl/Cmd, and then click on the Red channel.
This will automatically create a selection around the flames. 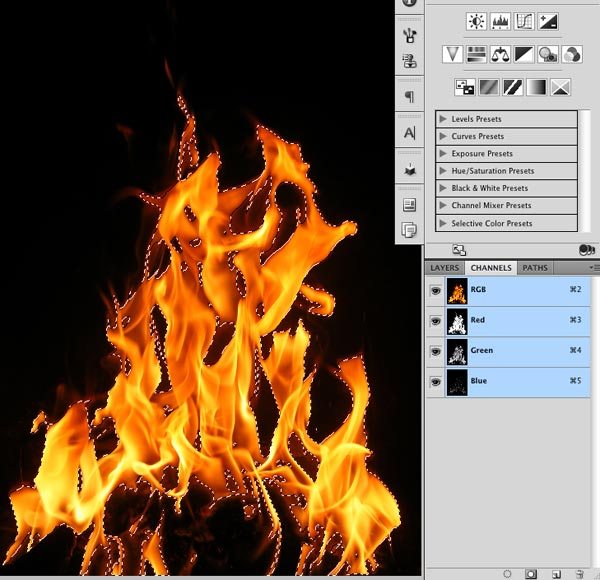
Step 4: Set the Scene on Fire
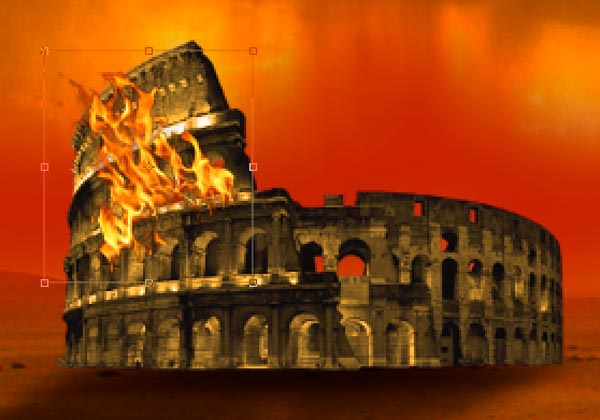
Copy the selection (Ctrl/Cmd + C) and paste it (Ctrl/Cmd + P) into our document. Scale it down with Free Transform (Cmd/Ctrl + T) and position it with the Move Tool (V).
Put this layer behind the “Colosseum” layer group. 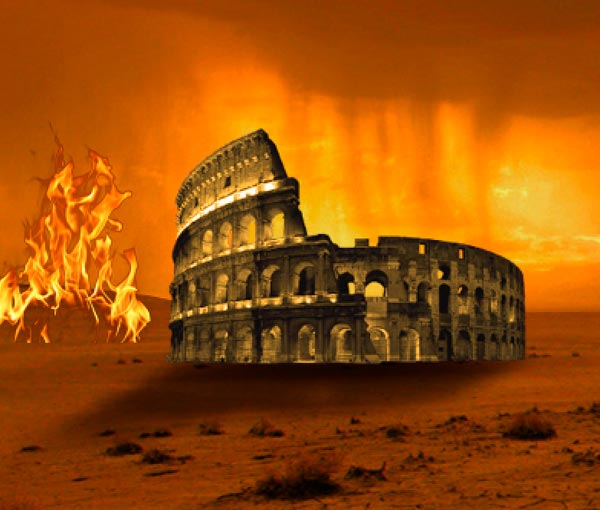 Duplicate the flame layer (Cmd/Ctrl + J) and move it a bit to the right.
 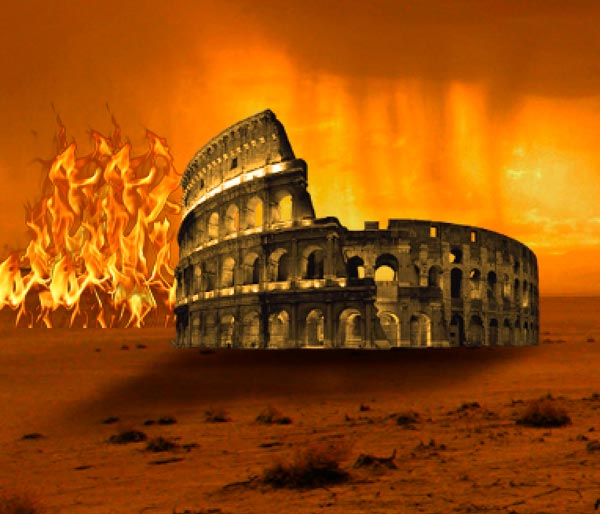 Add more flames.
Rotate and scale some of the duplicated layers to create variations. 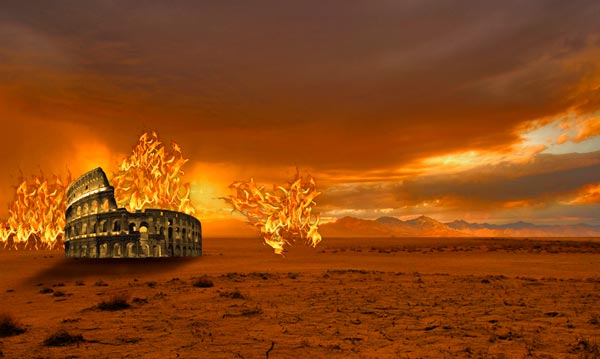 Continue adding flames until you fill the background with flames.
 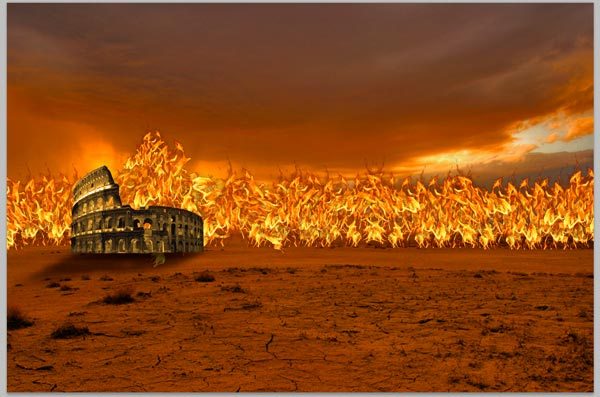 Select all the flame layers and group them into a “flames” layer group, and then convert the group to a smart object by right-clicking on it in the Layers Panel and choosing Convert to Smart Object.
Name this layer “fire front”. 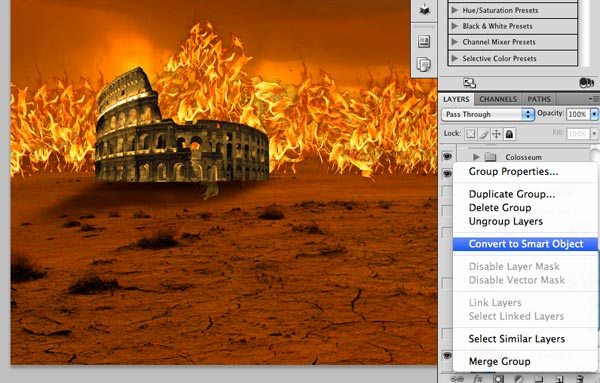 With Free Transform (Cmd/Ctrl + T), scale down the “fire front” layer and apply a Gaussian Blur with 0.5px Radius.
  Apply a layer mask (Layer > Layer Mask > Reveal All) to this layer, set your Foreground Color to black (#000000), pick up the Brush Tool (B) and, with a soft brush (Master Diameter at around 50px, Hardness at 0), paint over the bottom of this layer to remove some parts and soften the parts of the flames close to the ground.
 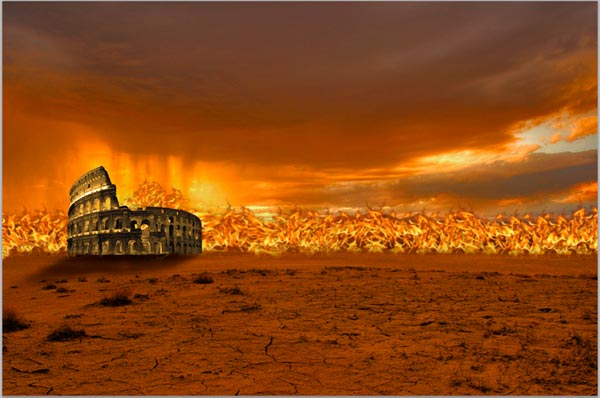 Next, load a selection around the “fire front” layer by Cmd/Ctrl + clicking on its thumbnail in the Layers Panel.
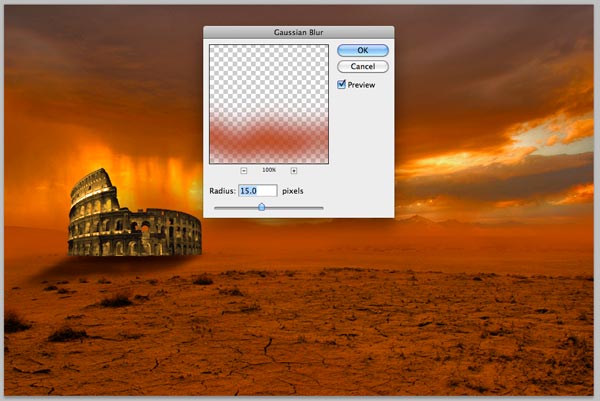
Change the Foreground Color to a dark orange (#a24702), create a new layer below the “fire front” layer, and fill the selection with the Foreground Color (Alt + Backspace). Hide the “fire front” layer to see the result. 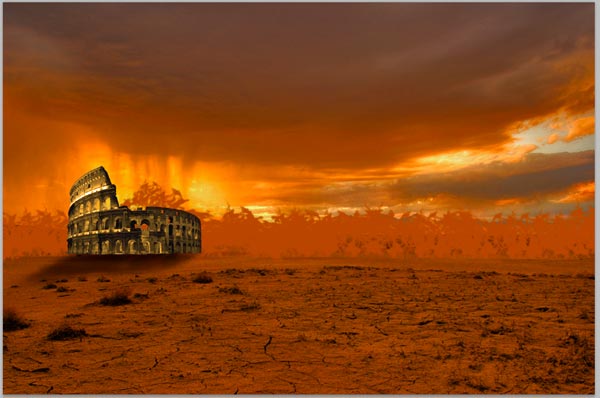 Go to Filter > Blur > Gaussian Blur and give this layer a Gaussian Blur with 15px Radius.
 Hold Shift and press the Up Arrow key 3 times. This will move the layer 30px up.
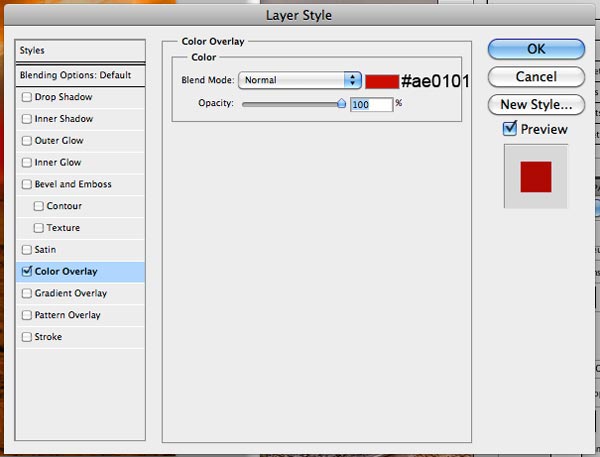
 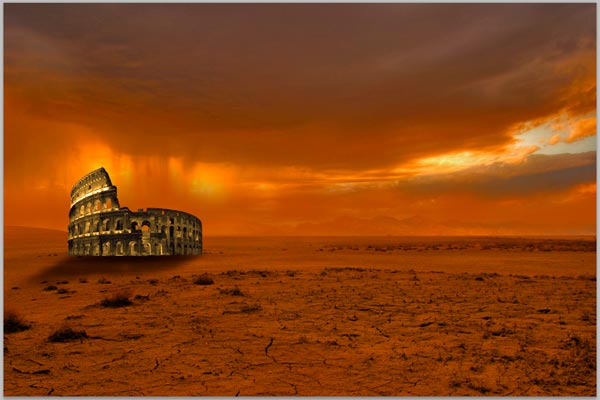 Duplicate this layer (Cmd/Ctrl + J), open the Layer Style dialog window by double-clicking on the layer, and then add a Color Overlay layer effect (use the image below as a reference for the settings).
 Apply a Gaussian Blur with 15px Radius to this layer.
 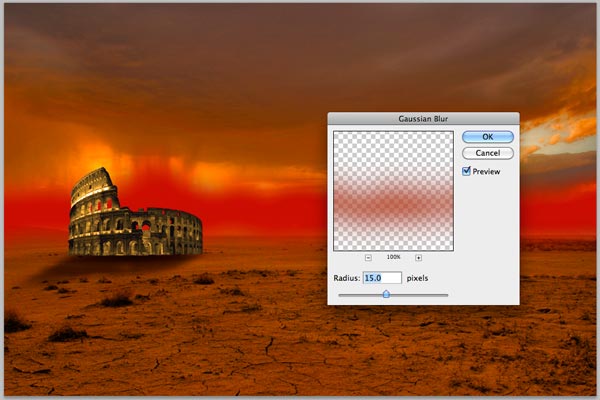 Lower the Opacity of this layer to 60% and unhide “fire front” layer. Here is the preview of where we are now:
 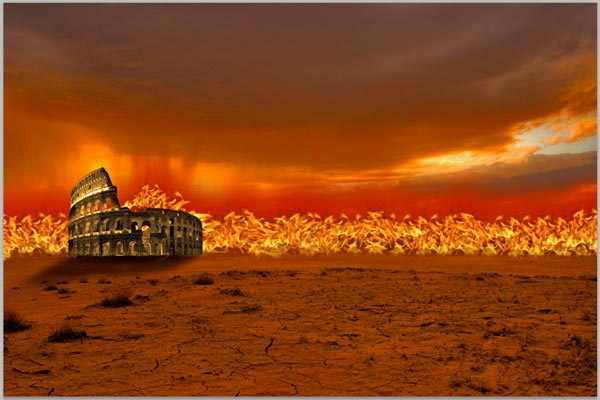 One more time, hide the “fire front” layer to be able to see what you’re doing.
Extract the flame from the Fire Flames image as described in Step 3, copy and paste it above the “fire front” layer, scale it down with Free Transform and position it inside the Colosseum. 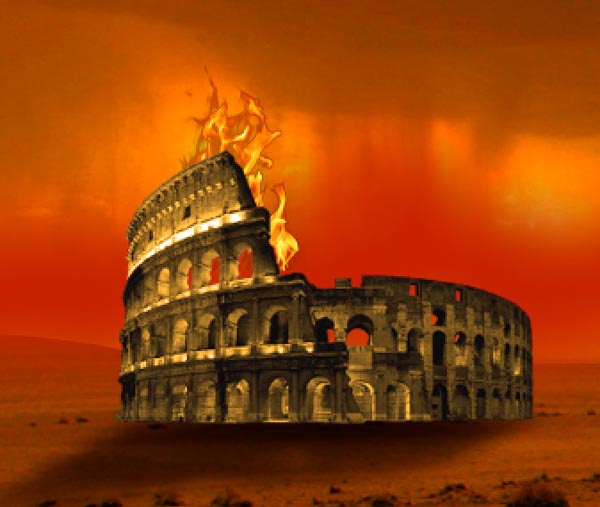 Continue adding flames inside the Colosseum by duplicating the flame layer until you have something similar to the image shown below. Group all these flames into a layer group that you could call “flames inside colosseum”.
  Now let’s add some flames in front of the Colosseum. Duplicate one of the flames layers and move it above the “Colosseum” layer group. Scale it down and rotate it a bit using Free Transform and position it as shown on the image below (please note that the “fire front” layer and the “flames inside colosseum” group are hidden in the image below).
 Add another flame by duplicating this layer and apply some transformation (scale down and rotate).
  And another one (again, scale down and rotate).
 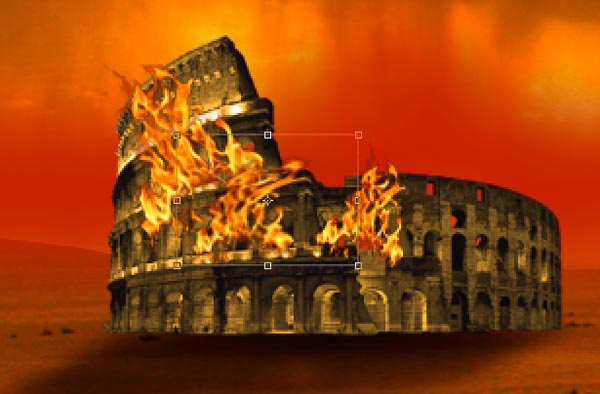 Group these layers into a layer group that you could call “flames in front of colosseum”. Unhide the “fire front” layer and the “flames inside colosseum” layer group, and this what we have right now:
Step 5: Add the Woman to the Scene
Download the Red Dress Stock 3 photo made by Johanna, and open it in Photoshop. 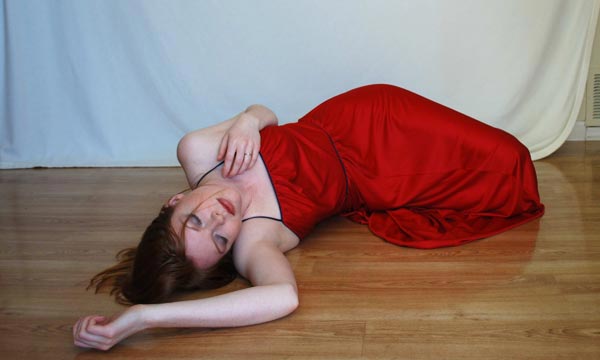 Extract the subject from the background using the Pen Tool (P).
 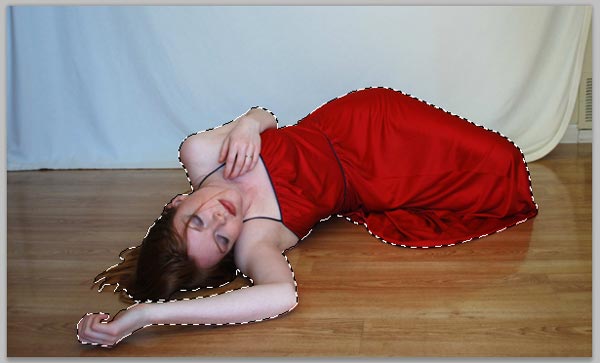 Put her into our main document.
Scale her down and adjust the perspective with Free Transform (Cmd/Ctrl + T). We are going to do a series of adjustments so that the subject fits into our composition better. Remember to load a selection around her by Cmd/Ctrl + clicking on her layer before creating the adjustment layers so that adjustment layers will only applied to that layer.
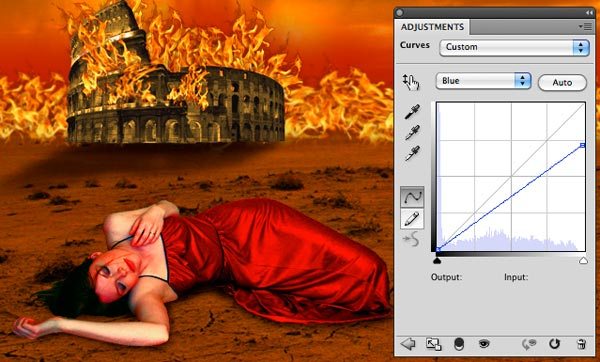
First go to Image > Adjustments > Shadows/Highlights. Below are the settings I used for Shadows/Highlights. 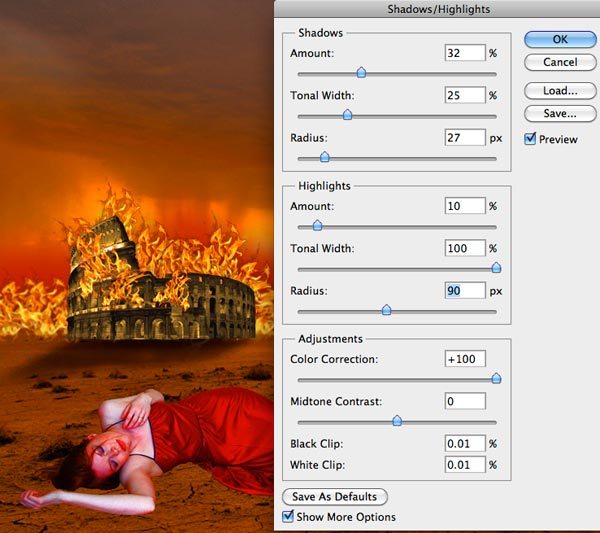 Second, create a Curves adjustment layer (Layer > New Adjustment Layer > Curves) with the following settings:
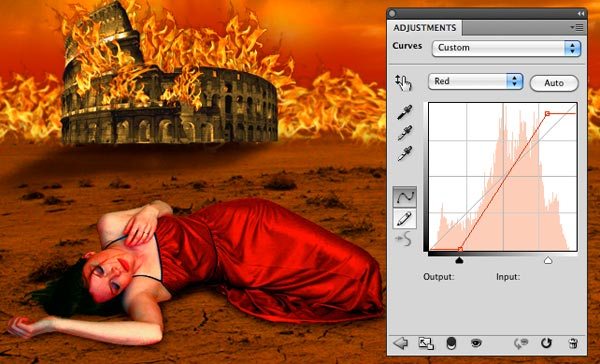
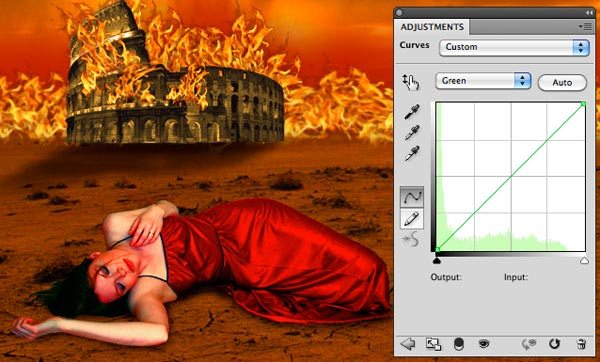
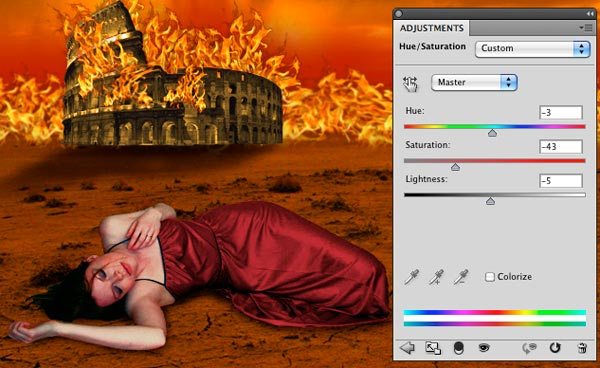
 Next, add another adjustment layer, but this time create a Hue/Saturation adjustment layer (Layer > New Adjustment Layer > Hue/Saturation).
 Lastly, create a Color Balance adjustment layer (Layer > New Adjustment Layer > Color Balance).
 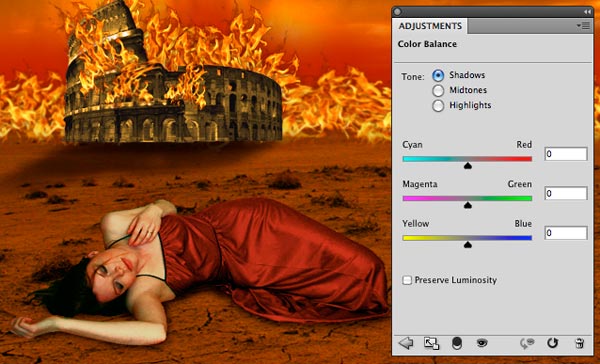 Don’t forget to add a shadow. We can create the shadow manually.
Create a new layer below the subject and, with a black, soft brush, create a gentle shadow effect. 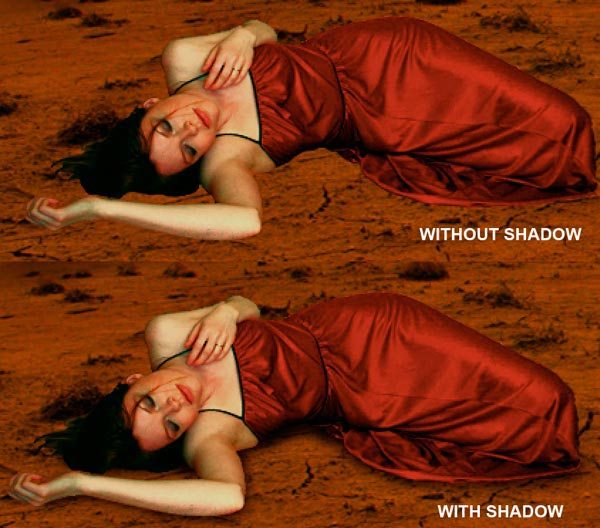 Do a bit of organization with our layers again. In the Layers Panel, select the girl layer, adjustment layers and shadow layer, and then group them into a layer group, which you could name “girl in red dress”.
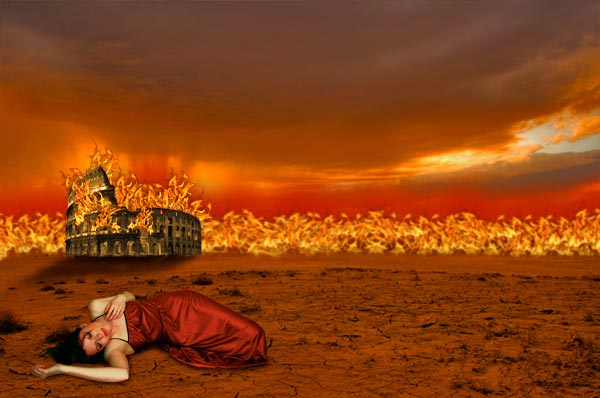
Step 6: Bringing in the Barbarian Warrior
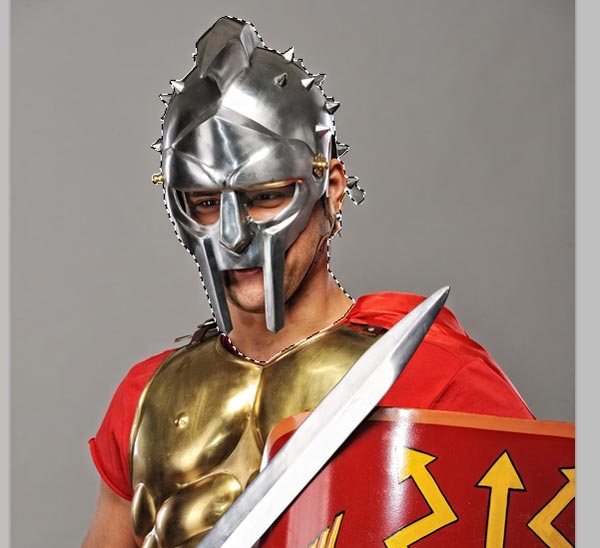
It’s time to introduce our hero to the scene: the Barbarian Warrior. So, grab this awesome photo of Barbarian Warrior J – 11. Open up the image in Photoshop and carefully clip out the warrior from its background by using the Pen Tool (P) to draw around him.
Copy and paste the isolated warrior in a new Photoshop document that has a transparent background. The warrior is a major element in our composition, so we will invest some time in tweaking him. 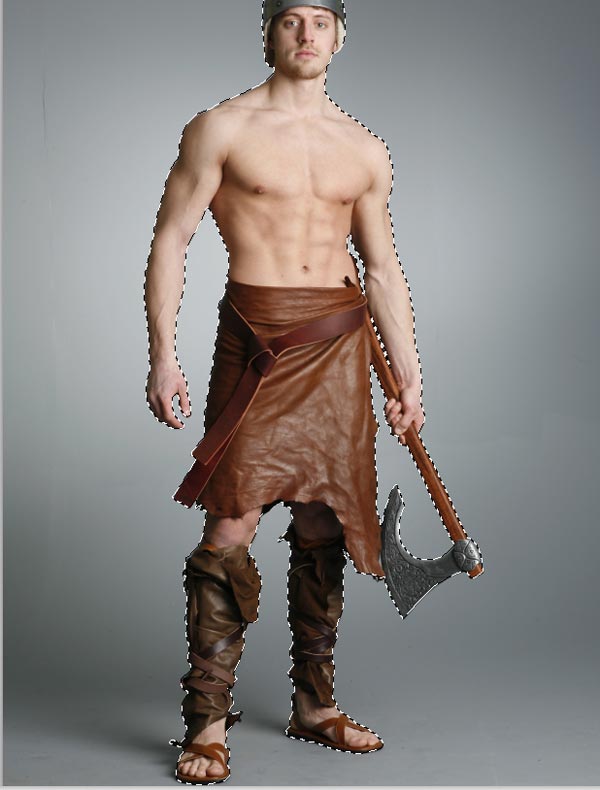
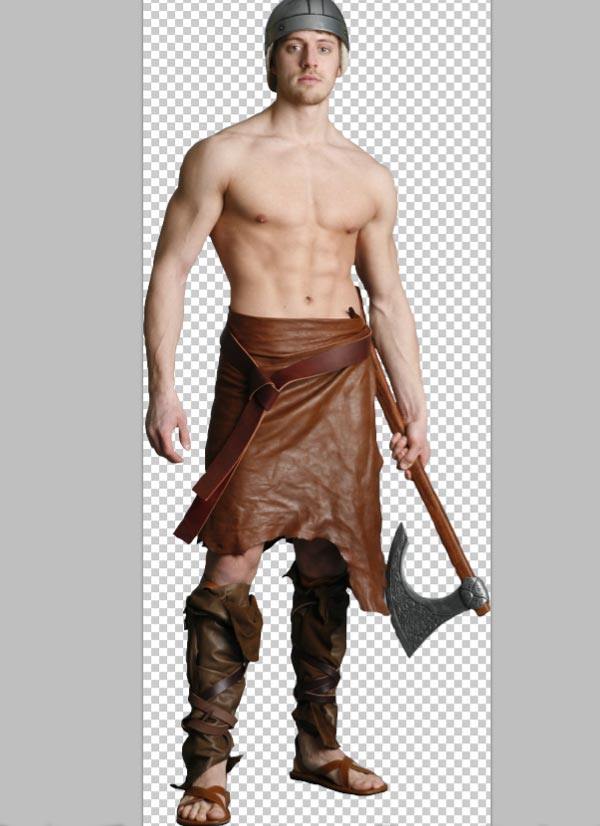 Let’s make some changes to the warrior.
The warrior is not looking dangerous enough, so first we will remove the subject’s head using the Pen Tool (P) to make the selection and then removing the selected area. 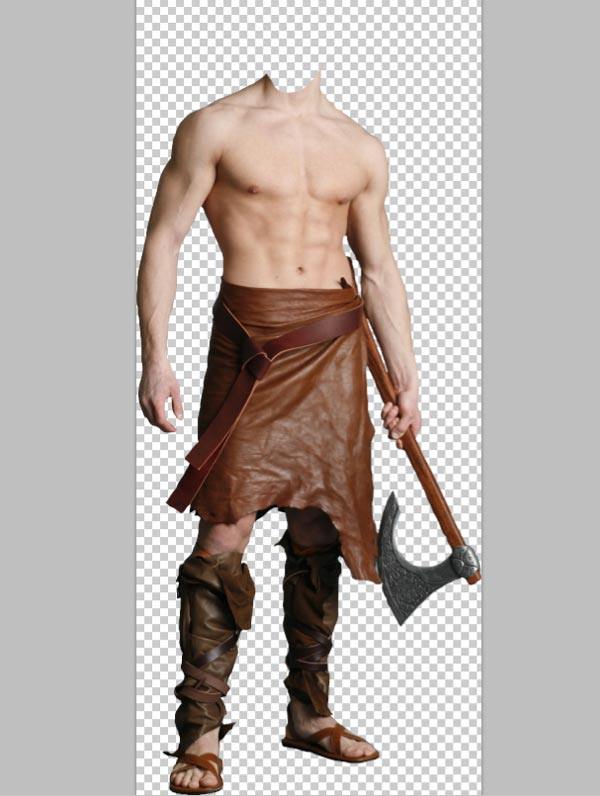 After searching a while for an image of a dangerously looking warrior, I came across this stock image of a Legionary soldier ready for a war. Using the Pen Tool (P), extract the head from the Legionary soldier and paste it over the body of the Barbarian Warrior.
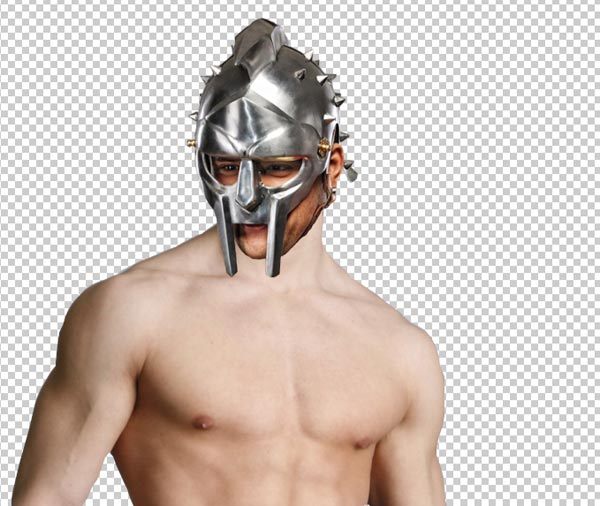 Merge the body and head layer by pressing Cmd/Ctrl + E. Copy and paste the warrior in our main document. Convert the warrior layer to a smart object by right-clicking on its layer and then picking Convert to Smart Object in the menu that appears.
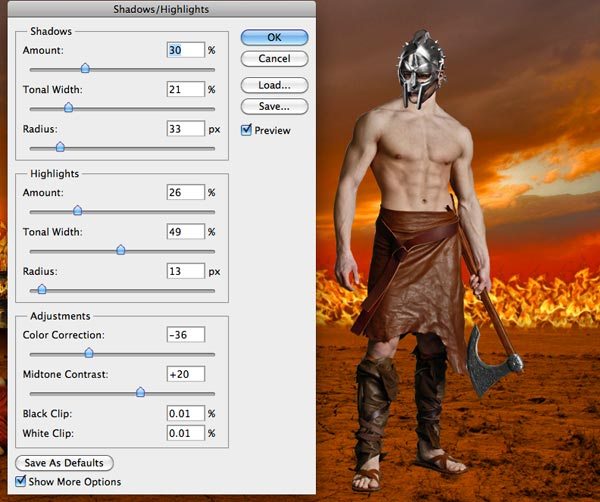
Now resize the warrior using Free Transform to fit our design perfectly.  Go to Image > Adjustments > Shadows/Highlights to make tweaks in our shadows and highlights. Since our warrior is a smart object, we can apply shadows and highlights without the fear of not being able to revert to our original work.
 Open the Layer Style dialog window by double-clicking on the layer and then add a Color Overlay layer effect.
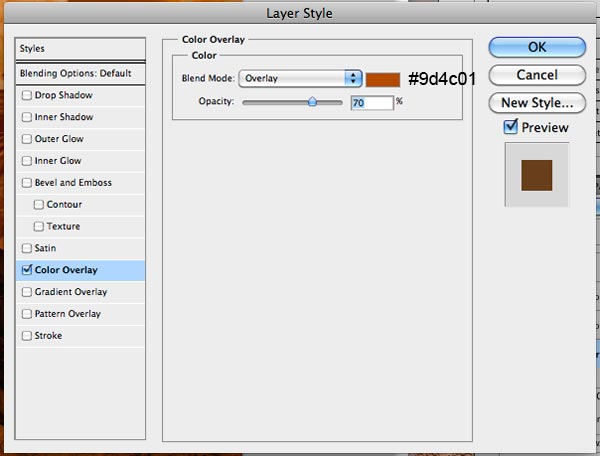
 Time to create the warrior’s shadow. First, hide “girl in red dress” layer group to get better visibility of the warrior.
Let’s duplicate the warrior’s layer by pressing Cmd/Ctrl + J. Remove the smart filters and the layer style on the duplicate layer by right-clicking on it and then choosing Clear Smart Filters in the menu that appears and then right-clicking again and choosing Clear Layer Style in the menu that appears. Go to Edit > Free Transform (Cmd/Ctrl + T).
Hold Cmd/Ctrl and squeeze down the warrior like on the picture below. Also, make some corrections to the position of this duplicated layer. 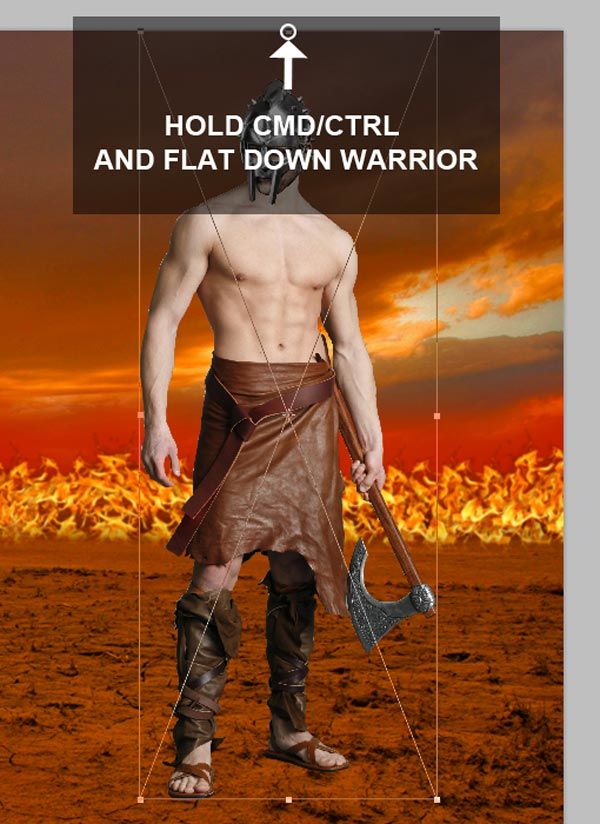
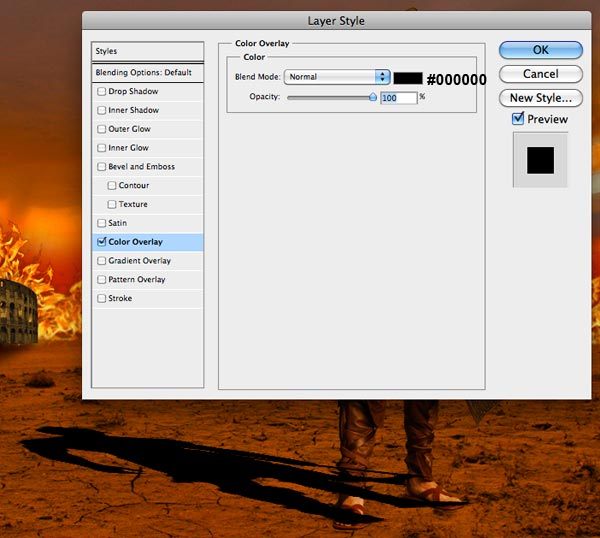
 Open the Layer Style dialog window and add a Color Overlay layer effect (use the image below as a reference).
 Drag the shadow layer behind warrior.
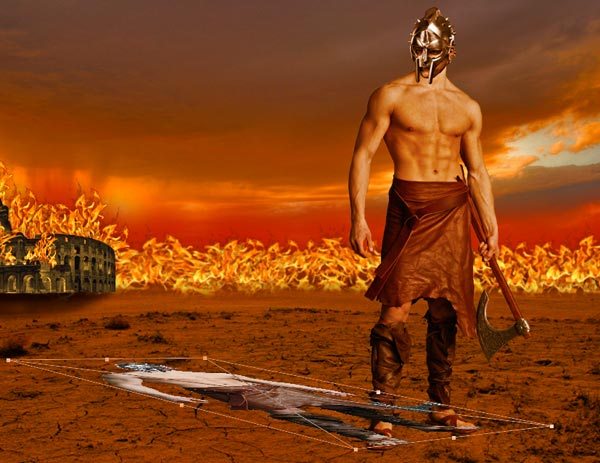
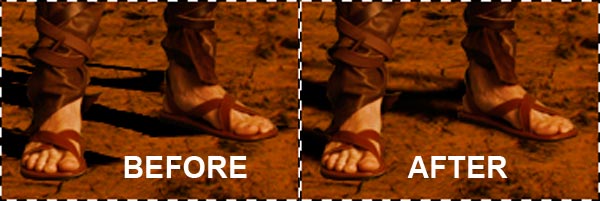
 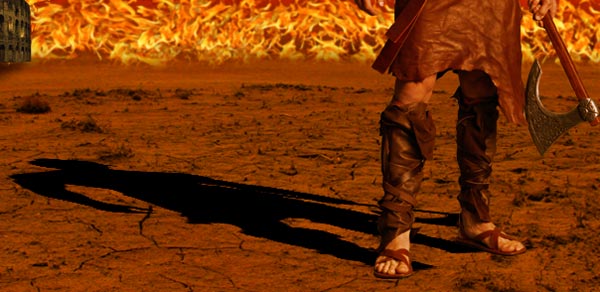 Now focus on the details and fix the shadows. As you can see below, the shadow moves a little below his feet.
Fix this by doing minor transformation, erasing unnecessary parts of the shadow with the Eraser Tool (E) and painting with black using the Brush Tool (B). Since the warrior’s shadow is a smart object and it’s not directly editable, it needs to be rasterized before we can use the Brush Tool and Eraser Tool. To rasterize the smart object, right-click on the layer and from the menu, choose Rasterize Layer.
 Add a slight Gaussian blur with 1.1px Radius to soften the shadow.
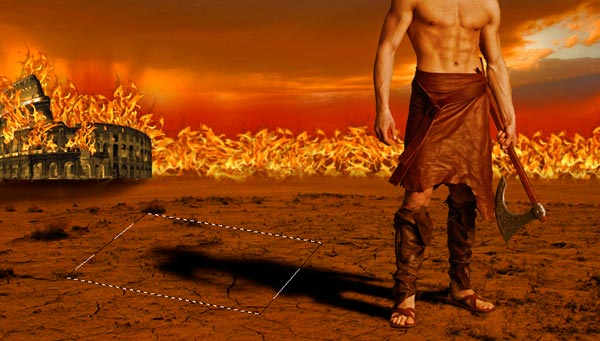
 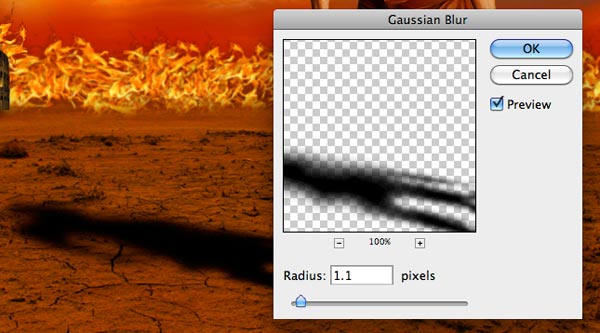 The shadow needs to be less blurry near his feet, and as we move away from the warrior, the shadow should have softer edges. So, first, let’s select the furthest part of the shadow with the Polygonal Lasso Tool (L).
 Then let’s soften the selection (Select > Modify > Feather) to make it more natural.
 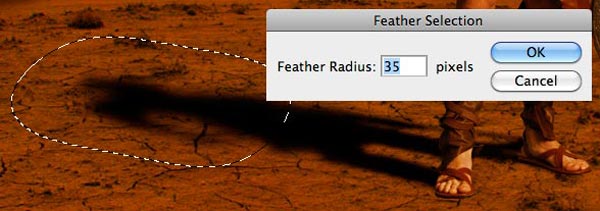 Then we need to apply a Gaussian Blur with Radius set to 4px.
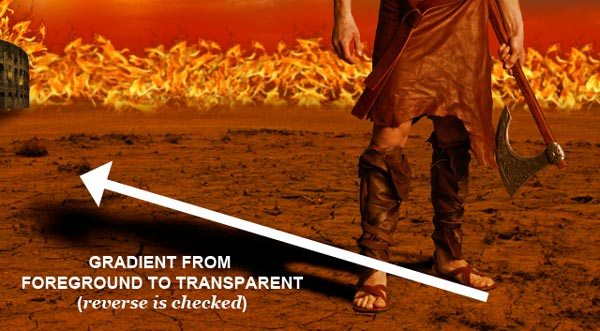
 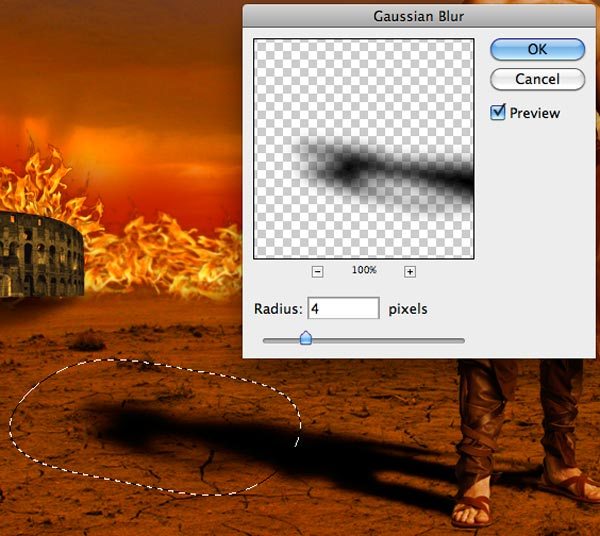 Add a layer mask (Layer > Layer Mask > Reveal All), set your Foreground Color to a dark gray (#454545), and use a Foreground to Transparent linear gradient (check the Reverse option) to make the shadow fade away.

 Lower this layer’s Opacity to 80%.
 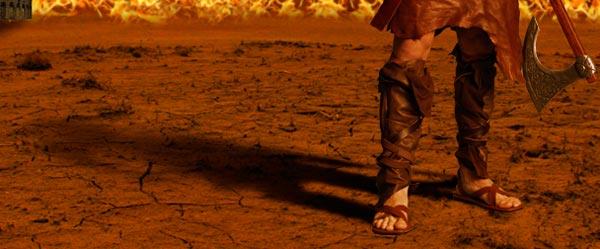 Bring the “girl in red dress” layer group back to scene and take a look at where are we now:
  To finish this step, we need to add one more detail to the warrior: a shield. Open up the Shield of King Pharnakes image in Photoshop, extract the shield with the Pen Tool (P), and then copy it into our scene.
 Resize the shield, use Edit > Transform > Flip Horizontal to orient it properly, adjust the perspective with Free Transform, and place it over the warrior’s right hand.
 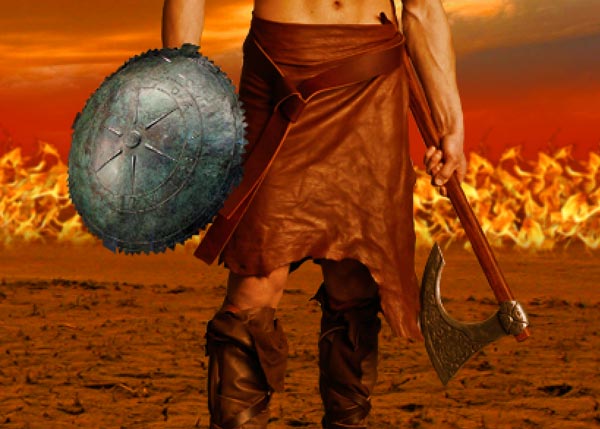 Make a selection around the shield by Cmd/Ctrl + clicking on the shield layer’s thumbnail, then go to Layer > New Adjustment Layer > Color Balance to perform color corrections to the shield so that it matches our scene’s color theme.
 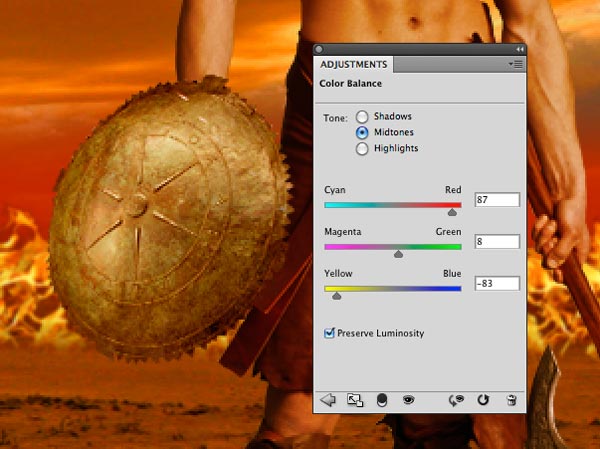 We’re done with the warrior, so let’s place its associated layers in a layer group that we can call “Warrior”. The scene is almost complete; take a look at the preview image below.
Step 7: Scene Enhancements
To make the scene more dramatic, follow this sequence: Press Cmd/Ctrl + A to load a selection around the canvas, go to Edit > Copy Merged (Shift + Cmd/Ctrl + C), paste (Ctrl/Cmd + P) the result into a new layer and then change the layer’s Blend Mode to Screen.  Duplicate this layer (Cmd/Ctrl + J) twice more, and then hide the topmost duplicate layer.
In the duplicate layer that is visible, change the Blend Mode to Multiply and add a Gaussian Blur with a 3px Radius. 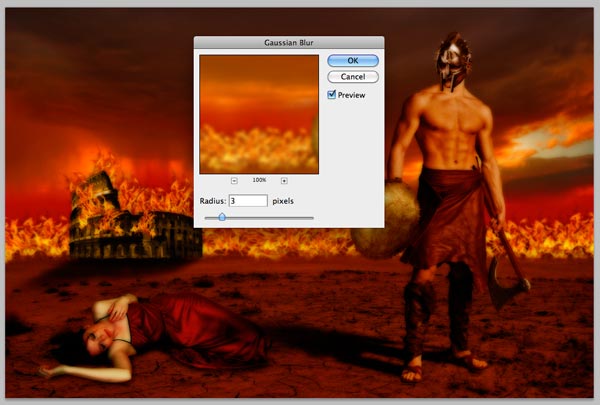 Afterwards, lower the Opacity of the layer to 85% to soften the blur effect.
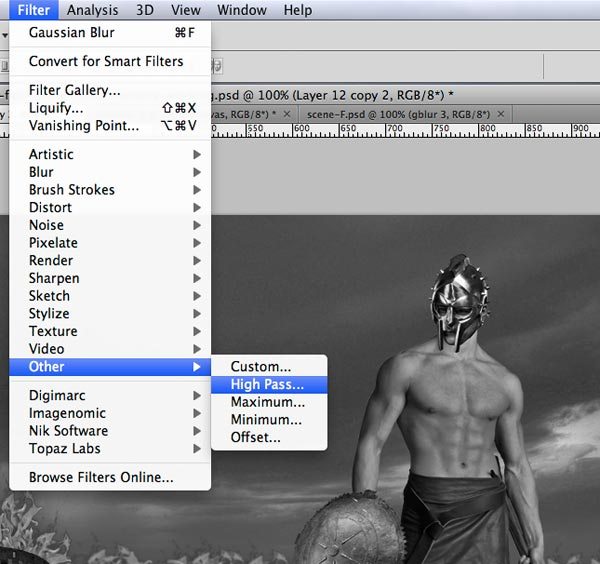
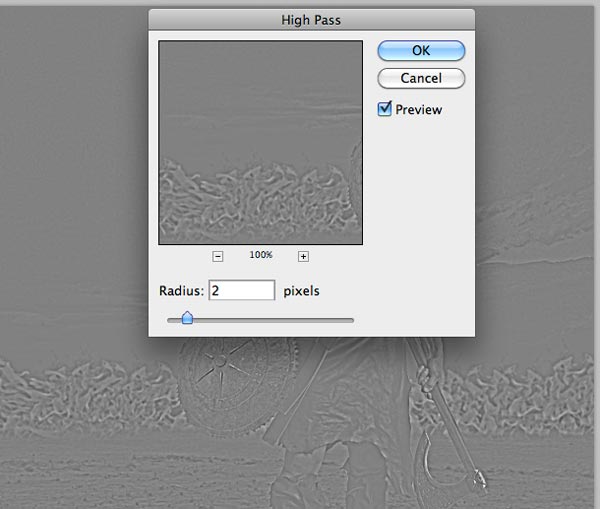
 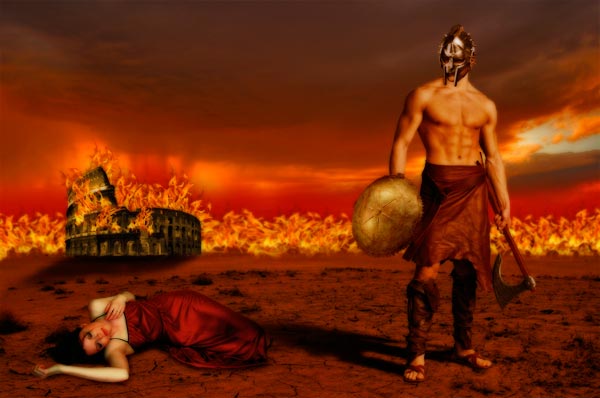 Unhide the top duplicate layer, desaturate the layer (Image > Adjustments > Desaturate) to remove its colors, and then go to Filter > Other > High Pass to add a High Pass filter with a 2px Radius.
 Change the Blend Mode of this layer to Soft Light.
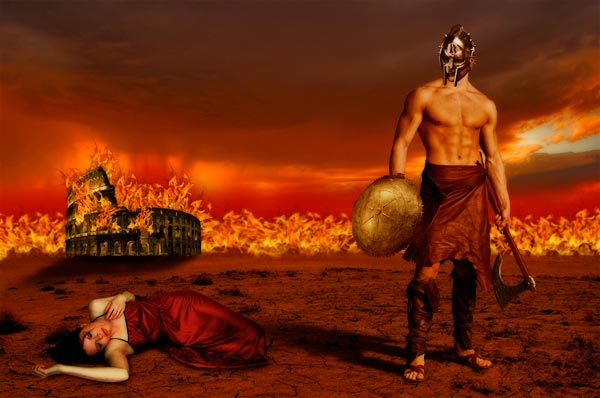
Step 8: Final Touch – Add a Texture
This is the final step in the tutorial. Download and open this canvas stock texture.
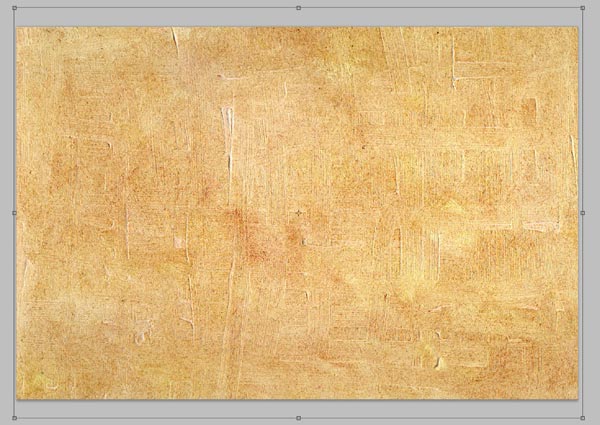
Copy the canvas and paste it into our scene and then rotate the image clockwise by a quarter-turn (Edit > Transform > Rotate 90° CW). Scale it down with Free Transform to fit our canvas. 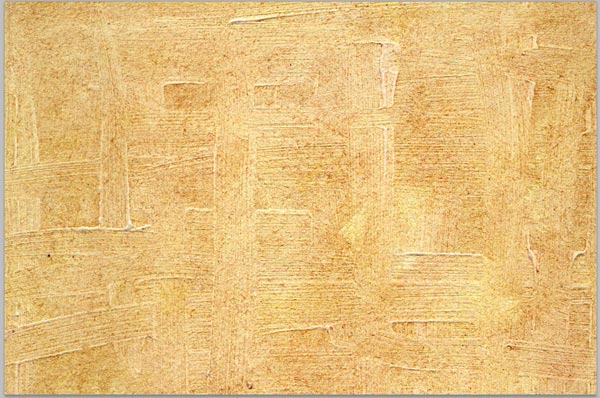
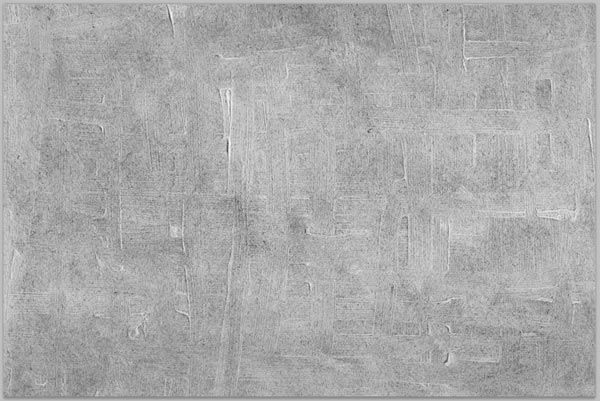
 Desaturate the canvas texture (Image > Adjustments > Desaturate) to remove its colors.
 Change the Blend Mode of this layer to Overlay and reduce the Opacity to 55%. As you can see with this final step, we achieve a sort of “painting on a canvas” effect.
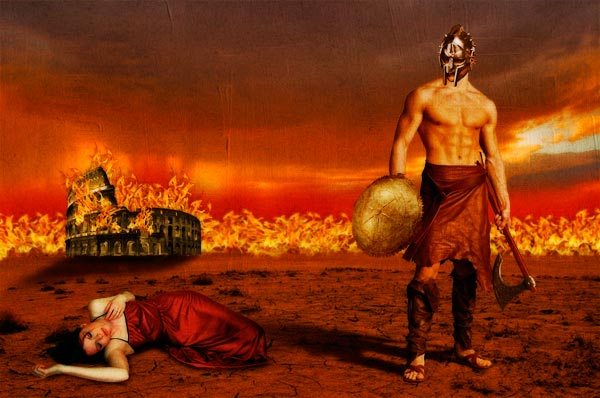
Tutorial Summary
We are done!
Take a break after all of your hard work and enjoy the final result for a few moments. In this tutorial, we mixed stock photos, textures, blending modes, smart objects, filters, adjustment layers and layer styles to create the final result. I hope you have learned something new and please share your thoughts and questions in the comments.
Thanks for reading!
Download Source Files
- roman_empire_photomanipulation (ZIP, 21.8 MB)
-
 Trevin serves as the VP of Marketing at WebFX. He has worked on over 450 marketing campaigns and has been building websites for over 25 years. His work has been featured by Search Engine Land, USA Today, Fast Company and Inc.
 -

WebFX is a full-service marketing agency with 1,100+ client reviews and a 4.9-star rating on Clutch! Find out how our expert team and revenue-accelerating tech can drive results for you! Learn more
Make estimating web design costs easy
Website design costs can be tricky to nail down. Get an instant estimate for a custom web design with our free website design cost calculator!
Try Our Free Web Design Cost Calculator
Table of Contents
- Preview
- Tutorial Resources
- Step 1: Creating the Background
- Step 2: Extract and Place the Colosseum in the Scene
- Step 3: Extract the Flames
- Step 4: Set the Scene on Fire
- Step 5: Add the Woman to the Scene
- Step 6: Bringing in the Barbarian Warrior
- Step 7: Scene Enhancements
- Step 8: Final Touch – Add a Texture
- Tutorial Summary
- Download Source Files
Share this article


Web Design Calculator
Use our free tool to get a free, instant quote in under 60 seconds.
View Web Design Calculator
Make estimating web design costs easy
Website design costs can be tricky to nail down. Get an instant estimate for a custom web design with our free website design cost calculator!
Try Our Free Web Design Cost Calculator