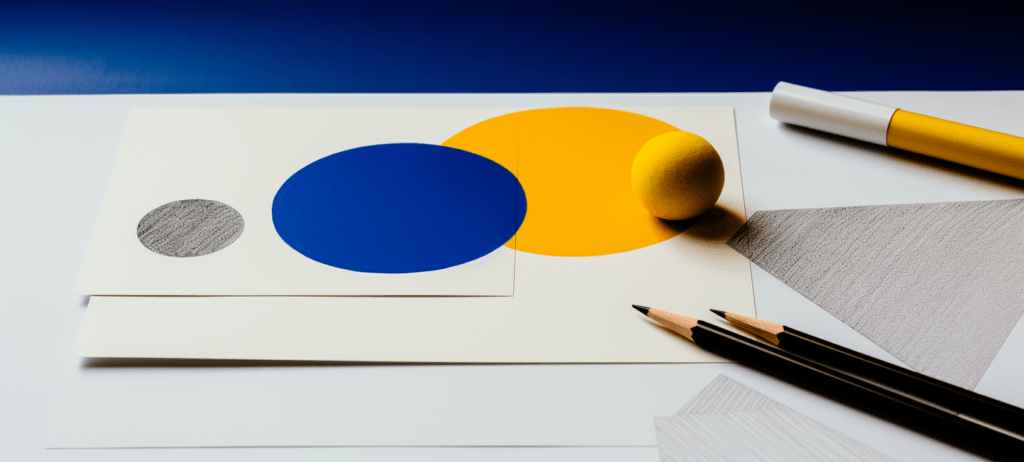
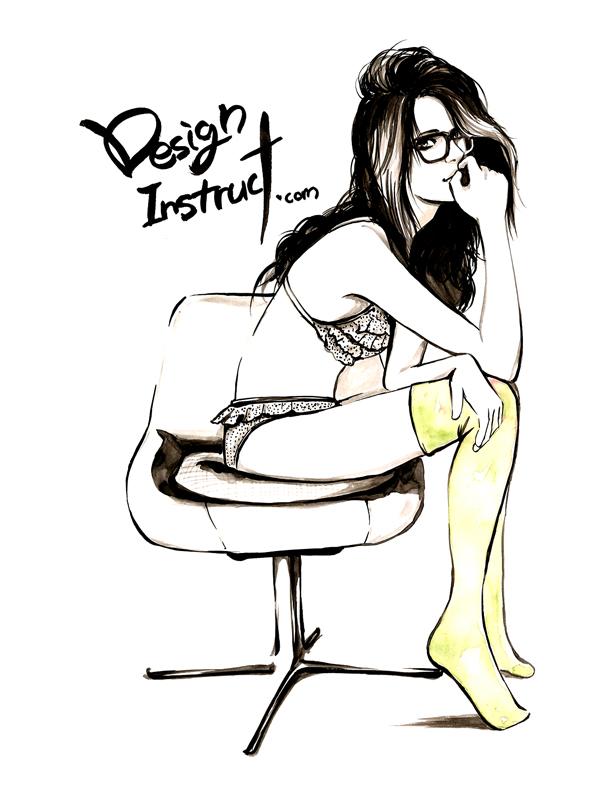
Preview
Tutorial Resources
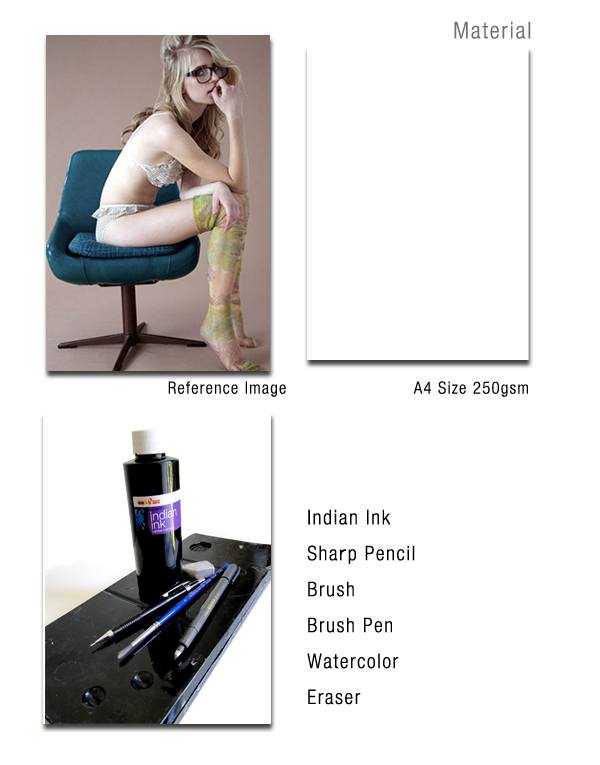
- Reference image: Lonely Hearts
Step 1: Research and Gathering Materials
You might need to search for images that you will use as your illustration’s reference. Pick a reference image that you like.
Also, choose the right tools and materials for your illustration. For example, in my illustration, I use A4 size 250gsm paper with Indian ink and watercolor.
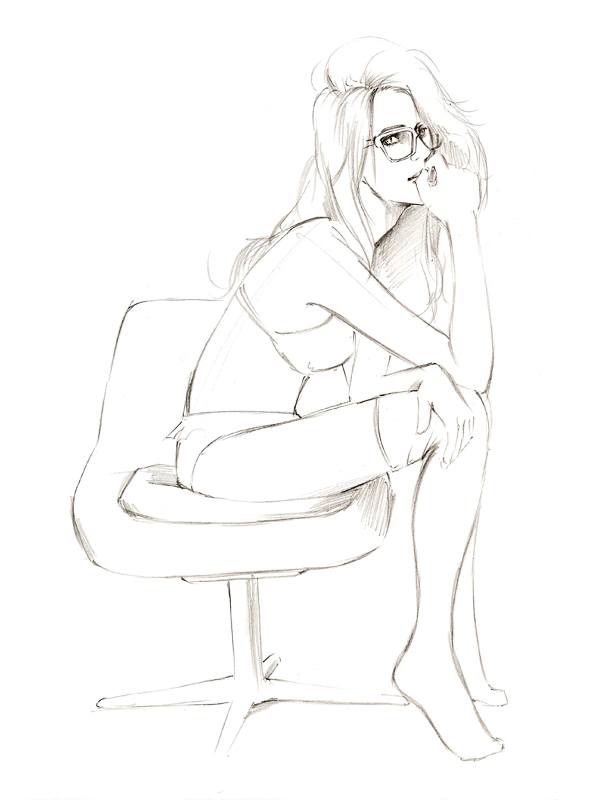
Step 2: Sketch
I use a sharp pencil to draw the sketch softly.
It is important to emphasize here that if you do not draw softly, the pencil marks will remain even after you ink the sketch and it will be very hard remove.
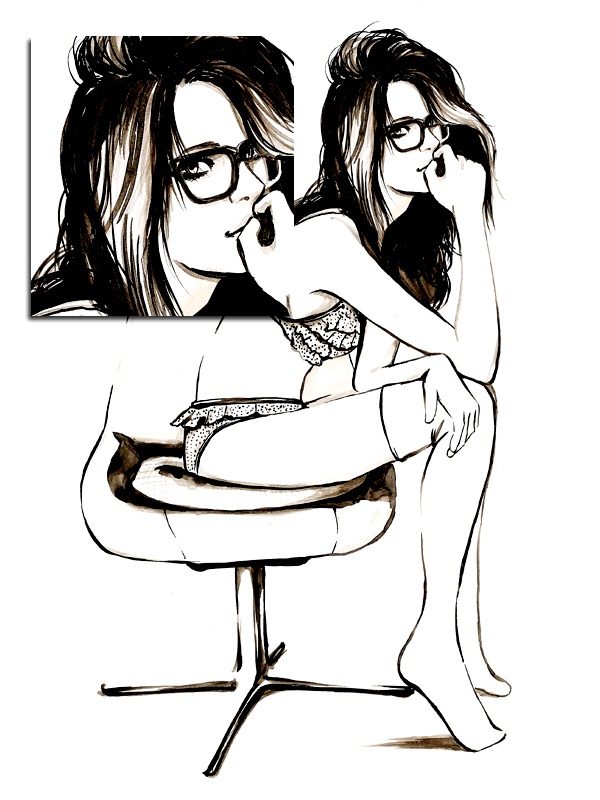
Step 3: Inking the Sketch
Use Indian ink and a brush pen to draw lines on top of the pencil sketch.
For wide pencil strokes, use ink and a brush. Ink and water should be mixed to control density and to add brightness.
Use a brush pen for the narrower, finer pencil strokes (such as the facial area). The reason for using a brush pen is that, compared to a normal pen, its lines are more organic and, at the same time, gives you the benefit of being able to control your lines more freely.
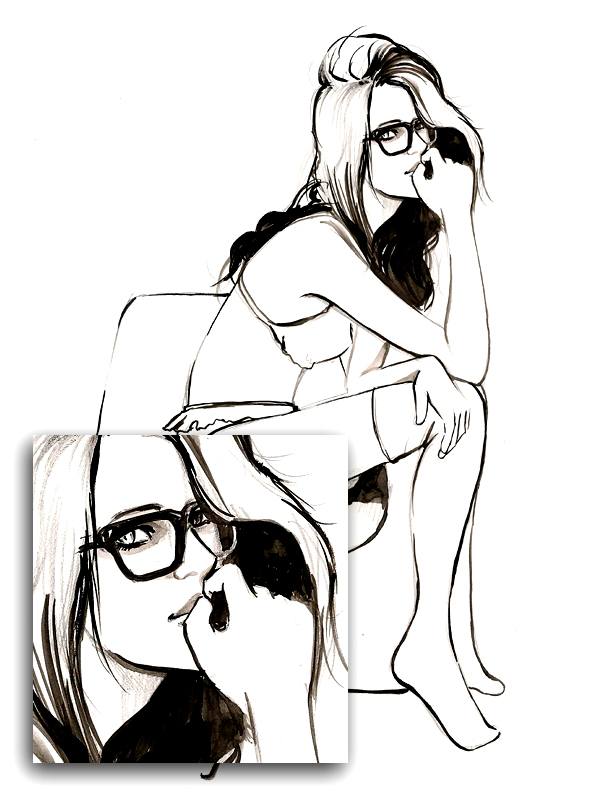
Step 4: Remove the Pencil Lines and Draw More Details
Erase the pencil lines cleanly and continue adding and expressing more details in the illustration.
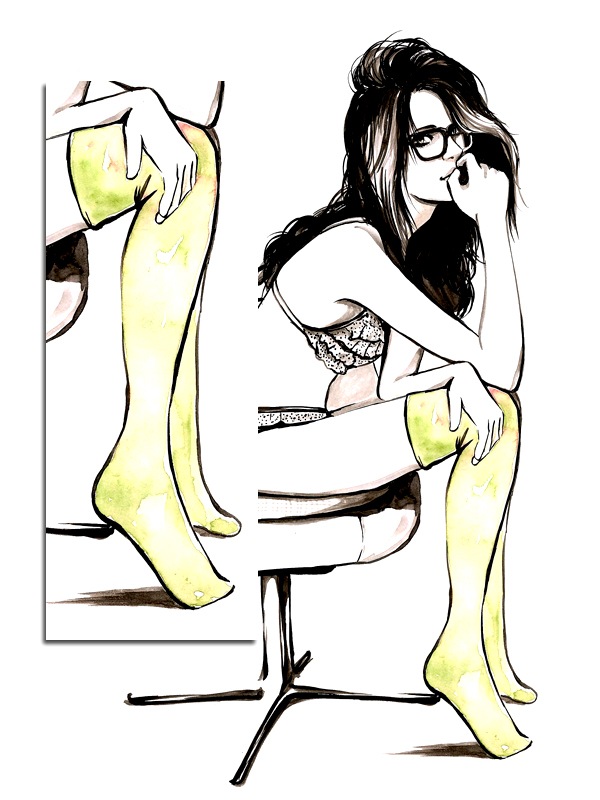
Step 5: Using Watercolor
Use watercolor to color in the illustration.
In this instance, we will start with the subject’s stockings. Water should be placed in some areas of stockings to add subtle variations, texturing and details in the watercolor — this will enhance the expression of our watercolors.
Step 6: Scan the Illustration
Scan in the illustration into your computer. When illustrations are scanned, they can often lose their original colors and subtle details.
They become lighter and some of the strokes become messy.
Once scanned, open up the illustration in Photoshop.
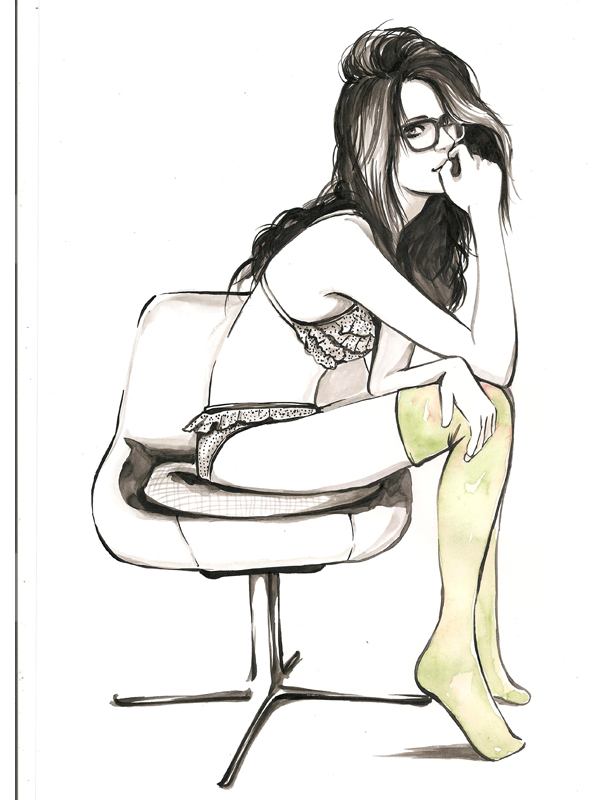
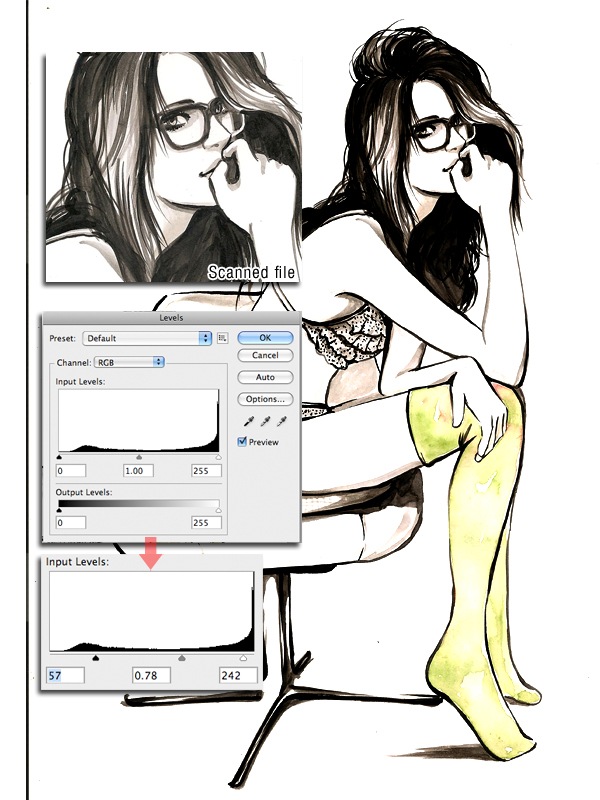
Step 7: Levels Image Adjustment
First, we need to correct the colors and other unwanted effects of scanning hand-drawn illustrations. One of the ways to do this is to use image adjustments.
Go to Image > Adjustments > Levels. I experiment with the Input Level sliders until I get the colors I want.
For this particular case, I want the whiter colors to become a little brighter and the darker colors to become darker, which will also remove some of the messy marks made by the scanner.
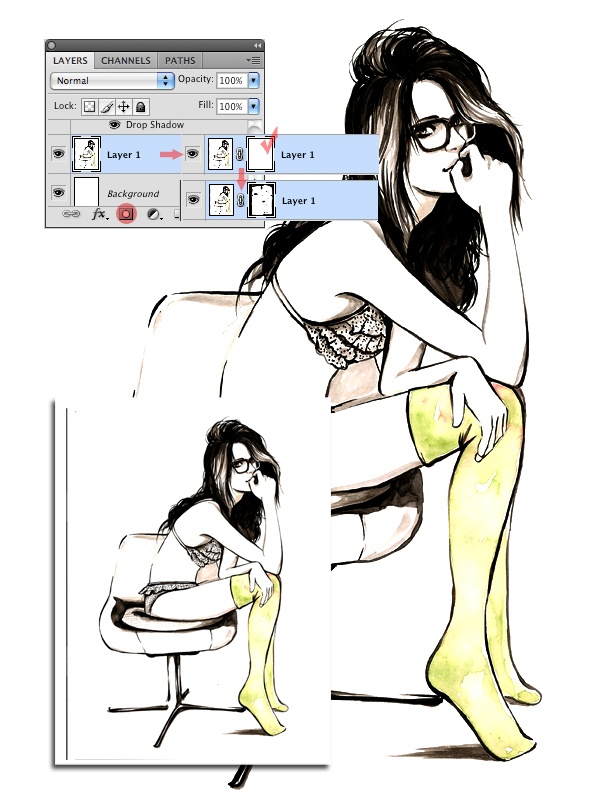
Step 8: Layer Mask
Add a layer mask on the illustration layer (click on the Add layer mask button at the bottom of the Layers Panel) to erase unnecessary parts. There are several Photoshop techniques for erasing, but a layer mask is nice because it is non-destructive and gives you finer control.
To erase, simply use black as your Foreground color, switch to the Brush Tool (B) and paint on the layer mask. If you make a mistake while erasing, change the brush to white and paint over the mistakes (on layer masks, white shows and black hides) or use the History Panel — whichever is appropriate.
Use varying brushes and brush settings as needed.
Step 9: Handwritten Typography
I like using handwritten type in my work as it suits my illustration style and it helps complement and complete the piece. If you also like this typographic style, you might need to try several times with Indian ink to get the perfect one (you can see my experiments below).
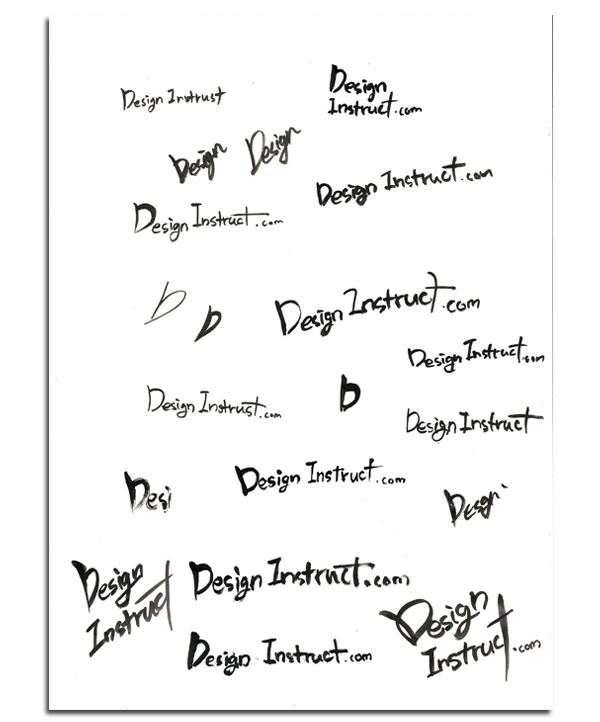
If you don’t like your own handwriting, ask a friend to do it for you or even just use a handwriting font.
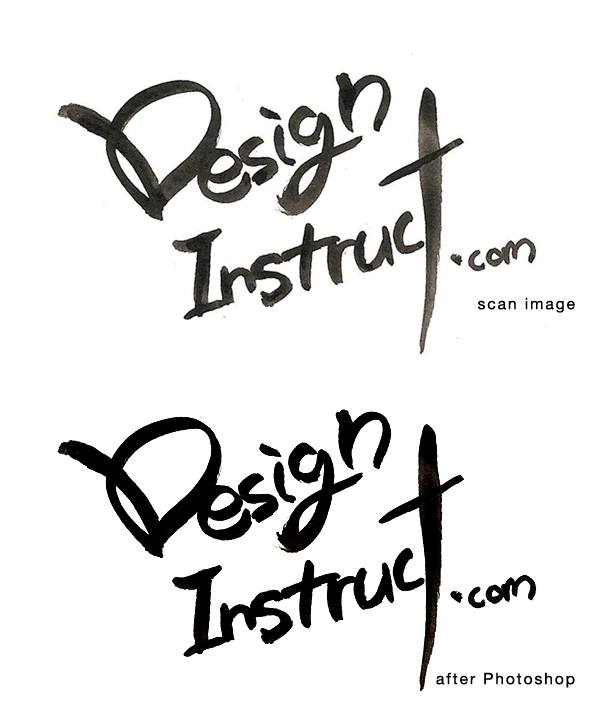
Step 10: Refining the Handwritten Type
Scan in your text and place it into the illustration as its own layer. Then use Levels image adjustments and a layer mask to make corrections on the text, just like we did with the illustration.
Tutorial Summary
In this tutorial, you saw my general workflow for drawing an illustration and processing it in Photoshop.
The two main Photoshop features I use are image adjustments to correct and enhance the colors of the illustration and layer masks to non-destructively remove unwanted parts of the piece.
I hope you all enjoyed my tutorial and have found it to be useful.
Download Source Files
- develop_illustration_photoshop (ZIP, 2.72 MB)
-
 Trevin serves as the VP of Marketing at WebFX. He has worked on over 450 marketing campaigns and has been building websites for over 25 years. His work has been featured by Search Engine Land, USA Today, Fast Company and Inc.
 -

WebFX is a full-service marketing agency with 1,100+ client reviews and a 4.9-star rating on Clutch! Find out how our expert team and revenue-accelerating tech can drive results for you! Learn more
Make estimating web design costs easy
Website design costs can be tricky to nail down. Get an instant estimate for a custom web design with our free website design cost calculator!
Try Our Free Web Design Cost Calculator
Table of Contents
- Preview
- Tutorial Resources
- Step 1: Research and Gathering Materials
- Step 2: Sketch
- Step 3: Inking the Sketch
- Step 4: Remove the Pencil Lines and Draw More Details
- Step 5: Using Watercolor
- Step 6: Scan the Illustration
- Step 7: Levels Image Adjustment
- Step 8: Layer Mask
- Step 9: Handwritten Typography
- Step 10: Refining the Handwritten Type
- Tutorial Summary
- Download Source Files
Share this article


Web Design Calculator
Use our free tool to get a free, instant quote in under 60 seconds.
View Web Design Calculator
Make estimating web design costs easy
Website design costs can be tricky to nail down. Get an instant estimate for a custom web design with our free website design cost calculator!
Try Our Free Web Design Cost Calculator