Preview

Step 1: Set Up the Photoshop Canvas
Open a new file using File > New (Ctrl/Cmd + N). We will use a canvas dimension of 300x300px. 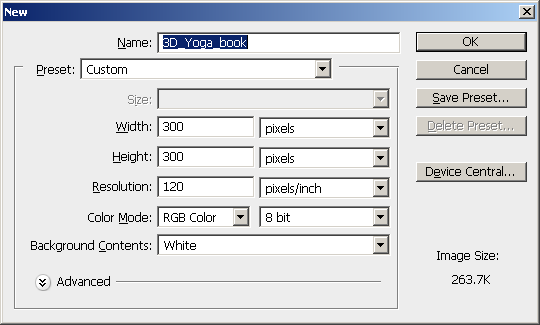
Step 2: Draw the Book Cover
Use the Pen Tool (P) to draw a shape above the Background layer.
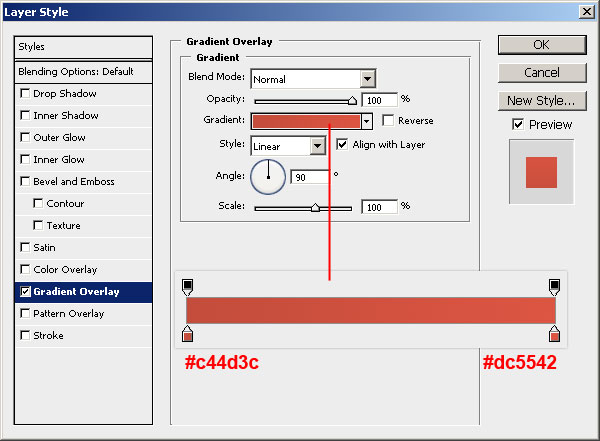
Notice that the left corners curve inside. 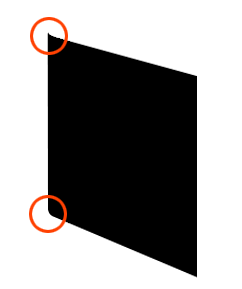 Double-click on the book cover’s layer to view the Layer Style window. Give the shape a red (#c44d3c) to pink (#dc5542) Gradient Overlay.

Step 3: Draw the Book Binding
Above the book cover, create a shape to represent the book’s spine/binding.  Double-click on the layer to access the Layer Style window, and give the layer a blue (#323656) Color Overlay.
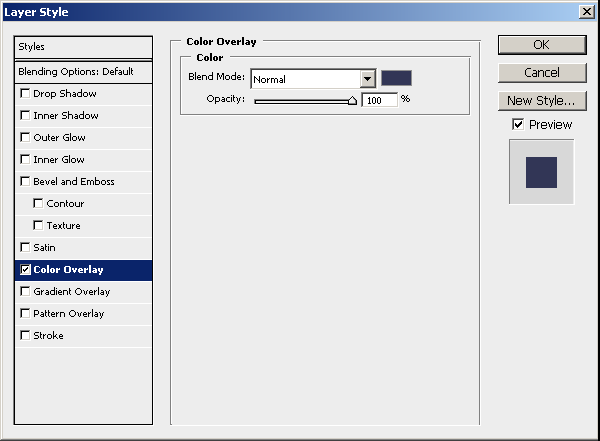

Step 4: Draw the Top Edge of the Book
Create the green shapes shown below.
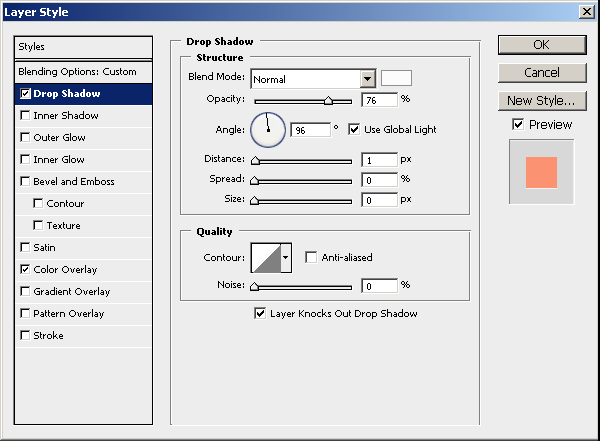
 Give the shapes a Color Overlay and Drop Shadow.
Color Overlay
The color of the Color Overlay is a faded pink (#fc9271). 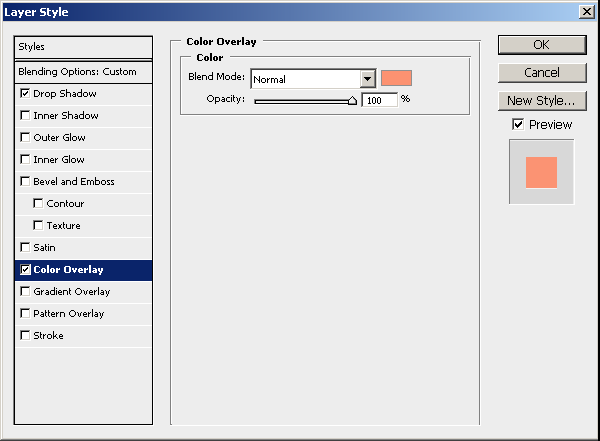
Drop Shadow
The Drop Shadow color is white (#ffffff).

Step 5: Draw the Side Edges of the Book
Create the side edges of the book.  Give the side edges a dark pink (#9b4737) Color Overlay layer style.
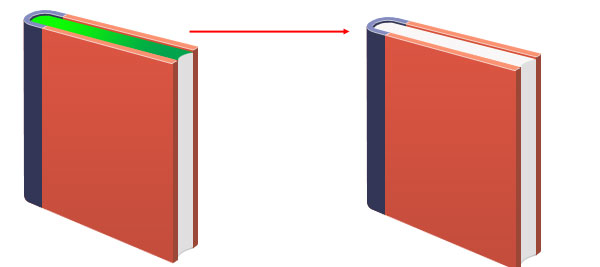
Step 6: Draw the Curved Top Edge by the Binding
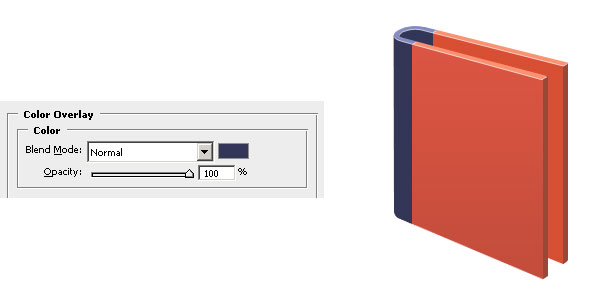
Draw the shape shown in green below.
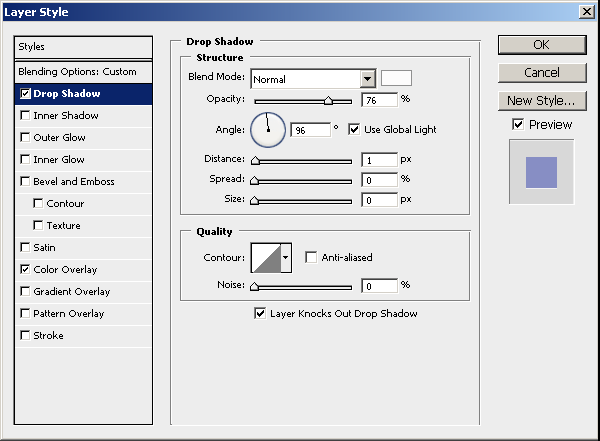
 We will give this shape a Color Overlay and Drop Shadow.
Color Overlay
The color of the Color Overlay is blue (#868ec5). 
Drop Shadow
The color of the Drop Shadow is white (#ffffff).
 Place all of the shapes thus far into a layer group.
Step 7: Draw the Inside of the Book
Create a new shape (shown in green) above the Background layer using the Pen Tool (P). This will be the inside of the back cover of the book.
 Give the inside of the back cover a dark pink (#d74f34) Color Overlay.
  Similarly, use the Pen Tool to draw the shape for the binding.
  Give this a dark blue (#323657) Color Overlay.
Step 8: Create the Book Pages
Draw a shape to represent the front part of the book pages.  Give this shape a gray (#e0dfdf) Color Overlay and a black (#000000) Drop Shadow layer style.
 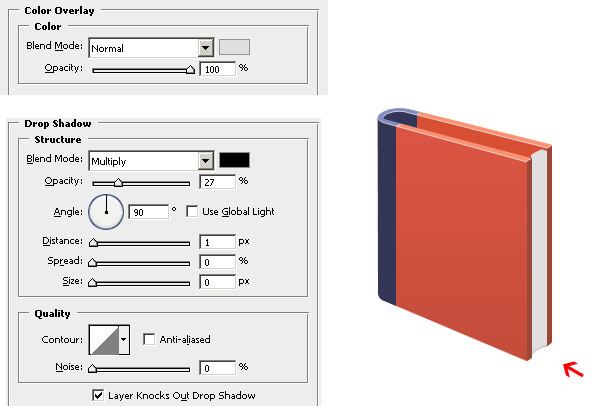 Draw the shape for the top of the book pages and give it a white (#ffffff) Color Overlay.
 Draw vertical lines at the front part of the book pages to give the book pages definition. Afterwards, reduce the layer’s Opacity to 18%.
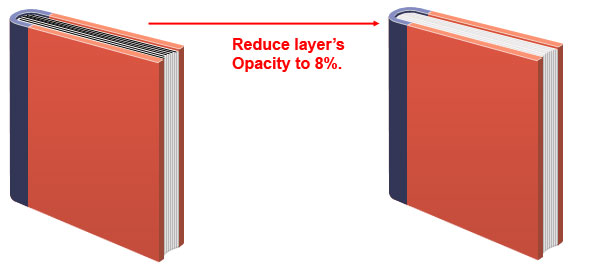
 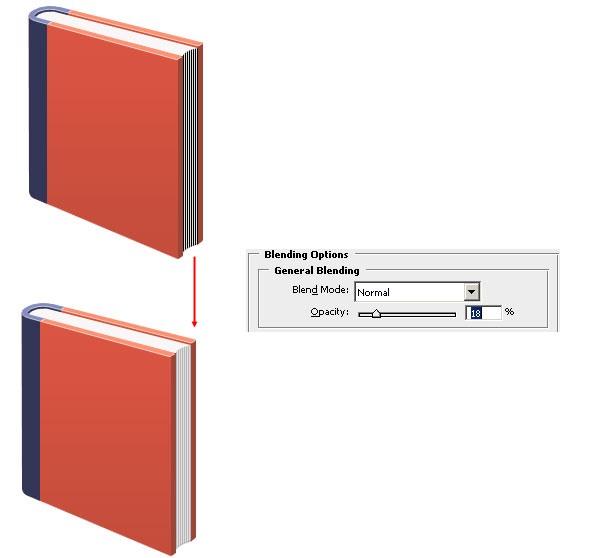 Similarly, create lateral black lines for the top of the book and reduce their layer’s Opacity to 8%.
 Create a tiny detailing shape where the top and side parts of the book pages meet (shown in green). Give this shape a white (#ffffff) Color Overlay layer style.
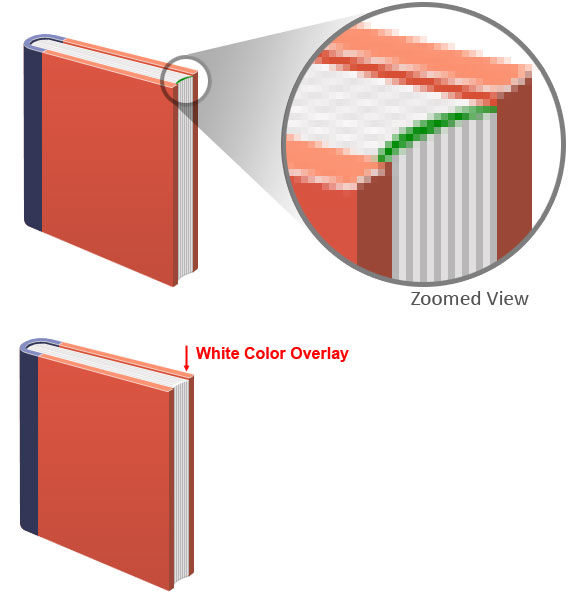
Step 9: Draw the Book Cover’s Inner Shadow
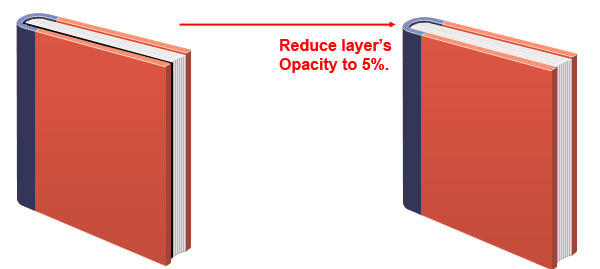
Now we need to create a faint shadow that the book cover casts on the pages.
Draw a black shape similar to the shape shown below using the Pen Tool (P). Set the layer’s Opacity to around 5%. The shadow is practically invisible because there is very little space between the pages and the cover.
Step 10: Shading and Detailing the Cover
Create a new layer (Shift + Ctrl/Cmd + N) on top of the book cover. Use the Polygonal Lasso Tool (L) to make a selection of the front cover. Switch to the Gradient Tool (G) and set it up such that it is at Radial Gradient and using a white to transparent color gradient.
Draw the gradient diagonally (from the top right corner to the bottom left). 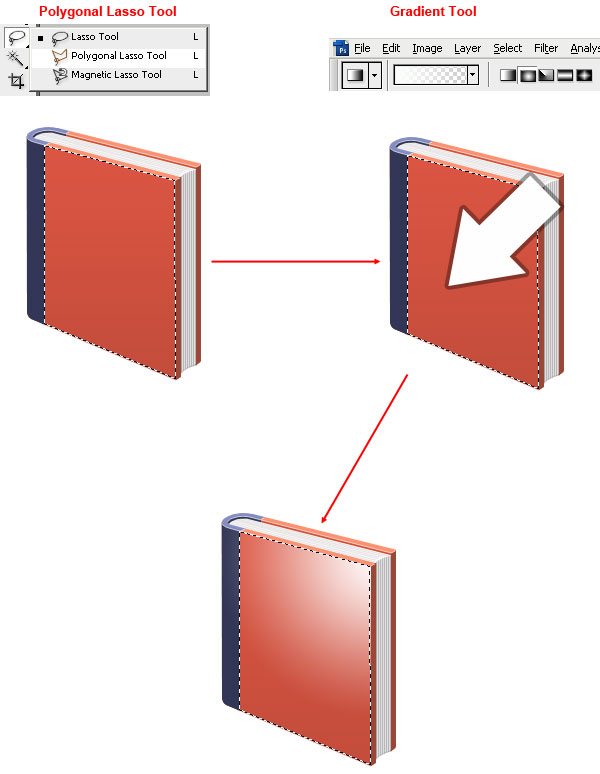 Switch the Blend Mode of the layer to Overlay and Opacity to 70%.
 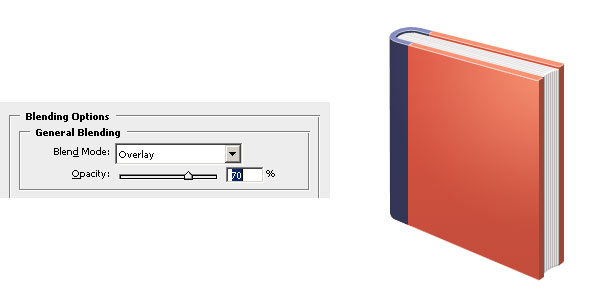 Create a very thin white line on the right edge of the book cover.
Set the line layer’s Blend Mode to Overlay and reduce the Opacity to 50%. 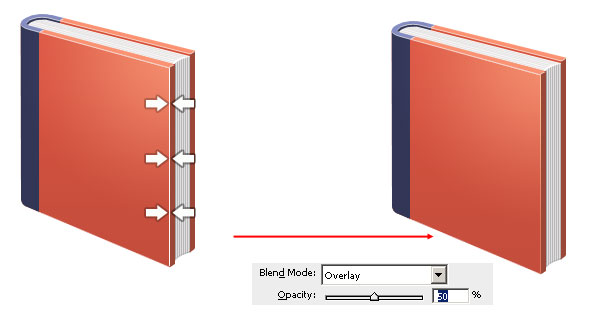 Use the Polygonal Lasso Tool again to draw two selections on the side edge of the book cover. Do this by completing one of the selections and then pressing Shift to create another selection.
Use the Gradient Tool (G) with a white to transparent linear gradient and draw it from top to bottom. Then just switch the layer’s Blend Mode to Overlay and reduce the Opacity to 15%. 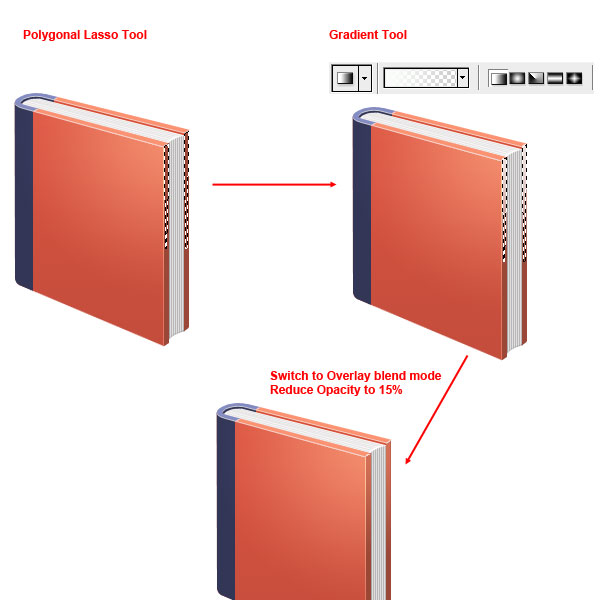 Duplicate the layer above (Ctrl/Cmd + J) and set the Opacity of the duplicated layer to 15%.
 Create a very think black line at the top edge of the front cover. Use a Color Overlay to set its color to a brownish color (#be715a).
 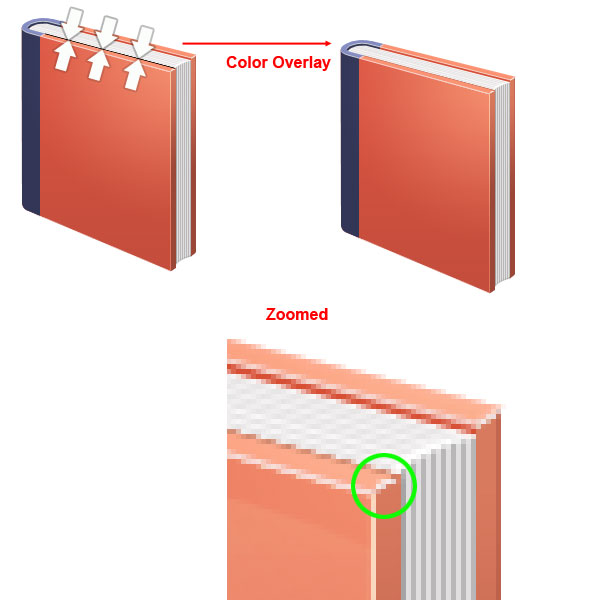 The joints of the front top and right edge of the book cover (shown in green) is not properly lit, and we should do something about it.
On a new layer, draw a white line where the top edge and left edge meets. 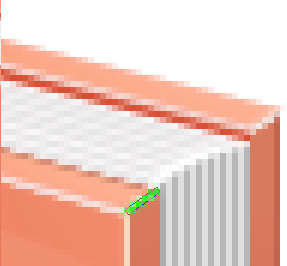 Set the Blend Mode of the white line layer to Overlay and Opacity to 70%.
  Use the Polygonal Lasso Tool again to make rectangular selections on the top edges of the book cover.
On a new layer, use the Gradient Tool to give the area underneath the selection a white to transparent linear gradient. Finish off the top highlight by setting the Blend Mode to Overlay and reducing the Opacity to 27%. 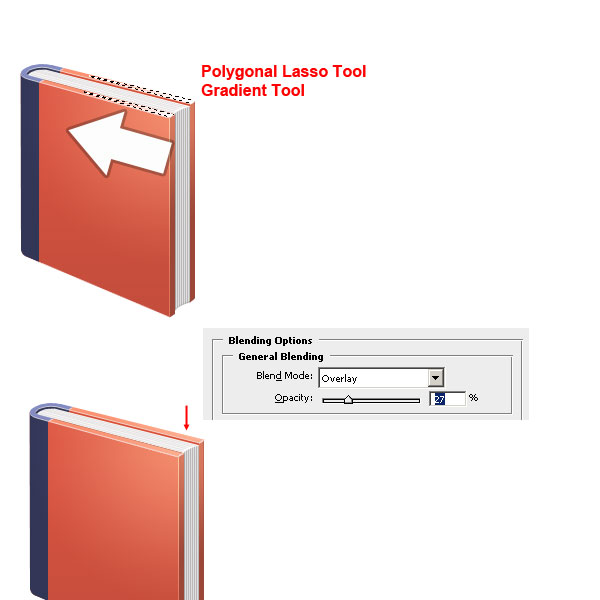
Step 11: Highlighting and Detailing the Book’s Binding
Let’s move to highlighting and detailing the binding now.
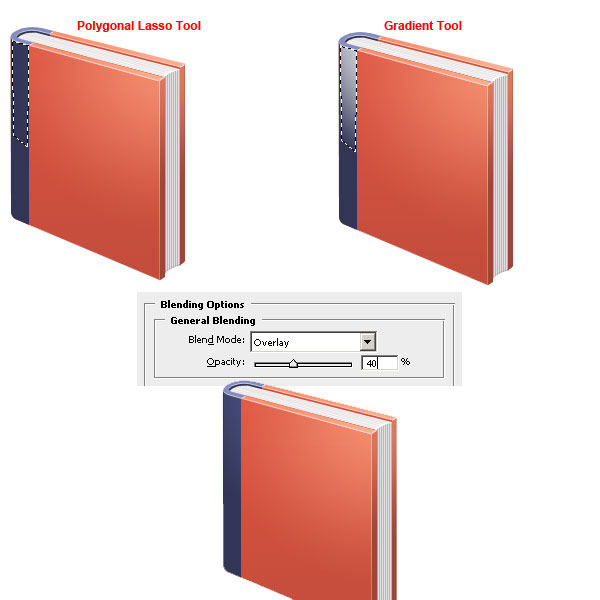
Make a Polygonal Lasso Tool (L) selection that’s oriented along the top section of the book’s binding. On a new layer, use the Gradient Tool (G) to create a white to transparent linear gradient starting from the top. Set the Blend Mode of the layer to Overlay and lower the Opacity to 40%.
 Now create a white shape on a new layer. Set the Blend Mode of the layer to Overlay and lower the Opacity to 20%.
 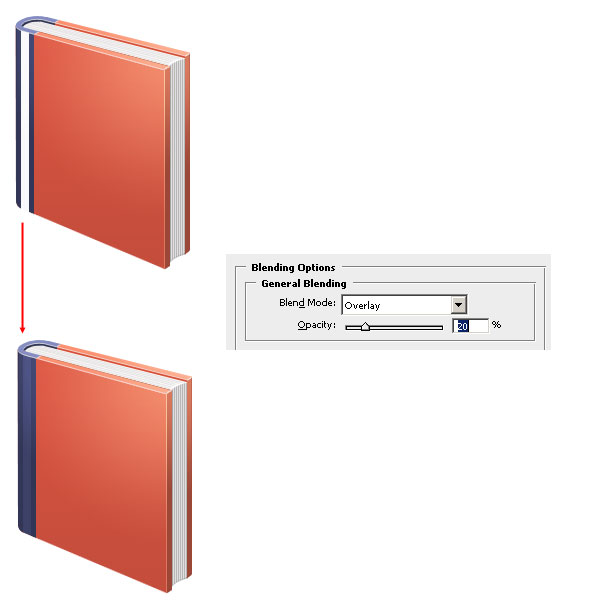 Now make a very thin 1px black line where the binding and front cover meets.
Duplicate the black line 5 times. Use the Move Tool (V) to arrange the duplicated lines along the width of the binder. Merge all the layers with the black lines into one layer (Ctrl/Cmd + E).
Reduce the Opacity of the merged layer to about 20%. 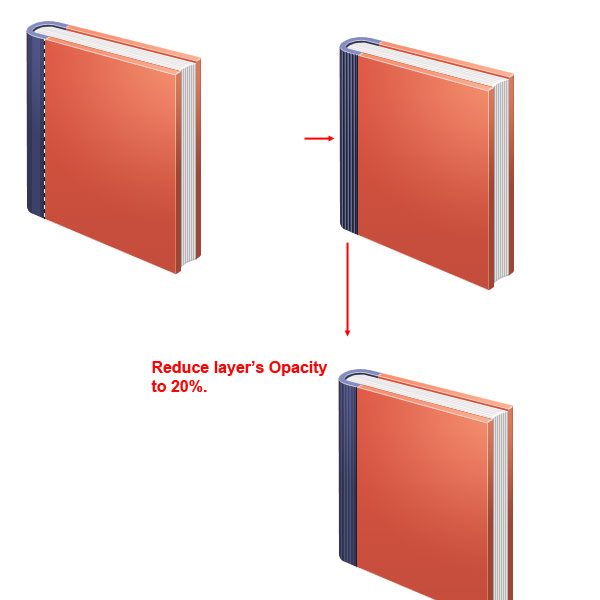 On the layer with the vertical lines, add a layer mask by clicking on the Add layer mask icon at the bottom of the Layers Panel. On the mask, use a black to white linear gradient going from right to left.
This will make the lines appear more subtle on the right side, reinforcing the 3D look we are trying to achieve. 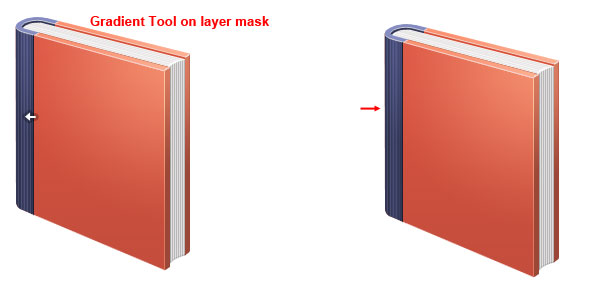
Step 12: Make the Cover Art of the Book
The cover art is the most distinguishable feature of the book. I chose to go with a Yoga theme for this book, but please feel free to use another theme.
To draw the flower-like shape, first set your Foreground Color to white. Then activate the Custom Shape Tool (U). In the Options Bar, under the Shape dropdown menu, look for the custom shape named Flower 6.
Draw it on the canvas on a new layer. To hollow out the center of the shape, just use the Elliptical Marquee Tool (M) to create a circle in the middle, then go to Edit > Clear. 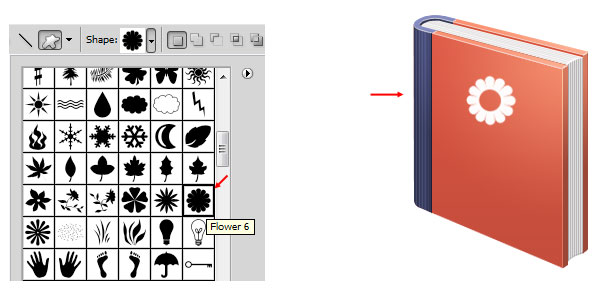 Give the white flower a Gradient Overlay (from #f9cabd to #ffffff) and Stroke (#000000) layer style.
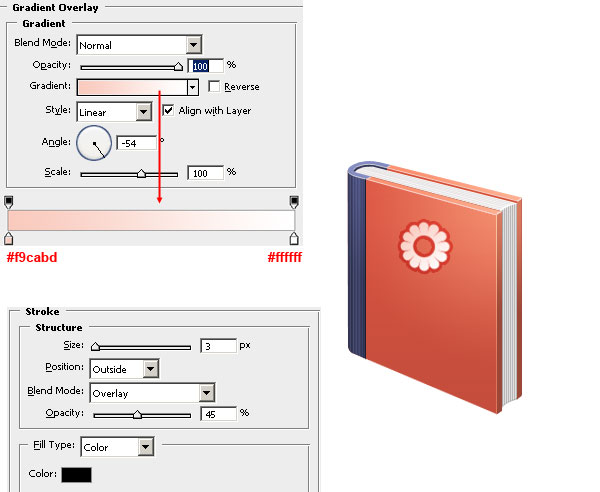 Use the Horizontal Type Tool (T) to type “Yoga Secrets” below the flower. Give it the same layer style as the flower. Do this by first copying the layer style from the flower by right-clicking on its layer and then choosing Copy Layer Style.
Then paste the layer style into the “Yoga Secrets” text layer by right-clicking on it and choosing Paste Layer Style.  Select the flower layer and the “Yoga Secrets” text layer, and then go to Edit > Transform > Skew. Drag the top-left and bottom-right transform controls so that the objects match the angle and perspective of the front cover.
 Now select the Move Tool (V) to move the cover art at the center of the front cover.
  If you want extra detail, you can add a sort of barcode graphic on the bottom right of the front cover using similar techniques as above.
Step 13: Give the Front Cover Light Effects
Switch to the Brush Tool (B).
Select a soft brush at about 100px Master Diameter. Set your Foreground Color to white. On a new layer, apply a stroke at the center of the book.
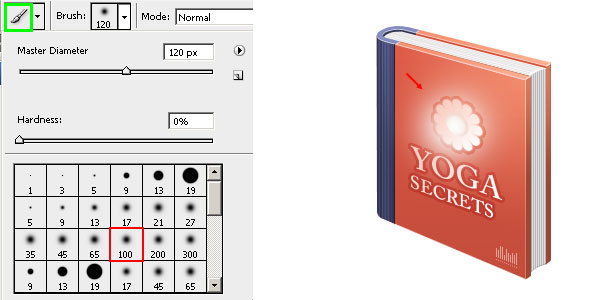 Use the Elliptical Marquee Tool (M) to make a wide ellipse toward the bottom of the white paint stroke. Then go to Edit > Clear (Delete) to remove the area selected by the elliptical marquee. Then simply switch the layer’s Blend Mode to Overlay to finish off the effect.
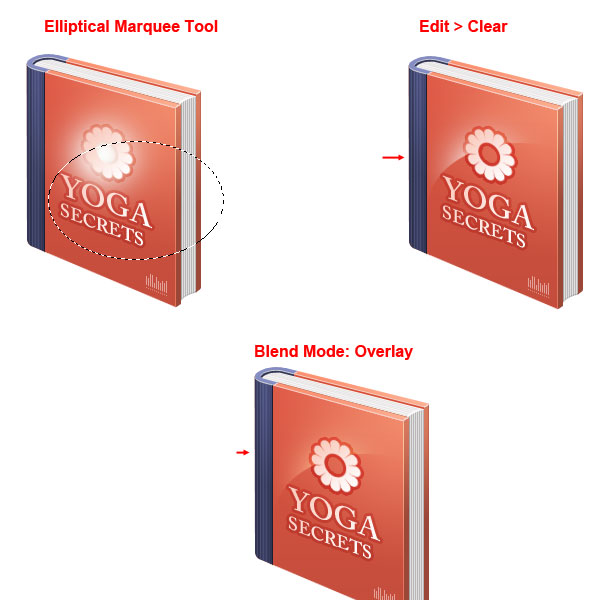 Use the same technique (on different layers) to produce more light effects.
Step 14: Create a Highlighting Detail on the Front Cover’s Corner
Create thin white lines using the Pen Tool (P) located at the top right corner of the book cover. Create a layer mask by clicking on the Add layer mask button at the bottom of the Layers Panel.
 On the layer mask, use the Gradient Tool to create a diagonal white to black linear gradient so that the white lines gradually fade out as we get farther from the book’s edges. Set the layer’s Opacity to 40% to finish off the highlighting effect.
Step 15: Adding a Shadow to the Book
This is our last step.
Create a new layer just above the Background layer. Use the Polygonal Lasso Tool (L) to draw out a shape for the book’s shadow. Switch to the Gradient Tool (G) and create a black to transparent linear gradient on the new layer.
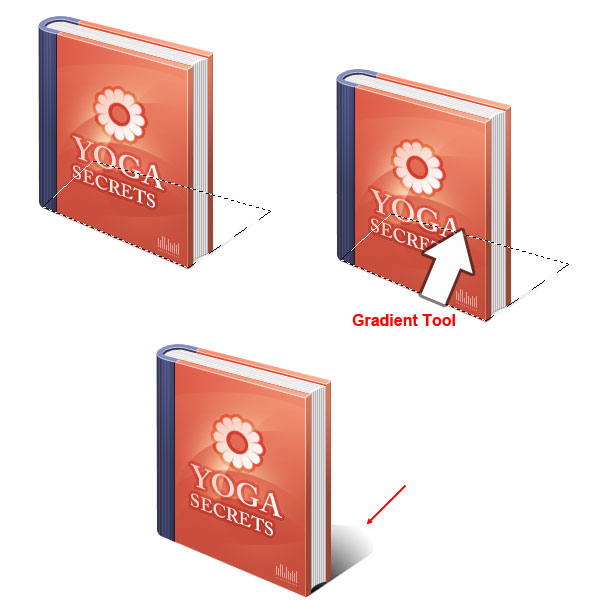 Set the Opacity of the layer to around 25%.
  Again, use the Polygonal Lasso Tool to create a selection as shown below. On the canvas, right-click inside the selection and choose Layer via Cut from the menu that appears to transfer the selected parts of the shadow into a new layer.
Lower the new layer’s Opacity to about 10%. 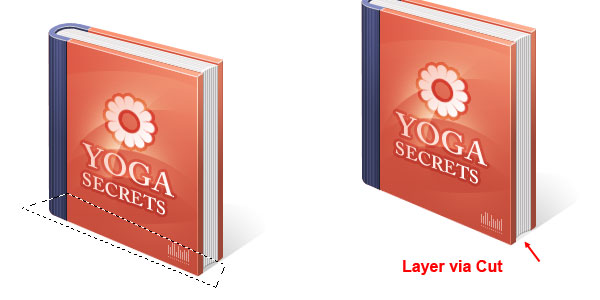
Tutorial Summary
In this tutorial, we created a 3D book icon using Photoshop. We used various tools such as the Polygonal Lasso Tool, the Pen Tool, the Gradient Tool and layer masks to create the book.
We paid attention to details by making sure we create highlights and details where necessary. I hope you have found this tutorial to be useful.
Download Source Files
- 3d_book_icon (ZIP, 0.13 MB)
-
 Trevin serves as the VP of Marketing at WebFX. He has worked on over 450 marketing campaigns and has been building websites for over 25 years. His work has been featured by Search Engine Land, USA Today, Fast Company and Inc.
 -

WebFX is a full-service marketing agency with 1,100+ client reviews and a 4.9-star rating on Clutch! Find out how our expert team and revenue-accelerating tech can drive results for you! Learn more
Make estimating web design costs easy
Website design costs can be tricky to nail down. Get an instant estimate for a custom web design with our free website design cost calculator!
Try Our Free Web Design Cost Calculator
Table of Contents
- Preview
- Step 1: Set Up the Photoshop Canvas
- Step 2: Draw the Book Cover
- Step 3: Draw the Book Binding
- Step 4: Draw the Top Edge of the Book
- Step 5: Draw the Side Edges of the Book
- Step 6: Draw the Curved Top Edge by the Binding
- Step 7: Draw the Inside of the Book
- Step 8: Create the Book Pages
- Step 9: Draw the Book Cover’s Inner Shadow
- Step 10: Shading and Detailing the Cover
- Step 11: Highlighting and Detailing the Book’s Binding
- Step 12: Make the Cover Art of the Book
- Step 13: Give the Front Cover Light Effects
- Step 14: Create a Highlighting Detail on the Front Cover’s Corner
- Step 15: Adding a Shadow to the Book
- Tutorial Summary
- Download Source Files
Share this article


Web Design Calculator
Use our free tool to get a free, instant quote in under 60 seconds.
View Web Design Calculator
Make estimating web design costs easy
Website design costs can be tricky to nail down. Get an instant estimate for a custom web design with our free website design cost calculator!
Try Our Free Web Design Cost Calculator