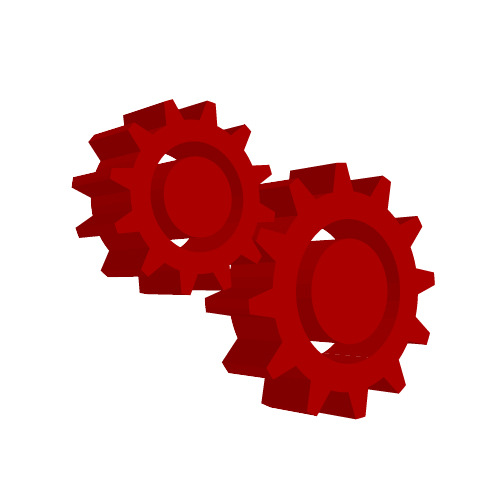
Tutorial Preview

Step 1: Creating the Flat Shape
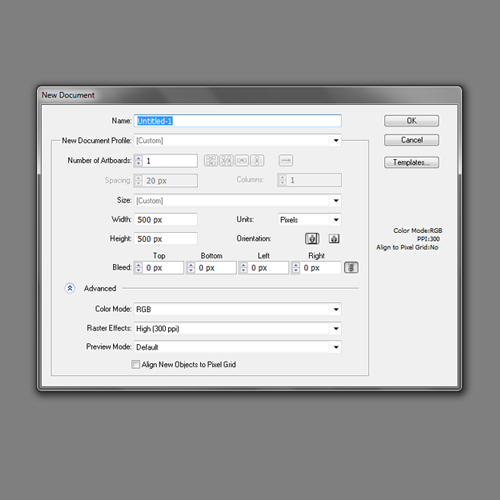
Start by making a new Adobe Illustrator document with an artboard that’s 500x500px in size. Make sure that the Color Mode option is set to RGB.
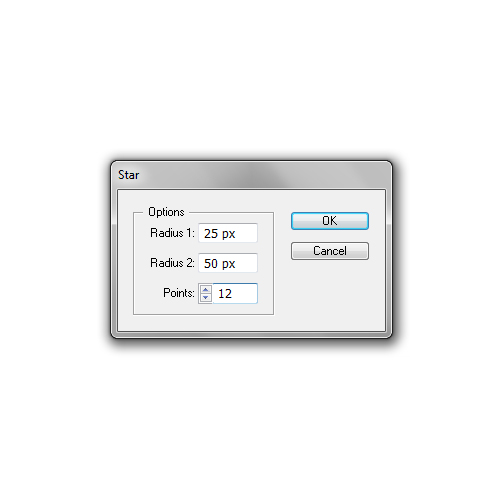
Activate the Star Tool in the Tools panel and then click anywhere on the artboard. Doing so should make the Star dialog window pop up.
Set the values for Radius 1 at 25px, Radius 2 at 50px and Points to 12.
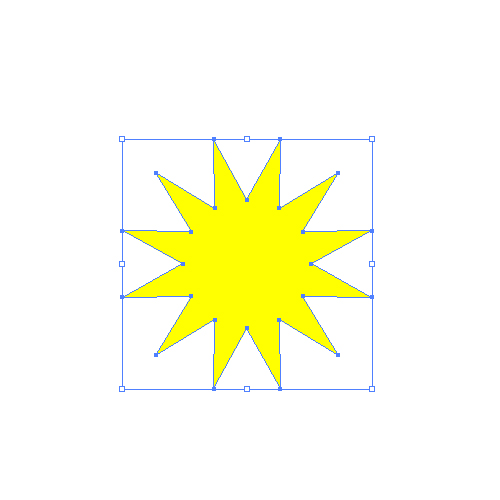
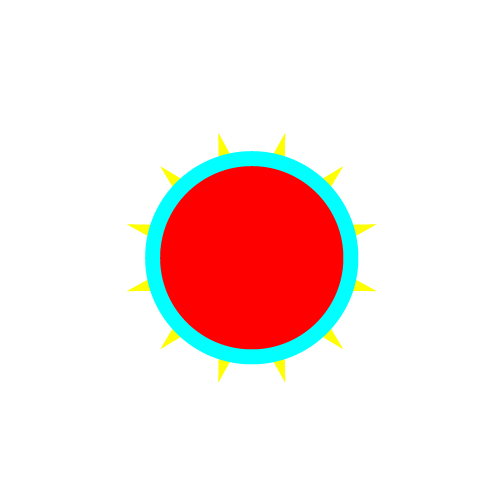
Doing the above will create an object that looks like this:
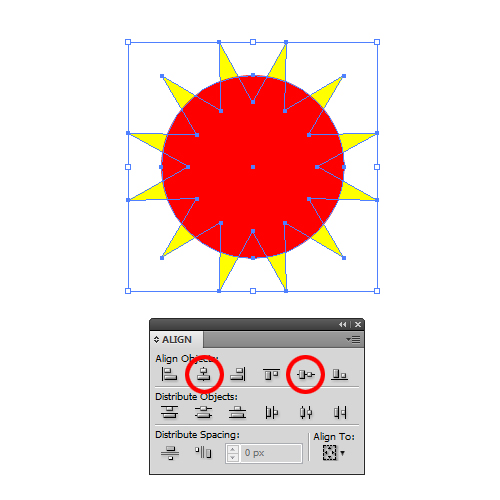
Switch to the Ellipse Tool (L), hold down Shift, and then draw a circle as shown in the next image. (You need to hold down Shift to make a perfect circle.)
You also need to align the circle with the star by first selecting both shapes using the Selection Tool (V) and, in the Align panel (Window > Align or press Shift + F7) click on both the Horizontal Align Center and Vertical Align Center buttons.
Copy the circle (Ctrl/Command + C) and paste it in place (Ctrl/Command + F). Make the new circle a bit bigger.
Afterwards, move it behind the smaller circle using Object > Arrange > Send Backward (Ctrl/Command + [).
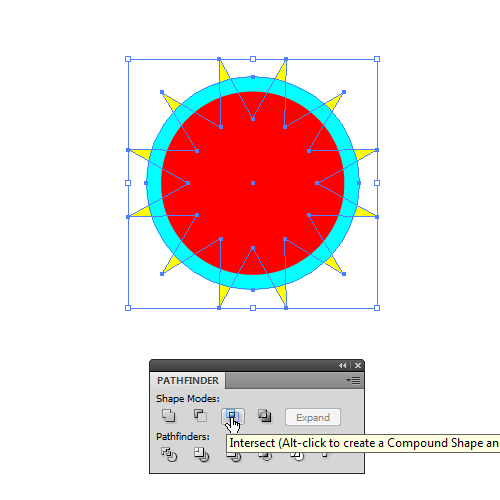
Select just the star and the bigger circle and, under the Pathfinder panel (Window > Pathfinder), click on the Intersect button which will trim off the points on the star.
Now, select the star shape and the red circle and use the Unite button (also in the Pathfinder panel).
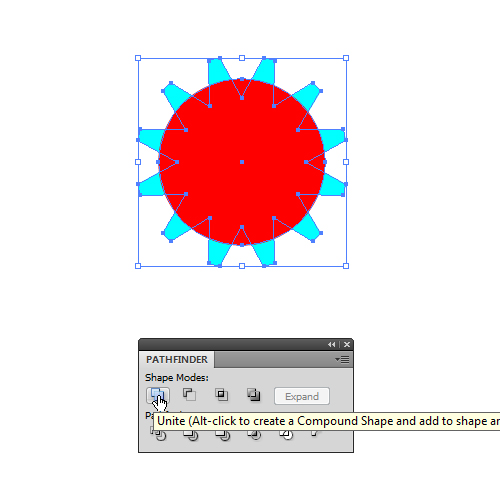
You should end up with something like this:

Grab the Ellipse Tool (L) again and create another smaller circle. Use the Horizontal Align Center and Vertical Align Center commands again to place this circle at the center of our shape.
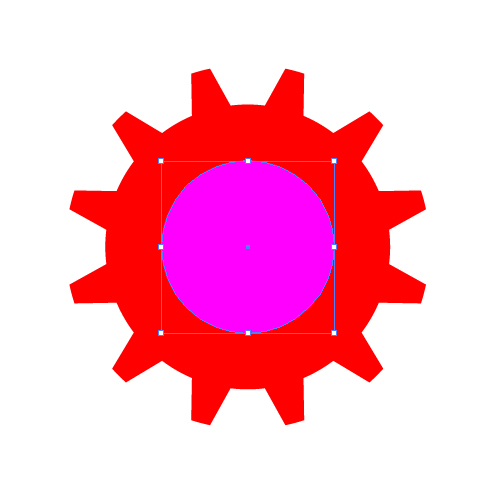
Make sure to remove the Fill color of the circle and leave just the Stroke color. Afterwards, set the value for the Stroke Weight to 12pt.

Expand the stroke by going to Object > Expand (this will turn the circle stroke into an editable vector object).
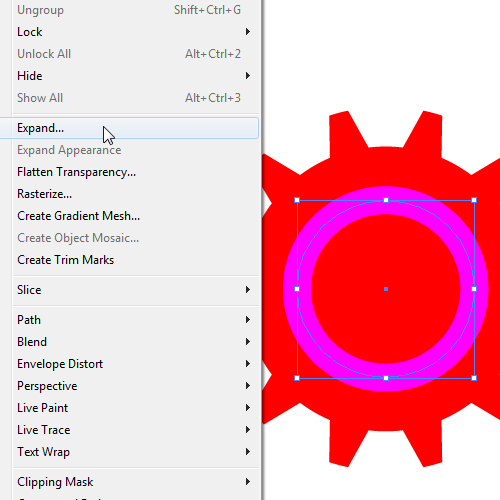
Select both shapes and, under the Pathfinder panel, click the Minus Front button.
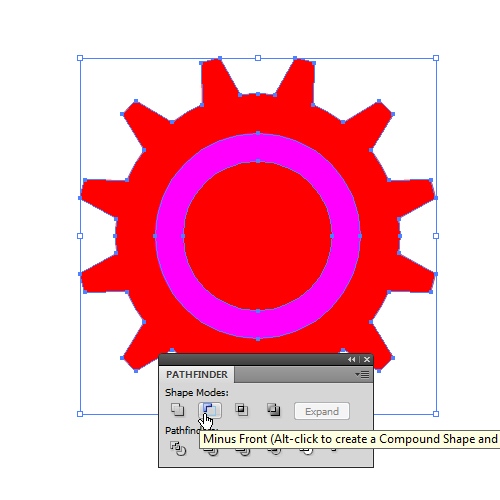
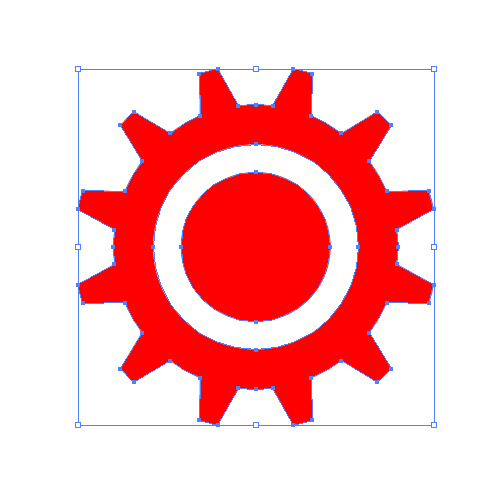
You should end up with a cogwheel that looks like this:
Duplicate the cogwheel (Ctrl/Command + C, Ctrl/Command + F), scale down the duplicate and then place it to the left of the first cogwheel as shown below.

Select everything and then put them inside a group (Ctrl/Command + G).
Step 2: Creating 3D Objects
We’ll now convert our flat illustration into 3D shapes.
Select our group and go to Effect > 3D > Extrude & Bevel.

Feel free to play around with the Extrude & Bevel options until you get the effect you want.
Enabling the Preview option in the Extrude & Bevel dialog window is very helpful.
Here are my settings:
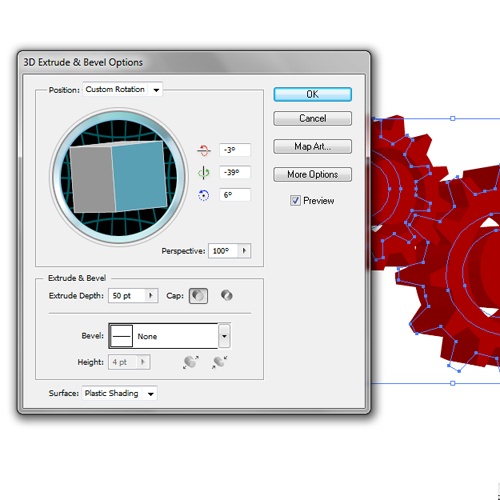
Using the settings above, you should end up with something like this:
Step 3: Expanding and Uniting the 3D Elements
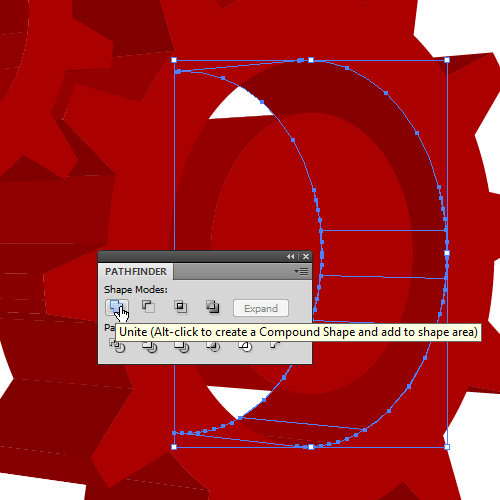
In order to work with various parts of our 3D cogwheels, first we need to expand the object and then use the Unite button in the Pathfinder panel to combine related elements.
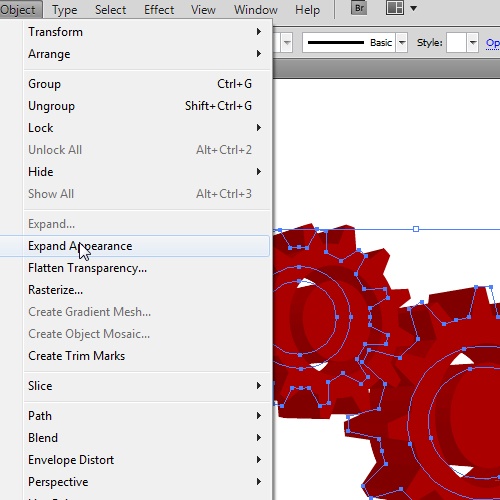
To expand the 3D cogwheels, select them and then go to Object > Expand Appearance.
After expanding the appearance of our 3D object, we need to completely ungroup it. Select everything with the Selection Tool (V) and press Shift + Ctrl/Command + G several times until everything is completely ungrouped.
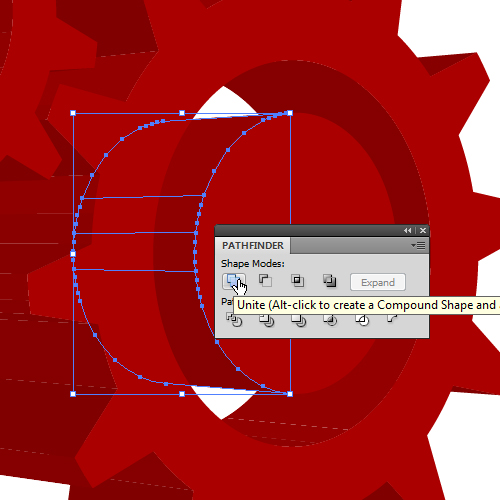
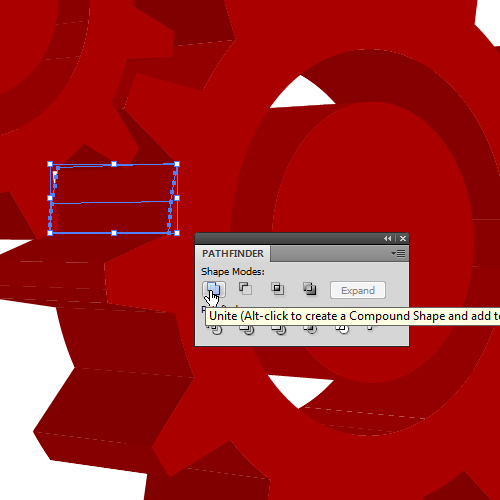
After everything is ungrouped, we need to unite related parts together. Use the following images to see what parts should be combined together.
Use the Unite button in the Pathfinder panel for this process.
Step 4: Applying Color Gradients
Now we’ll apply some nice color gradients.
Since our cogwheels are made of metal, we’ll be using gray color gradients to mimic that type of surface.
For this, use Illustrator’s Gradient Tool (G) and Gradient panel (Window > Gradient).
Use the following images as reference for the front-face of the cogwheels:
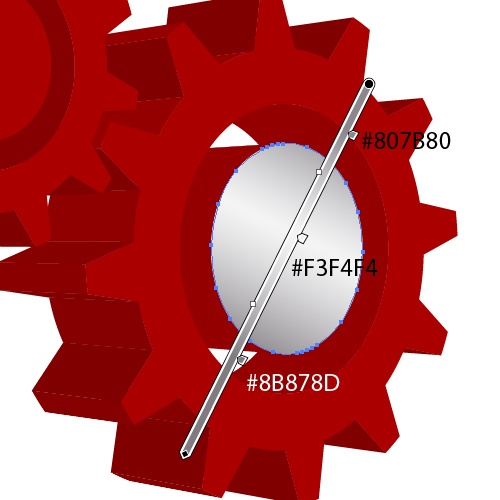
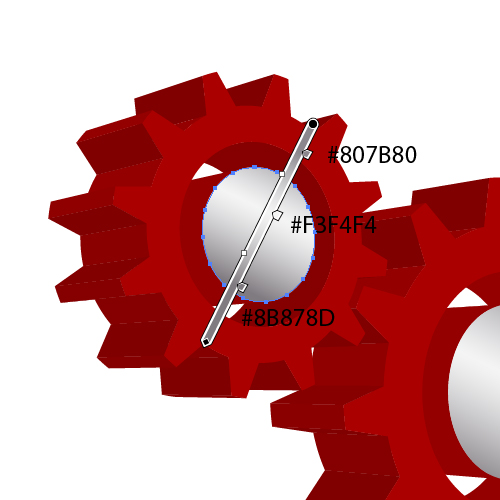
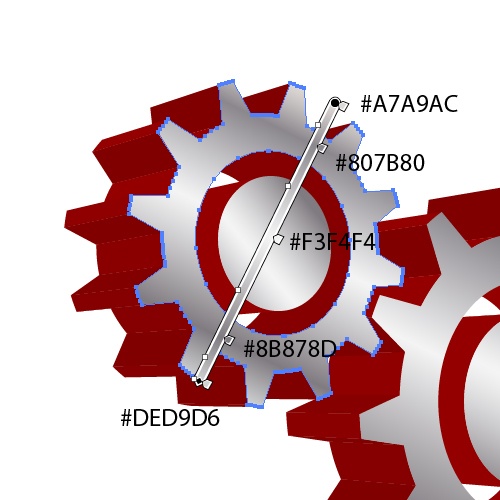
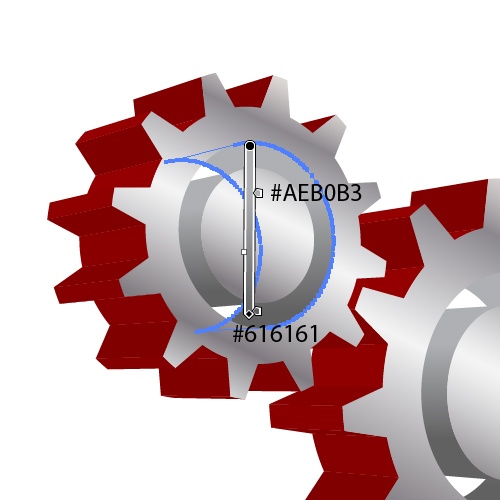
Here are the gradients for the inner sides of the cogwheels:
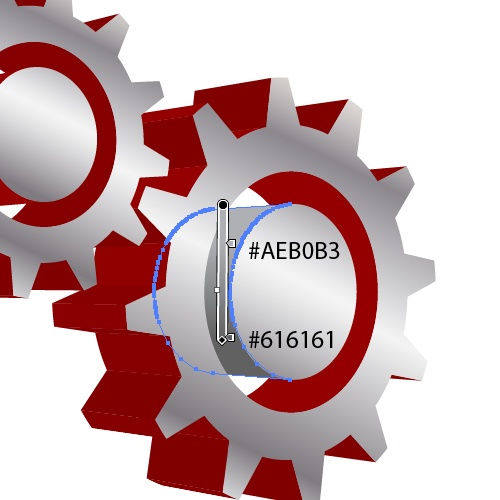
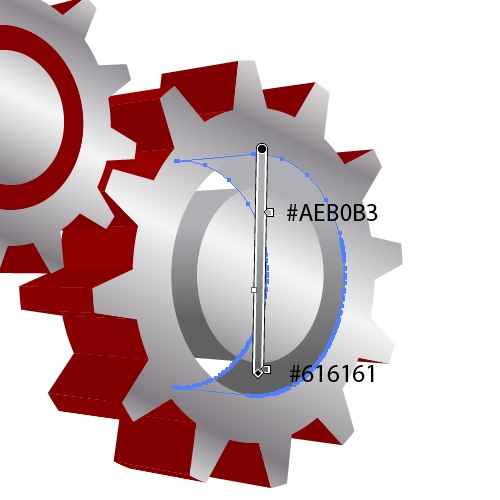
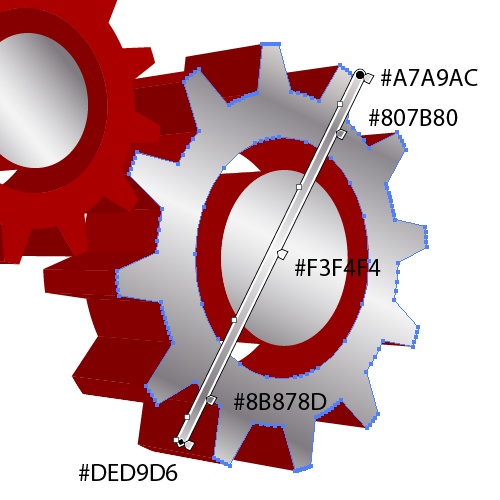
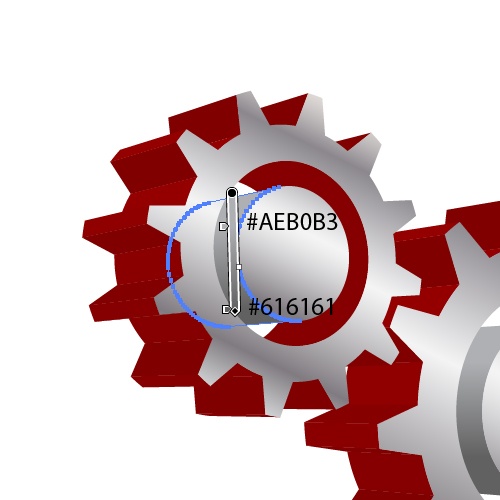
Use these images as reference for the cogwheel on the left:
All we need to do now is to fill in the “teeth” of the cogwheels. Use the same linear gradient we used for the inner part of the cogwheels.
To keep our illustration’s lighting accurate, just make sure to place the lighter color of the gradient at the top of the teeth and the darker color at the bottom.
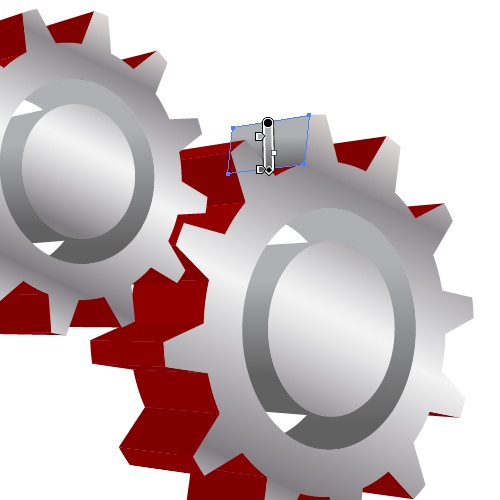


Use same color gradient for the parts between the teeth.


For the top of the teeth, you can use various shades of solid gray as their Fill color; as you go up towards the top of the artboard, the shade of gray should be lighter (i.e., as we get closer to the light source).

Our work is mostly done — let’s just add some details to our illustration in the next steps.
Step 5: Give the Edges a Highlight
Although our illustration looks quite nice already, we will do a few more things to finish it off.
First, we need some highlights at the edges, as this will improve the look of our cogwheels.
Duplicate (Ctrl/Command + C, Ctrl/Command + F) the front side of the cogwheel. Move the duplicate down by 1px using your Down Arrow key.
Select both the original and the duplicate and, under the Pathfinder Panel, hit the Minus Front button.
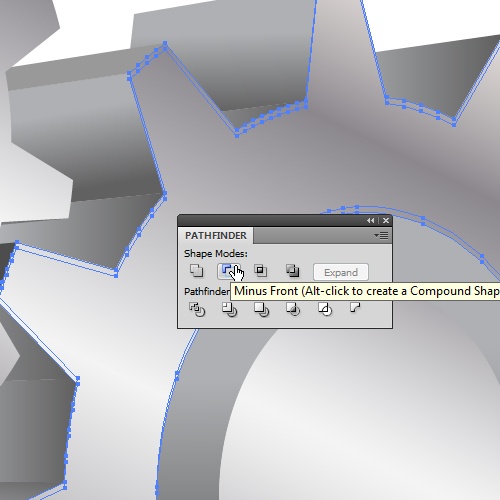
Change the Fill color of the shape we just made to a light gray color in order to make it stand out a bit.

Repeat this step for the middle part of the cogwheel as well:

Do the same thing for the left cogwheel as well.
When you’re satisfied, select all the objects and put them in a group (Ctrl/Command + G).

Step 6: Create the Illustration’s Background
As a design flourish for our illustration, let’s put our cogwheels on top of a background.
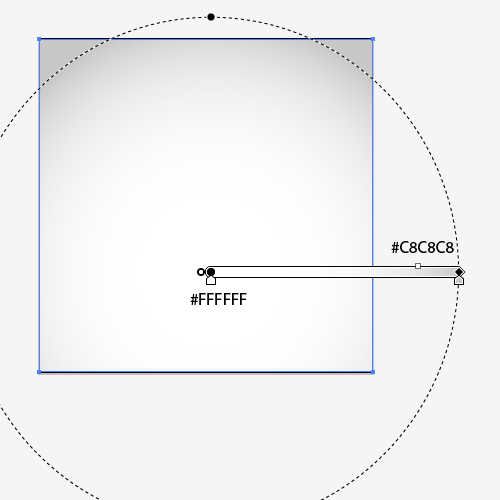
Grab the Rectangle Tool (M) from the Tools panel and click somewhere on the artboard — the Rectangle dialog window should pop up. Set the Width and Height options to 500px (which is the same dimension as our artboard). Press OK to create the 500x500px rectangle.
Apply a radial gradient as shown on the image below:
Place the background behind the cogwheels using Object > Arrange > Send to Back (Shift + Ctrl/Command + [).
Step 7: Create a Reflection Effect
Now I’ll show you a quick and easy way to create reflections of vector objects in Illustrator.
First, in order to create a realistic reflection, we need to rotate our cogwheels a bit.
Take a look at the bottom of the right cogwheel. You’ll notice that the bottom teeth aren’t in line with x-axis of our artboard. Let’s create a temporary horizontal line (it’s the red line in the following images) to help us correct the angle of our cogwheels.

Select the cogwheels and rotate them in order to make the teeth parallel with red line.

Delete the red line after doing the adjustment.
Next, select the cogwheels, then go to Object > Transform > Reflect.
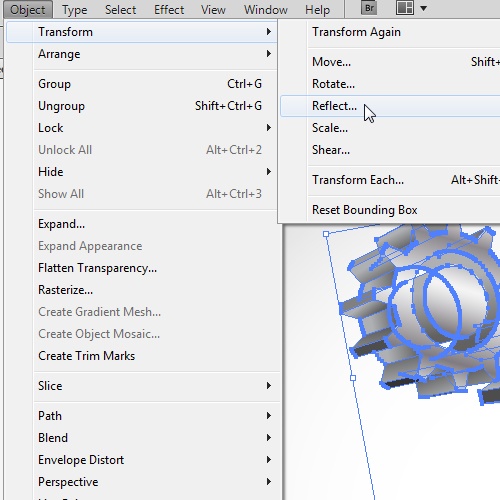
The Reflect dialog window will pop up.
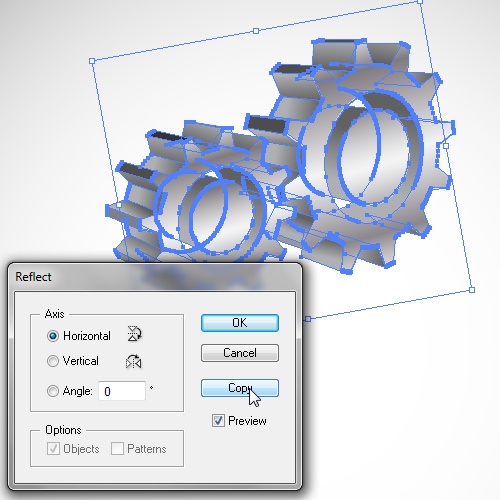
Set the Axis option to Horizontal and then click on the Copy button, which will create a reflected copy of our cogwheels.
Select the reflected copy of our cogwheels, hold down Shift, and drag it downwards.

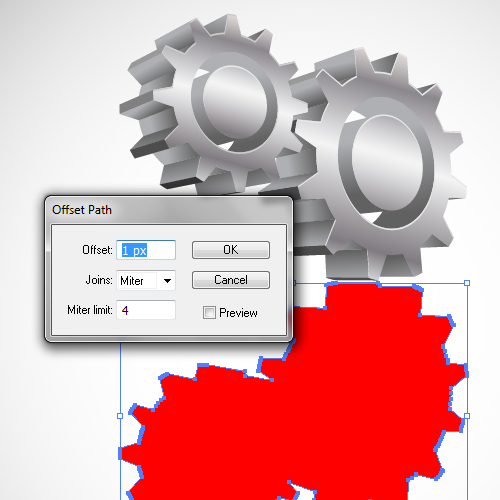
Duplicate the reflection of the cogwheels and ungroup (Shift + Ctrl/Command + G) the duplicate.
Under the Pathfinder panel, press the Unite button to unite all the elements into one object.

Go to Object > Path > Offset and set the value for the Offset to 1. This will create a slightly larger object. Make sure to delete the original (smaller) object afterwards.
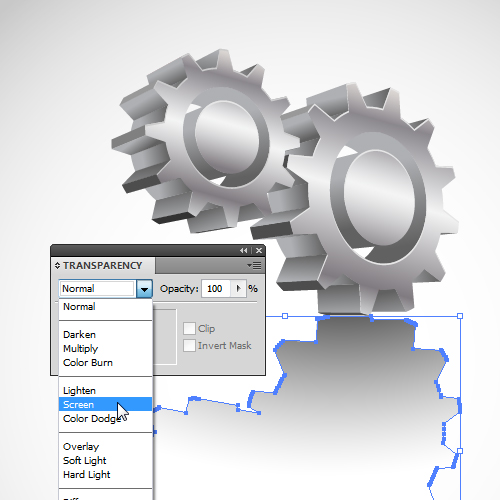
Apply a radial gradient on the offset path as shown below:
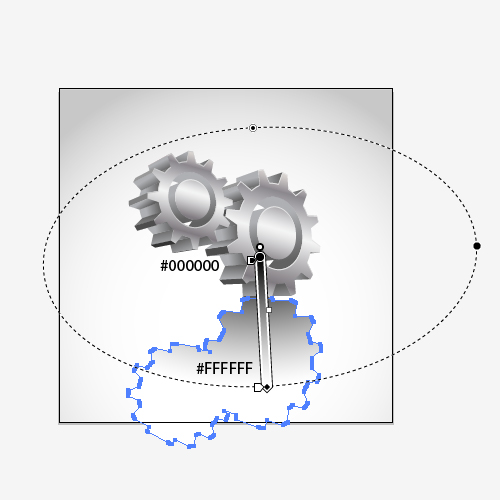
Under the Transparency panel (Window > Transparency or press Shift + Ctrl/Command + F10), set the Blending Mode to Screen. This will make the black part of the gradient transparent and it will fade into the white color.
Select all the objects on the artboard except the background and then Group them (Ctrl/Command + G).

And we’re done!
Tutorial Summary
In this tutorial, we made a very interesting 3D illustration using basic Adobe Illustrator techniques.
We converted a flat vector illustration into a 3D illustration. We used the Gradient Tool to color in our work. Then I showed you a technique for creating a reflection effect, which you can use in other illustrations.
Thank you for following along with my tutorial.
Please feel free to share your thoughts and pose any questions in the comments!
Tutorial Source Files
- 3d_cogwheels_illustrator (ZIP, 0.61MB)
-
 Trevin serves as the VP of Marketing at WebFX. He has worked on over 450 marketing campaigns and has been building websites for over 25 years. His work has been featured by Search Engine Land, USA Today, Fast Company and Inc.
 -

WebFX is a full-service marketing agency with 1,100+ client reviews and a 4.9-star rating on Clutch! Find out how our expert team and revenue-accelerating tech can drive results for you! Learn more
Make estimating web design costs easy
Website design costs can be tricky to nail down. Get an instant estimate for a custom web design with our free website design cost calculator!
Try Our Free Web Design Cost Calculator
Table of Contents
- Tutorial Preview
- Step 1: Creating the Flat Shape
- Step 2: Creating 3D Objects
- Step 3: Expanding and Uniting the 3D Elements
- Step 4: Applying Color Gradients
- Step 5: Give the Edges a Highlight
- Step 6: Create the Illustration’s Background
- Step 7: Create a Reflection Effect
- Tutorial Summary
- Tutorial Source Files
Share this article


Web Design Calculator
Use our free tool to get a free, instant quote in under 60 seconds.
View Web Design Calculator
Make estimating web design costs easy
Website design costs can be tricky to nail down. Get an instant estimate for a custom web design with our free website design cost calculator!
Try Our Free Web Design Cost Calculator