- Home
- Blog
- Web Design
- 5 Web Files That Will Improve Your Website
5 Web Files That Will Improve Your Website
-
 18 min. read
-
 William Craig
 CEO & Co-Founder
- President of WebFX. Bill has over 25 years of experience in the Internet marketing industry specializing in SEO, UX, information architecture, marketing automation and more. William’s background in scientific computing and education from Shippensburg and MIT provided the foundation for RevenueCloudFX and other key research and development projects at WebFX.
 The amount of code that developers encounter regularly is staggering. At any one time, a single site can make use of over five different web languages (i.e. MySQL, PHP, JavaScript, CSS, HTML).
There are a number of lesser-known and underused ways to enhance your site with a few simple but powerful files. This article aims to highlight five of these unsung heroes that can assist your site. They’re pretty easy to use and understand, and thus, can be great additions to the websites you deploy or currently run.
An Overview
Which files are we going to be examining (and producing)? Deciding which files to cover was certainly not an easy task for me, and there are many other files (such as .htaccess which we won’t cover) you can implement that can provide your website a boost.
The files I’ll talk about here were chosen for their usefulness as well as their ease of implementation. Maximum bang for our buck. We’re going to cover robots.txt, favicon.ico, sitemap.xml, dublin.rdf and opensearch.xml. Their purposes range from helping search engines index your site accurately, to acting as usability and interoperability aids.
Let’s start with the most familiar one: robots.txt.
Robots.txt
The primary function of a robots.txt file is to declare which parts of your site should be off-limits for crawling. By definition, the use of this file acts as an opt-out process. If there are no robots.txt for a directory on your website, by default, it’s fair game for web robots such as search engine crawlers to access and index.
While you can state exclusion commands within an HTML document through the use of a meta tag (<meta name="robots" content="noindex" />), the benefits of controlling omitted pages through a single text file is the added ease of maintenance. Note: It’s worth mentioning that obeying the robots.txt file isn’t mandatory, so it’s not a good privacy mechanism. 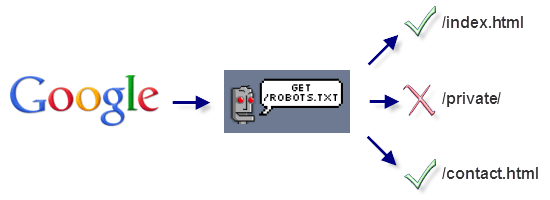 This is how the robots.txt file interacts between a search engine and your website.
Creating a Robots.txt File
To create a robots.txt file the first and most obvious thing you will need is a text editor. It’s also worth pointing out that the file should be called robots.txt (or it won’t work) and it needs to exist within the root directory of your website because by default, that’s where web robots look for the file.
The next thing we need to do is figure out a list of instructions for the search engine spiders to follow. In many ways, the robot.txt’s structure is similar to CSS in that it is comprised of attribute and value pairs that dictate rules. Another thing to note is that you can include comments inside your robots.txt file using the # (hash) character before it.
This is handy for documenting your work. Here’s a basic example telling web robots not to crawl the /members/ and /private/ directory:
User-agent: * Disallow: /members/ Disallow: /private/
The robots.txt exclusion standard only has two directives (there are also a few non-standard directives like Crawl-delay, which we’ll cover shortly). The first standard directive is User-agent.
Each robots.txt file should begin by declaring a User-agent value that explains which web robots (i.e. search crawlers) the file applies to. Using * for the value of User-agent indicates that all web robots should follow the directives within the file; * represents a wildcard match.
The Disallow directive points to the folders on your server that shouldn’t be accessed. The directive can point to a directory (i.e. /myprivatefolder/) or a particular file (i.e.
/myfolder/folder1/myprivatefile.html). 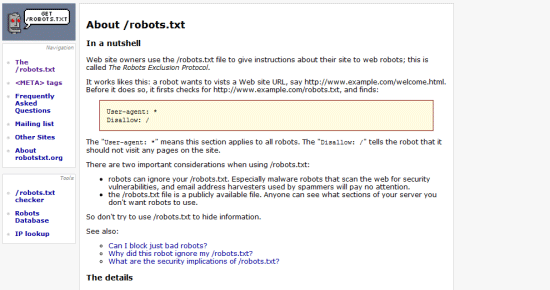 There is a specification for robots.txt, but the rules and syntax are exceptionally simple.
Robots.txt Non-Standard Directives
Of course, whilst having a list of search engines and files you want hidden is useful, there are a few non-standard extensions to the robots.txt specification that will further boost its value to you and your website. Although these are non-standard directives, all major search crawlers acknowledge and support them. Some of these more popular non-standard directives are:
- Sitemap: where your
Sitemap.xmlfile is, which you can use to submit URLs to Google - Allow: opposite of
Disallow - Crawl-delay: sets the number of seconds between server requests that can be made by spiders
There are other less supported directives such as Visit-time, which restricts web robots to indexing your site only between certain hours of the day. Here’s an example of a more complex robots.txt file using non-standard directives:
Allow: /private/public.html Comment: I love you Google, come on in! Crawl-delay: 10 Request-rate: 1/10m # one page every 10 minutes Robot-version: 2.0 Sitemap: /sitemap.xml Visit-time: 0500-1300 # military time format
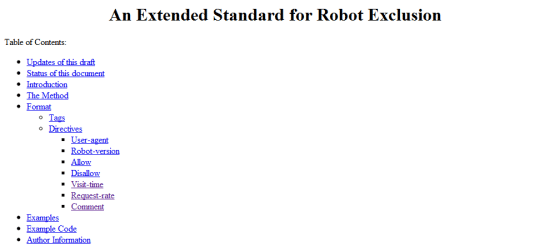 Whilst not a standard, there is an extension for robots.txt which has mainstream support.
Favicon.ico
A favicon (short for “favourites icon”) is a small image (like a desktop application’s shortcut) that represents a site.
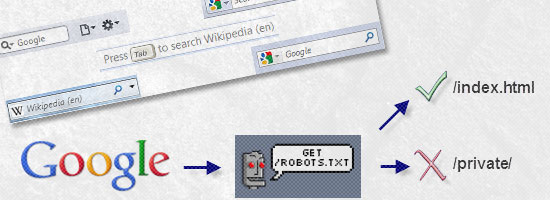
Shown in the browser’s address bar, the favicon gives you a unique opportunity to stylise your site in a way that will add identity to browser favourites/bookmarks (both locally and through social networks). The great thing about this file is that every major browser has built-in support for it, so it’s a solid extra file to provide. 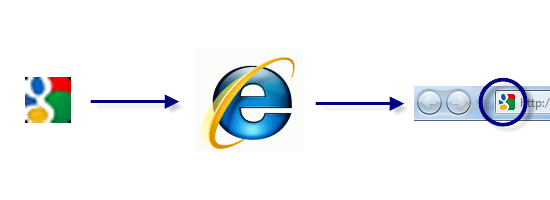 This is how the favicon.ico file affects your site visually through the browser such as IE.
Creating a Favicon.ico file
To create a favicon, you’ll need an image or icon editor.
I am a fan of Axialis IconWorkshop, but there are free editors like IcoFX that do the job well. You can also find quite a few free online favicon tools by viewing this list of web-based favicon generators. You need to have a 16x16px icon (or 32x32px, scaled down) that matches what you want to see in the browser.
Once you are done creating your icon’s design, save the file as “favicon.ico” in the root directory of your web server (that’s where browsers look for it by default). Note: It’s a good idea to use the .ico file type, as some browsers don’t support PNG, GIF or JPEG file types. To make this file work properly, refer to the location of your favicon in the <head> tags of all your HTML documents, as such:
<head> <link rel="shortcut icon" type="image/vnd.microsoft.icon" href="favicon.ico" /> <head>
The rel attribute values of “shortcut icon” or “icon” are considered acceptable and the MIME type of “vnd.microsoft.icon” (as of 2003) replaced the older type (“image/x-icon”) as the official standardized favicon MIME type for .ico files on the web.
Note: While Internet Explorer (and some other browsers) will actively seek out your favicon in the root directory of your site by default (which is why you should have it there), it’s worth adding the above code into the <head> of your HTML just to make it explicitly known by other types of browser agents. ![]() There are multiple online tools which can create a favicon from existing images.
There are multiple online tools which can create a favicon from existing images.
Favicons in Apple Devices
Another standard (of sorts) has appeared in light of Apple’s iPod, iPad, and iPhone. In this situation, you can offer a 57×57 PNG, ICO or GIF file (alpha transparency supported) that can be displayed on the devices’ Home screen using the web clip feature.
Apple also recommends that you use 90-degree corners (not rounded corners, which the devices will do for you automatically) to maintain the “feel” of such icons. To make this file work properly, place the following code into every page within your <head> tags:
<head> <link rel="apple-touch-icon" href="images/icon.png" /> </head>
![]() For users of Apple devices, a specially produced “favicon” can be produced.
For users of Apple devices, a specially produced “favicon” can be produced.
Sitemap.xml
One thing website owners worry about is getting their website indexed correctly by the major search engines like Google. While the robots.txt file explains what files you want excluded from results, the Sitemap.xml file lists the structure of your site and its pages.
It gives search engine crawlers an idea of where things are on your site. 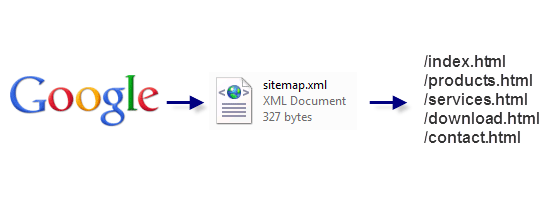 This is how the Sitemap.xml file interacts between a search engine and your website. As always, the first recommended course of action to produce a Sitemap is to create the XML file that will contain its code. It’s recommended that you name the file as “sitemap.xml” and provide it within the root directory of your website (as some search engines automatically seek it there).
It’s also worth noting that while you can submit your Sitemap file location directly to search engines, adding the non-standard Sitemap directive to your robots.txt file can be useful as it’s widely supported and gives spiders a push in the right direction. Below is a basic example of how a Sitemap looks like.
<?xml version="1.0" encoding="UTF-8"?> <urlset > <url><loc>index.html</loc></url> <url><loc>contact.html</loc></url> </urlset>
Each Sitemap file begins with a Document Type Definition (DTD) that states that the file is UTF-8 encoded, written in XML, and uses the official Sitemap schema. Following those formalities, you simply produce a list of your URLs that exist within your website’s structure.
Each URL must be contained within two elements: <url> and <loc>. This is a very simple specification to follow, so even less experienced developers should be able to replicate this basic mechanism with little effort. To reference your Sitemap inside your HTML documents, place this code between the <head> tags:
<head> <link rel="sitemap" type="application/xml" title="Sitemap" href="sitemap.xml" /> <head>
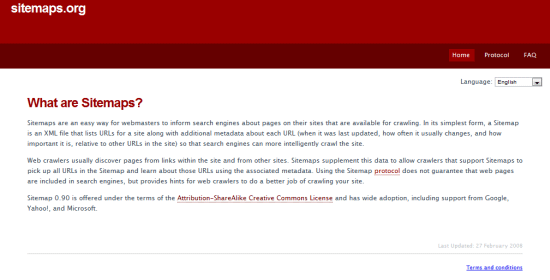 Just like most XML-based schemas, there is a protocol and specification to follow.
Other Sitemap Tags
While you could limit yourself to simply listing every file, there are a number of other meta-information that can be included within the <url> tag to help further define how spiders deal with or treat each page in the site — and this is where the Sitemap’s true power lies.
You can use <lastmod>, for example, to state when the resource was last modified (formatted using YYYY-MM-DD). You can add the <changefreq> element, which uses values of always, hourly, daily, weekly, monthly, yearly, and never to suggest how often a web page changes (for example, the front page of Six Revisions has a value of daily). There is also the <priority> tag, which uses a scale of 0.0 to 1.0 that you can utilize to indicate how important a web page is to a website.
Here’s an example of using the above tags:
<lastmod>2010-05-13</lastmod> <changefreq>monthly</changefreq> <priority>0.8</priority>
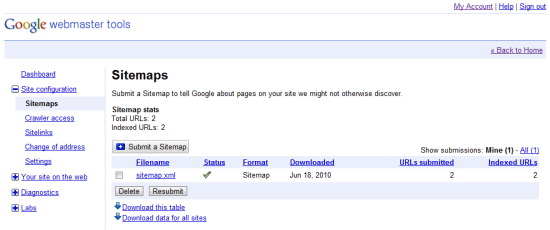 Google Webmaster Tools allows you to submit your Sitemap to initiate its analysis of your site structure.
Dublin.rdf
Ensuring you provide metadata has become big business among SEO professionals and semantics advocates. The appropriate use of HTML, metadata, microformats and well-written content improves the chances of appearing in the right search results. They also allow an increasing number of browsers and social networks to aggregate and filter the data so that they can accurately understand what your content represents.
The Dublin.rdf file acts as a container for officially recognised meta elements (provided by the DCMI specification) which can augment the semantic value of the media you provide. If you’ve ever visited a library and tried to locate a book, you know that you will often have to flick through the library catalogs to find books based on their subject, their author, or perhaps even their title. The aim of the DCMI is to produce such a reference card for your website that will help search engines, social networks, web browsers, and other web technologies understand what your site is.
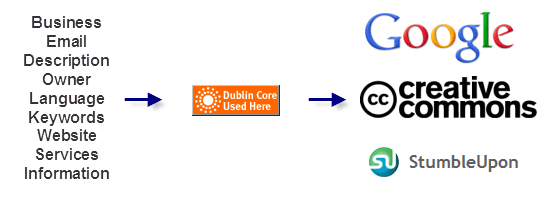 This is how the Dublin.rdf file interacts with supporting social networking mediums.
Creating a Dublin.rdf File
To begin, you need to produce the file itself (which we shall name “Dublin.rdf”). In order to maintain consistent meta details about the site (as opposed to individual DCMI meta tags for specific pages and resources), we shall create an RDF file (formatted as XML) with a reference within the HTML document to indicate that the information is available. While you can embed DCMI meta tags within HTML, RDF allows you to cache the data.
 When a supporting spider or other resource that acknowledges the DCMI core sees the file, they can cache and directly relate to the information. This doesn’t mean you shouldn’t use traditional meta tags, but the file can serve as a useful supplement.
<?xml version="1.0"?> <rdf:RDF xmlns_rdf="http://www.w3.org/1999/02/22-rdf-syntax-ns#" xmlns_dc= "http://purl.org/dc/elements/1.1/"> <rdf:Description rdf_about="http://www.yoursite.com/"> <dc:contributor>Your Name</dc:contributor> <dc:date>2008-07-26</dc:date> <dc:description>This is my website.</dc:description> <dc:language>EN</dc:language> <dc:publisher>Company</dc:publisher> <dc:source>http://www.yoursite.com/</dc:source> </rdf:Description> </rdf:RDF>
Like most XML files, this RDF document has a DTD — and within that, you have the description element (which links to the resource being referenced). Within the description, as you can see from the above, there are several elements (beginning with the prefix of dc:) — these hold the metadata of the page.
There’s a whole range of terms you can add (see this list of DCMI metadata terms), it’s simply a case of adding the term’s name, then giving a value as denoted by the DCMI specification. You’ll end up with a library of useful data that can improve your site’s semantics and interoperability with other sites and applications! To make this file work properly, place the following code into every HTML document within the <head> tags:
<head> <link rel="meta" type="application/rdf+xml" title="Dublin" href="dublin.rdf" /> <head>
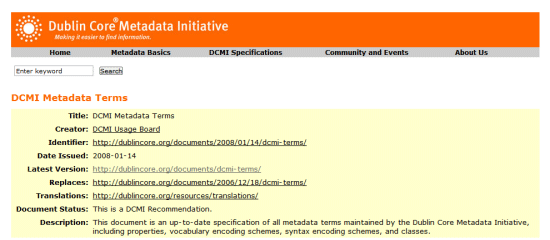 The Dublin.rdf file makes use of the DCMI specification to provide meta information.
OpenSearch.xml
The ability to search a website is one of the most important ways people locate content.
The OpenSearch file allows you to add a custom search engine listing (on your own site) through the search feature that appears in all modern browsers. All of the major browsers can take advantage of OpenSearch; it’s pretty durable. While you will still want to provide a search mechanism on your website, this core enhancement complements the user’s in-browser search capabilities.
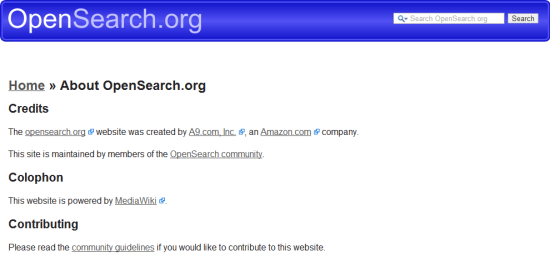
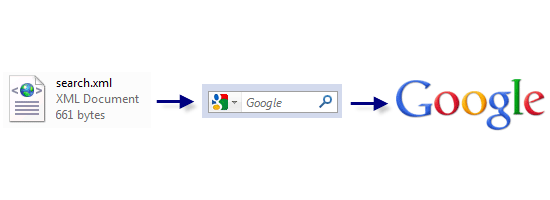 This is how the OpenSearch file interacts with your site through the browser. Like with all things we’ve discussed thus far, we need to produce the file for the code to be placed in. As this particular type of file doesn’t have assumed name reservations like robots.txt or sitemap.xml, we could call the file whatever we like. However, the convention for OpenSearch files is to name the file, “opensearch.xml”. You’ll want to include the code below as your starting template, then proceed to customising the required tags such as
 <ShortName>, <Url> and <Description> (they are case-sensitive) to describe your site. The example used below is for Six Revisions using Google Search.
<?xml version="1.0" encoding="UTF-8" ?> <OpenSearchDescription > <ShortName>Six Revisions</ShortName> <Description>Search this website.</Description> <Image>favicon.ico</Image> <Url type="text/html" template="http://www.google.com/search?sitesearch=http%3A%2F%2Fwww.sixrevisions.com%2F&as_q={searchTerms}"/> </OpenSearchDescription>The tags included above are:
- ShortName: the title you want for your search extension
- Description: explains the purpose of the search box
- Image: this isn’t required like the others, but I recommend referencing your Favicon with it so the search feature has a unique icon
- Url: requires a MIME type and a template attribute which links to the search terms
To make this file work properly, place the following code into every page within the <head> tag:
<link rel="search" type="application/opensearchdescription+xml" title="Website" href="opensearch.xml" />
Other OpenSearch Tags
There’s a range of additional tags we can provide. Among these are:
- AdultContent: if the site has adult material needing to be filtered, set to
false - Attribution: your copyright terms
- Contact: an email address for the point-of-contact of your site
- Developer: who made the site?
- InputEncoding and OutputEncoding: The MIME type used
- Language: i.e.
ENfor English - Query: for more detailed search terms
- Tags: keywords, separated by a space
- SyndicationRight: The degree to which people can request, display or send results
Example usage of these other tags:
<AdultContent>false</AdultContent> <Attribution>Copyright, Your Name 2010, Some Rights Reserved.</Attribution> <Contact>[email protected]</Contact> <Developer>Your Name</Developer> <InputEncoding>UTF-8</InputEncoding> <Language>en-us</Language> <OutputEncoding>UTF-8</OutputEncoding> <Query role="example" searchTerms="terms" /> <Tags>Example Tags Element Website</Tags> <SyndicationRight>open</SyndicationRight>

Simple, Small and Effective
While this guide represents a crash course in producing these useful files, it’s worth pointing out that taking the time to understand the syntax of any language is important in order to determine what the impact of these files on your website. These files represent a truth that there’s more to a website than HTML, CSS, and JavaScript, and while producing these files will certainly not act as a replacement for your existing code workflow, their inherent benefits make them worthy of consideration to supplement your projects. Give them a try for yourself!
Related Content
-
 President of WebFX. Bill has over 25 years of experience in the Internet marketing industry specializing in SEO, UX, information architecture, marketing automation and more. William’s background in scientific computing and education from Shippensburg and MIT provided the foundation for RevenueCloudFX and other key research and development projects at WebFX.
 -

WebFX is a full-service marketing agency with 1,100+ client reviews and a 4.9-star rating on Clutch! Find out how our expert team and revenue-accelerating tech can drive results for you! Learn more
Make estimating web design costs easy
Website design costs can be tricky to nail down. Get an instant estimate for a custom web design with our free website design cost calculator!
Try Our Free Web Design Cost Calculator


Web Design Calculator
Use our free tool to get a free, instant quote in under 60 seconds.
View Web Design Calculator
Proven Marketing Strategies
Make estimating web design costs easy
Website design costs can be tricky to nail down. Get an instant estimate for a custom web design with our free website design cost calculator!
Try Our Free Web Design Cost Calculator
What to read next


