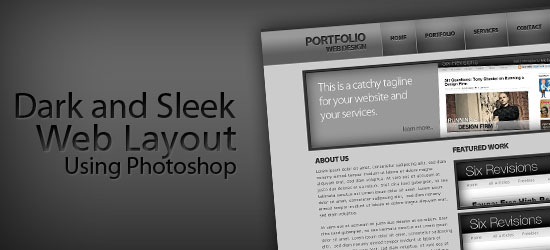
 In this Photoshop web design tutorial, we are going to create a beautiful, dark, and sleek website mock-up centered on an elegant navigation menu that lends itself easily to CSS background sprites. This is the first part of a two-part series of tutorials that will show you how to create the design in Photoshop. The second part of the series will show you how to build a web page with the Photoshop layout mockup using HTML/CSS and a little bit of jQuery. Credit: This tutorial was heavily inspired by the Dragon Interactive website design; they are a groundbreaking web design and development agency based in Los Angeles, California.
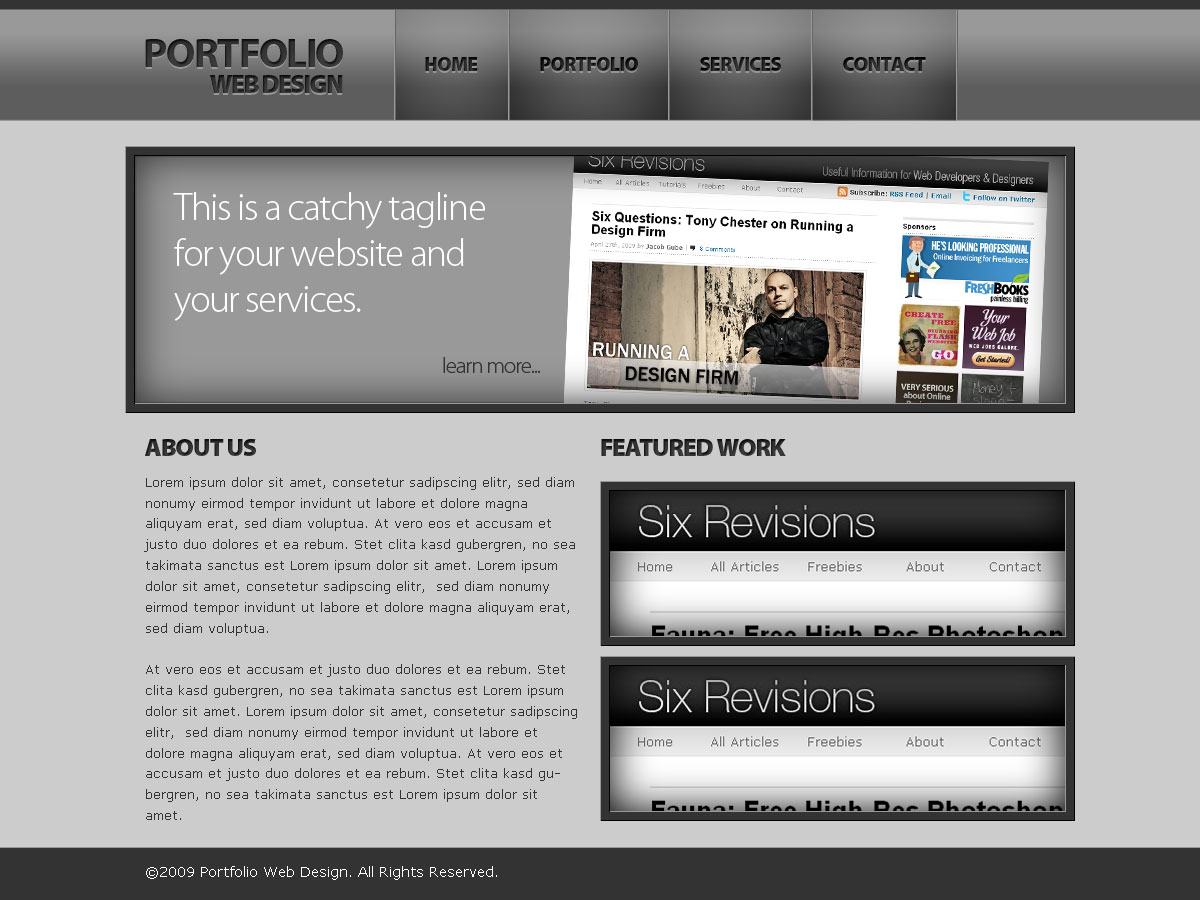
Final Result
Click on the image below to see a full-scale version of what we’re about to make.
Setting up the Photoshop document
1 Let’s start off by opening up a 1280px x 900px document in Photoshop. Fill the background with light gray color (#CCCCCC). 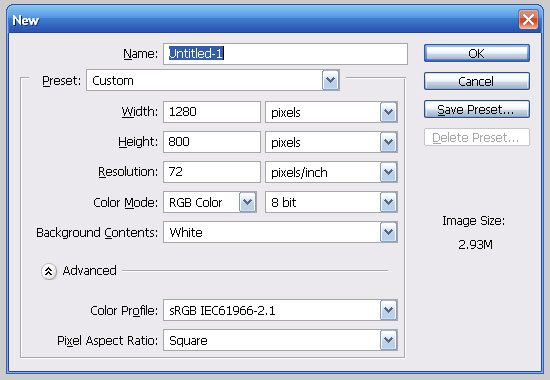 2 Make a guide in the center of our document.
To do this, click and drag a guide to the middle of the document from the vertical ruler; the guide will lock in at the exact center of the background layer. 3 Now that we have that, create a new 950px x 900px document, then click and drag it into our original document. Use the Free Transform option, Edit > Free Transform (Ctrl + T), to transform the object and to bring up the Transform Controls.
Line up the middle top and bottom anchor points so our 950px box lines up right in the center. 4 Click and drag a guide for the left and right side of that 950px box. 5 Now, delete the layer.
Creating the navigation bar
6 We are going to start off with the navigation, so let’s make a new folder in the Layers palette (third icon in from the left at the bottom of the layers palette) and call it “Navigation“. 7 In that folder create another one called “Nav Basics” which we will use to place the basic setup of the navigation bar. 8 Create a new layer within the “Nav Basics” folder called “Nav Background“. 9 Use the Rectangular Marquee Tool (M) to make a selection with a height around 120px that extends the full width of the canvas. Fill in the selection using Edit > Fill… (Shift + F5), with the color #999999. 10 Create another new layer called “border top“. Using the Rectangular Marquee Tool (M) again, create a box around 10px high that goes across the entire canvas. Fill in the selection with a gray color (#333333). 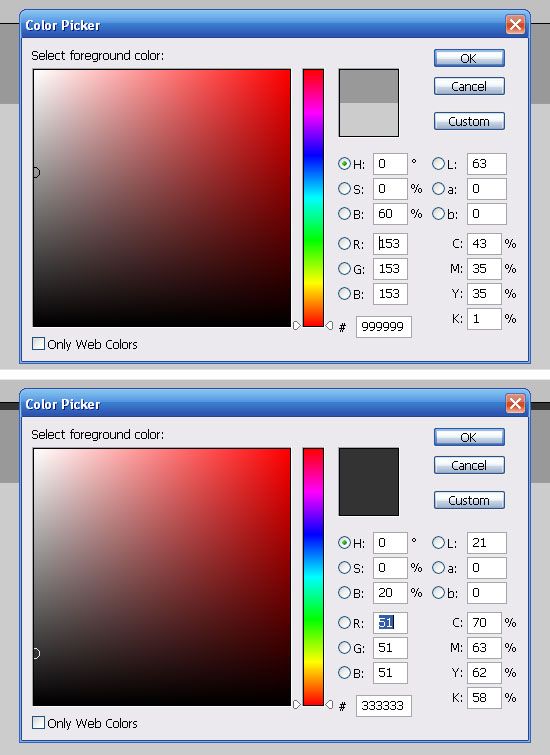 11 Click on the “Nav Background” layer, and then add a Gradient Overlay on the layer by clicking on the icon at the bottom of the Layers palette that says “Fx”, and then selecting “Gradient Overlay…” which will open up the Gradient Overlay dialog box.
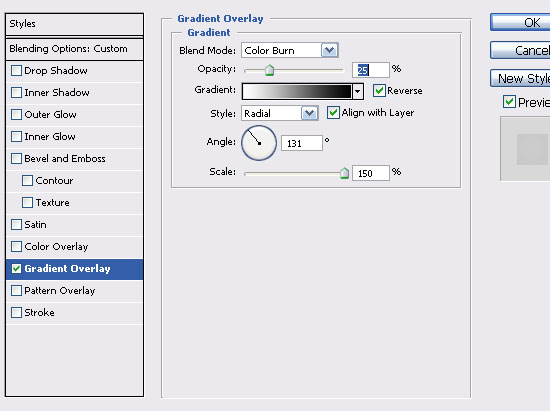
12 We are going to create a gradient with the setting I have in the following figure with a color of #333333 that fades to 0% opacity. 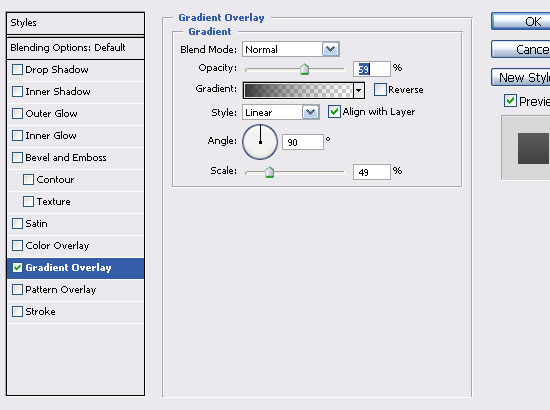
Setting up the navigation text
13 Create a new folder within the “Navigation” folder and call it “header text“. 14 Create another new folder – this time within the “header text” folder and call it “Logo“. 15Add your logo (if you have one) to the “Logo” folder and fill it with #333333. Add a Gradient Overlay and an Inner Shadow Layer Style, as I have done in the following figure. 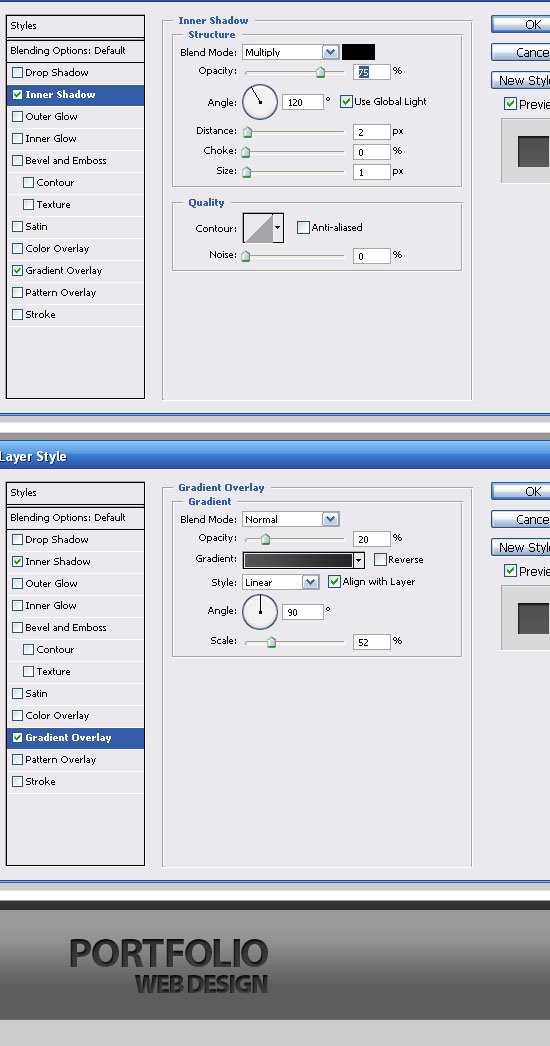
Putting in the navigation menu text
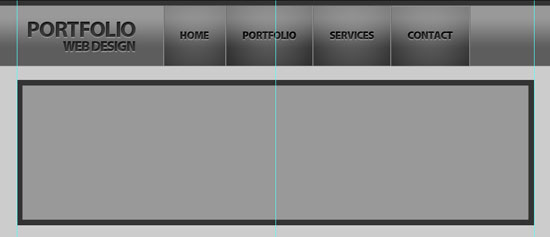
16 Create a new folder in the “Header Text” folder and call it “Navigation Text“. 17 Next, add the text for your navigation menu items; this tutorial uses Home, Portfolio, Services, and Contact with a font face of Myriad Pro. 18 Add the same layer styles as the logo in Step 15 to your text layer. I spaced them out so that if you are starting end to end, hold the Shift key and move it over six times with your arrow keys.

Giving the text a light gray drop shadow
19 Now create a new layer in the “Logo” folder. 20 Make a selection around the logo text by Ctrl + clicking on the texts’ layer. 21 Fill in the selection with the color #999999.
22 Deselect your selection using Select > Deselect (Ctrl + D), then move the text layer down two units using your arrow keys. 23 Repeat Steps 20-22 for the text inside the “Navigation Text” folder. 
Giving the navigation bar some highlights
24 Now, we are going to add some subtle highlights and shadows to the navigation.
In the “Nav Basics” folder, create a new layer called “Highlights“. 25 Make a 1px horizontal selection across the entire length of the canvas using the Single Row Marquee Tool, and then fill it in with the color #999999 as the color at bottom of the light gray box. 26 Make another line, but this time the color is going to be #666666 at the bottom of the dark gray box. 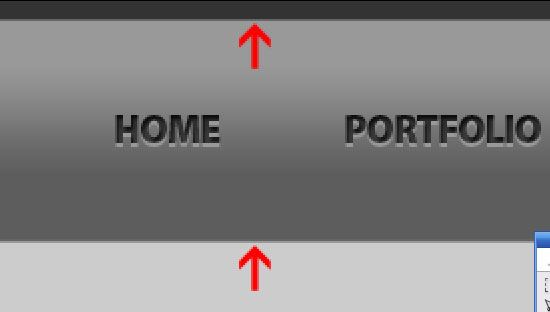
Giving the navigation text some highlights
27 Create a new layer in the “Nav Basics” folder called “Button Highlights“. 28 Using the Rectangular Marquee Tool, create a 1px vertical line the same height as the light gray background. Fill this in with the color #999999. 29 Create another 1px vertical line selection on the right of the previous vertical line and fill it in with the color: #666666.
30 Move the lines to the edge of the left side of “Home” using the Move Tool (V), then holding down Shift, move it over three spaces using your arrow keys. 31 Duplicate the lines into another layer by right-clicking on the Button Highlights layer, then choosing “Duplicate Layer…” (Ctrl + J). Move the lines to the right side of “Home” using the same method as the previous step (Step 30).
32 Repeat Steps 29-31 with each button so you get a blocked off area for each one. 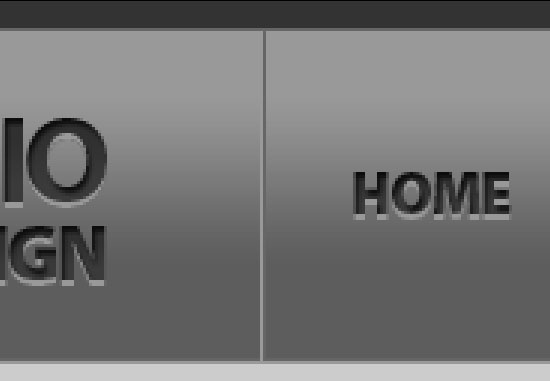
Creating the blue rollover state
We’re going to create the rollover state menu instance; this will be used for when the user hovers over a menu button. 33 Create a new folder called “Nav Instances“. 34 In that folder, create a new layer called “Blue Highlight“. This will be our rollover background state for the non-active buttons. 35 Using the Rectangular Marquee Tool (M), make a box around the “Home” button. Fill the selected area with the color #0033FF and then change the Layer’s Blend Mode to “Overlay“. 36 Duplicate “Blue Highlight” layer (Ctrl + J), move the duplicated layer over the next navigation menu item, then transform the object using Edit > Free Transform (Ctrl + T). Repeat this step for each menu item. 37 Link all the blue layers by clicking on each of the empty boxes in between the eye icon and the layer and then merge the linked layers by right-clicking on a layer and selecting Merge Layers (Ctrl + E).

Giving the blue rollover state an Inner Glow
38 Let’s give the layer an Inner Glow. Double-click on the layer to enter its Layer Style dialog box. Check the box beside “Inner Glow, and change the settings to the same settings as the following figure, using the color #000066.

Giving the blue rollover state a gloss
39 Now, we are going to give our buttons a gloss. Using the Elliptical Marquee Tool, make a selection that resembles an oval circle on top of the “Home” menu item. 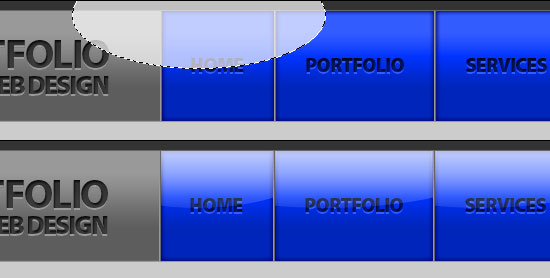 40 Create a new layer called “Nav Highlight“, and with the oval circle selection from the previous step still still active (Step 39), use the Gradient Tool (G) to add a White to 0% opacity gradient over the bottom half of the over circle that is overlapping the blue background.
Play around with it until you get something you like. 41 Select the object in the “Blue Highlight” by Ctrl + clicking on the layer, then invert the selection using Select > Inverse (Ctrl + Shift + I), and then delete the selected area (the area outside of the blue background) using Edit > Clear (or Del key). 42 Duplicate the “Blue Highlight” layer, move it over each menu item, using Edit > Free Transform (Ctrl + T), and moving the Transform Controls to fit the highlight on the menu items.
43 Load the “Blue Highlight” layer again by Ctrl + clicking on the layer and then create a new layer called “Nav Shadow“. 44 Add a Gradient Overlay Layer Style with the gradient preset set to Black to 0% opacity, make a shadow starting at the bottom of the button and going to the bottom of the white highlight we just made. Change the Blend Mode to Soft Light.
Creating the active state instances
45 Let’s create our active menu items which will be lighter than the rest. Ctrl + click on the “Blue Highlight” layer to load the selection, and then create a new layer called “White Highlight“. Fill it in (Shift + F5) with a white color (#FFFFFF). 46 Drop the opacity down of the “White Highlight” layer to 70%, then change the Blend Mode to Overlay. 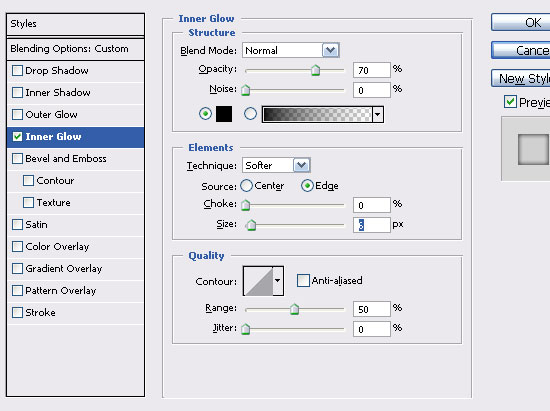 47 Double-click on the “White Highlight” layer to open up the Layer Styles dialog box, and then add an Inner Glow with a color of black (#000000).
Making the orange menu background
48 We are now going to make the orange menu item background that is going to be the menu hover item for the page that the user is currently on.
Repeat Steps 45 through 47, except call the new layer “Orange Highlight” and fill it in (Shift + F5) with an orange color (#FF9900), and keep the opacity at 100% instead of dropping it down to 70% (like in Step 46). 49 Add an Inner Glow Layer Style with #993300. 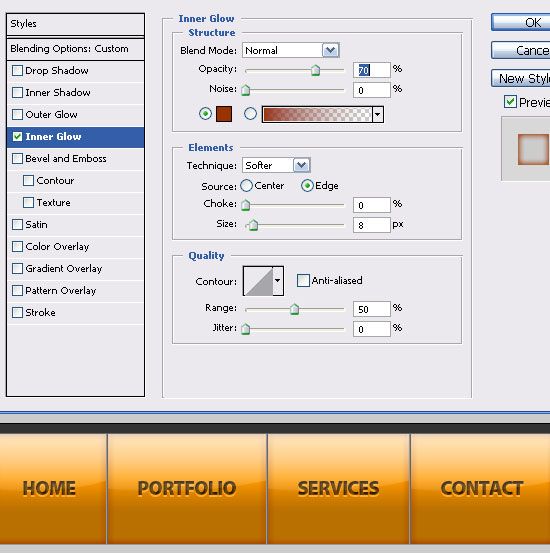
Creating the “idle” state menu background
The next menu item we’re going to create is the “idle” state, that is, when the button is neither active nor hovered on.
For this state, we are going to have to make a layer for each menu item because of the gradient we are going to add to each one. 50 First, hide the highlight and shadow layers by clicking on the “eye” icon to toggle the layers’ visibility. 51 Use the Magic Wand Tool to create a selection around the navigation menu items, clicking on any one of the other colored layers one at a time to add to the selection.
52 Once you have the selected area create a folder called “Gray Highlight“, then create a new layer called “Gray Home” and fill with #333333. Change the fill to 0%, and add a gradient overlay Layer Style as I have done with a the Black to White gradient preset selected. Repeat this step for each menu item, naming the layer accordingly.
Creating the “featured area” container
53 Create a new folder called “box” and then create a new layer inside it called “box border”. 54 Using the Rectangular Marquee Tool, make a box that goes in between the two guides about the same height as I have (around 270px) and then fill with the color #333333. Select the object by Ctrl + clicking on the “box” layer and then shrink the selection by using Select > Modify > Contract, and then contract it by 10px. 55 Create a new layer called “border background” and fill the selection you made in the previous step (Step 54) with a gray color (#999999).
Adding details to the gray box
56 Double-click on the “border background” layer to enter the Layer Styles dialog box, and then add an Inner Glow Layer Style using the settings in the figure below. 57 Create a new layer called “Box Highlight“. Create a 1px selection using the Rectangular Marquee Tool on the right of the box, and fill it in with black (#000000). Create another 1px selection at the bottom of the box and fill it in with black (#000000) as well. 58 Create a 1px selection on the top edge of the box, and then fill it in with a dark gray color (#999999).
Repeat this step for the left edge of the box. Create a 1px line on the right of the outer edge of the box and fill it in with #000000. Repeat this process for the bottom of the outer edge.
59 Now, make a 1px selection on the top-left edge of the outer edge, fill it in with dark gray (#999999), then do the same for the bottom-right of the inner edge. 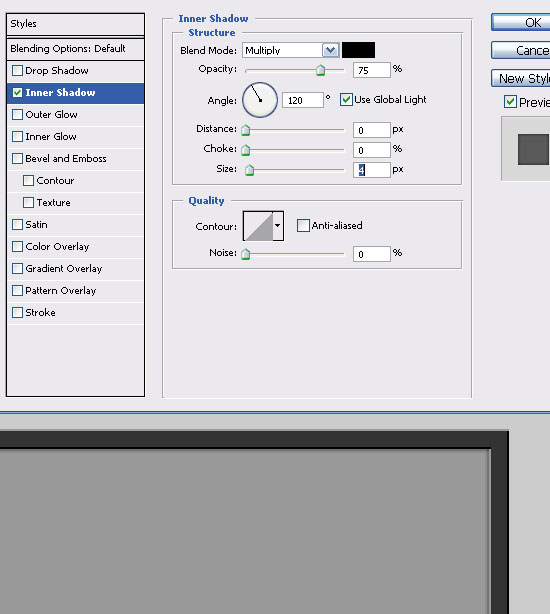
Add some content into the gray box
60 Add an image and some kind of tag line; I used Myriad Pro Light as the font for the tag line text.  61 Using the Rectangular Marquee Tool, select around the light gray area, and then modify the selection to feather it by using Select > Modify > Feather (Shift + F6) with the value of 20px for the feather.
62 Invert the selection using Select > Inverse (Ctrl + Shift + I), and fill in the inverted selection with a gray color (#333333). 63Invert the selection again (Ctrl + Shift + I), then delete the selected area (Edit > Clear or hit the Del key); this deletes the area not covering that box. 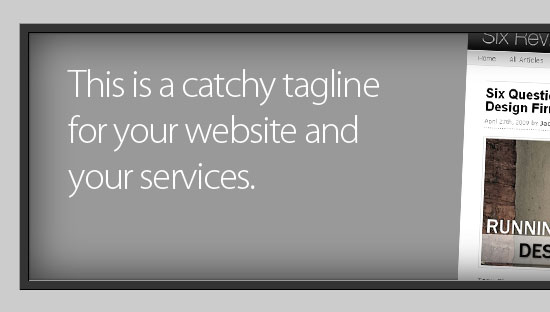
Creating the “Featured Work” area
64 Create a new folder called “featured work“. Using the same font and styles as the navigation bar text (see Step 17 above), type out “featured work” using the Horizontal Type Tool (T). Align the left side of the text on the middle guide. 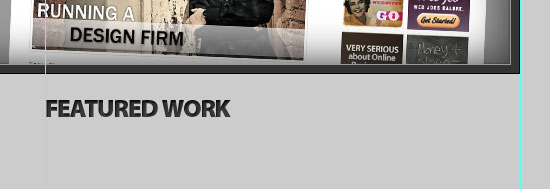
Adding the “Featured Work”content
65 Repeat Steps 53-60 with a box the width of the area between the center guide and the right guide for the featured work to create the second box.
66 Add you work inside the boxes by positioning them on top of the box, making a selection around the light gray box by Ctrl + clicking on its layer, inverting the selection (Ctrl + Shift + I), and then deleting the area inside the inverted selection. Repeat this with the second feature box. 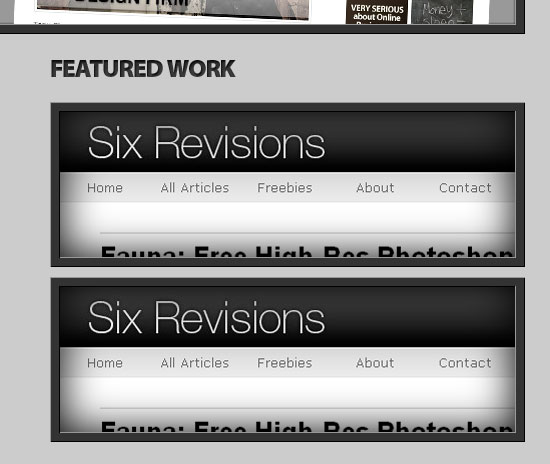
Creating the “About Us” content
67 Create a new folder called “about us“. Type out “about us” and align it to the right of the “featured work” text on the left side of the guide. Use the same styles “Featured Work” area. 68 Move the type layer in by holding down Shift and pressing your arrow key twice.
69 Add some text in by creating a box the width of the area from the left guide to the center guide and set Anti-Aliasing to None. 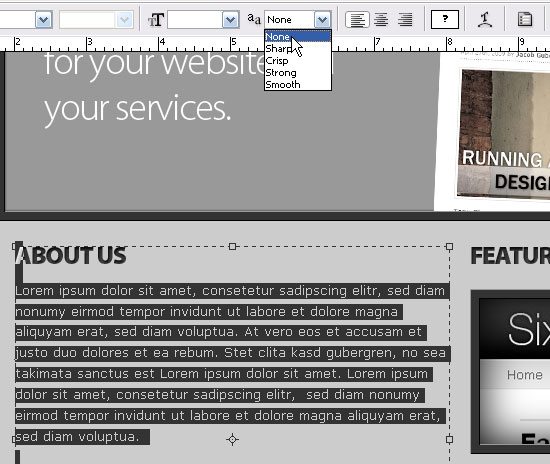 70 Using your arrow keys to move the layer, Hold Shift and move it to the left four times, bring the left side to the left guide, Hold Shift, then move it to the right twice.
Building the Footer area
71 Make a selection across the bottom of the screen for the footer using the Rectangular Marquee Tool spanning the width of the canvas, filling it in with a gray color (#333333). This will serve as the footer’s background.
72 Use the Single Row Marquee Tool to select a 1px line across the top of the footer, and fill this selection in with a dark gray color (#999999). 73 Finally, add the content for your footer area (such as copyright information) using the Horizontal Type Tool (T). 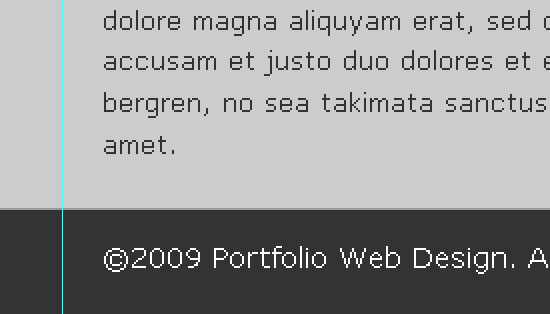
And… we’re done!
If you followed along the tutorial, you should end up with something like the following figure:
Stay tuned if you want to learn how to code this design!
If you’re interested in learning how to convert this web design into a working web page – stay tuned for the follow-up tutorial which will be published next week!
The best way to know when the next part of the tutorial is published is by subscribing to the Six Revisions RSS feed.
“Dark and Sleek Web Layout” Series
This is the first part of a two-part series that teaches you how to create a dark and sleek web design mockup in Photoshop and then you how to code it into a functional web page template.
- Part 1: Create a Dark and Sleek Web Layout Using Photoshop
- Part 2: How to Code a Dark and Sleek Web Design from Photoshop
Do you have questions?
If you have questions regarding this tutorial, don’t hesitate to ask in the comments. In the same token, if you have any feedback or if you catch any errors on this tutorial – please share it with us in the comments. * Credit *: This tutorial was heavily inspired by the Dragon Interactive website design; they are a groundbreaking web design and development agency based in Los Angeles, California. Check them out when you have a few moments to spare!
Related content
- How to Create a Sleek and Textured Web Layout in Photoshop
- How to Create a “Worn Paper” Web Layout Using Photoshop
- How to Create a Slick and Clean Button in Photoshop
- Make High-Impact Backgrounds for Your Designs with Photoshop
- Related categories: Tutorials, Web Design, and Web Development
About the Author
 Tyler Denis is a part-time freelance designer from Ashland, New Hampshire. He is also the creator/writer of the design blog Denis Designs/blog, a website dedicated to bringing quality tutorials and inspiration. You can follow him on Twitter or at his personal site, Denis Designs.
-
 President of WebFX. Bill has over 25 years of experience in the Internet marketing industry specializing in SEO, UX, information architecture, marketing automation and more. William’s background in scientific computing and education from Shippensburg and MIT provided the foundation for RevenueCloudFX and other key research and development projects at WebFX.
 -

WebFX is a full-service marketing agency with 1,100+ client reviews and a 4.9-star rating on Clutch! Find out how our expert team and revenue-accelerating tech can drive results for you! Learn more
Make estimating web design costs easy
Website design costs can be tricky to nail down. Get an instant estimate for a custom web design with our free website design cost calculator!
Try Our Free Web Design Cost Calculator
Share this article


Web Design Calculator
Use our free tool to get a free, instant quote in under 60 seconds.
View Web Design Calculator
Make estimating web design costs easy
Website design costs can be tricky to nail down. Get an instant estimate for a custom web design with our free website design cost calculator!
Try Our Free Web Design Cost Calculator