- Home
- Blog
- Web Design
- The Essential Guide to @font-face
The Essential Guide to @font-face
-
 12 min. read
-
 William Craig
 CEO & Co-Founder
- President of WebFX. Bill has over 25 years of experience in the Internet marketing industry specializing in SEO, UX, information architecture, marketing automation and more. William’s background in scientific computing and education from Shippensburg and MIT provided the foundation for RevenueCloudFX and other key research and development projects at WebFX.
Fonts on the Web
The days of being limited to a handful of fonts on the web are very close to being a thing of the past. The problem is no longer a lack of viable solutions, but rather, an abundance of them. Technologies like Cufon, sIFR, FLIR and @font-face all represent different groups of developers placing bets on what they believe to be the future of web typography.
There is, as of yet, no consensus in this ever-evolving game. All of these methods have perfectly valid arguments both for and against their use. Further, even the most popular browsers support each of these technologies in widely varying degrees.
However, the @font-face CSS method is among the strongest, simplest and most flexible competitors in this game. It seems to be the current rockstar of the bunch, garnering all the attention and causing a number of sites to pop up offering both free and premium fonts in support of it. This guide will teach you how to implement @font-face with cross-browser compatibility and will also look at a number of the supporting services that have arisen, making it even easier to use custom web font formats in your web designs.
Licensing and Free Fonts
Font licensing presents one of the largest headaches and stumbling blocks to great typography on the web.
Naturally, font foundries would like to be paid for their work and therefore place strict restrictions on the use of their fonts. These foundries have teamed up with various premium @font-face solutions that we’ll discuss later in the article, but for now, we’ll just dodge the licensing problem completely by using a free font. The web font licensing problem has caused a major rise in the popularity of sites offering quality free fonts.
Among these, the two that I like the best are Font Squirrel and Fontex. These sites both provide tons of great resources absolutely free and even share many of the same font choices.
The Basic Syntax
@font-face only requires a few lines of CSS and is therefore very easy to use without any third party tools. To get started, stop by one of the free font sites mentioned above and download Chunkfive (or any other font you like).
Once you’ve downloaded the font, place the font file in the root directory of your web page. Now, go into your stylesheet and insert the following code:
@font-face { font-family: Chunkfive; src: url('Chunkfive.otf'); }This snippet gives the custom font an identifier for the rest of your CSS and then points to the font file to use when this identifier is mentioned. The first line in my code sets an identifier of “Chunkfive” to the font.
It’s best to keep things simple by always using the font name, but you can ultimately use any name you want. “MyReallyCoolFont” would work just as well as long as you refer to the font elsewhere using the same name. The second line tells the browser that when “Chunkfive” is called, it should load the font Chunkfive.otf file from the url mentioned.
This url is simply wherever you choose to place your fonts file. If you had placed Chunkfive in a folder called Fonts, this attribute would’ve read url(Fonts/'Chunkfive.otf'). When you want to use that font anywhere in your site, simply build a font stack like you would normally, using your custom font identifier at the beginning.
font-family: Chunkfive, Georgia, Palatino, Times New Roman, serif;
It’s important to set up these fallbacks in case the custom font doesn’t work for some reason.
Make sure to test your design in at least one of your fallback fonts to ensure that it doesn’t cause your layout to break. Depending on your browser, this should give you a page with a working custom font. The text should load immediately, is fully selectable and should work with copy/paste computing functions (a limitation of of other font replacement techniques).
 A screenshot of using Chunkfive on a block of HTML text.
Cross-Browser Compatibility
It would be nice if using custom fonts online were that easy, but it isn’t. Of course, we can’t possibly expect all the browsers to play nice and agree on a given solution! That would just be unreasonable. Instead, all the major browsers have decided to go their own way with font formats that they choose to support[1].
- Internet Explorer only supports EOT
- Mozilla browsers support OTF and TTF
- Safari and Opera support OTF, TTF and SVG
- Chrome supports TTF and SVG.
Further, mobile browsers like Safari on the iPad and iPhone require SVG. Confused yet? You should be.
Fortunately, there are brilliant developers that have worked this all out for you by developing simple systems to follow. The most popular method of utilizing @font-face across multiple browsers seems to be Paul Irish’s Bulletproof @font-face syntax. Using Irish’s method, you include multiple versions of the font so that it works on all browsers. When speaking on SEO terms, this won’t directly impact search results, but it will create a better user experience, which leads to a higher time on site, and better rankings.
In addition, the code contains a little trick that ignores locally-installed fonts with the same name. Though it is much faster to load a local font, it’s been largely agreed upon that doing so can often have messy results[2]. Let’s take a look at the Bulletproof Syntax using Chunkfive:
@font-face { font-family: 'ChunkFiveRegular; src: url('Chunkfive-webfont.eot); src: local(‚ò?'), url('Chunkfive-webfont.woff') format('woff'), url('Chunkfive-webfont.ttf') format('truetype'), url('Chunkfive-webfont.svg#webfont') format('svg'); font-weight: normal; font-style: normal; }As before, we first declare an identifier for the rest of our code.
Next, we refer to the EOT version of the font for IE. If the browser is not IE, it will ignore this and move down the line until it finds a font type it can actually use. The src:local bit is the local font trick I mentioned above.
It essentially tells the browser to use a fictional font name that won’t be present on your machine so there is no mess from the wrong font being displayed. Finally, setting the font-weight and font-style to normal here will ensure that all browsers default to the same values. This makes it so that you can apply a faux bold or italic style later in the CSS.
Without this snippet, Webkit browsers will ignore any weight or style commands. Keep in mind that font rendering can vary widely across browsers and operating systems. Many developers have experienced such poor results from Windows and Internet Explorer that they avoid using custom fonts altogether. Always be sure to examine your results closely on all the browsers that you can to decide if the quality is acceptable.
Having a site that is responsive and viewable on all browsers is super important, especially for tech companies. Nothing looks worse for a company that is supposed to be tech-savvy than a website that a user can’t view due to fonts that won’t work on their browser.
Where Do I Get All Those Font Types?
You’ve probably noticed that the method above requires you to have at least four different versions of every custom font that you use. Many font sources, such as Fontex, will frequently only provide one file type in a download.
So what do you do when you only have a single font file?
Font Squirrel
The answer is to add Font Squirrel to your list of new favorite sites. Font Squirrel offers tons of free @font-face kits that are essentially a one-click download for everything you need to get going with custom, cross-browser compatible fonts. Each kit includes all the font types you need as well as demo HTML and CSS files to get you started.
All you need to do is download the kit, grab the font files and CSS snippet, and you’re ready to go! The CSS used by Font Squirrel is based on Paul Irish’s bulletproof @font-face syntax shown above so you can be confident that it’s the best method currently available for ensuring compliance for as many users as possible.
@font-face Kit Generator
What if FontSquirrel doesn’t have the kit you need? No problem.
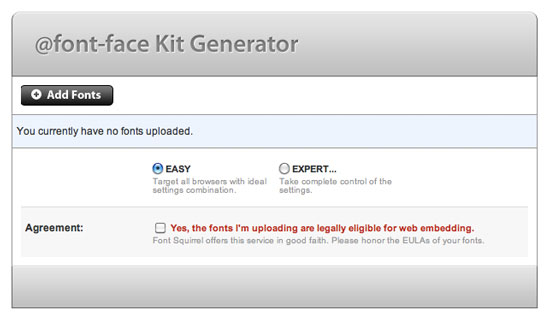
If you have a font that you obtained from another source, simply stop by the Font Squirrel @font-face kit generator. All you do is upload your font file and this amazing tool will automatically convert it to all the necessary file types and generate a kit for you to download. Note that using the @font-face Kit Generator means that you’re guaranteeing that you have the rights/license to convert and embed the font files you upload to the site.
This service is completely free and you can use it with zero sign up. 
Popular @font-face Services
As I mentioned at the beginning of this article, several services have popped up offering both free and premium solutions for simplifying the @font-face process. Below is a list of some of the most popular services currently available.
Google Font API
 The Google Font API is one of the easiest and newest solutions for inserting custom fonts into your designs.
Using this API, you simply choose a font from the Google Font Directory and grab a snippet of code to insert into the <head> tag of your HTML documents. Afterwards, you can refer to the font in your CSS just like any other font you use normally, no @font-face CSS required (it takes care of all this behind the scenes). All of the fonts in the Google Font Directory are free and open-source.
The downside is that there are currently less than twenty options available. The Google Fonts API also neglects to include an SVG version so there is currently no support for mobile devices. Read the Six Revisions guide on using Google Font API.
TypeKit
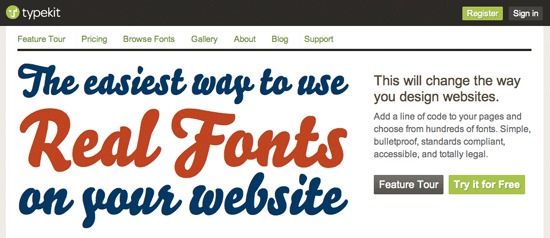
 TypeKit was one of the first services to launch dedicated to making
 @font-face easier to implement.
The TypeKit team has partnered up with font foundries from all over the world to provide hundreds of excellent fonts with zero licensing complications for as long as you use the service. There is a free trial plan that allows you to use a limited number of fonts on a single website. Paid plans range from $24.99 per year for two sites all the way to $99.99 per year for an unlimited number of sites.
Typotheque
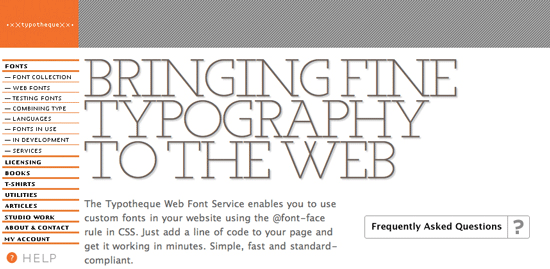
 Typotheque allows you to purchase any of their fonts for web use.
The nice thing about this service is that instead of a yearly plan, there’s only a one-time fee for purchasing the font. Once you purchase the font you want, just copy and paste the provided CSS and you’re done!
Fonts Live
 Fonts Live is yet another service that takes care of the complicated licensing hassles while bringing you hundreds of high-quality fonts from the best designers and foundries. With Fonts Live, you purchase each font individually and pay a yearly subscription fee for the use of the font.
Once you purchase the font, you are provided with the simple code snippets necessary to embed the fonts into your site.
Kernest
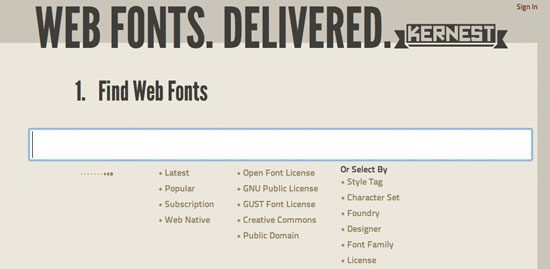
 The Kernest system is nearly identical to that of the Google Font API. Simply find a font you like, grab the link to embed into the
 <head> tag of your HTML documents and you’re all set to start using the font in your CSS. Kernest has lots of both free and premium fonts available.
Unfortunately, the browsing system on Kernest.com attempts to load lots of these fonts simultaneously and can therefore be painfully slow and difficult to use. Prepare for a browser crash if you stumble onto a page with too many font previews.
Wrapping Up @font-face
You should now be fully armed to begin using beautiful custom fonts in your web designs. Using just a few lines of CSS and a free web service (or host your own files as outlined above), you can generate your own @font-face kits that work on most major browsers and won’t cost you a dime to implement.
If the free solutions don’t provide enough options and thinking about font licensing gives you a headache, check out the services above that take care of the complicated legal stuff, and even most of the code, making it extremely simple for you to use premium fonts online.
References
Related Content
-
 President of WebFX. Bill has over 25 years of experience in the Internet marketing industry specializing in SEO, UX, information architecture, marketing automation and more. William’s background in scientific computing and education from Shippensburg and MIT provided the foundation for RevenueCloudFX and other key research and development projects at WebFX.
 -

WebFX is a full-service marketing agency with 1,100+ client reviews and a 4.9-star rating on Clutch! Find out how our expert team and revenue-accelerating tech can drive results for you! Learn more
Make estimating web design costs easy
Website design costs can be tricky to nail down. Get an instant estimate for a custom web design with our free website design cost calculator!
Try Our Free Web Design Cost Calculator


Web Design Calculator
Use our free tool to get a free, instant quote in under 60 seconds.
View Web Design Calculator
Proven Marketing Strategies
Make estimating web design costs easy
Website design costs can be tricky to nail down. Get an instant estimate for a custom web design with our free website design cost calculator!
Try Our Free Web Design Cost Calculator
What to read next


