If you’re paying attention to the world of front-end development, you’re surely aware of how many tools exist. Git, Stylus, Broccoli, Node, Angular, etc.
In this tutorial, we’re going to be looking at Gulp. The buzziest of all the buzzwords.
Gulp is a build-automation tool.
Gulp is the work truck, where we keep our tool belt. It helps us use all the tools in our tool belt in a more effective way.
Instead of managing multiple apps to provide tooling for our individual projects, Gulp can provide us an automated build process.
Before we begin…
Gulp has a command-line interface.
If you’re not comfortable with CLIs, please see my tutorial called Getting Started with Command-Line Interfaces before reading this Gulp tutorial.
Familiarity with command-line interfaces is a requirement to being able to understand and use the things we will cover in this tutorial.
Also, I suggest downloading my sample source files. These sample source files will make it easier to test the code in this tutorial.
The sample files are on GitHub.
If you use Git, you can issue the following command:
git clone https://github.com/drewminns/sixrevisions_gulpstarter.gitInstalling Gulp on your computer
Gulp takes advantage of a JavaScript application platform called Node.js that provides us with an environment in which to run apps from.
One of the great features of Node — besides being a powerful tool for developing apps — is the package manager it comes with. Node’s default package manager is called npm.
In order to use npm and Gulp, you will need to install Node.
Once you have Node installed, you can use npm from your command line to install Gulp, and any other package you will need.
In your CLI, issue the following command:
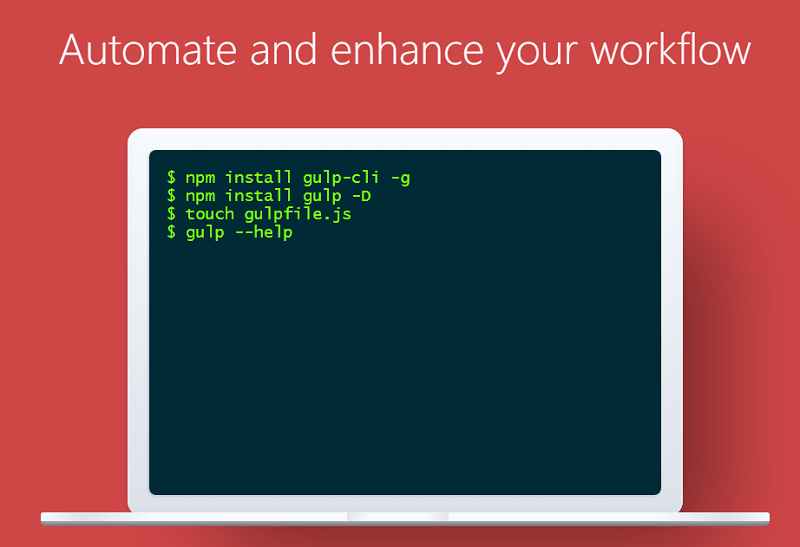
npm install gulp -gIf you’re having trouble: Use superuser privileges
If the command above doesn’t work, prefix the command with sudo. This command means super do.
This enables administrator (superuser) access to the file system.
Whenever you have an issue performing a command, add sudo at the start of the command:
sudo npm install gulp -gUpon typing the command above, you may be asked for your password. The reason is that we are attempting to install the Gulp package globally on our system. If you begin to type your password, you won’t see any characters being inputted.
Rest easy, the characters are there, but they’re not shown for security purposes in case someone’s looking over your shoulders.
An explanation of the command
Before moving forward, let’s break down what each portion of the command means.
npmis the command to work within the scope of npm.installis the action to perform within the the scope ofnpm.gulpis the name of the package we want to install.-gis a command option/flag that stands for global. With this command option, we’re saying we want Gulp to be available to our entire system.
Changing to the project directory
If everything installed successfully with no errors, go ahead and change your working directory to the directory where you downloaded the sample files to.
cd /your/project/directoryThis will be our project directory for this tutorial.
Using Gulp for a project
Once we have Gulp installed on our system, we can move into automating our projects.
Creating a package.json file
Run the following command:
npm initWhen you type the command, you will be presented with the ability to create a file called package.json.
Fill out the fields as best you can, and in the end you will find a newly created package.json file in your project directory.
What is package.json?
The package.json file contains information about your project. As we add more packages to our project, the file will also serve as a listing for those packages, telling our system what files are needed.
If we were to move our project to another computer, or work with another developer who wants to use the same build tasks, the package.json file will serve as a manifest.
Creating a gulpfile
The engine of any project that uses Gulp is the gulpfile.js file. This JavaScript file is commonly referenced as a gulpfile. The terms “gulpfile.js” and “gulpfile” are synonymous in the context of this tutorial.
A gulpfile allows us to create tasks and automate them in our project. The contents of gulpfile.js will vary from project to project.
Let’s create a gulpfile for our project.
touch gulpfile.jsInstalling Gulp plugins
Even though we installed Gulp on our system, we also need to install it in our project directory.
Run the following command:
npm install gulp --save-devNote: You may have to type sudo again at the start of the command to give yourself system access if you’re having trouble executing the command.
Next, let’s install a few Gulp plugins that will allow us to compile our Sass files into CSS, and then combine them all into one CSS file.
In the command line, type the following:
npm install gulp-sass gulp-concat --save-devnode_modules directory
You’ll notice that a node_modules directory has been created inside your project directory after issuing the npm install command. This directory contains all the required files to run the plugins.
As we install Gulp plugins and Node packages, they’ll be placed in node_modules.
Setting up a Gulp task
Within gulpfile.js, we can now set up a Gulp task.
Open up gulpfile.js in your favorite code editor and let’s get coding.
Specifying the project’s dependencies
Node’s require() function allows us to specify the plugins that are needed in order to run our Gulp tasks. These are called dependencies.
We depend on them to make our Gulp tasks work.
Also, so that we’re not calling the require() function every time we want to reference one of our plugins, we put whatever the require() function returns into JavaScript objects.
var gulp = require('gulp'),
 sass = require('gulp-sass'),
 concat = require('gulp-concat');
So now, when we use the sass() function in our code, we’re talking about the gulp-sass plugin. When we use concat(), we’re referencing the gulp-concat plugin.
Using the project’s dependencies
Once we’ve told Gulp what our dependencies are, we can set up a task.
We’ll create a Gulp task named styles.
gulp.task('styles', function() {
 return gulp.src('styles/*.scss')
 .pipe(sass({
 'sourcemap=none': true
 }))
 .pipe(concat('style.css'))
 .pipe(gulp.dest('styles/'))
});
Whoa. What?
In the code block above, we’ve created a task called styles.
This is our reference to our task. We can use this name in other Gulp tasks, or call it from the command line.
Inside the task wrapper, we write what is essentially our script for our task. The general format of the Gulp task wrapper is:
gulp.task('name-of-the-task', function() {
 // The guts go here
});
The return statement says that the styles task will return a value when it’s executed.
The value in this case is our processed code.
We use a Gulp method called .src() to get and specify the input files we want to run the styles task on, which are the .scss files. By placing an asterisk (*) in the place of a specific filename, we are essentially saying, Go find any file that has an extension of .scss inside the styles directory.
gulp.task('styles', function() {
 return gulp.src('styles/*.scss')
});
Now, the beautiful part of Gulp. Chaining the processes we want to execute with Node’s pipe() method. The pipe() method allows us to pass code from one process to another.
When one plugin has processed our .scss files, the output gets passed to the next plugin.
gulp.task('styles', function() {
 return gulp.src('styles/*.scss')
 .pipe(sass({
 'sourcemap=none': true
 }))
 .pipe(concat('style.css'))
 .pipe(gulp.dest('styles/'));
});
This is what our styles task does:
- Get and specify the files we want to process. For this, we use the
.src()method to get and point to the .scss files inside the styles directory. - Compile Sass files to CSS. Remember that we instantiated the
sass()function earlier, which refers to the gulp-sass plugin. - Combine all CSS style rules into one stylesheet. The gulp-concat plugin creates a stylesheet named style.css containing all of our CSS.
- Write the stylesheet in the styles directory. The style.css file will be placed in the styles directory. This is done with the
.dest()method.
Running a task
Now the moment of truth. Running the task.
To run the task, first be sure that your working directory is where your gulpfile is. The following command won’t work otherwise.
Our Gulp task, as you may recall, is named styles.
To run the styles task, issue this command:
gulp stylesOur styles task will run and it should compile our .scss files into a file called style.css that will be placed inside the styles directory. Congrats!
One small problem though, it’s a bit arduous to switch back and forth between code and the command line to compile Sass every time we update our code.
Watching changes to your source files
Gulp has a built-in method called .watch(), that allows us to tell Gulp to look out for any changes to our source files. This way, whenever we update any of our .scss files, our styles task will automatically execute and recompile the styles.css file.
Let’s create another Gulp task to watch our source files.
We’ll name this Gulp task as watch. Just like our styles task, we will create the watch task using the task wrapper.
gulp.task('watch', function() {
 // The guts goes here
});
This is what the watch task will do:
- Use Gulp’s
.watch()method to monitor any changes to any of our .scss files. - Whenever Gulp detects a change, our
stylestask will be executed.
gulp.task('watch', function() {
 gulp.watch('styles/*.scss', ['styles']);
});
Now, instead of running gulp styles whenever we want to compile our Sass, we can run gulp watch just once when we’re working on a project. Gulp will watch our Sass files for any change. When it sees that we have updated a Sass file, it will automatically run our styles task. This will happen whenever we save a .scss file.
Creating new tasks
Gulp has a massive community.
It has over 1,400 plugins right now. We can improve our build process with these plugins.
Let’s create another Gulp task. This new task will analyse our JavaScript files to find common issues.
For this Gulp task, we will lean on JSHint.
JSHint is a JavaScript code-quality analysis tool. JSHint will go over our JavaScript files with a fine-toothed comb and if it spots something problematic, it will print the issue in our command line.
To use JSHint, we can install and require a Gulp plugin called gulp-jshint.
First, let’s install the gulp-jshint plugin to our project.
npm install gulp-jshint --save-devNext, let’s amend our dependencies statement in our gulpfile:
var gulp = require('gulp'),
 sass = require('gulp-sass'),
 concat = require('gulp-concat'),
 jshint = require('gulp-jshint');
So now we have sass(), concat() and jshint() at this point.
Let’s set up a task called jshint. This Gulp task will run gulp-jshint on .js files that are inside the js directory.
gulp.task('jshint', function() {
 return gulp.src('js/*.js')
 .pipe(jshint())
});
Our task doesn’t need to output any file.
Instead, if JSHint catches any errors, we’ll be notified via our command line.
To run the task we can issue the following command:
gulp jshintWe can also add the jshint task to our watch task so we don’t have to manually call it whenever we make changes to our JavaScript files.
gulp.task('watch', function() {
 gulp.watch('styles/*.scss', ['styles']);
 gulp.watch('js/*.js', ['jshint']);
});
Adding processes to existing tasks
We can easily add more things to do for our existing tasks. Let’s do that now.
Let’s install a supplemental plugin that will give us a more readable output.
Run the following command to install the JSHint-stylish library to our project.
npm install jshint-stylish --save-devWe can then modify our jshint task so that it uses jshint-stylish as our reporter.
gulp.task('jshint', function() {
 return gulp.src('js/*.js')
 .pipe(jshint())
 .pipe(jshint.reporter('jshint-stylish'))
});
Let’s run the jshint task:
gulp jshintIf JSHint discovers errors and code-quality issues, it will output it in our command line.
$ gulp jshint
[10:29:57] Starting 'jshint'...
\js\main.js
 line 2 col 7 Use '===' to compare with '0'.? 1 warning
[10:29:57] Finished 'jshint' after 93 ms
Auto-prefix CSS properties
Vendor-prefixing CSS properties is a lot of work and knowing what to prefix is a job all on it’s own.
Luckily there’s a package called Autoprefixer that will do all the hard work for us.
Install the gulp-autoprefixer plugin to your project with the following command.
npm install gulp-autoprefixer --save-devAppend our dependencies statement to require the gulp-autoprefixer plugin.
var gulp = require('gulp'),
 sass = require('gulp-sass'),
 concat = require('gulp-concat'),
 jshint = require('gulp-jshint'),
 autoprefixer = require('gulp-autoprefixer');
Modify the styles task to pipe the gulp-autoprefixer plugin process.
gulp.task('styles', function() {
 return gulp.src('styles/*.scss')
 .pipe(sass({
 'sourcemap=none': true
 }))
 .pipe(concat('style.css'))
 .pipe(autoprefixer())
 .pipe(gulp.dest('styles/'));
});
To ensure that you’re targeting the right browsers, you can pass in a comma-seperated list of browsers to support.
gulp.task('styles', function() {
 return gulp.src('styles/*.scss')
 .pipe(sass({
 'sourcemap=none': true
 }))
 .pipe(concat('style.css'))
 .pipe(autoprefixer('last 2 version', 'safari 5', 'ie 8', 'ie 9', 'opera 12.1'))
 .pipe(gulp.dest('styles/'));
});
The above will support the last 2 versions of all browsers, Safari 5, IE 8 and 9 and Opera 12.1.
A full list of values you can pass in can be found here at Browserslist.
Putting it all together
At this point, we have three Gulp tasks that all serve a purpose in our build process:
styles– deals with processes related to our CSSjshint– checks our JavaScript fileswatch– automatically runs thestylesandwatchtasks whenever Gulp detects changes in our source files.
However, we can make one master task that accomplishes all of these in one go.
Right now, we could run gulp watch and it would start the watch task, which would in turn wait for us to make a change to our files.
However, what if we wanted the files to be compiled and checked immediately, and then watched for a change, all by simply typing gulp.
Within gulpfile.js, add a new task called default, but instead of using a function for the second argument, use an array.
gulp.task('default', []);
Within that array, we can pass in our tasks in the order we want them run.
gulp.task('default', ['styles', 'jshint', 'watch']);Now when we run gulp in the command line in our project directory, it will:
- Compile our Sass to CSS
- Combine all our CSS into one file called styles.css
- Add vendor-prefixes to the appropriate CSS properties
- check our .js files for errors
- Watch our source files for changes and rerun our tasks automatically
Imagine having to do all of that manually. Every single time you update your source code. Not only is this build process tedious to do without a task runner, but it’s also prone to human error.
Here are the contents of our gulpfile:
// Dependencies
var gulp = require('gulp'),
 sass = require('gulp-sass'),
 concat = require('gulp-concat'),
 jshint = require('gulp-jshint'),
 autoprefixer = require('gulp-autoprefixer');
// Task: styles
gulp.task('styles', function() {
 return gulp.src('styles/*.scss')
 .pipe(sass({
 'sourcemap=none': true
 }))
 .pipe(concat('style.css'))
 .pipe(autoprefixer('last 2 version', 'safari 5', 'ie 8', 'ie 9', 'opera 12.1'))
 .pipe(gulp.dest('styles/'))
});
// Task: watch
gulp.task('watch', function() {
 gulp.watch('styles/*.scss', ['styles']);
});
// Task: jshint
gulp.task('jshint', function() {
 return gulp.src('js/*.js')
 .pipe(jshint())
 .pipe(jshint.reporter('jshint-stylish'));
});
// Default task
gulp.task('default', ['styles', 'jshint', 'watch']);
Moving forward
The Gulp ecosystem is massive and developers are creating new tools and plugins every day.
To see what plugins are available for you use, check out the Gulp Plugin Registry.
Related Content
- Getting Started with Command-Line Interfaces
- How to Install Node.js
- Bower Beginner’s Guide
- Speed Up Your Web Development Workflow with Grunt

-
 President of WebFX. Bill has over 25 years of experience in the Internet marketing industry specializing in SEO, UX, information architecture, marketing automation and more. William’s background in scientific computing and education from Shippensburg and MIT provided the foundation for RevenueCloudFX and other key research and development projects at WebFX.
 -

WebFX is a full-service marketing agency with 1,100+ client reviews and a 4.9-star rating on Clutch! Find out how our expert team and revenue-accelerating tech can drive results for you! Learn more
Make estimating web design costs easy
Website design costs can be tricky to nail down. Get an instant estimate for a custom web design with our free website design cost calculator!
Try Our Free Web Design Cost Calculator
Table of Contents
- Before we begin…
- Installing Gulp on your computer
- Using Gulp for a project
- Creating a gulpfile
- Installing Gulp plugins
- Setting up a Gulp task
- Running a task
- Watching changes to your source files
- Creating new tasks
- Adding processes to existing tasks
- Putting it all together
- Moving forward
- Related Content
Share this article


Web Design Calculator
Use our free tool to get a free, instant quote in under 60 seconds.
View Web Design Calculator
Make estimating web design costs easy
Website design costs can be tricky to nail down. Get an instant estimate for a custom web design with our free website design cost calculator!
Try Our Free Web Design Cost Calculator