
Understand the Basics
With most print jobs, you should have specifications to adhere to. These specs work for preparing advertisements, brochures, business cards, and other printed mediums.
CYMK vs RGB
A lot of the colors you create in RGB mode are not achievable using standard four-color process printing.
It is always best to create your document from the start in CMYK color mode to ensure that you have a better idea of how your colors are going to print. Some exceptions are tradeshow signs or large format prints, but the best way to know for sure is to check with the printer. 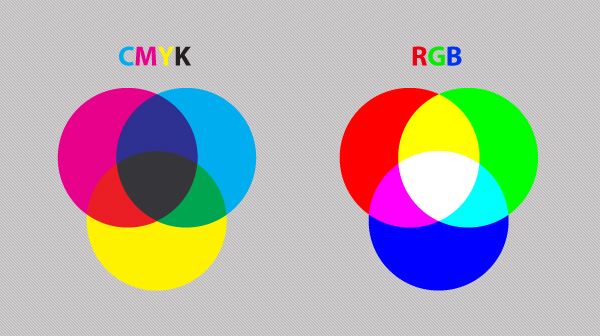
Four over Four (or 4/4)
If you’re printing a flyer, you might be printing 4/4, which essentially means you are printing four color on the front and four color on the back.
If nothing’s on the back, then it would be 4/0. For postcards, you might print 4/1: four color on the front and 1 spot color on the back. For business cards, you might print 2/2: 2 spot colors on the front and back.
Print Layout
Here is a diagram of a typical document for print designs.
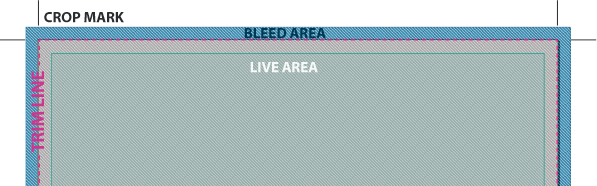 Trim Line: This is the finished size of the piece. Live Area: The area that is considered safe to keep any important information within. For example, if an ad’s trim size is 8.25 in × 10.25 in, the live area might be 7.75 in × 9.75 in.
This takes into consideration the binding if the ad is placed on the left or right of a spread and you don’t want copy to be unreadable if it is too close to the spine. Bleed Area: The more bleed you can offer, the better.The minimum bleed you need for a printed piece is 0.125 in (1/8 in) but some specs require more than that. So if you are working with an image in Photoshop and you’re placing it in InDesign for print preparation, keep in mind the area you might need to use for the bleed.
Crop Marks: Indicates where to cut the paper.
Deciding to Use Black or Rich/Packed Black
When printing with black color, there are two types of black you can use.
- Black – 100 K: can be used for body copy and barcodes
- Rich Black – 40 C 40 M 40 Y 100 K: should be used when using blocks of black
Note: Rich/Packed black specifications may differ from printer to printer, so you should ask your printer what they recommend.
Rich Black vs Black (100 K)
Below, you will see the difference between rich black and black. It may be hard to tell the difference when preparing files on your monitor screen depending on your monitor type and monitor calibration since PC screens show richer colors in RGB.
Therefore, it is wise to get a press proof when printing blocks of black. 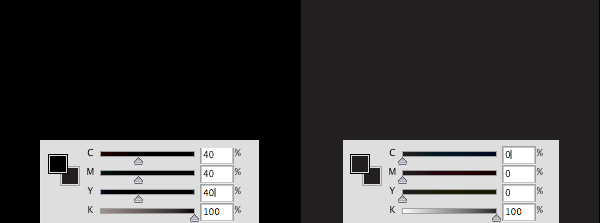 Here is a sample of a flyer using the 2 blacks. The live area is denoted in green and the dashed, pink line is the trim area.
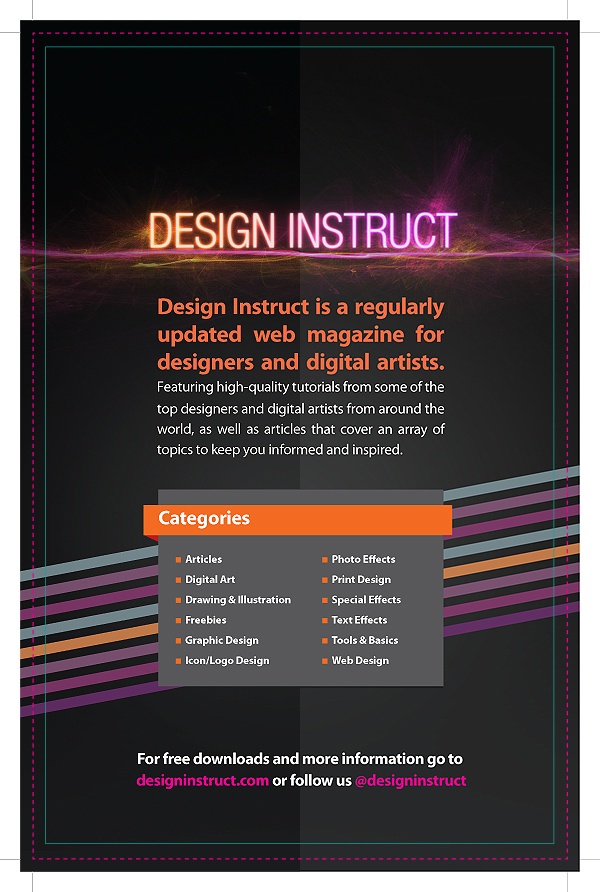 Download the InDesign template for the flyer above.
Preparing a File with UV Varnish/Coating
If you decide to use a UV varnish/UV coating on your printed piece, all you need to do is select the image or text you want the varnish on. To keep your work organized, I’d suggest creating a layer and a spot color named “varnish/spot” and then make sure this spot color you create is not already used in the file.
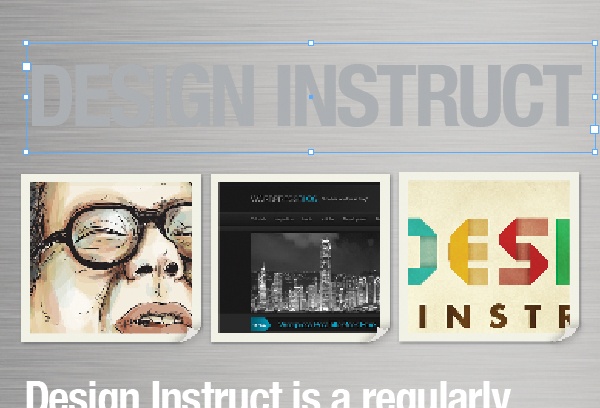
Here is a piece without a UV varnish layer.  First, create your spot color in your Swatch Panel.
  Then select the image/s and text block/s you want to apply the UV coating on.
 Add a new layer, duplicate the elements (Ctrl/Cmd + J), and then apply the spot color to the elements on that new layer.
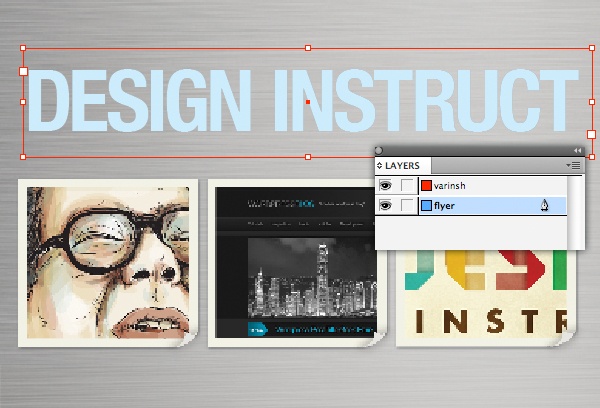
Extending Design Elements into the Bleed Area
If you haves a design that has type that’s flush with the trim, one suggestion is to rasterize the type and pull the paths out beyond the bleed. Here is some text that’s flush to the bleed line on the left.
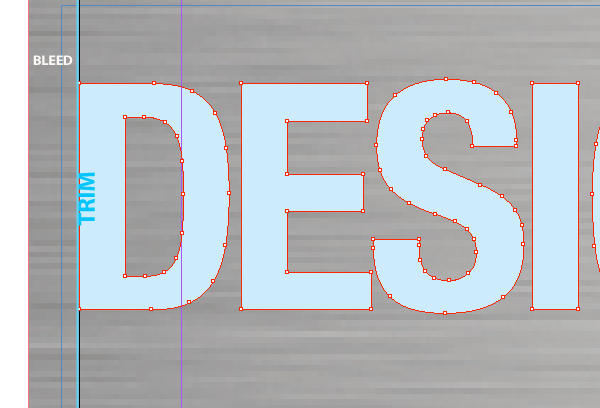 Here, we extend the letter “D” to the bleed area so that we can ensure that the text is going to be printed right at the edge when the piece is trimmed by the printer. If we don’t extend it into the bleed area, the text might have a gap at the edge of the printed material.
 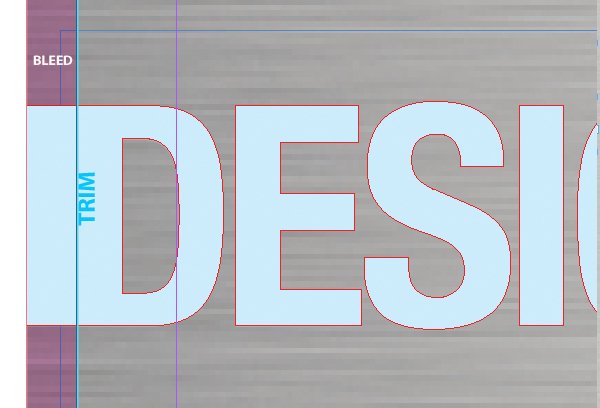 Download the InDesign template for the UV varnish/UV coating piece above.
Using Spot Color
If you need more vibrant colors or exact color matching (e.g. for consistent company branding) than what CMYK inks produce, spot colors/PMS colors is the way to go.
Example of a Flyer with 2 Spot Colors
Here is a sample of using 2 spot colors in InDesign (the design is 2/2).
 Download the InDesign template for the 2-spot color flyer above. If you are doing spot colors in Photoshop, make sure all objects and type that are in the same color are merged on the same layer and named with the spot color they should be printed in so it is clear to the printer. Also, provide a layered PSD or TIFF file and rasterize your type and vector layers.
This can also be applied to files set up in Illustrator. Additionally, remove any unused colors before packaging file. 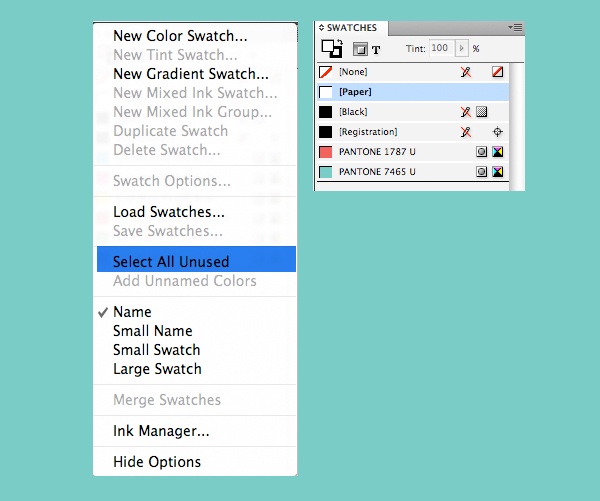
Collecting Files in InDesign
In CS4, collecting files is known as Packaging (in previous versions it was known as Preflight).
To collect and package your files in InDesign, go to File > Package. 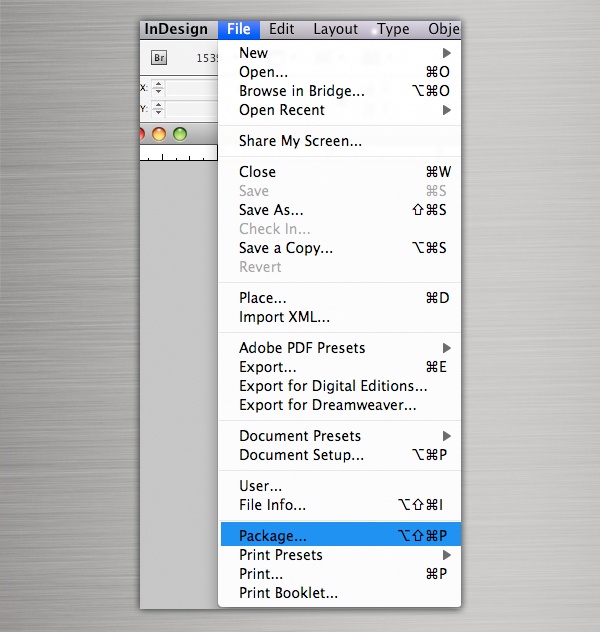 A summary screen will pop up. Here, you will see any spot colors used, RGB images, image sizes and fonts in the file.
On the image below, you will see that there is 1 font used, 2 linked images, no RGB images, 4 color process and 1 spot color. 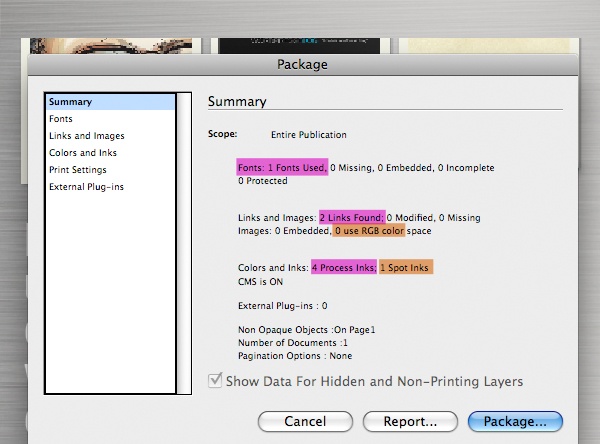 For a more detailed overview of each component, click through the navigation menu on the left side of the Package window. It is good practice to check these.
Fonts
Check the font/s you used in the document in case you need to remove anything saved on the pasteboard. 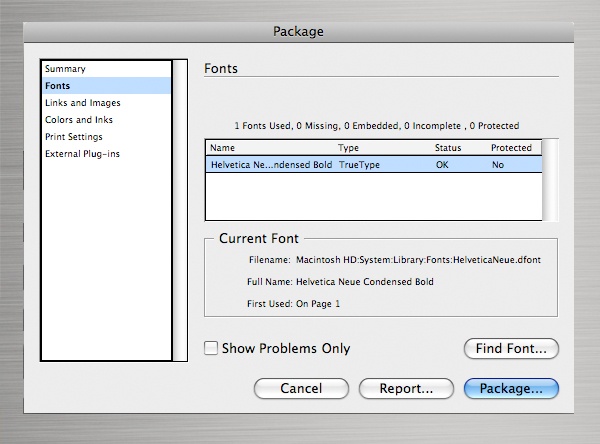
Links and Images
In the Links and Images section, you can see the file type is a TIFF with CMYK value at 300 ppi. If you only want to see errors such as RBG linked files, check the Show Problems Only option.
If everything looks good, hit the Package button. 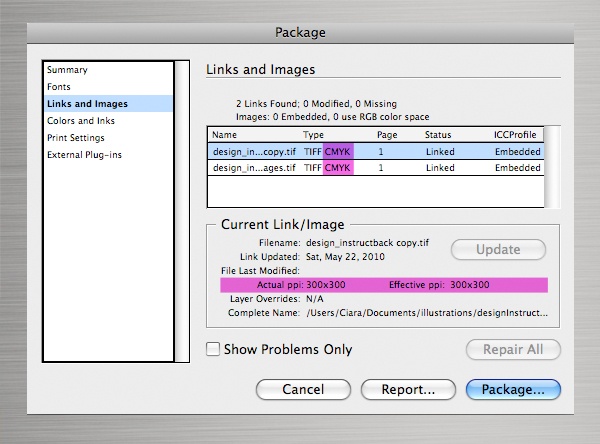 When collecting the native files for the packaged folder, make sure the links below are clicked on.
 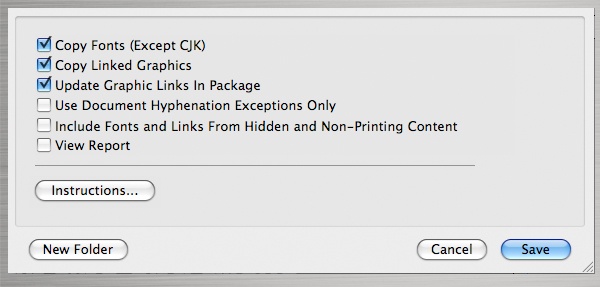 Your final packaged folder should resemble this:
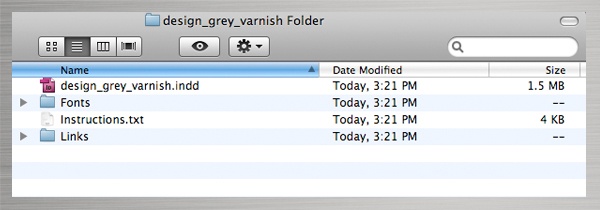
Preparing Print Files in Adobe Creative Suite Applications: Summary
| Photoshop | InDesign | Illustrator |
|
|
|
Tutorial Summary
This tutorial outlined processes for preparing your artwork for traditional printing presses to ensure the best possible results. I’ve included the templates used as examples in this guide. We focused on InDesign, but the process is very similar amongst other Adobe Creative Suite applications.
You can see the similarities and overview of the process above in the summary table with the heading “Preparing Print Files in Adobe Creative Suite Applications: Summary.”
Download Tutorial Source Files
- prepping_files_print_flyer_template (ZIP, 6.5 MB)
- prepping_files_print_uv_coating_template (ZIP, 35.8 MB)
- prepping_files_print_2_spot_color_flyer_template (ZIP, 1.2 MB)
-
 This article was written by Vladimir Gendelman of Company Folders, Inc.
 -

WebFX is a full-service marketing agency with 1,100+ client reviews and a 4.9-star rating on Clutch! Find out how our expert team and revenue-accelerating tech can drive results for you! Learn more
Make estimating web design costs easy
Website design costs can be tricky to nail down. Get an instant estimate for a custom web design with our free website design cost calculator!
Try Our Free Web Design Cost Calculator
Table of Contents
- Understand the Basics
- Deciding to Use Black or Rich/Packed Black
- Preparing a File with UV Varnish/Coating
- Extending Design Elements into the Bleed Area
- Using Spot Color
- Collecting Files in InDesign
- Preparing Print Files in Adobe Creative Suite Applications: Summary
- Tutorial Summary
- Download Tutorial Source Files
Share this article


Web Design Calculator
Use our free tool to get a free, instant quote in under 60 seconds.
View Web Design CalculatorMake estimating web design costs easy
Website design costs can be tricky to nail down. Get an instant estimate for a custom web design with our free website design cost calculator!
Try Our Free Web Design Cost Calculator


