Today, it’s easier than ever for consumers to use their smartphones or other mobile devices to purchase their favorite products in only a few clicks. So, if you’re not currently using Google local inventory ads to sell more products to your local customers, it’s time to start.
These valuable ads enable you to promote your products to shoppers nearby when they search on Google.
On this page, we’ll dive into the ins and outs of local product ads and explain how you can set them up for yourself! So keep reading to learn more!
P.S. Looking for even more ways to boost your sales and revenue? Sign up for our newsletter, Revenue Weekly! Our subscribers get revenue-driving digital marketing advice sent straight to their inbox for free from our award-winning experts!
What are Google local inventory ads?
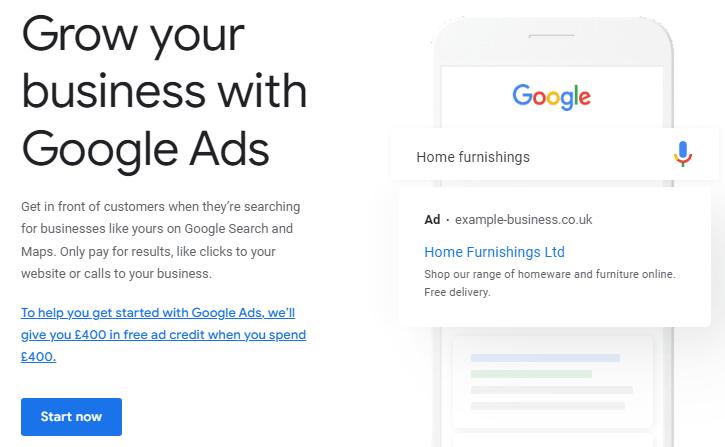
Google local inventory ads are digital advertisements that display products on the Google search engine results pages (SERPs). This feature enables you to showcase your products and store information to nearby shoppers searching with Google.
How do Google local inventory ads work?
Local inventory advertisements display in the search results when users search for products on Google. For example, your ad will display if users search for phrases like “Calvin Klein cologne near me” or “Pink summer dress nearby.”
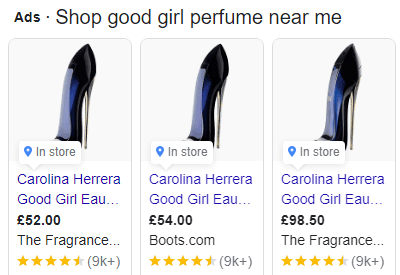
Consumers will arrive at your local shop front when they click on your ad. The local shop storefront can either be a Google-hosted page for your shop or your landing page on your website if it meets specific requirements.
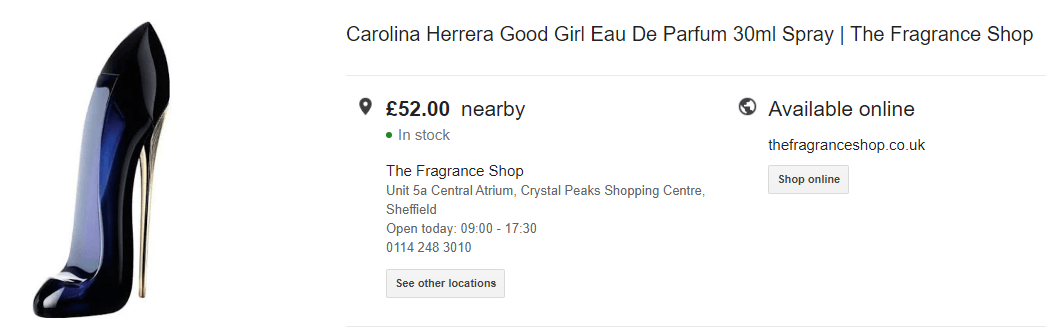
When users land on your local shop front, they can view:
- Whether your product is currently in stock
- The address of your local shop
- Your opening hours
- Your phone number
- Your website
And if consumers land on your product page on your website, they can make a purchase immediately.
What you can do with Google local inventory ads?
Curious about what you can do with these valuable advertisements? Find out below:
- Promote in-store inventory: When you use Google local product ads, you let your potential customers know that your store has what they need at a nearby location when they are ready to buy.
- Bring your physical store online: More than 80% of shoppers do product research online. With local shopping ads, you bring your physical store online, so shoppers can view your opening hours, locations, and current stock.
- Track your success: You can also easily track the results of your ad campaign and sales so you can view what effect your digital ads have on your in-store sales.
Google inventory ads are one of the best ways to reach your local audience when they’re ready to make a purchase so you can earn more sales and revenue for your business.
Benefits of Google local inventory ads
Can local product ads really benefit your business? Yes, and here’s why:
- They boost your brand awareness: Local shopping ads enable you to showcase your products directly at the top of the search results. As a result, more consumers will discover your business, increasing your brand awareness.
- They increase your sales: Because these ads boost your brand awareness, you can reach more potential customers online, resulting in more sales and revenue for your business.
- They drive more traffic to your physical store: Google local product ads also help you drive more foot traffic to your physical store. Because the ads showcase your address and opening hours, shoppers can easily find your physical storefront and discover more of your products.
So, if you’re ready to expand your reach and maximize your sales for free, local inventory advertisements are a must.
How to set up Google local inventory ads
Ready to set up your ad campaign after reading those awesome benefits? Learn how to set up Google local inventory ads with our complete step-by-step guide below:
- Set up your Google Business Profile
- Create a Google Merchant Center account
- Create a Google Ads account
- Link your accounts
- Enable Google local product ads
- Add your business information
- Select a landing page experience
- Upload a primary product inventory feed
- Upload a local product inventory feed
- Register and submit your feeds
- Request inventory verification
- Enable local products in your Shopping campaigns
1. Set up your Google Business Profile
Google Business Profile enables you to create a listing for your business on Google, and you’ll need an account before you can start promoting local products.
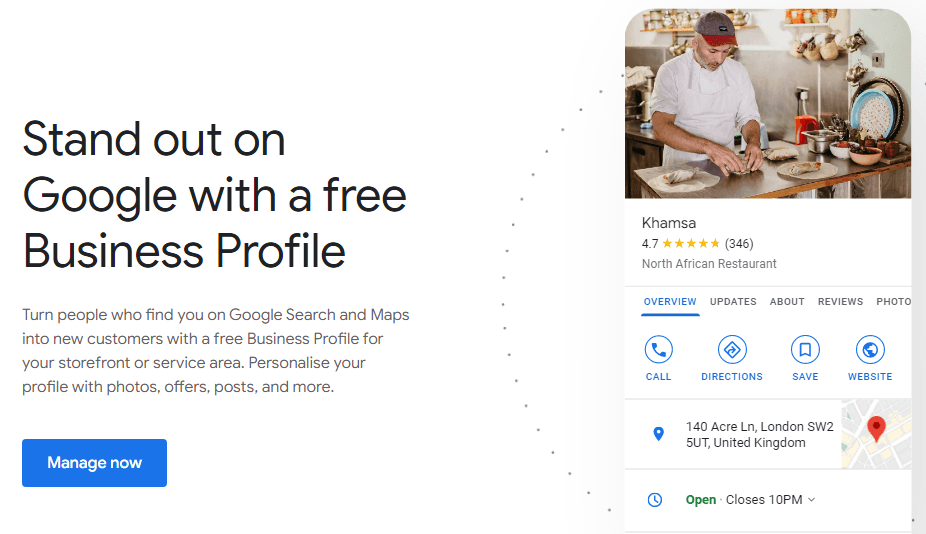
It’s easy and free to create your account. Here are a few quick steps to help you set up your Google Business Profile:
- Sign up and create your profile via Google
- Enter your business information
- Verify your account
And that’s it. You’ve now claimed your Google Business Profile!
2. Create a Google Merchant Center account
You’ll also need a Google Merchant Center account to promote your local products and store.
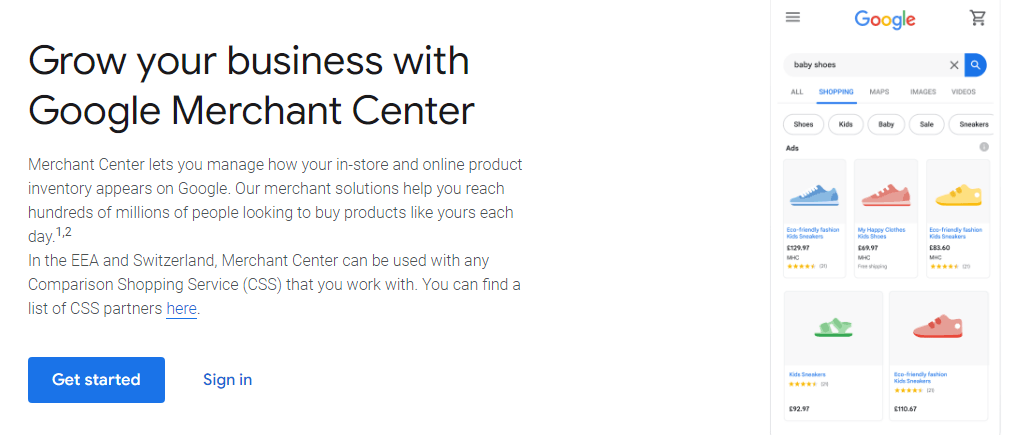
Here’s how to create your Google Merchant Center account:
- Navigate to the Google Merchant Center website and click Get Started
- Enter your business information
- Choose how you want users to purchase your products, either via your website, Google, your local store, or all of the above
- Select any additional online shopping tools you currently use like Shopify or PayPal
- Click “create account” and get ready to reap the benefits of promoting your store online
3. Create a Google Ads account
A Google Ads account is also a requirement to run local ads.
Simply navigate to the Google Ads website and click “start now.” You’ll then answer a few questions about your business and provide billing information.
4. Link your accounts
The next step in how to set up local inventory ads is to link your Google Merchant Center account with your Google Business Profile and Google Ads accounts.
To link your Google Merchant Center and Google Business Profile accounts:
- Sign into your Google Merchant Center account
- Click on the tools and settings icon
- Select Linked Accounts under Settings
- Click the Business Profiles tab
- Click Link
To link your Google Ads account with your Google Merchant Center account, you can follow the same steps outlined above, and select “Google Ads” once you navigate to your “linked accounts.”
5. Enable Google local inventory ads
Now that you’ve created all of your accounts, it’s time to enable local ads. Here’s how to do it:
- Sign into your Google Merchant Center account
- Click Growth in the navigation menu
- Click Manage Programs
- Select Get Started on the local inventory ads
- Choose your country
6. Add your business information
When setting up your inventory ads, you’ll need to add basic information about your business. This information includes your:
- Shop name
- Business address
- Opening hours
- And more
These details will be what users see when they click on your ads.
7. Select a landing page experience
Now it’s time to select a landing page. Your landing page is the page users will see once they click on your ad.
To select your desired landing page, you’ll need to follow a series of steps:
Step #1: Tell Google about your landing page
First, you need to decide what type of landing page you want to use. Here’s how to do it:
- Click on the tools and settings icon in Google Merchant Center
- Select Local Ads Inventory Setup under Tools
- Select your country
- Navigate to Website Product Pages
- Select a shop front setup
You’ll need to choose from the following shop front setups:
- Merchant-hosted local shop front (full): Choose this setup if you can customize your product pages to display your product’s price and availability at a specific location
- Merchant-hosted local shop front (basic): Select this setup if your product pages allow shoppers to check your product’s availability at your retail shop
- Google-hosted local shop front: Choose this setup if your product pages can’t display which shops carry your products
Step #2: Provide an example product page for review
If you’ve selected either a merchant-hosted local shop front full or basic, you need to submit your product landing page for review.
To do this, navigate to the “Example product page” section and enter the URL of your product page. Google will review the link to ensure your website meets functionality requirements.
If you’ve chosen a Google-hosted local shop front, you will not need to submit an example product page for review.
Step #3: Submit a link to your price guarantee policy
If you let shoppers purchase your product in-store for the price listed in your ad, you can include a link to your price guarantee policy.
To do so, check the box labeled, “Shoppers can purchase something in-store for the price on my website.” Then, enter the URL to your price guarantee policy. Google will review the link to ensure it meets their requirements.
8. Upload a primary product feed
Your primary feed lists and describes all your products for sale. Google Merchant Center uses your feed to access and display your products.
To build your primary feed, you can either create a delimited text file or use API.

In your document, you need to include each product’s:
- Name
- Price
- Description
- Image link
- GTIN
- Brand name
- Any excluded destinations where you don’t want your product to show up
To upload your primary feed:
- Select Feeds under Products in Google Merchant Center
- Click the “plus” button under the Primary Feed section
Then, enter the following information:
- Your country
- Your language
- Your currency
- Your feed destination
- The primary feed name
- The input method
9. Create a local product inventory feed
The local product inventory feed lists all the products you sell in each shop if you have multiple store locations.
To create your local product inventory feed, follow the same steps above. Additionally, you will need to tell Google which products you sell in each store location.
To do so, you’ll need to include the following information for each product:
- Product ID
- Shop code
- Quantity
- Price
You can then follow the steps outlined above to upload your feed to Google Merchant Center.
10. Register and submit your local feeds
Now that you’ve created your primary product and local product feeds, it’s time to register and submit them.
Follow these steps to register and submit your product feeds:
- Sign into your Google Merchant Center Account
- Click Products in the navigation menu
- Click Feeds
- Select the feed you’d like to submit
- Click the three-dot icon under the Processing tab
- Select Upload Input File from the drop-down menu
- Upload your feed file
- Click Upload
Google recommends uploading your primary product feeds at least once a week and your local inventory feeds once a day to ensure your ads display accurate information for shoppers.
11. Request inventory verification
Once you’ve submitted your product feeds, you can request inventory verification. These verification checks enable Google to ensure that your inventory information matches what’s actually in your physical store.
Follow these steps to request an inventory verification from Google:
Step #1: Submit inventory verification contact
Your inventory verification contact is someone from your business who will coordinate the verification process with Google.
Here’s how you can submit your inventory verification contact:
- Sign into your Google Merchant Center account
- Click Overview in the navigation menu
- Click Continue
- Select your country
- Complete the inventory contact details
- Click Save
Step #2: Request inventory verification
To request your inventory verification, follow these steps:
- Sign into your Google Merchant Center account
- Click Overview in the navigation menu
- Click Continue
- Select your country
- Click Request Verification
Step #3: Complete inventory verification
Once you’ve requested inventory verification, Google will review your submitted feeds. Once Google approves your feeds, their team will get in touch with your designated contact to schedule verification and resolve any issues.
12. Enable local products in your Shopping campaigns
To finally get your local products to display on Google, you need to enable them in your shopping campaigns.
Follow these steps to run local product ads in your shopping campaigns:
- Log into your Google Ads account
- Click on one of your existing Shopping campaigns or create a new one
- Navigate to Settings and then Shopping Campaign Settings
- Select Additional Settings and Local Products
- Check the “enable ads for products sold in local shops” box and click Save
Congratulations! You’ve successfully set up your local product ad campaign and can enjoy more awareness and sales for your business!
We foster and form long-term partnerships so that your business has long-term results.
Over 90%
Need help launching revenue-driving Google local inventory ads?
Do you need help implementing and managing digital ad campaigns that drive revenue for your business? Let WebFX help!
As a Google Premier Partner with more than 30 years of experience helping clients earn a higher return on investment (ROI), you can rest easy knowing that your campaign is crafted to drive incredible results for your business.
Ready to partner with the Google Ads agency behind over $10 billion in revenue? Chat with one of our strategists today by calling 888-601-5359 or contact us online. We can’t wait to help your business grow!
-
 Abby is a Digital Marketing Analyst at WebFX, where she implements, optimizes, and tracks SEO and digital marketing strategies that are powered by data for WebFX. With certifications in SEO, Local SEO, and Google Analytics, Abby has implemented hundreds of optimizations and led strategies and initiatives that have helped WebFX improve online visibility, traffic, and leads. Before her time as a Digital Marketing Analyst, Abby was an innovative content writer who created content for WebFX clients in various industries and for WebFX’s own blog and website. When she’s not implementing strategies and optimizations that drive leads and revenue, you’ll find her walking her dog, travelling around Europe, or watching her favorite reality TV show.
 -

WebFX is a full-service digital marketing agency delivering revenue-driving strategies across online advertising, SEO and AI search optimization, and digital marketing. Backed by 1,100+ client reviews, a 4.9-star rating on Clutch, and proprietary revenue-tracking technology, our team helps businesses grow visibility and revenue across platforms, from Google to ChatGPT to LinkedIn. Discover how our expert team and revenue-accelerating tech can drive results for you. Learn more
Cost Per Click (CPC) Calculator
Do you advertise on platforms that charge per click? Use our calculator and figure out exactly how many clicks will fit within your budget.
Calculate Your CPC
Share this article

Cost Per Click (CPC) Calculator
Do you advertise on platforms that charge per click? Use our calculator and figure out exactly how many clicks will fit within your budget.
Calculate Your CPC