
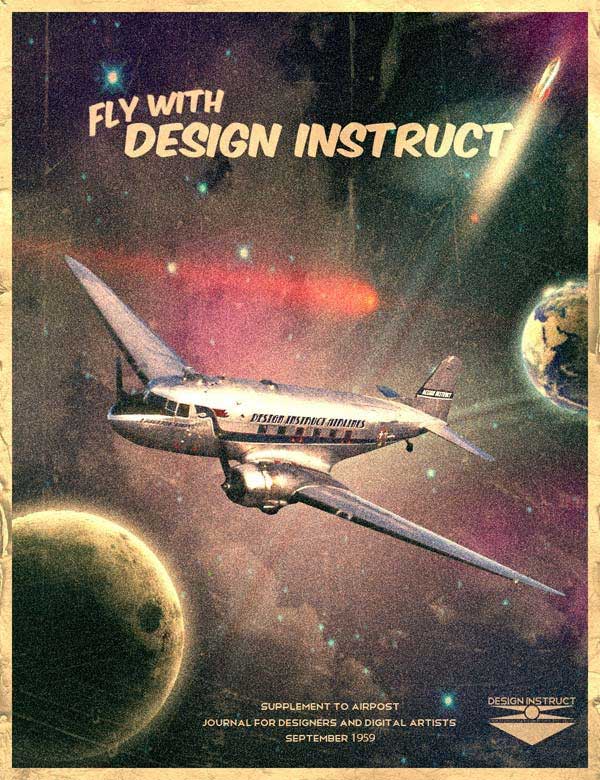
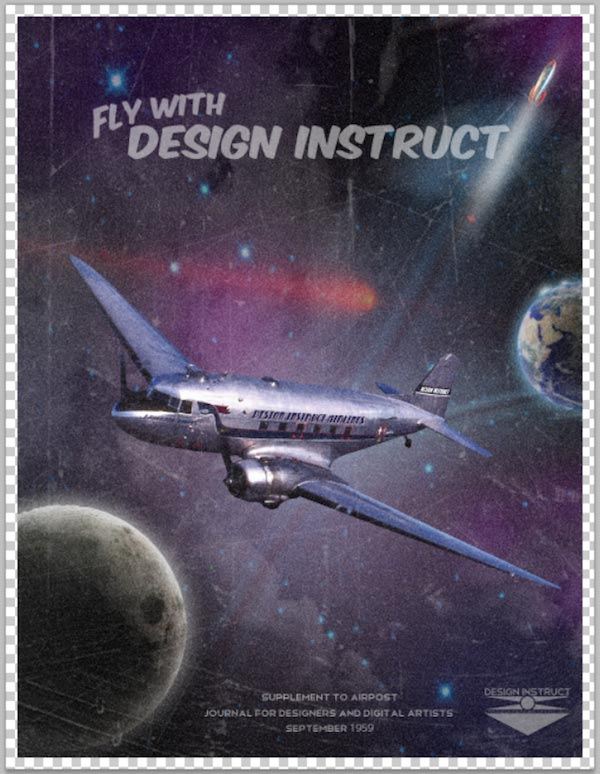
Preview
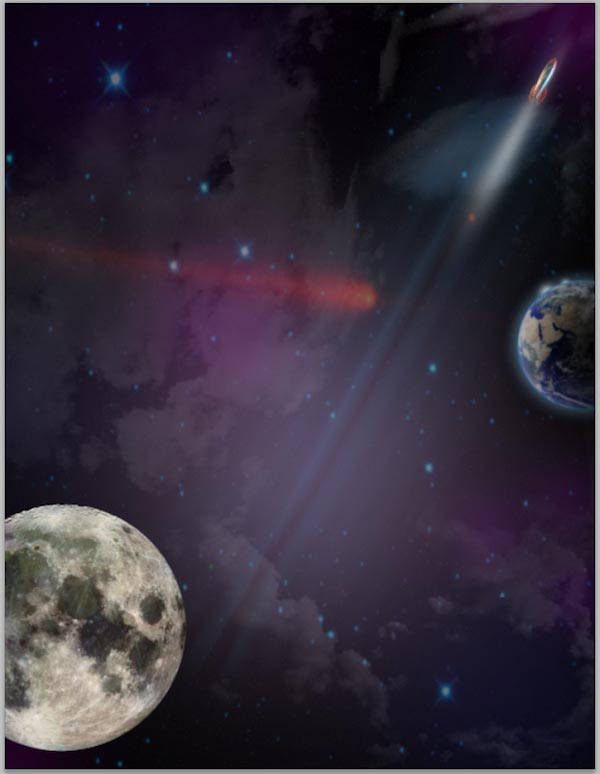
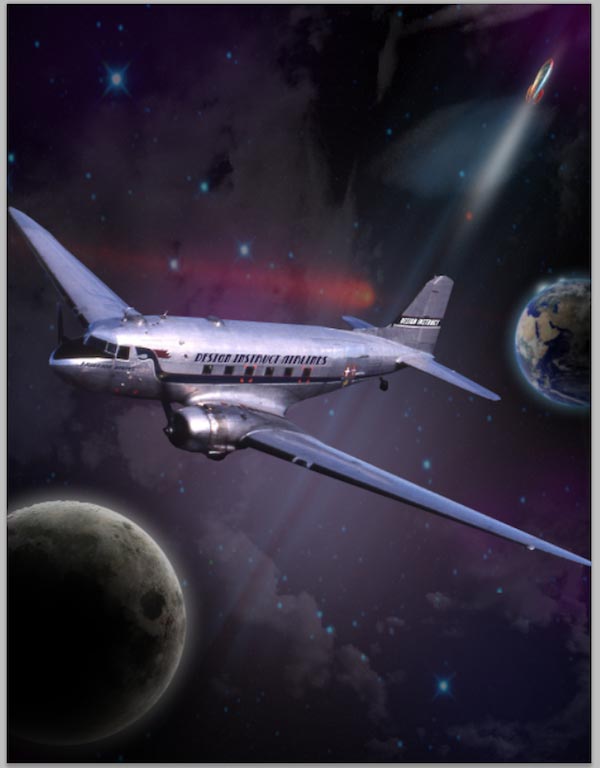
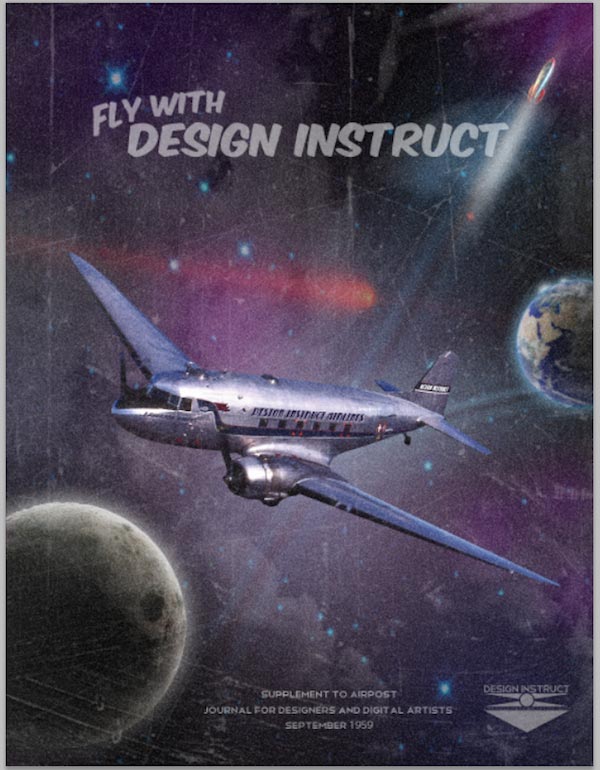
Click the preview image to see the final result in full size.

Tutorial Resources
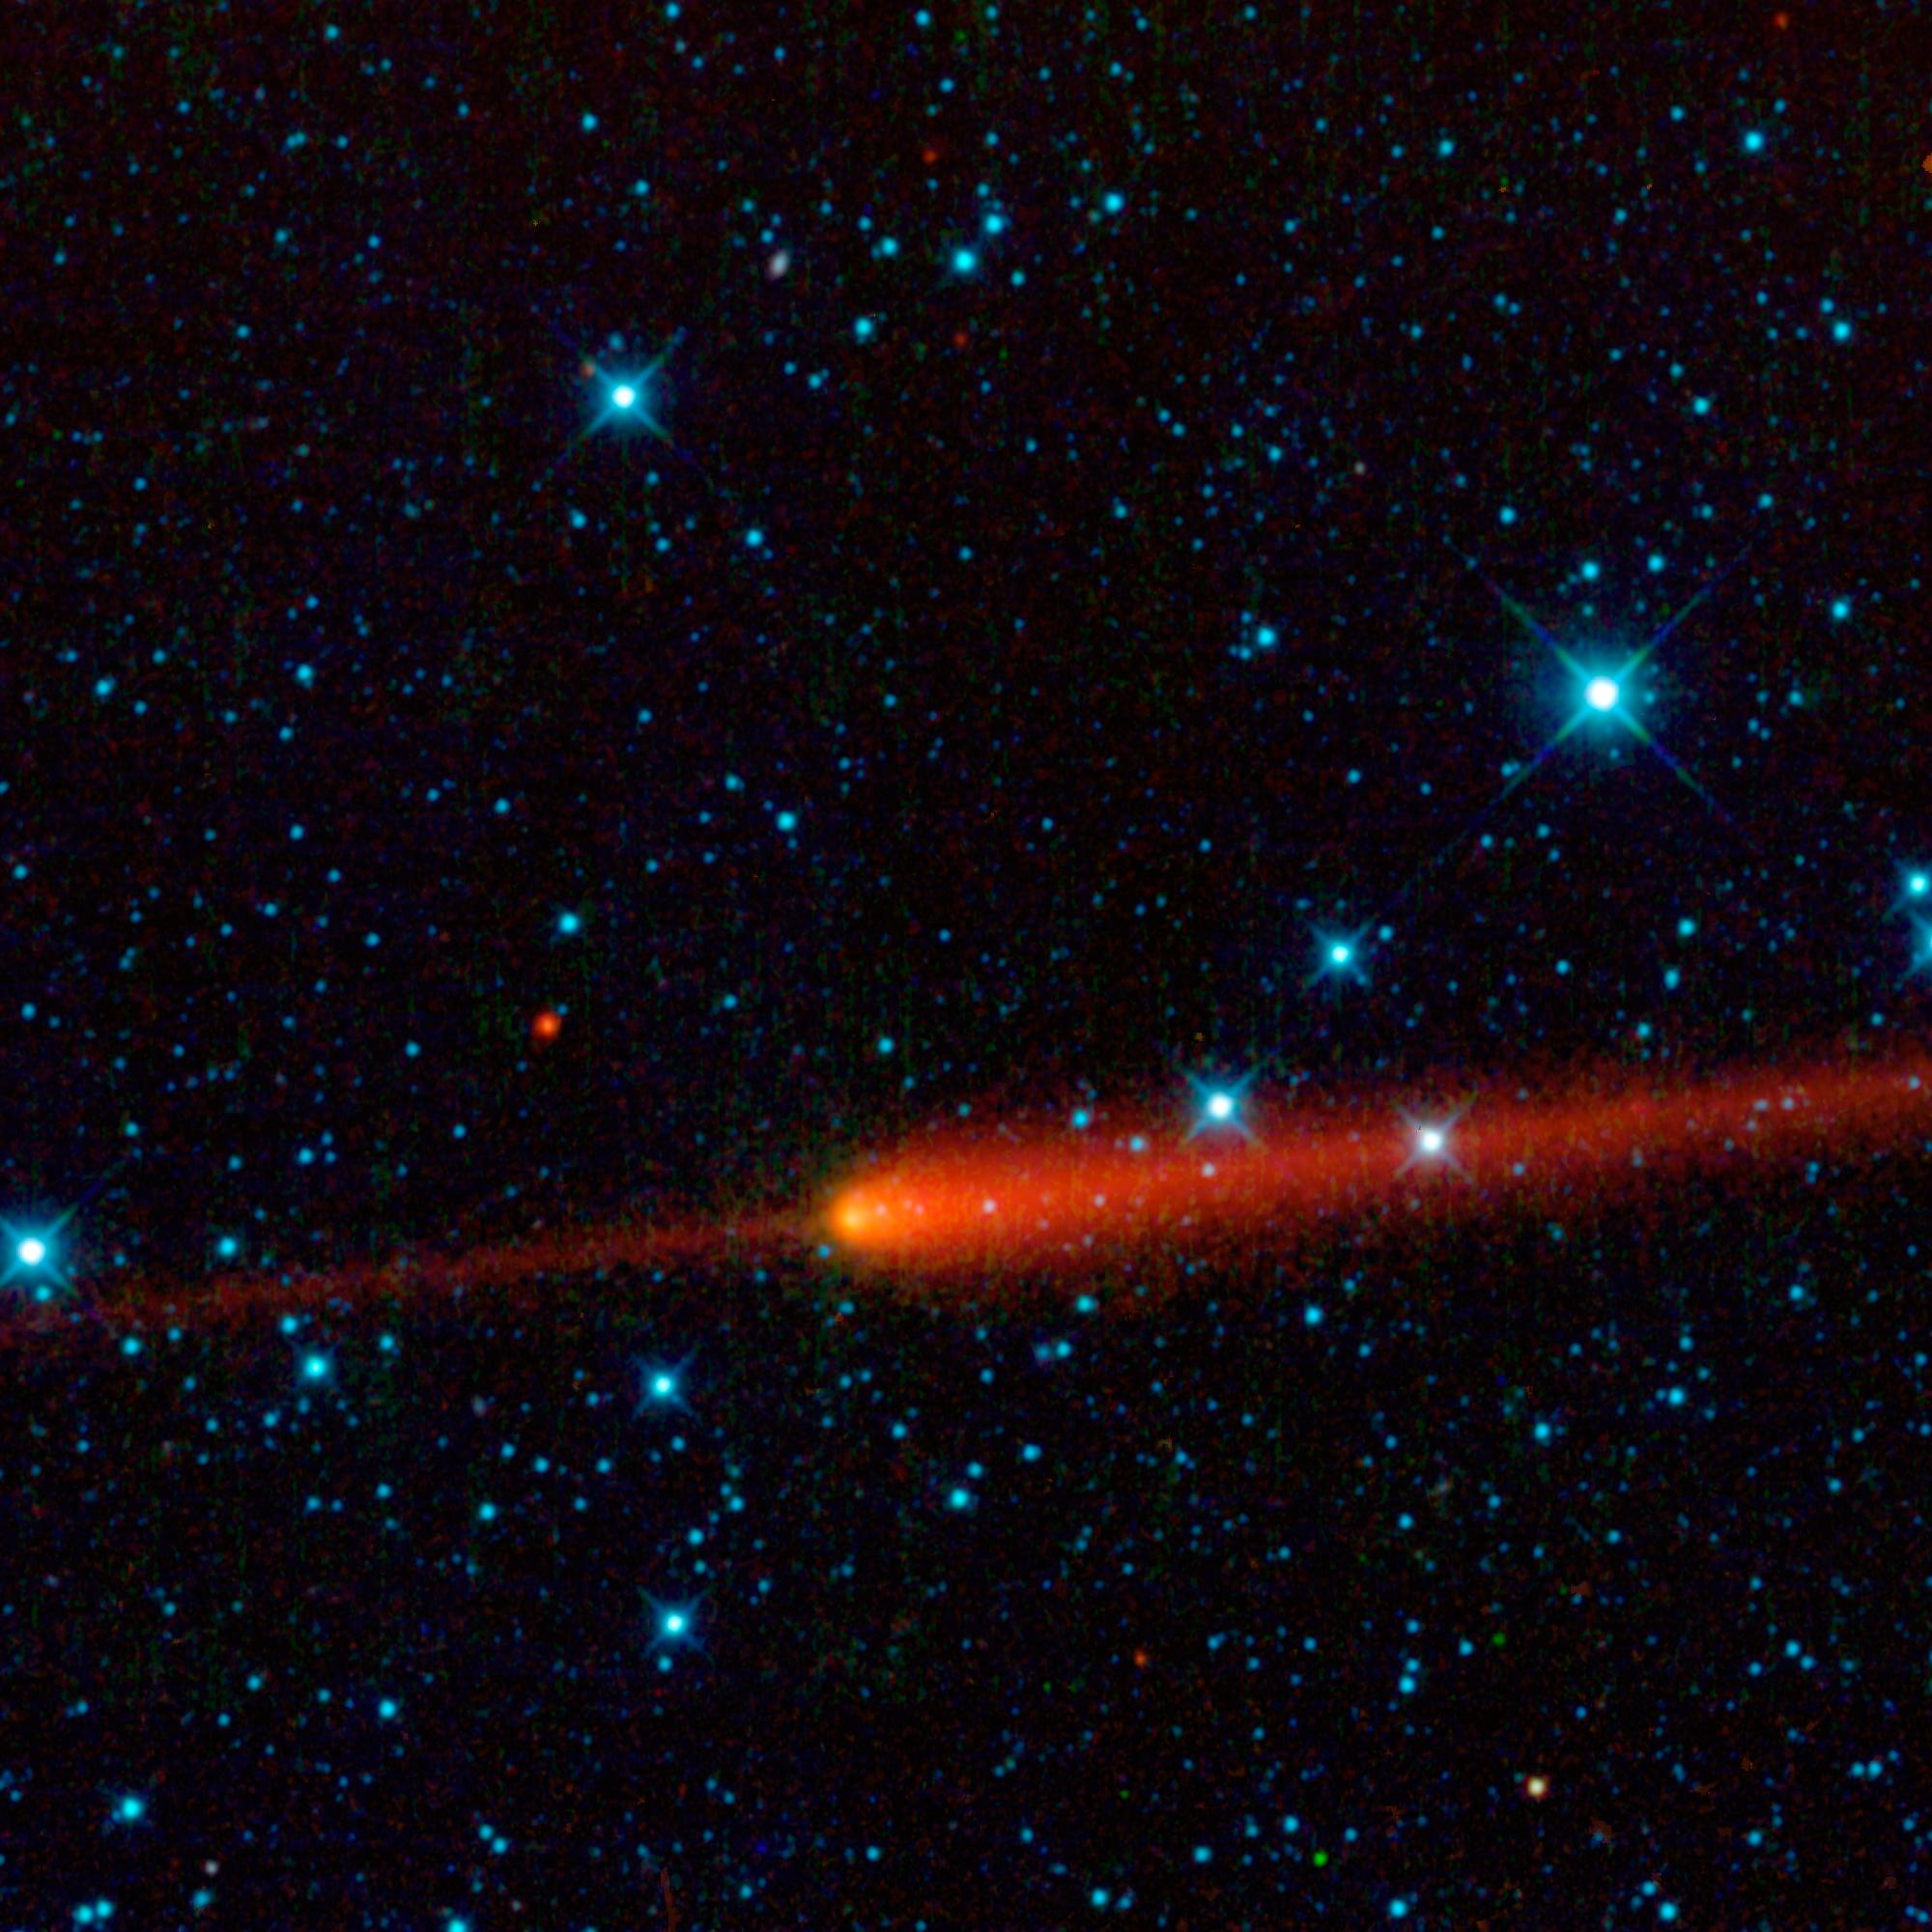
- Image: PIA13115: WISE Catches Comet 65P/Gunn by Jet Propulsion Laboratory
- Image: PIA00405: Earth’s Moon by Jet Propulsion Laboratory
- Image: The Blue Marble by NASA Visible Earth
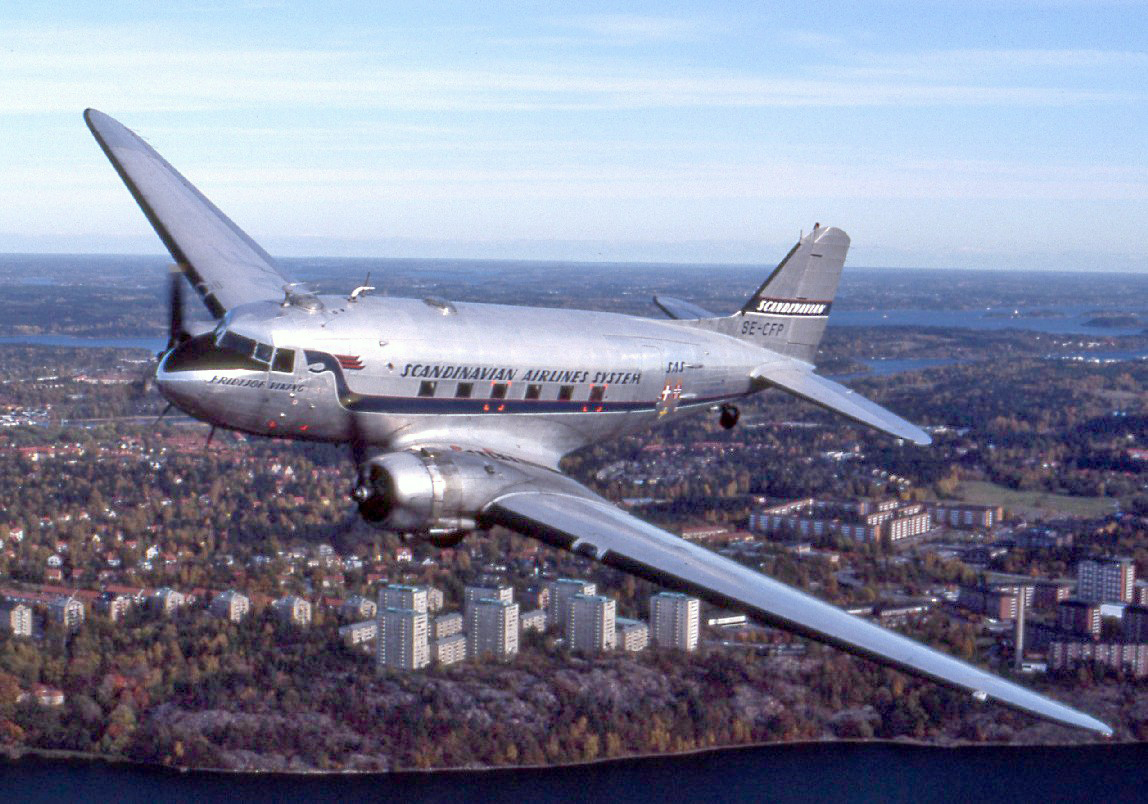
- Image: Douglas DC-3, SE-CFP from Wikipedia
- Image: Rocket from iStockphoto
- Texture: Cloud Texture 04 from the Six Revisions Cloud Textures set
- Texture: Cloud Texture 06 from the Six Revisions Cloud Textures set
- Texture: Cloud Texture 07 from the Six Revisions Cloud Textures set
- Texture: Handmade Paper from stock.xchng
- Brushes: CD Scratch from PSD Central
- PSD: Design Instruct Retro Logo from Stylish Futuristic Textured Wallpaper
- Font: Betty Noir from DaFont
- Font: League Gothic by The League of Movable Type
- Font: Komika Axis from Font Squirrel
- Font: Telegraphico by Ficod
Step 1: Setting Up the Document
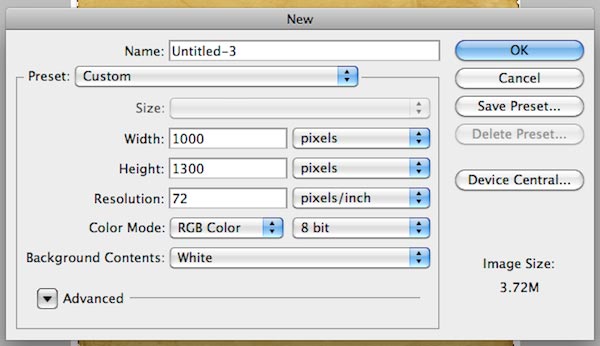
Open up Adobe Photoshop and create a document with your desired poster dimensions. Remember to use a high DPI (between 150-300 dpi) and CMYK Color Mode if you are planning on sending your work to the press. For this tutorial, I created a document sized at 1000x1300px, RGB Color at 72dpi for web use.
Step 2: Create a Star Field for the Background
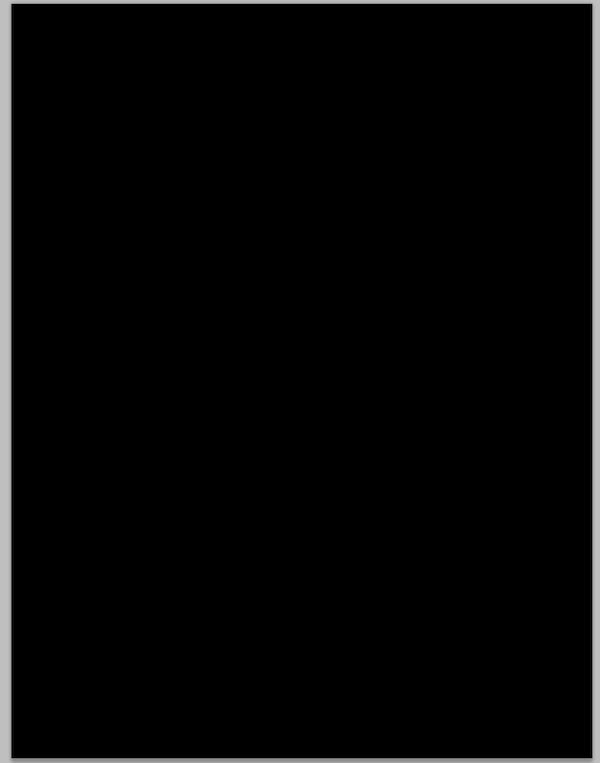
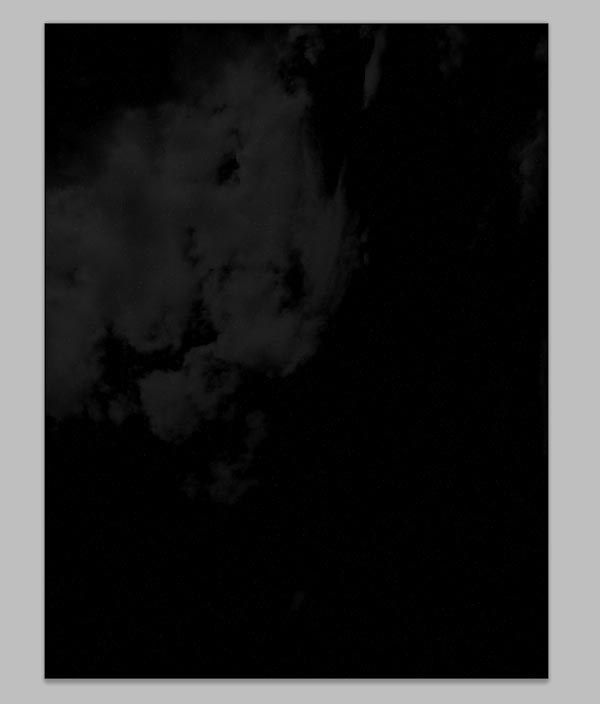
Fill the default Background layer with black color (#000000) using the Paint Bucket Tool (G).
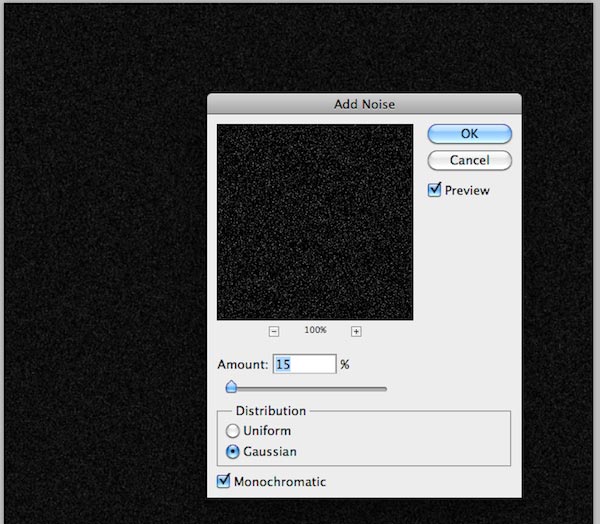
Go to Filter > Noise > Add Noise.
Use 15% for the Amount, Gaussian for the Distribution and select the Monochromatic option.
We now have a layer full of noise. To reduce the noise and to create a quick and easy star-filled backdrop, we need to make adjustments to the layer.
First, zoom to 100% using the Zoom Tool (Z) or press Cmd/Ctrl + 1 to view the actual pixels. We need to zoom to 100% so that you will be able to see the changes you’re making in full resolution.
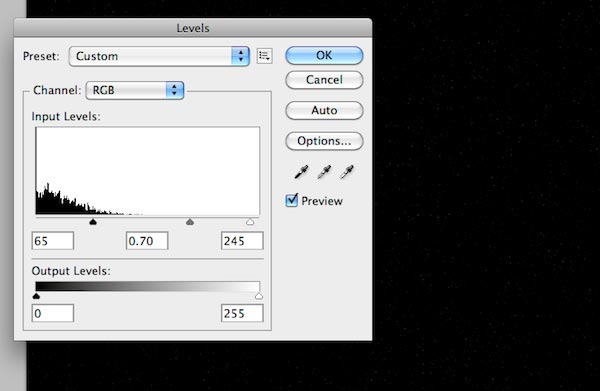
Next, go to Image > Adjustment > Levels and use 65, 0.70 and 245 for Input Levels to reduce the amount of noise, giving us the needed effect we are trying to achieve.
Step 3: Creating the First Nebula
Download the original size of Cloud Texture 04 and open it in Photoshop.
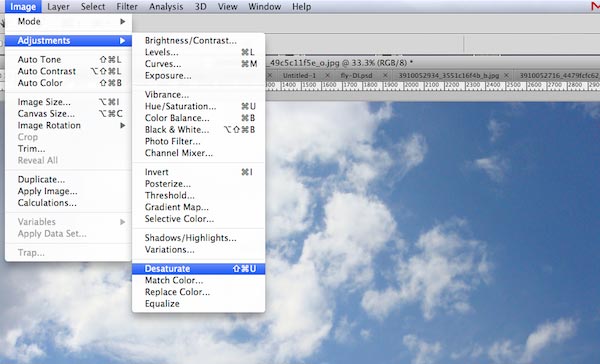
First, desaturate the stock image by choosing Image > Adjustments > Desaturate (Shift + Cmd/Ctrl + U).
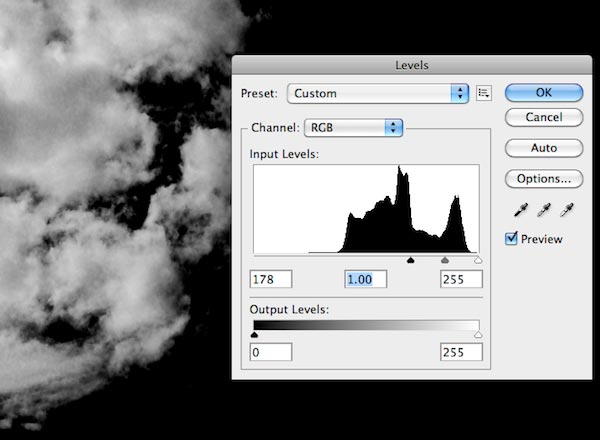
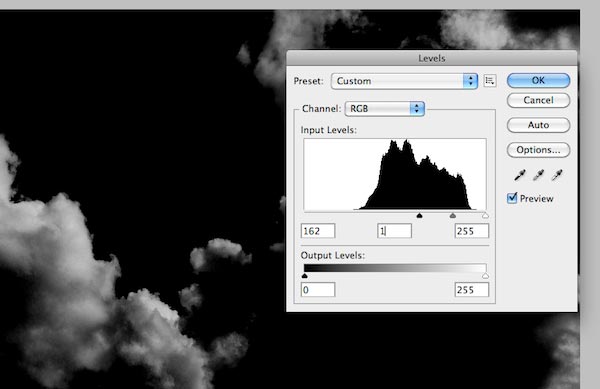
Next, render the blue sky to black by adjusting levels (Image > Adjustment > Levels).
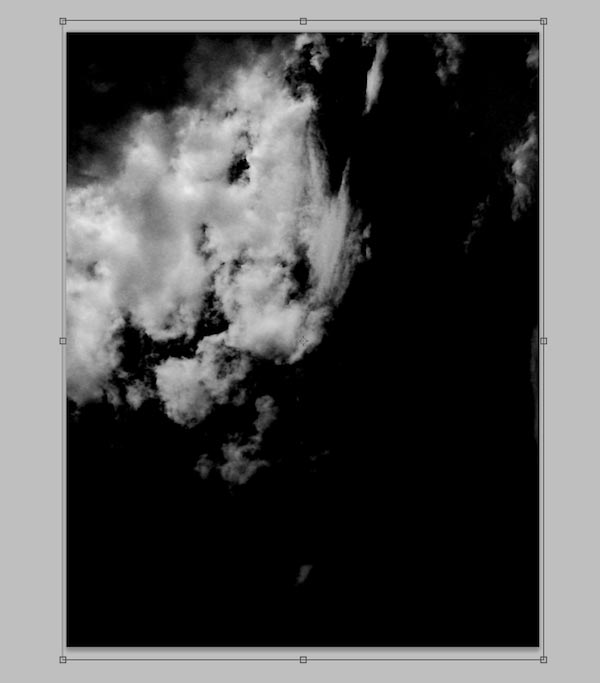
Now insert that image into our design and then use Free Transform (Cmd/Ctrl + T) to resize and rotate it. Use the Move Tool (V) to position it as shown on the picture below.
Change the Blend Mode of this layer to Screen and set the Opacity to 15%.
Let’s add some color to our nebula. Create a new layer above the nebula layer.
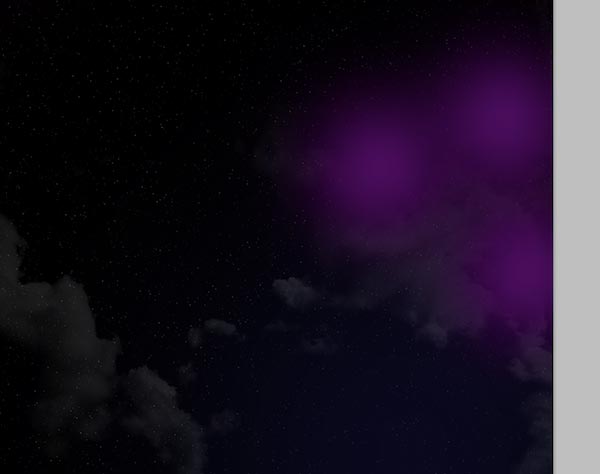
Set the Foreground Color to a purple color (#300a50). Next, pick up the Brush Tool (B), choose a soft brush and then set the Master Diameter to around 660px, Hardness to 0, and Opacity to 40%. Then just make one spot over the upper left corner of the clouds by clicking once on the canvas.
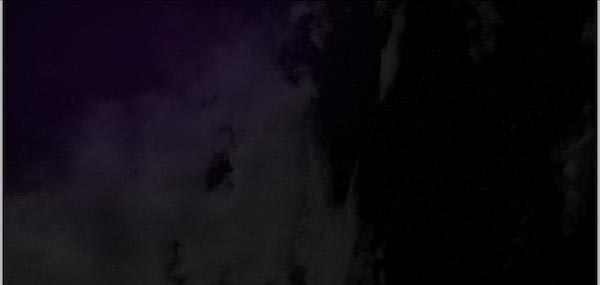
Let’s continue adding color.
Again, create a new layer. Switch your Foreground Color to a lighter purple (#710275). Lower the Master Diameter of your Brush Tool to around 390px.
Then just click once to apply the stroke over the clouds, and then once more on the upper right corner.

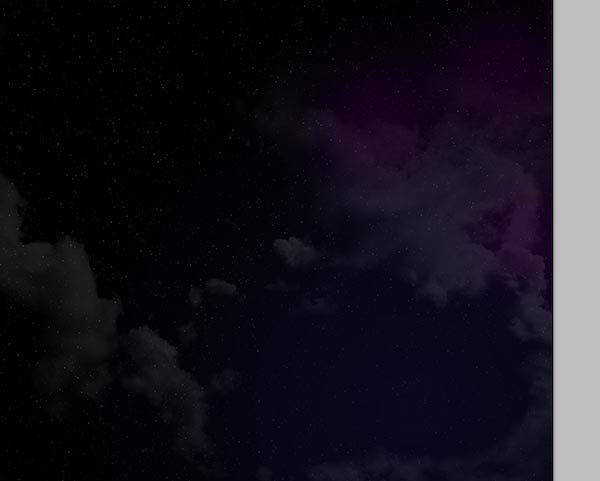
One more time! Create a new layer, change the Foreground Color to a dark blue (#111139), increase the Master Diameter back to around 660px, and make two spots on the canvas with the Brush Tool.
And here is where are work is at now:
Step 4: Add More Nebulas
In this step, we are going to add more nebulas. Download and open the original size of Cloud Texture 07 in Photoshop.
Desaturate the image and adjust levels to render the sky black, just like in the previous step.
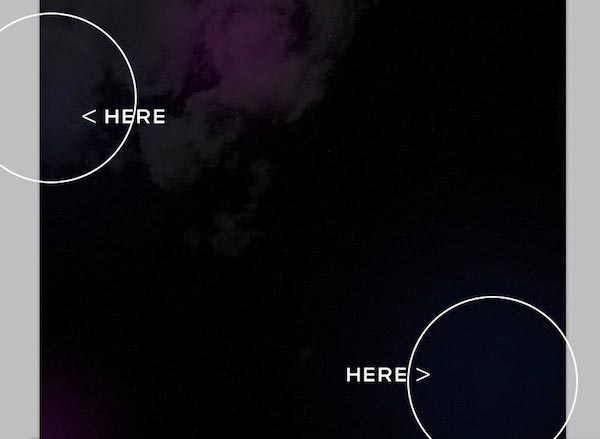
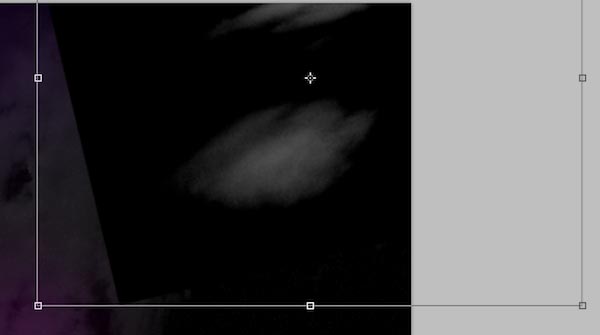
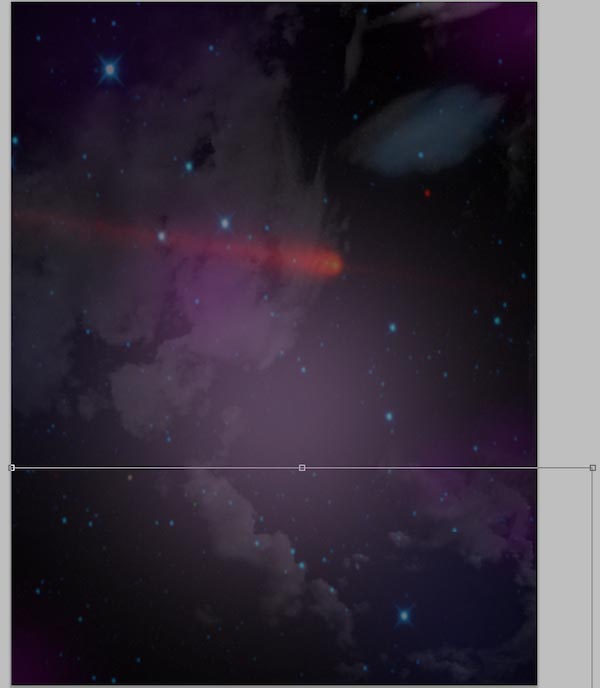
Import the stock image, use Free Transform to resize it, and then position it at the bottom right corner of the canvas.

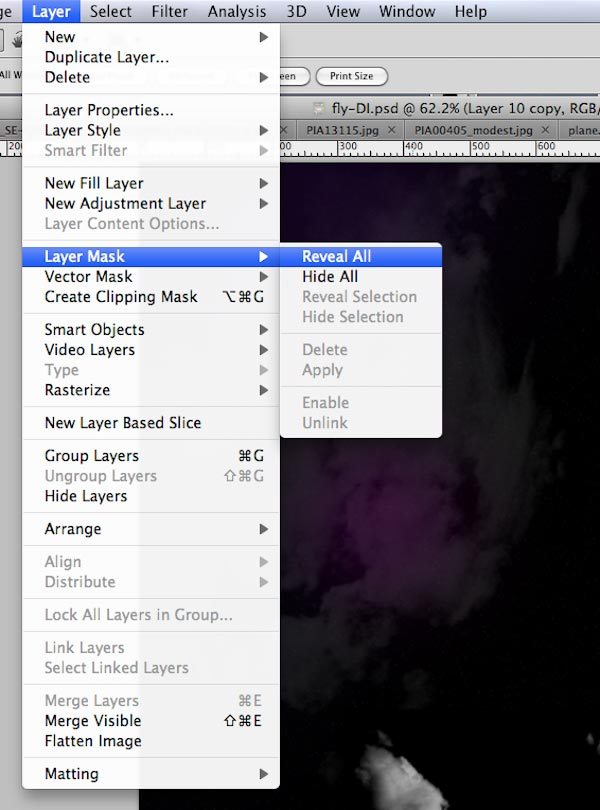
Go to Layer > Layer Mask > Reveal All and apply the layer mask to this layer.
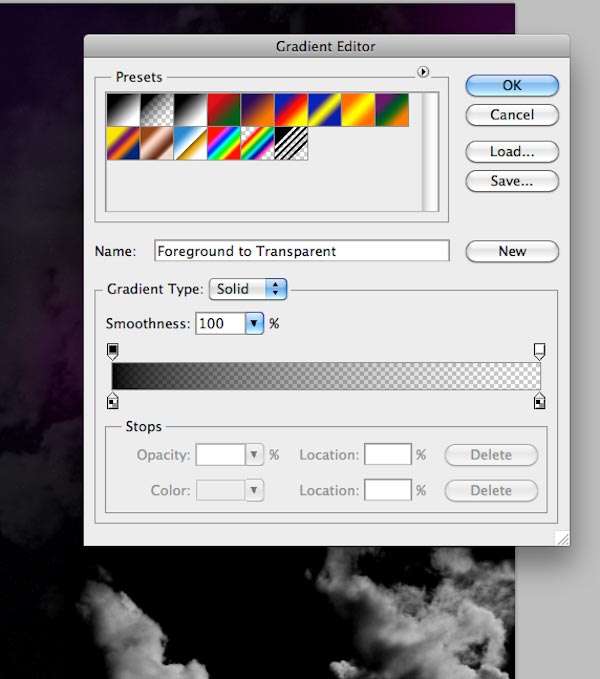
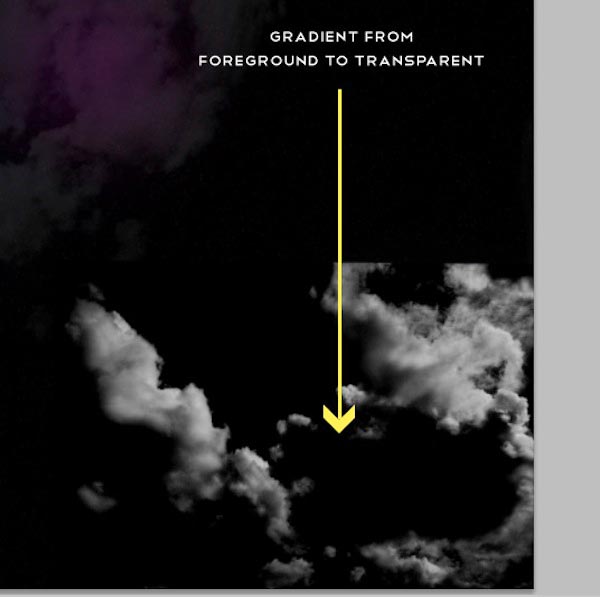
Set the Foreground Color to black (#000000). Choose the Gradient Tool (G) and select the Foreground to Transparent preset in the Gradient Editor.
Draw a few gradients to soften (and mask out) the top edge of cloud.
Change the Blend Mode of the layer to Screen and lower the Opacity to 15%.

Create a new layer. Change you Foreground Color to a purple (#49015b) and, with the Brush Tool at 195px Master Diameter and Opacity at 100%, make a few spots on the layer.
Lower the Opacity of this layer to 30%.
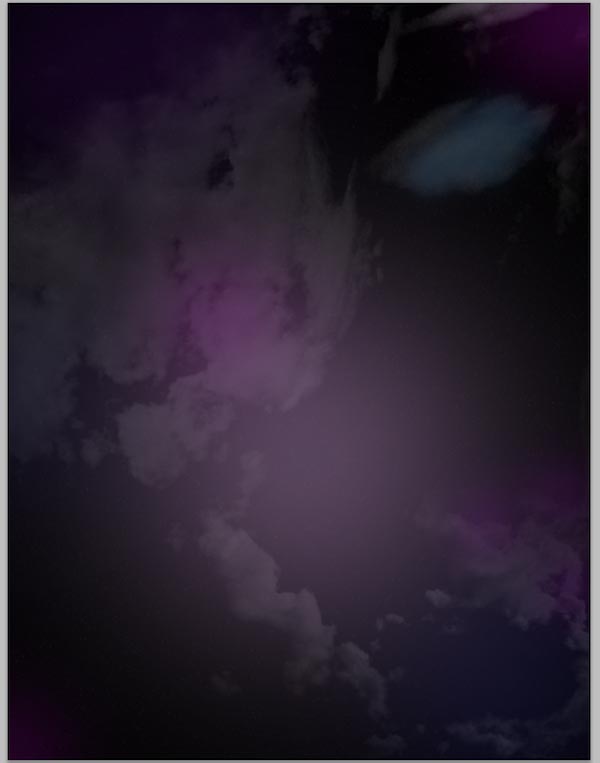
Next, download and open the original size of Cloud Texture 06, open it in Photoshop and — you know the drill by now — desaturate the image and adjust the image levels to render the sky black.
Then place the processed stock photo into our design and use Free Transform (Cmd/Ctrl + T) to resize it. Position it in our canvas with the Move Tool (V) as shown below.
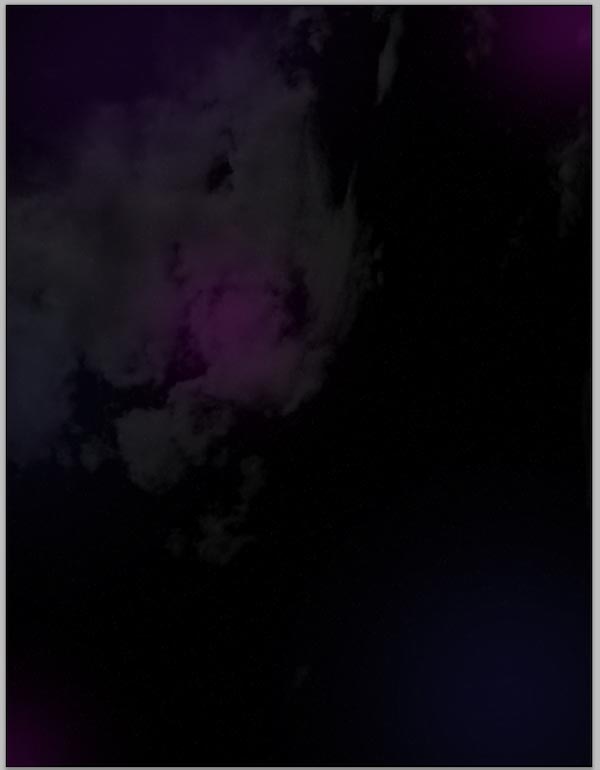
Create a new layer, set your Foreground Color to a dark blue (#112a40), choose the Brush Tool (B) and, with a soft brush, make a big spot over the cloud. Lower the Opacity of this layer to 50%.
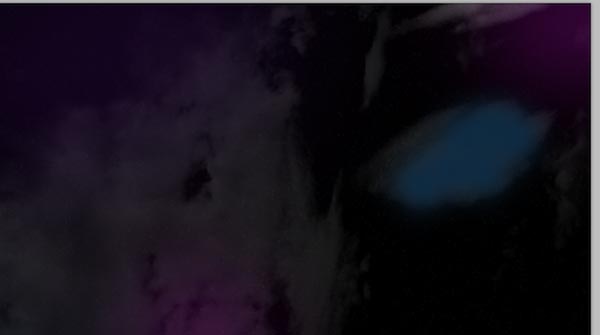
Change the Blend Mode to Screen and lower the Opacity to 70%.
And this is what we have done so far:

Step 5: Brighten Up the Scene
Let’s brighten up the scene a bit.
First, create a new layer. For your Foreground Color, choose a low-saturated pink color (#eebbfb). Use the Brush Tool (B) with a large, soft brush tip (900px Master Diameter) to create a spot in the middle of the canvas.
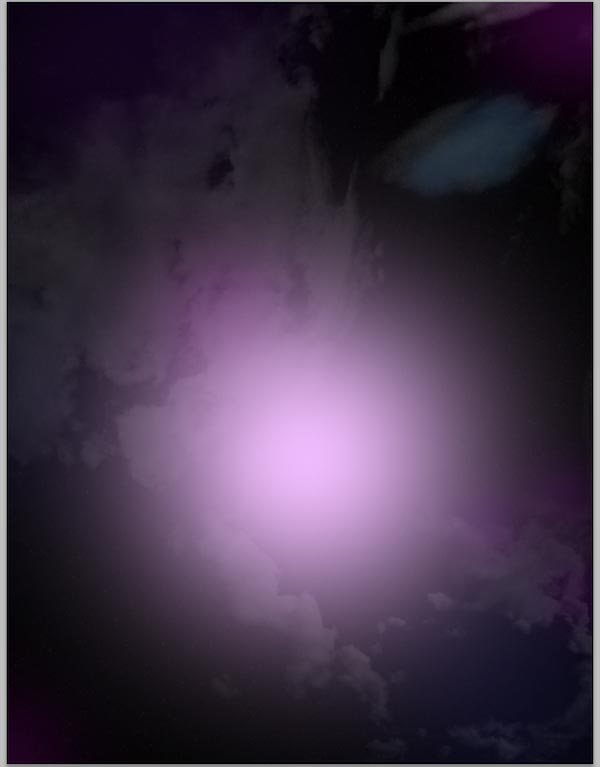
Apply the Gaussian Blur filter on this layer (Filter > Blur > Gaussian Blur) with Radius of 130px.
Then just set the Opacity of this layer to 50% to soften and blend the effect into its background.
Download PIA13115: WISE Catches Comet 65P/Gunn, import it onto poster, resize it and position it somewhere towards the top of our canvas.
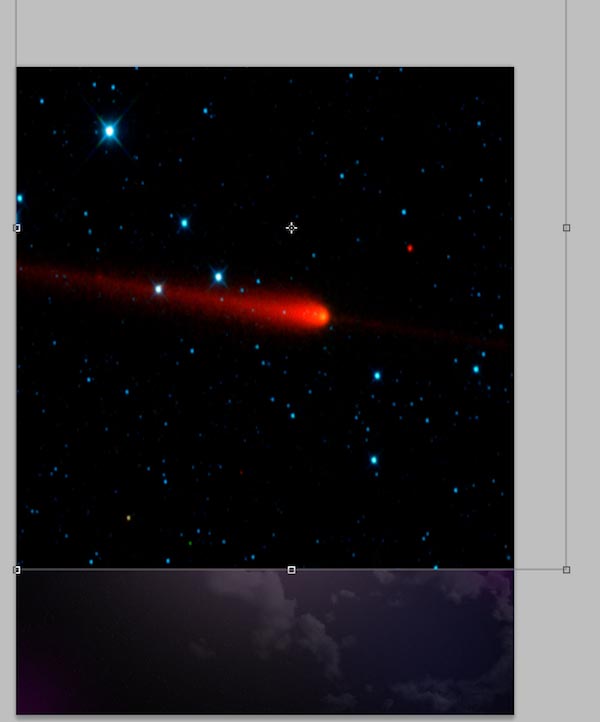
Change the comet layer’s Blend Mode to Screen and lower the Opacity to 40%.

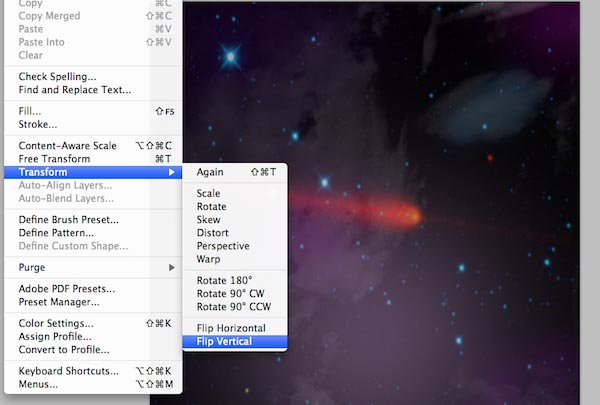
Duplicate the comet layer (Cmd/Ctrl + J), go to Edit > Transform > Flip Vertical and then move the flipped image down the canvas a bit.
Since, as you can see, we have created so many layers (and we are just at the background), we should tidy up our Layers Panel a bit. Go ahead and select all the layers in the Layers Panel and then go to Layer > Group Layers (Cmd/Ctrl + G) to place them inside a layer group. Give this group a descriptive name such as Space Background.
Step 6: Add the Vintage Rocket
Get this photo of a rocket ship and open it in Photoshop.
Extract the rocket from its background. This particular image has a clipping path so it’s quite easy; just open the Paths Panel (View > Paths), hold down Cmd/Ctrl and then click on the path to make a selection around the rocket.
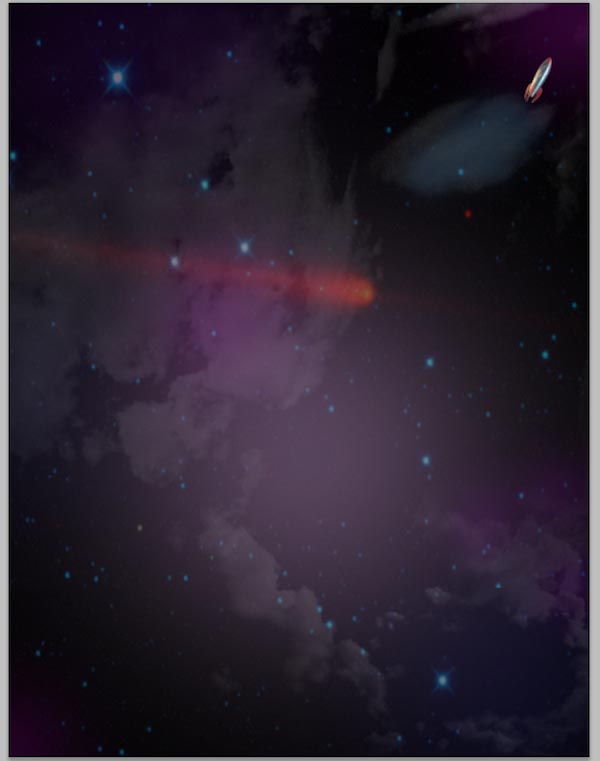
Place the rocket in our design, rescale it down and rotate it with Free Transform (Cmd/Ctrl + T). Move it at the top right of the canvas (as shown below).
Duplicate this rocket layer (Cmd/Ctrl + J) and then change the Blend Mode of the duplicated layer to Multiply and Opacity to 20%.
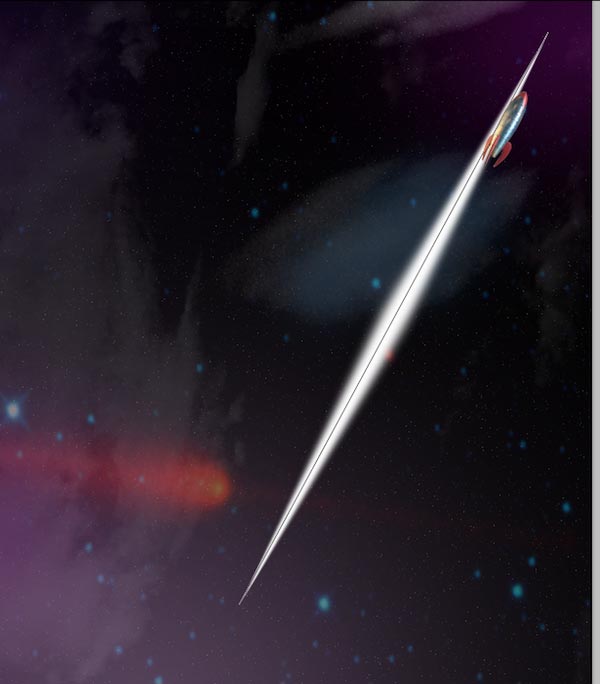
Next, we are going to create the rocket’s stream. To do this, create a path with the Pen Tool (P) that is double size of the desired length.
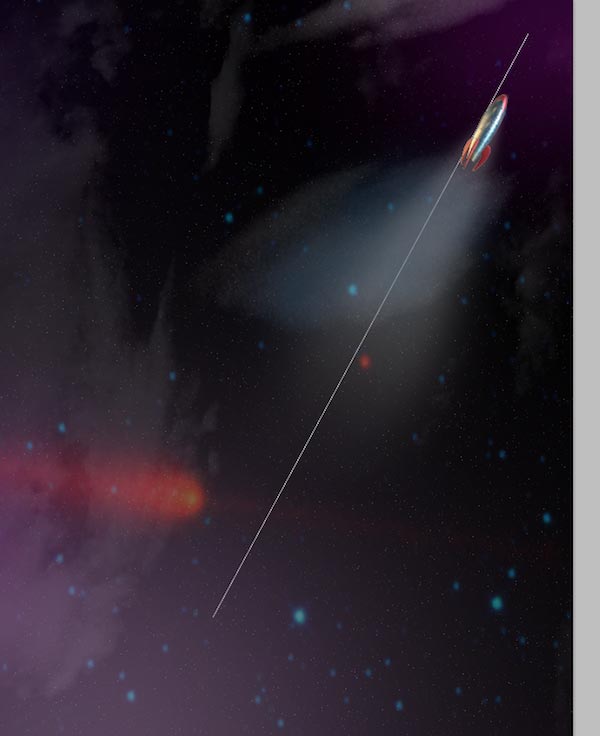
Create new layer below the two rocket layers and set your Foreground Color to white (#ffffff). Select a large, soft brush and set the brush size according to the thickest part of the stream you wish to make (I used 50px Master Diameter).
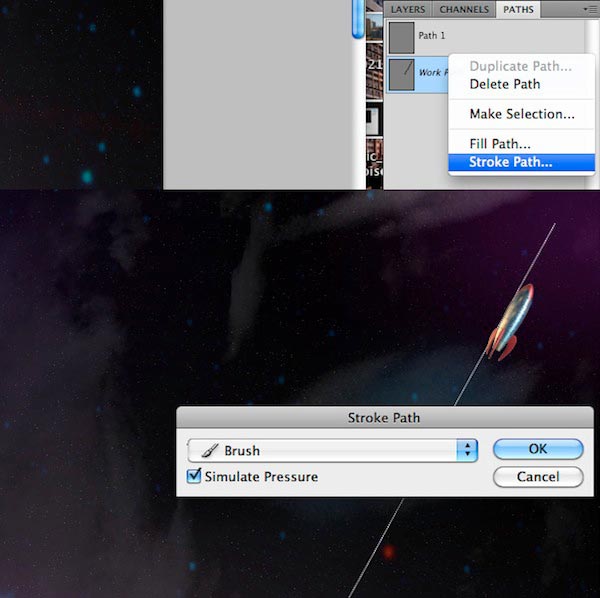
In the Paths Panel, right-click on the path and then select Stroke Path. Select the Simulate Pressure option and then just press OK to apply the stroke.
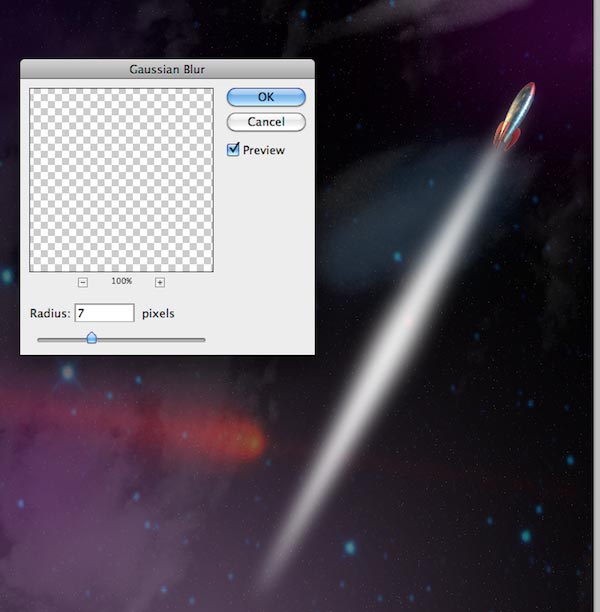
Soften the rocket stream by applying the Gaussian Blur filter on its layer; set the Radius option of the blur to 7px. Also, you might want to adjust the rocket stream’s position a bit with the Move Tool (V).
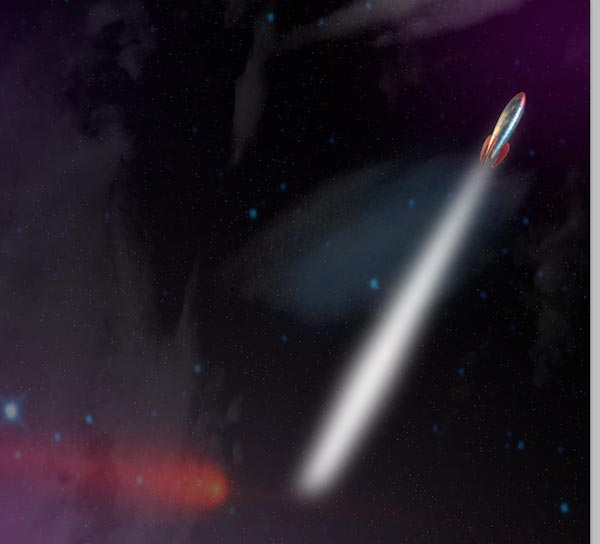
I think the rocket stream is too long.
It might detract the viewer from the other parts of our piece. Let’s erase the bottom half of the stream (starting from the thickest part) using the Eraser Tool (E).
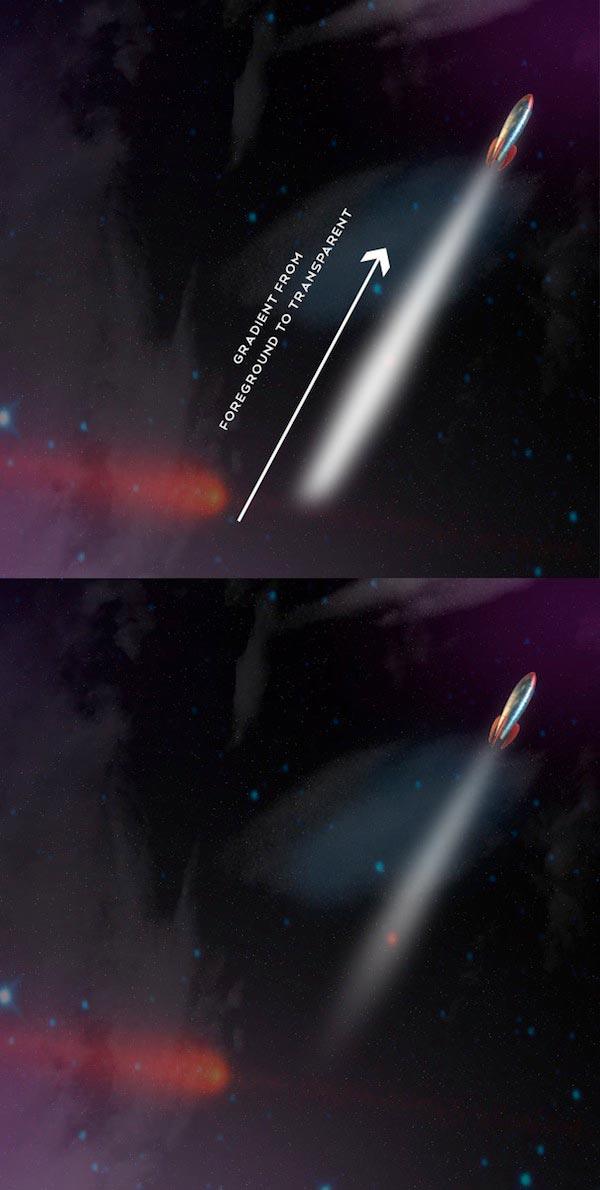
Now go to Layer > Layer Mask > Reveal All to apply a layer mask to the rocket stream. Set the Foreground Color to black (#000000), choose the Gradient Tool (G), select the Foreground to Transparent preset in the Gradient Editor, and then draw some gradients to soften the bottom edge of the rocket trail (shown in white).
When you are done with that, lower the Opacity of the layer to 60%.
Step 7: Make Rays of Light
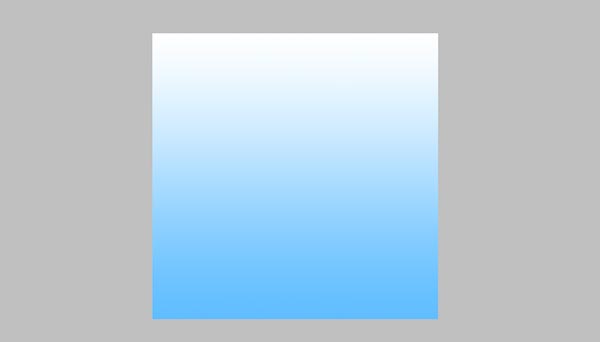
Create a new Photoshop document with a canvas size of 300x300px.
Set the Foreground Color to white (#ffffff) and the Background Color to a light blue (#60beff). With your Gradient Tool (G), fill the Background layer by creating a color gradient such that the Foreground Color (white) is at the top and the Background Color (blue) is at the bottom.
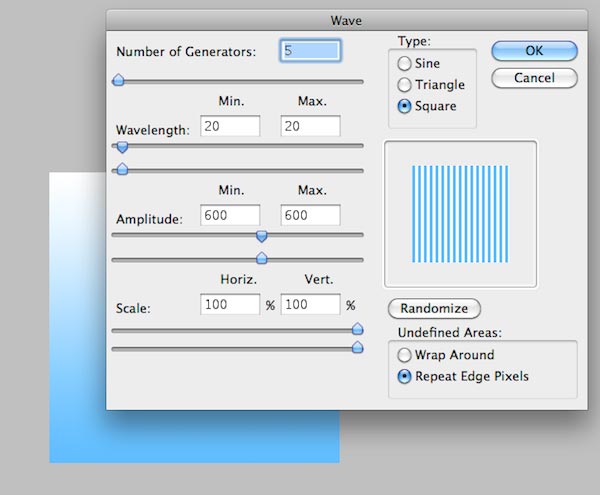
Go to Filter > Distort > Wave to create vertical bands.
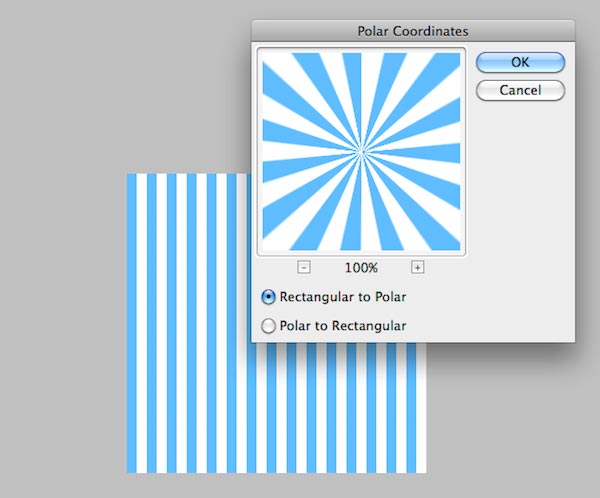
Choose Filter > Distort > Polar Coordinates to create a sunburst effect.
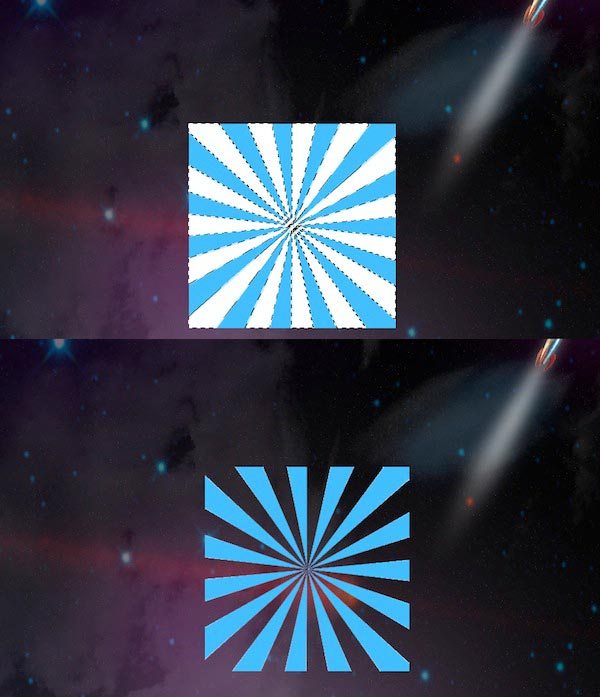
Place the sunburst into our design somewhere below the rocket stream. Don’t close the 300x300px sunburst Photoshop document yet because we will use it again later (save it if you must).
Back in our main document, remove the white areas of the sunburst.
You can use the Magic Wand Tool (W) to select the white areas and then just press delete to remove them.
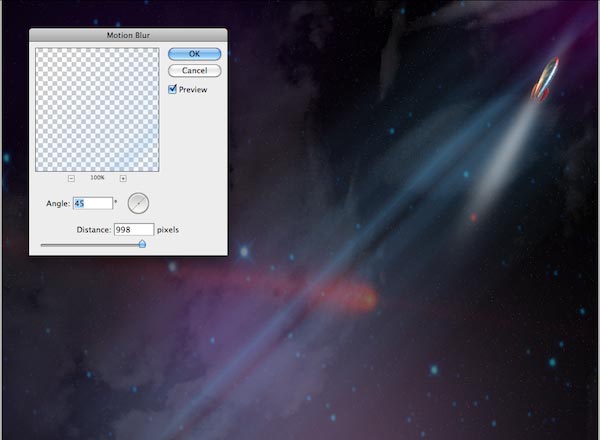
Apply the Motion Blur filter (Filter > Blur > Motion Blur); apply it heavily by using a large Distance value (998px).
Use Free Transform (Cmd/Ctrl + T) to rotate the rays the light. Use the Move Tool (V) to position it at a good location.
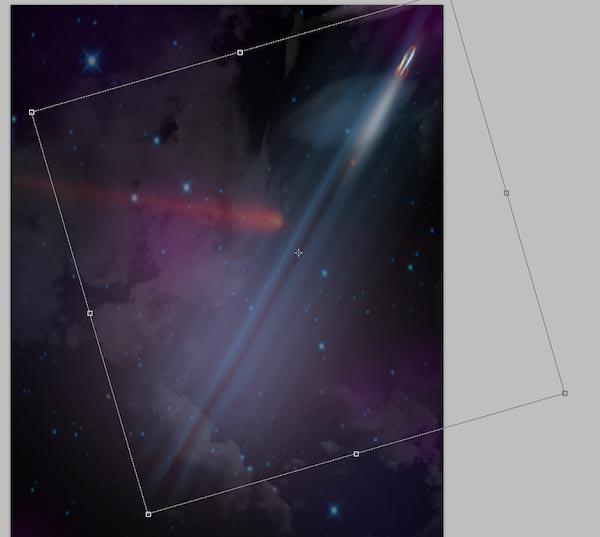
Lower the Opacity of the “light rays” layer to 50%.
Time to do a bit of organization with our layers again. In the Layers Panel, select the rocket layer, the rocket stream layer and the “light rays” layer, then group them into a layer group (call the group something descriptive, such as “Rocket”).
Step 8: Adding Earth into the Scene
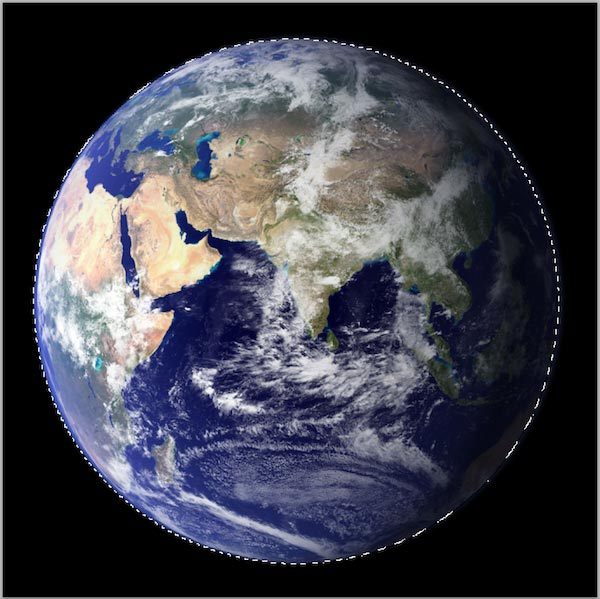
Download the Earth image mentioned in the Tutorial Resources section and then open it in Photoshop.
With the Elliptical Marquee Tool (M), make a selection around earth, copy it (Cmd/Ctrl + C) and then paste it (Cmd/Ctrl + V) into our design.
Convert the earth layer to a smart object by right-clicking on its layer and then picking Convert to Smart Object in the menu that appears.
We want to convert the layer to a smart object so that we can perform transformations (such as scaling, rotation, skewing, distorting, perspective transforms, warping, and so forth) nondestructively. In other words, we can make changes without changing the original layer or quality. This is a good practice to follow to make your work as flexible and editable as possible.
Now resize the earth smart object (make it smaller) using Free Transform (Cmd/Ctrl + T).
Apply the Gaussian Blur filter with a Radius of 0.8px on the earth layer.
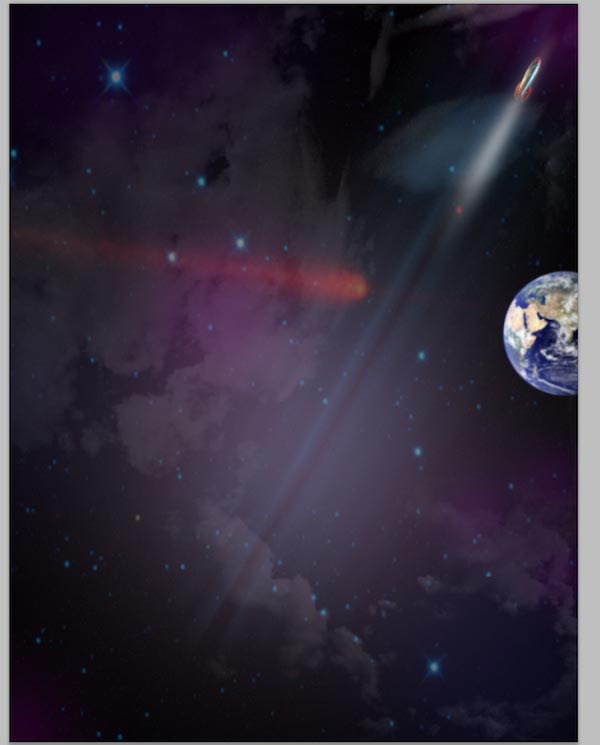
Use the Move Tool (V) to position our earth somewhere below the rocket (shown in the image below).
Open the Layer Style dialog window by double-clicking on the earth layer. Add an Outer Glow and Inner Glow layer effect (use the images below as references for the settings of each effect).

Cmd/Ctrl + click on the thumbnail of earth layer to put a selection around it. Create a new layer and, on this new layer, fill the selection with black.
Move the black circle towards the right, leaving just a portion of earth visible.
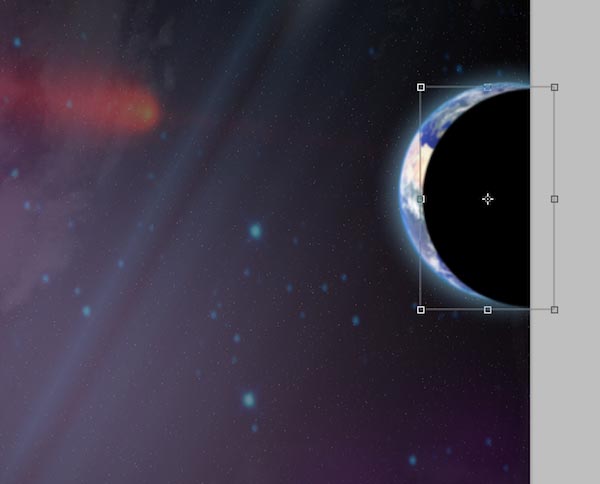
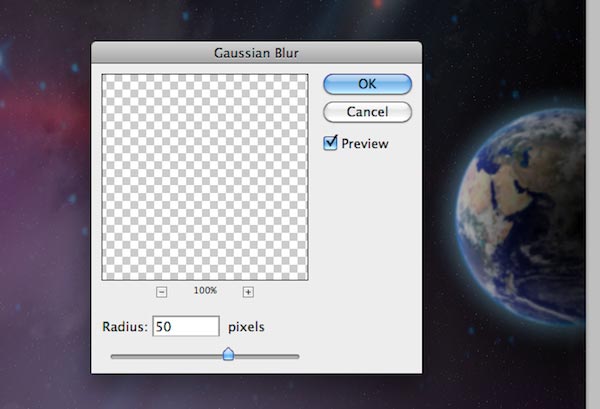
Apply the Gaussian Blur filter with Radius at 50px on the black circle layer. You can see that this technique gives our earth a nice shading effect, which in turn gives our work aspects of realism and accuracy.
Create a new layer below the earth layer. Using a soft white brush to make 2 spots over the lighter side of the earth.
Lower the Opacity of this layer to 70%. This small bit of detail adds a nice touch to our piece.
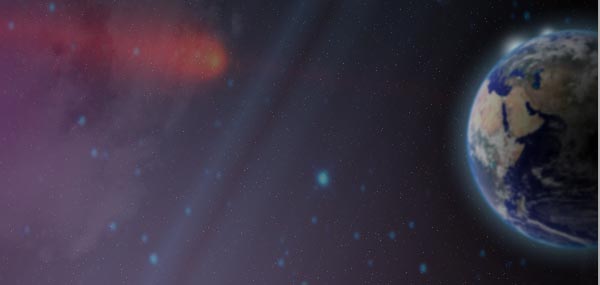
Again, group the layers associated with the earth by selecting the layers in the Layers Panel and then placing them in a layer group (Cmd/Ctrl + G). You could call this layer group “Earth.”
Step 9: Add the Moon
Download and open the image of the Earth’s Moon (listed in the Tutorial Resources section).
Like in the previous step, make a selection around the moon with Elliptical Marquee Tool (M), then copy and paste it into our scene.
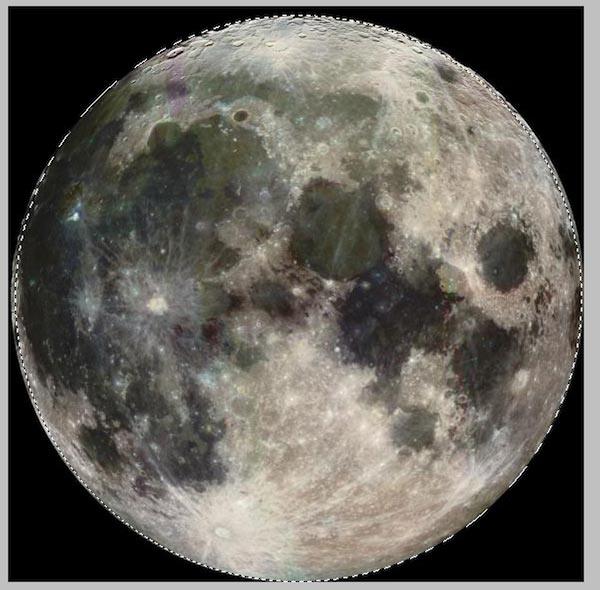
Place our moon somewhere in the lower left corner of the canvas.
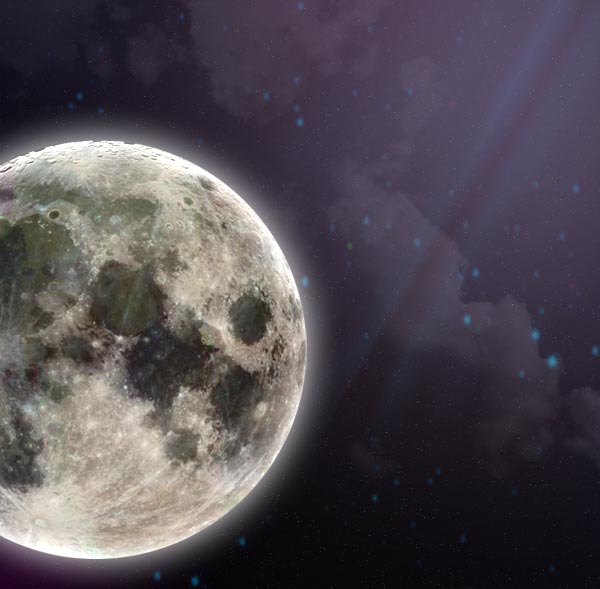
Give the layer an Outer Glow and Inner Glow layer style (see the following image for the settings).

Here is a close-up of the moon to make sure that we are all in the right track:
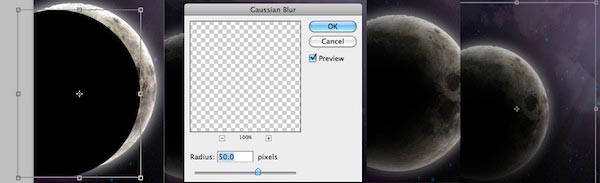
Using the method described previously, create a shadow over the moon — but this time, scale up the size of the shadow to make the effect darker and heavier.
We’re done with the moon graphic, so let us place its associated layers in a layer group that we can call “Moon”.
Step 10: Place the Airplane into the Scene
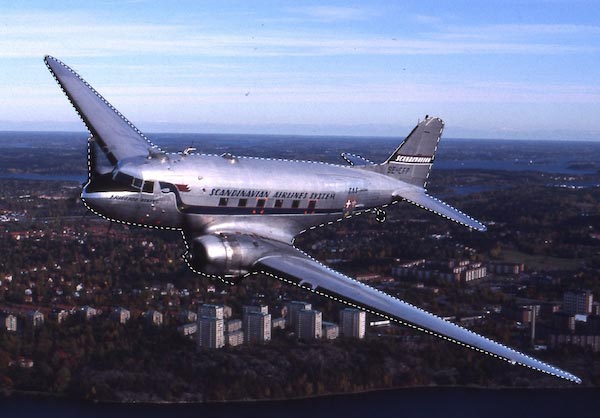
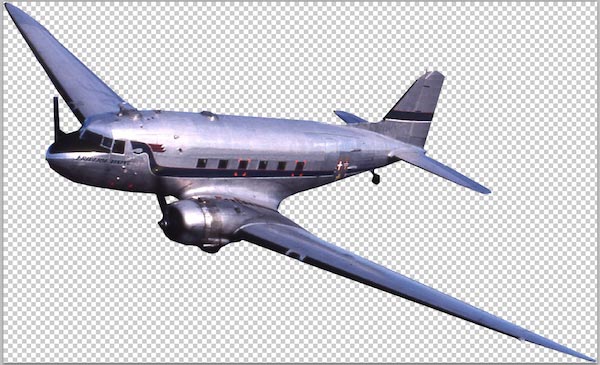
Grab this awesome photo of a Douglas_DC-3 (sourced from Wikimedia Commons, a nifty resource for us designers). Open up the image in Photoshop and carefully clip out the plane from its background by using the Pen Tool (P) to draw around it. In the Paths Panel, right-click on the path you drew with the Pen Tool and then choose Make Selection.
To be completely sure that we are only selecting the plane without its background, go to Select > Modify > Contract and contract our selection by 1px. Copy and paste object in new document so that we can process it further before placing it into our design.
The plane is a major element in our composition, so we will invest some time in tweaking it.
Let’s make some changes to the airplane. First, remove some text from the plane’s body by zooming into the image closely (800%).
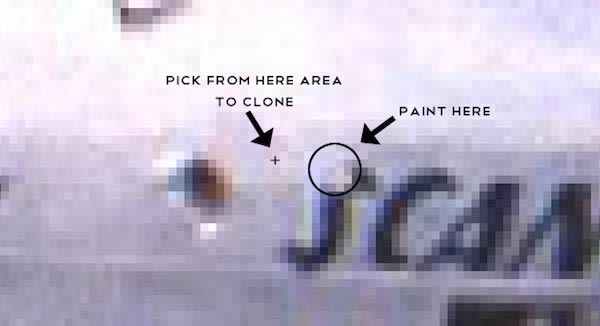
Next, choose the Clone Stamp Tool (S), set the Master Diameter of the tool to 4px in the Options bar, press down Option/Alt and sample an area to clone from.
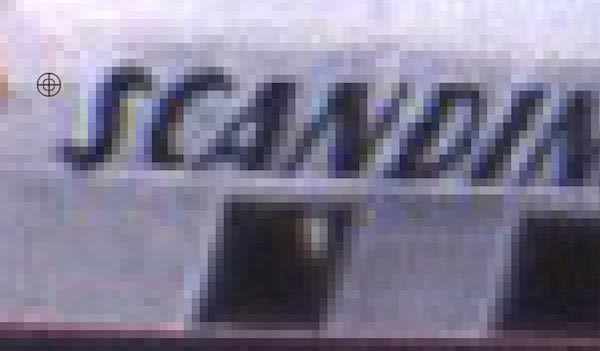
Start painting over the letters very carefully to remove them. Take your time with this. To get a good result with this process, you should frequently sample areas to clone from and you should paint in small increments.
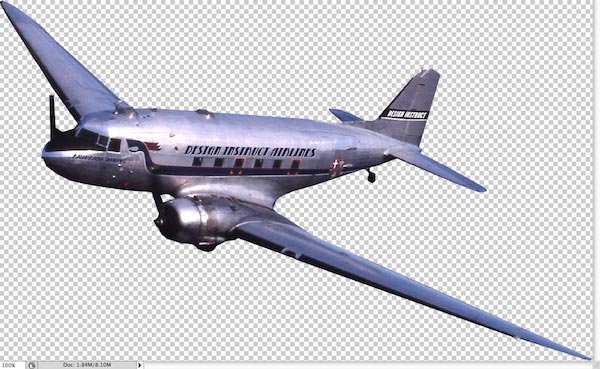
Here’s our text removed:
We will replace the text with our own brand of planes.
For the font, I’ve used the free Betty Noir font (feel free to use a font of your choosing). Select the Horizontal Type Tool (T) from the Tools Panel and then type “Design Instruct Airlines”. Use various transform commands (Edit > Transform …) to rotate and adjust the perspective of the text to match the airplane’s body.
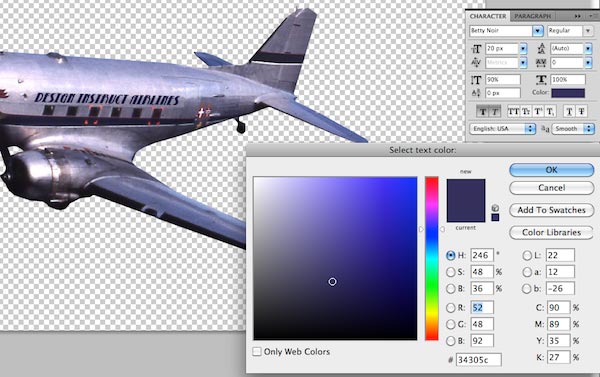
Duplicate the text layer, change the color of font to a faint pink color (#d3c7d3), move the duplicate below the original text layer, and move it 1px down and 1px to the right using the Move Tool (V) and your arrow keys. This creates a subtle outline effect.

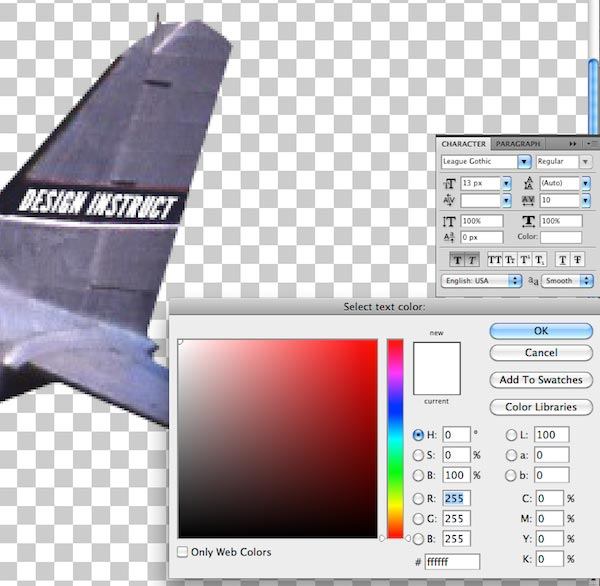
Now we will add some text to the tail of the plane. Download and install the free League Gothic font (featured in this Design Instruct font collection).
Using the Horizontal Type Tool, type “Design Instruct”. Adjust the angle of the text using Edit > Transform > Rotate.
Select all layers and merge them into one layer (Cmd/Ctrl + E).
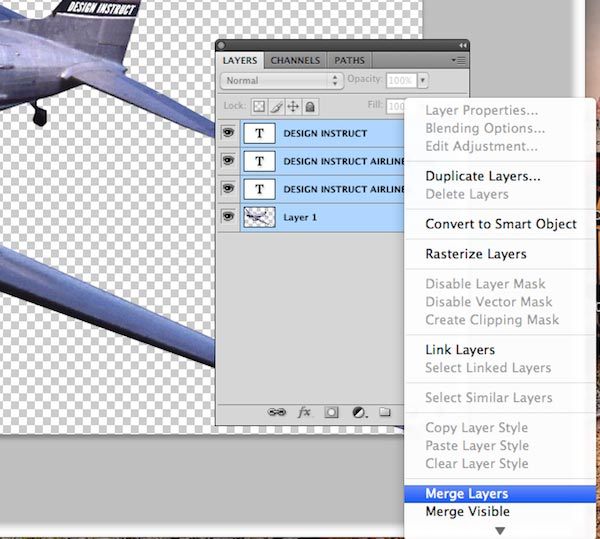
Cmd/Ctrl + click on thumbnail of the image to make a selection around it, then copy and paste the airplane in our design.
Convert the airplane layer to a smart object so we can perform nondestructive transforms on it. Namely, we will want to scale and modify the plane’s perspective.
First, adjust size of the airplane.
Then go to Edit > Transform > Perspective to make changes to the airplane’s perspective so that it matches our composition.

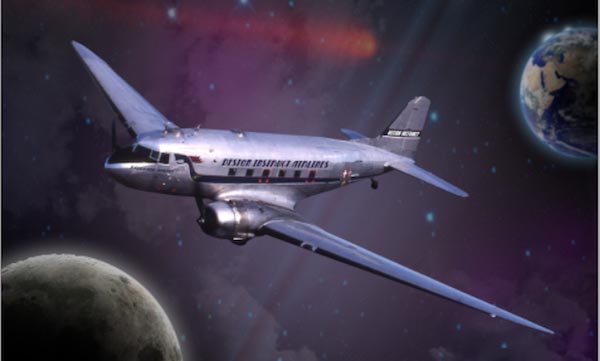
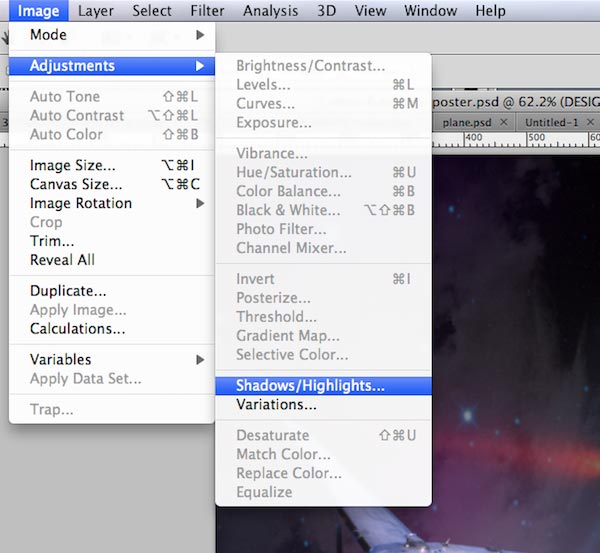
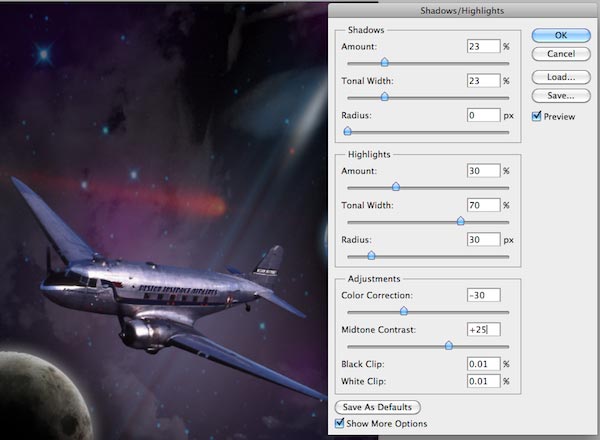
Go to Image > Adjustments > Shadows/Highlights to make tweaks in our shadows and highlights. Since our plane is a smart object, we can apply shadows and highlights without the fear of not being able to revert back to our original work (which we spent some time on modifying).
Below are the settings I used for the Shadows/Highlights adjustment:
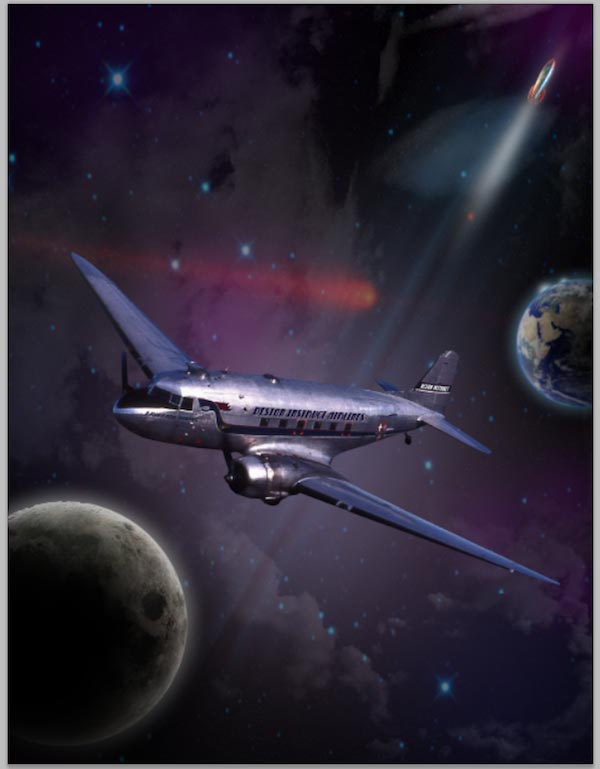
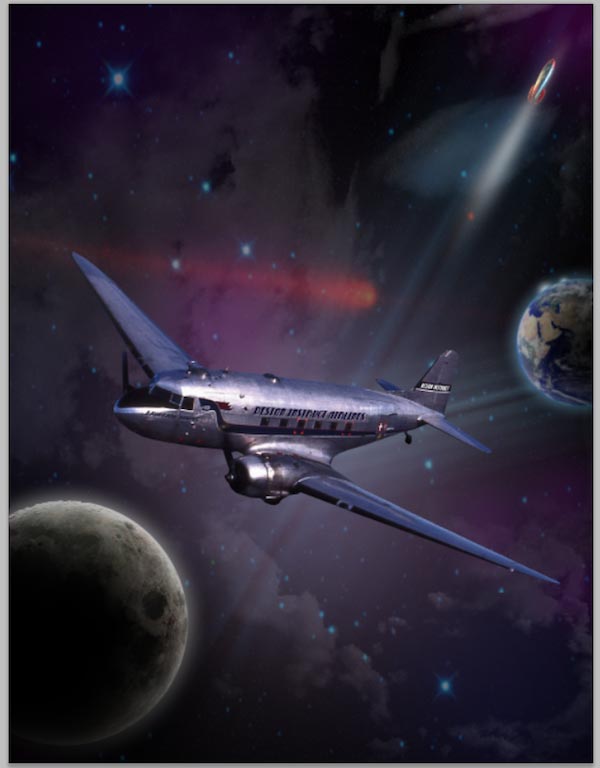
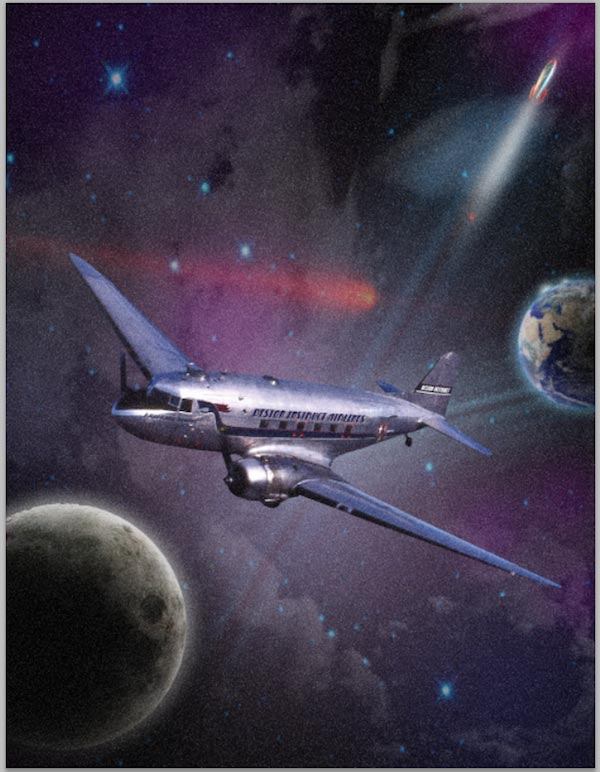
Here is the preview of where we are now:
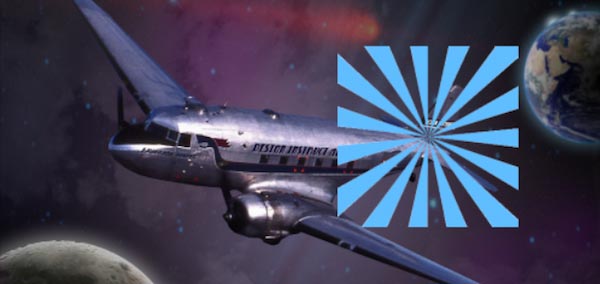
Step 11: Create the Airplane’s Trail
To create the airplane’s trail, repeat the process from Step 7. Use the same starburst we created earlier (that was why we didn’t close the 300x300px document). Place the sunburst into our composition, above airplane layer. Make sure to remove the white rays again using the Magic Wand Tool (W).
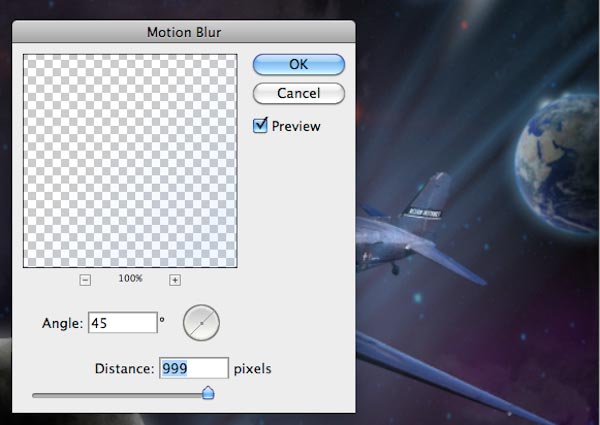
Apply the Motion Blur filter heavily with Distance set at 999px.
Scale down the stream and rotate it using Free Transform (Cmd/Ctrl + T).
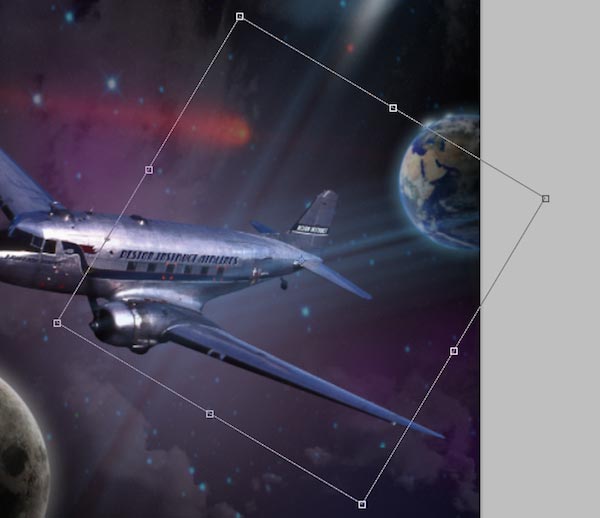
Change the layer’s Blend Mode to Linear Dodge (Add) and lower the Opacity to 70%.
Then move this layer below the Earth layer group so that it sits behind the airplane and our earth.
Step 12: Reproducing “Old Print” Texturing
Press Cmd/Ctrl + A to Select All, then go to Edit > Copy Merged (Shift + Cmd/Ctrl + C). Paste the result into a new layer, then go to Filter > Noise > Add Noise and enter 20% for the Amount.
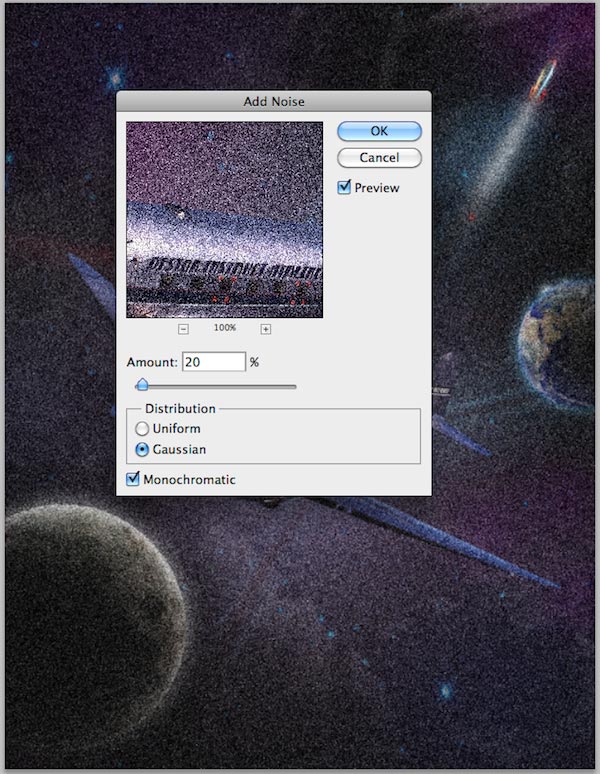
Change the layer’s Blend Mode to Screen and Opacity to 50%.
Step 13: Add Text to the Composition
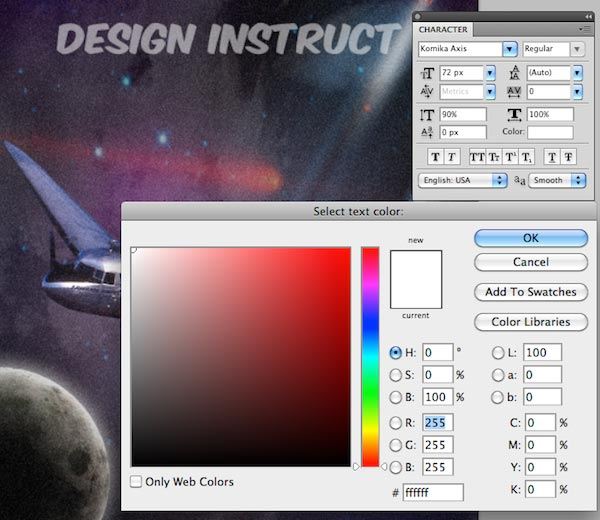
Download and install the Komika Axis font — our most prominent display font in the piece. With Horizontal Type Tool (T), type “Design Instruct”. Set the text layer’s Blend Mode to Screen and reduce the Opacity to 50%.
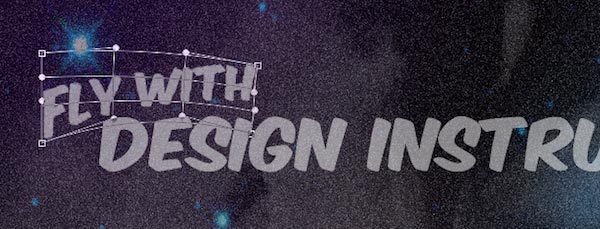
Next type “Fly With” using the same font. Set this text layer’s Blend Mode to Screen and Opacity to 50% too.
Let’s modify the “Fly With” text a bit. We will need to rasterize it first by right-clicking on the text layer in the Layers Panel and choosing Rasterize Type from the menu.

Rotate the “Fly With” text a little bit with Free Transform (Cmd/Ctrl + T).

Go to Edit > Transform > Warp and give the “Fly With” text a bit of a bend to make it look more interesting.
Step 14: Adding a Vintage-Futuristic Logo
Next, we will use an element from a previous Design Instruct tutorial by Jack Rugile called Make a Stylish Futuristic Textured Wallpaper in Photoshop.
You can download the PSD by clicking here. Open up the PSD in Photoshop.
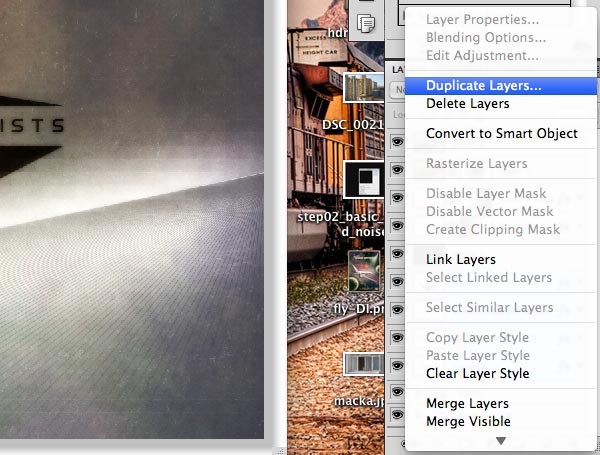
We will duplicate several layers from this PSD into our design. First, in the Layers Panel, select the following layers:
- Layer 1
- DESIGN INSTRUCT (text layer)
- A Web Magazine for Designers and Digital Artists (text layer)
- Shape 1
Next, right-click in the Layers Panel and choose Duplicate Layers. This will present you with a dialog window. Under Destination, there is a dropdown menu for the Document option.
Find the name of our document in the dropdown menu and choose it. This process should replicate the layers we selected into our own PSD.
Switch back to our design. Select the new layers we inserted in the Layers Panel, right-click to display the contextual menu, and then choose Merge Layers (Cmd/Ctrl + E) to combine all the layers into one.
Convert the resulting layer into a smart object (right-click, select Convert to Smart Object). Use Free Transform (Cmd/Ctrl + T) to rescale the logo down to an appropriate size.
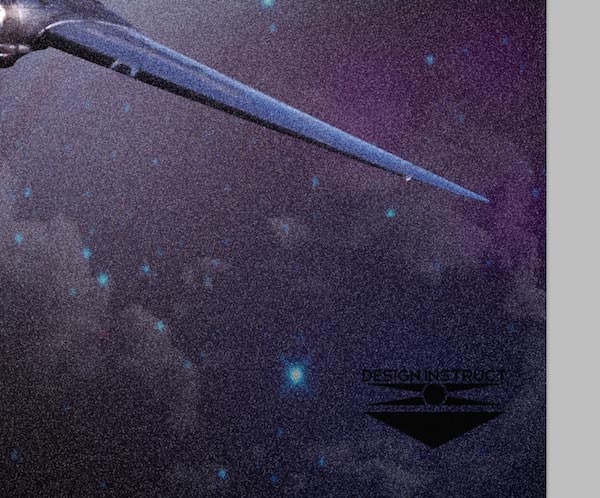
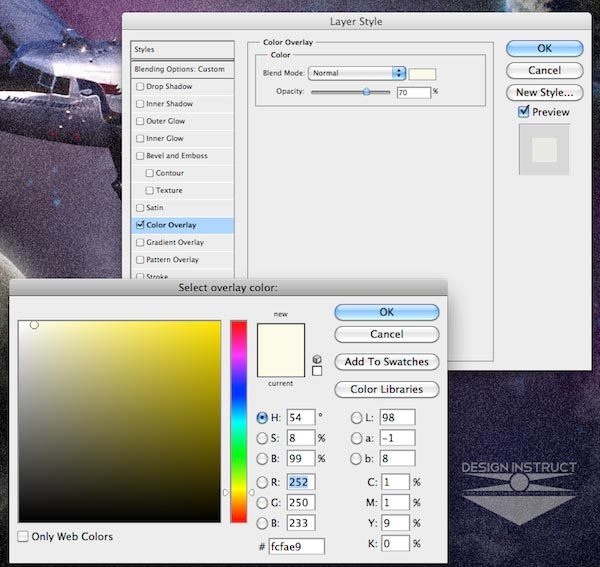
Use a layer style to give the logo a white Color Overlay.
Set the logo layer’s Blend Mode to Screen and turn down the Opacity to 60%.
Let us add more text to our poster design. Download and install Telegraphico.
Use the Horizontal Type Tool (T) to place some text on the left of the logo using the Telegraphico font.
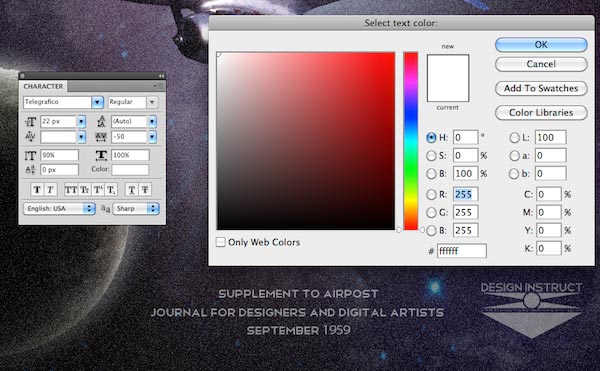
Change the text layer’s Blend Mode to Screen and Opacity to 50%.
Step 15: Adding Scratches to the Surface
So that we may bolster the idea of the vintage theme in the scene, we will distress the design a bit. In this step, we will add some scratches to the surface that will add to the aged and worn aesthetics we are trying to achieve. First, download and install the splendid CD Scratch brush pack.
Create new layer, set the Foreground Color to white (#ffffff), pick up Brush Tool (B) and choose one of the CD Scratch brushes.
Set the Master Diameter of the Brush Tool to something big (1557px) so that it will span the entire canvas.
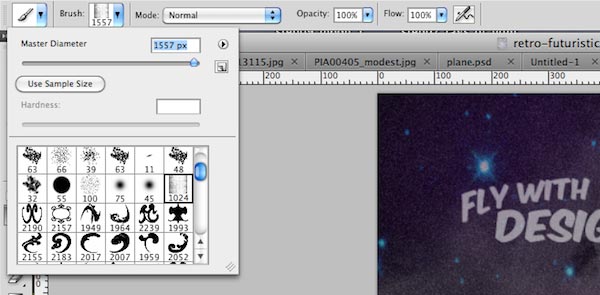
On the new layer, paint once with the brush. Afterwards, lower the Opacity of the layer to 15%.
Step 16: Creating a Border with a Layer Mask
We will use another nondestructive technique for placing a border in our work. First, select all layer groups and layers in the Layers Panel.
Place them into a layer group (Cmd/Ctrl + G) that you can name “poster design”. Using the Rectangular Marquee Tool (M), make a selection that is slightly smaller than the canvas.
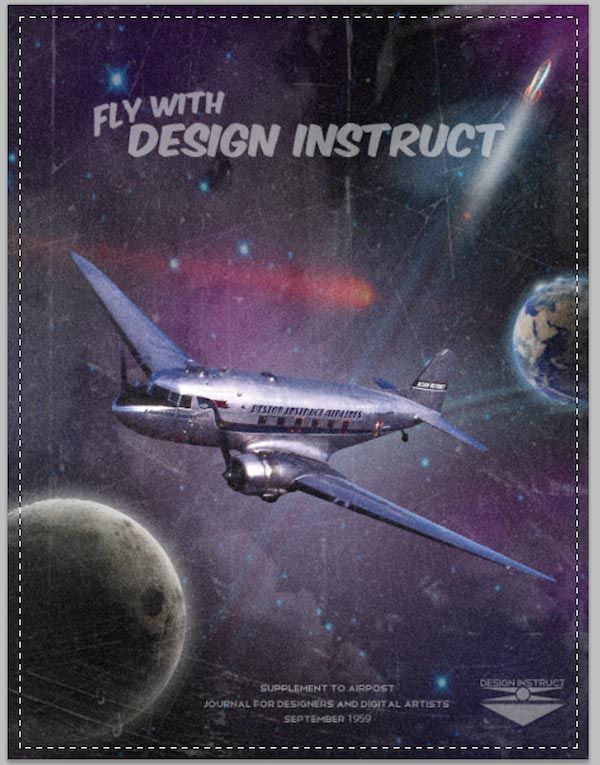
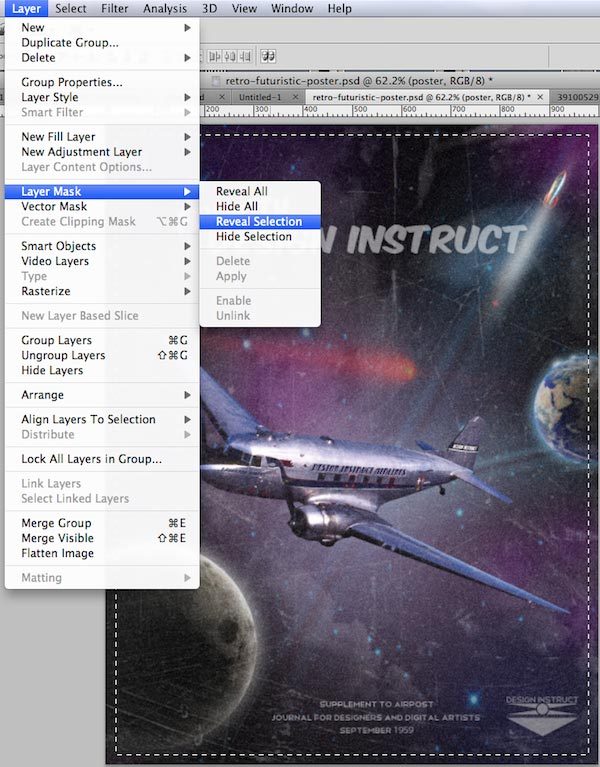
With the “poster design” layer group selected, go to Layer > Layer Mask > Reveal Selection.
Step 17: Adding a Paper Texture to Background
Download and open this Handmade Paper stock image. Extract the paper from its background by using the Magic Wand Tool (W) to select the white color in its background and then inverting the selection by choosing Select > Inverse (Shift + Cmd/Ctrl + I).
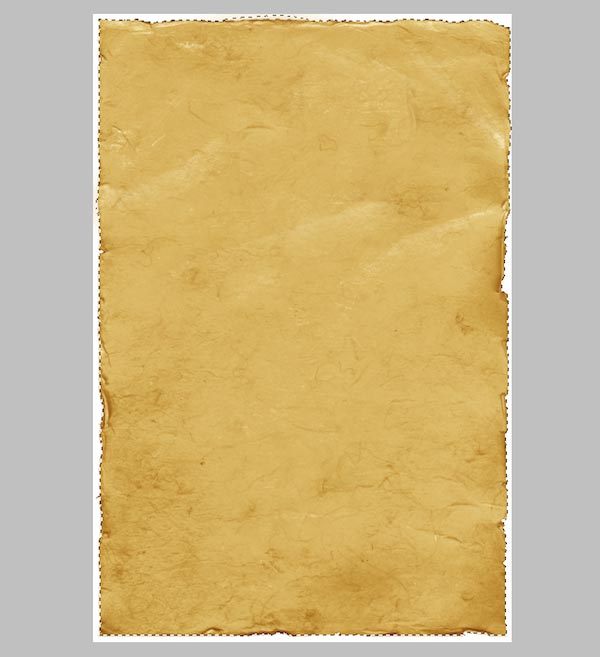
Copy the paper and paste it into our design. Scale it up to fit our canvas (make it a bit bigger) with Free Transform (Cmd/Ctrl + T).
Desaturate the paper (Image > Adjustments > Desaturate) to remove its colors.
Since we scaled it up, we should sharpen the paper’s resolution a little bit — do so by going to Filter > Sharpen.
Move the paper layer below the “poster design” layer group.
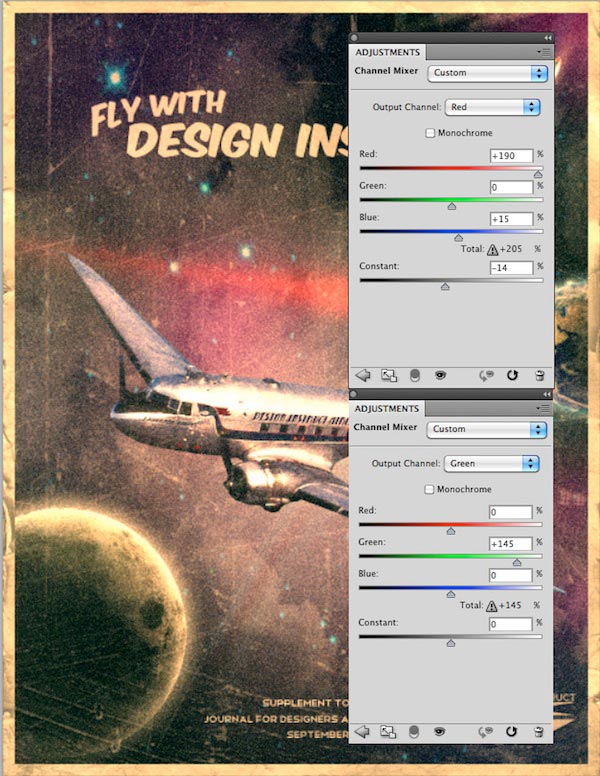
Step 18: Final Vintage Enhancement with Channel Mixer
This is the last step in the tutorial.
We will use an adjustment layer to give our entire composition the color theme we are going for. First, let us go to Layer > New Adjustment Layer > Channel Mixer to add an adjustment layer above all the other layers.
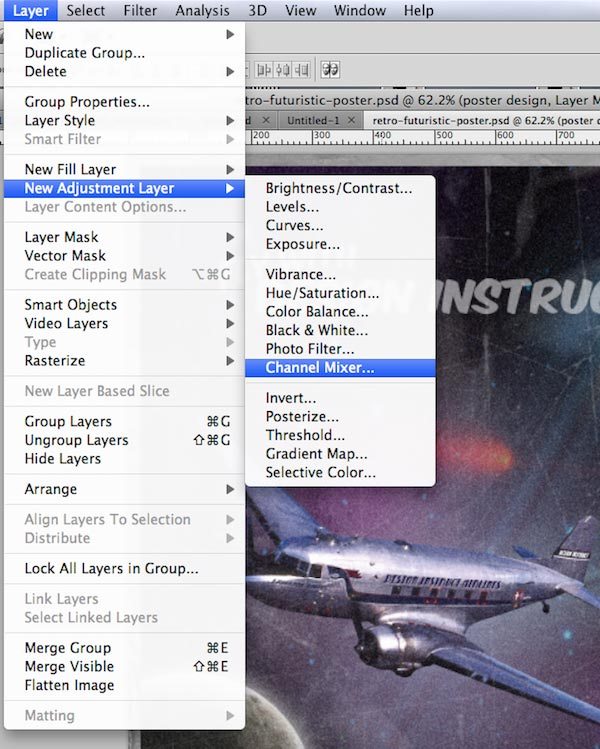
The Channel Mixer adjustment layer is a great way to manipulate the colors in your design. Adjust the Red and Green values to give our design a faded vintage feel.
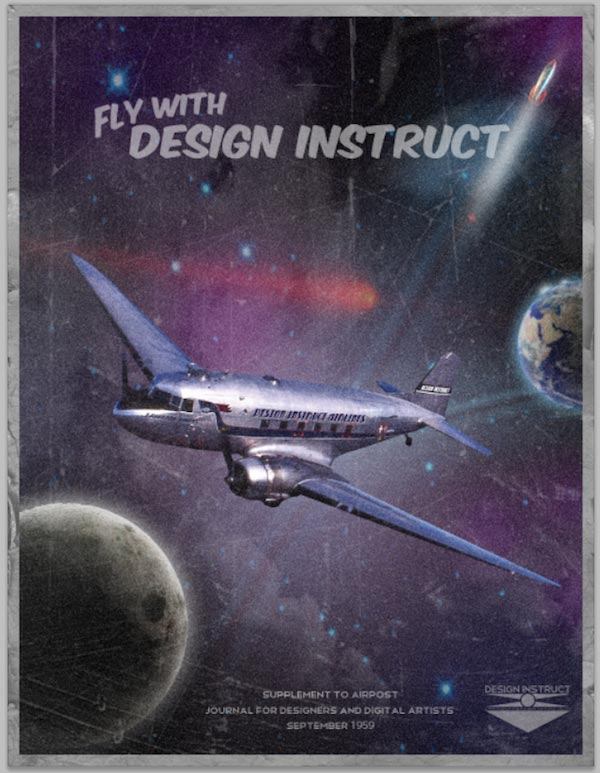
Tutorial Summary
That’s it — our poster design is now finished!
In this tutorial, we utilized stock photos, textures, blending modes, smart object, filters, brushes and layer styles to achieve the final design. You discovered plenty of graphic design techniques including creating a star-filled backdrop with the Noise filter, creating nebulas using cloud textures, rocket and airplane streams, shading techniques (for the planets), and we also discussed best practices for creating modifications nondestructively.
I encourage you to experiment with different photos, textures and fonts to create your own unique vintage-themed designs. I hope you have enjoyed this tutorial and thanks for reading it!
Download Source Files
- surreal_vintage_poster (ZIP, 20.30 MB)
-
 Trevin serves as the VP of Marketing at WebFX. He has worked on over 450 marketing campaigns and has been building websites for over 25 years. His work has been featured by Search Engine Land, USA Today, Fast Company and Inc.
 -

WebFX is a full-service marketing agency with 1,100+ client reviews and a 4.9-star rating on Clutch! Find out how our expert team and revenue-accelerating tech can drive results for you! Learn more
Make estimating web design costs easy
Website design costs can be tricky to nail down. Get an instant estimate for a custom web design with our free website design cost calculator!
Try Our Free Web Design Cost Calculator
Table of Contents
- Preview
- Tutorial Resources
- Step 1: Setting Up the Document
- Step 2: Create a Star Field for the Background
- Step 3: Creating the First Nebula
- Step 4: Add More Nebulas
- Step 5: Brighten Up the Scene
- Step 6: Add the Vintage Rocket
- Step 7: Make Rays of Light
- Step 8: Adding Earth into the Scene
- Step 9: Add the Moon
- Step 10: Place the Airplane into the Scene
- Step 11: Create the Airplane’s Trail
- Step 12: Reproducing “Old Print” Texturing
- Step 13: Add Text to the Composition
- Step 14: Adding a Vintage-Futuristic Logo
- Step 15: Adding Scratches to the Surface
- Step 16: Creating a Border with a Layer Mask
- Step 17: Adding a Paper Texture to Background
- Step 18: Final Vintage Enhancement with Channel Mixer
- Tutorial Summary
- Download Source Files
Share this article


Web Design Calculator
Use our free tool to get a free, instant quote in under 60 seconds.
View Web Design CalculatorMake estimating web design costs easy
Website design costs can be tricky to nail down. Get an instant estimate for a custom web design with our free website design cost calculator!
Try Our Free Web Design Cost Calculator


