- Home
- Blog
- Web Design How to Quickly Get Started with Git
How to Quickly Get Started with Git
-
 11 min. read
-
 William Craig
 CEO & Co-Founder
- President of WebFX. Bill has over 25 years of experience in the Internet marketing industry specializing in SEO, UX, information architecture, marketing automation and more. William’s background in scientific computing and education from Shippensburg and MIT provided the foundation for MarketingCloudFX and other key research and development projects at WebFX.
 A basic understanding of version control has become a necessity for everyone working with code, no matter if you’re a software developer, a web designer, or even a graphics designer who has to work with developers in a team. Apart from the have-to-know aspect, however, there are also a number of reasons why you should want to use a version control system (VCS).
Why You Want to Use a Version Control System
Version control makes collaboration in a team easier. Without a version control system, everybody on the team is probably working on the same shared set of files.
It’s only a matter of time until someone overwrites someone else’s changes. Also, a VCS takes care of combining changes from different people into one common version. In version control nomenclature, this is called merging.
As a result, working on the same files simultaneously becomes safe and easy. But even when you’re working on your own, a VCS still has plenty of benefits. For example, version control makes storing and restoring versions of your project a lot easier.
Without a VCS, you’re probably saving versions of your files and folders using your own adventurous naming scheme, resulting in a horrifically unmanageable number of files and folders with file names like website-relaunch-homepage_2013-10-11_v3_JenniferSmith.html. With a VCS in place, you only have a single project folder on your disk. All other versions and variants are safely stored in your version control system’s database, neatly described, and ready to be restored any time you want them. Last but not least, one of the best aspects about using a VCS is that it serves as documentation, and also helps promote the act of documentation. Since each major change is wrapped in a commit (more about this term later), and each commit is described with a message, you can very easily follow along and understand the incremental changes in a project.
This becomes even more useful when problems arise and you have to find out where they originated.
Why You Should Use Git
A ton of version control systems are available on the market, each with their own pros and cons. However, there are many reasons why you should choose Git. Git, for one, is arguably the most popular open source version control system out there right now.
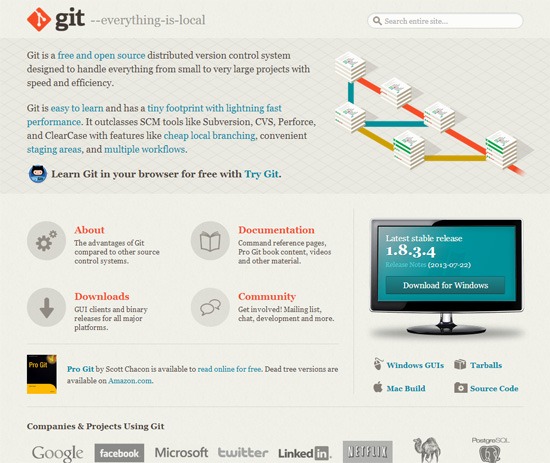 As a decentralized version control system, Git offers:
- Incredible speed
- The ability to work offline
- The advantage of having a complete copy (including the project’s history) on your machine
Another big advantage of Git is its superior branching management. Although other version control systems also know the concept of branches, Git was really built around it, and thus it provides a super-fast and easy branching experience. Once understood, making use of this concept can really take code quality to another level. Other concepts, like the Staging Area or the Stash, also contribute to making Git a very useful part of your coding tool belt.
When choosing any tool, you should also keep another factor in mind: Popularity. A tool without adoption in the market, without a community, is most often badly documented, can’t be integrated with other systems, and is not sure to survive in the long run. Git has already arrived in the mainstream.
With projects like the Linux kernel, Ruby on Rails, jQuery, and many other major open source projects, as well as big companies (such as Google, Facebook, and Twitter) using it, both of Git’s quality and its longevity are proven.
Install Git
Installing Git has become incredibly easy in recent times (lucky you!). There are one-click installers for both Mac and Windows. To follow along with this guide, please install Git on your computer first.
Also, having our free Git cheat sheet handy will be useful before we begin delving into Git. With the Git cheat sheet, you don’t have to remember all the Git commands by heart, and it will allow you to deviate from this guide and explore Git on your own. 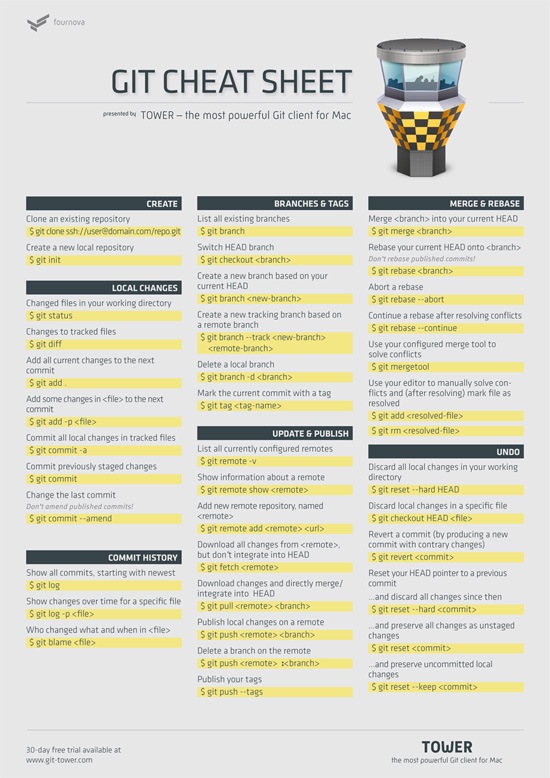 After completing the Git installation, it’s time to fire up your command line.
Two basic configurations should be made before you get started: Your name and your email. To set your name and email, issue the two following Git commands, but modify them so that you’re using your own name and your own email address:
$ git config --global user.name "Your Name"
$ git config --global user.email "[email protected]"
Start Using Git with Your First Repository
There are two ways to start working on a project with version control: cloning an existing repository and creating a new repository.
Cloning an Existing Repository
When you’re getting on board of a project that’s already running with a version control system, you were probably provided with a URL to the project’s repository on a remote server.
What’s a repository? A repository is just a fancy term for a project’s set of files and folders. For example, check out jQuery’s repository on GitHub: 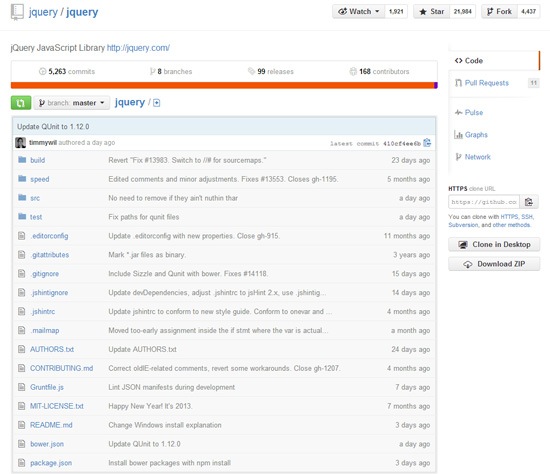 To get a copy of a project’s repository on your local computer, use the
 git clone command, like this:
$ git clone https://github.com/gittower/git-crash-course.git
The command above will download the respective repository located at https://github.com/gittower/git-crash-course.git to your computer. Note: If you don’t have a repository, feel free to clone from the above Git command example and fiddle with the test repository that it contains.
You can also browse through open source projects on GitHub, find a repository that’s interesting to you, and then clone it to your computer.
Creating a New Repository
The other possibility to getting started with version control is when you already have an existing project that is currently not under version control yet. Navigate into the project’s root folder with the command line, and then use the git init command to start versioning this project:
$ git init
Verifying the Presence the .git Folder
You might be wondering where Git stores all the data about your repository.
In both scenarios that I talked about — cloning an existing repository or creating a new repository — you should now have a hidden folder inside your project’s root folder. That folder is your local Git repository, and that folder’s name is .git. You can verify this by issuing the ls Unix command like this:
ls -la
Knowing that this folder exists is more than enough.
You should not touch anything inside this magical folder.
Working on Your Files
When working on your project’s files, you’ll have a great deal of peace of mind, and it will help liberate your creative and experimental thinking. You don’t have to be fearful any longer about making changes to your files: modify, delete, add, copy, rename, or move them using whatever application you prefer (such as your favorite editor, a file browser, etc.).
Git will allow you to undo changes when necessary, and it won’t affect anyone else working on the same file.
Making Commits
It’s only when you feel you’ve reached a noteworthy state that you have to mind version control again. At this point, when you have reached a good stage in your work, it’s time to wrap up your changes in a commit. A commit just means submitting the changes you’ve made to your files, to your repository.
Get an Overview of the Changes You’ve Made
My recommendation and a good practice: As the first step to making a commit, give yourself an overview of what you’ve changed.
You can easily see an overview of your changes with the git status command:
$ git status
After issuing a git status command, Git will list all changes since you last committed, grouped into various categories. Here’s our working example output after issuing the git status command: 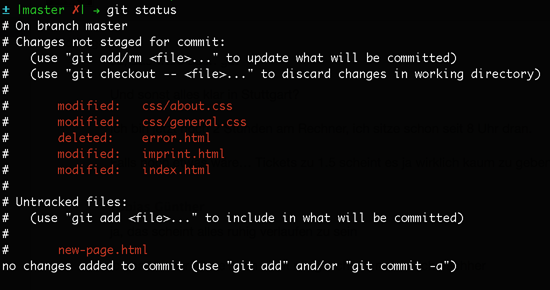 You might be unfamiliar with a couple of terms in the working example output above:
- Untracked files: Git calls files untracked when they aren’t yet under version control. In most cases, these are simply the new files you’ve created before committing to your repository.
- Staged/Unstaged files: Just because a file was modified doesn’t mean it’s automatically included in the next commit. To include changes in a commit, you explicitly need to tell Git to include them. This is a major difference that Git has compared to other version control systems; and a major advantage, at the same time, because it allows you to compose a commit very precisely with only related changes.
Changes that were marked for the next commit are called staged, while changes that should simply be left as local modifications are called unstaged.
Preparing to Commit
Now is the time to mark the changes you want to wrap up in the next commit. In Git lingo, this process means you’re staging your changes. How do you stage your changes?
- Use the
git addcommand for modified and untracked files. - Use the
git rmto confirm the deletion of a file. - In cases where you want to stage all of your changes you can use the
git add -Acommand.
From our working example above, here’s how you would stage the index.html file (which was modified), the new-page.html file (which is untracked), and the two modified files in the css folder:
$ git add index.html new-page.html css/*
Here’s the command confirming that you’d like to delete the error.html file:
$ git rm error.html
If you look at the output of the git status command from our working example above, you’ll see that, additionally, the imprint.html file was modified. I deliberately didn’t stage it with the git add command, because I want to leave it for a later commit.
Review Before the Commit
Again, I suggest taking a look at what git status tells you before finally making the commit.
Here’s the output of our working example now, after I’ve staged the files I want to commit: 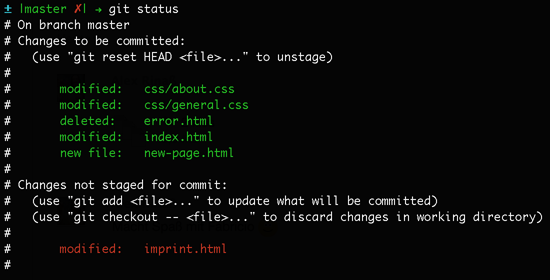 The Changes to be committed paragraph informs you about what you just staged.
Make the Commit
To save this set of changes in a commit, you only have to use the git commit command with a good, descriptive message that tells you and others what the commit is about, right after the -m option, like this:
$ git commit -m "Implement the new login box"
Inspecting the Commit History
If you want to see what happened in the project so far, you can get an overview with the git log command:
$ git log
This Git command lists all recorded commits in chronological order. 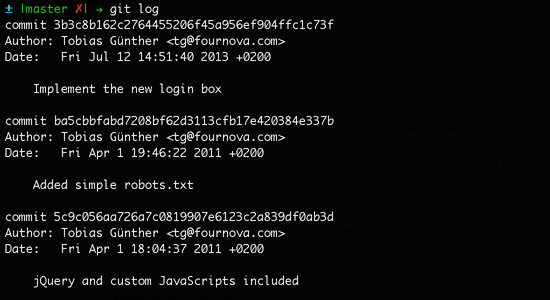
Your Next Steps to Git Mastery
Congratulations!
By now, you’ve already grasped the most important concepts of version control and Git. To get your Git knowledge to the next level, I suggest the following steps.
Try a Git GUI
A lot of tasks can be performed easier and more comfortably using a desktop client application, let alone not having to memorize all of the commands and parameters.
Windows users might want to have a look at Tortoise Git, while Mac OS users can give Tower a try, the Git desktop client my team and I have created to make Git easier to use. 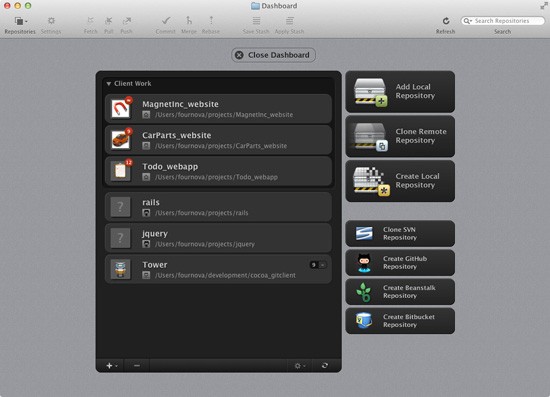
Git Learning Resources
In recent years, the amount of documentation, tutorials, and articles on Git has increased a ton. Read these resources to become better at using Git:
- Compilation of Git learning resources (books, articles, tutorials)
- Git – the Simple Guide
- Pro Git e-book (free)
- Version Control with Git: Powerful tools and techniques for collaborative software development (Amazon.com)
- Git Pocket Guide (Amazon.com)
Conclusion
Version control has become an integral part in the modern developer’s workflow. While version control used to be a chore in the past, systems like Git not only makes version control dead-simple, but also provides a lot of other workflow benefits.
Related Content
-
 President of WebFX. Bill has over 25 years of experience in the Internet marketing industry specializing in SEO, UX, information architecture, marketing automation and more. William’s background in scientific computing and education from Shippensburg and MIT provided the foundation for MarketingCloudFX and other key research and development projects at WebFX.
 -

WebFX is a full-service marketing agency with 1,100+ client reviews and a 4.9-star rating on Clutch! Find out how our expert team and revenue-accelerating tech can drive results for you! Learn more
Make estimating web design costs easy
Website design costs can be tricky to nail down. Get an instant estimate for a custom web design with our free website design cost calculator!
Try Our Free Web Design Cost Calculator


Web Design Calculator
Use our free tool to get a free, instant quote in under 60 seconds.
View Web Design CalculatorMake estimating web design costs easy
Website design costs can be tricky to nail down. Get an instant estimate for a custom web design with our free website design cost calculator!
Try Our Free Web Design Cost Calculator


