

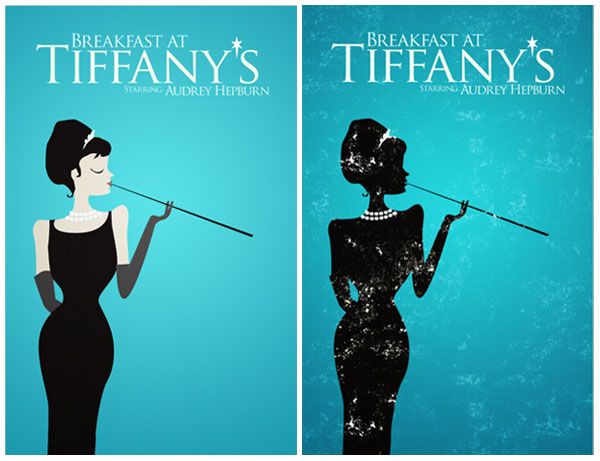
Preview
Tutorial Resources
- Textures: Elemental Grunge Texture Pack by Jerry Jones (ShadowHouse Creations)
Step 1: Document Setup
We will be using Photoshop for this tutorial, so go ahead and fire it up. Go to File > New (Cmd/Ctrl + N) to create a new document. Set the new document to an 11×17″ canvas.
I have this set up in RGB color mode, but if I were thinking of using this for print, I would save out to CYMK color mode for color printing. 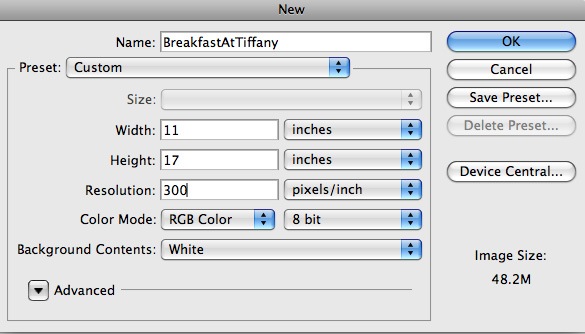
Step 2: Creating the Silhouette
Since we are creating a silhouette of a woman, do an image search (try Wikimedia Commons) for a full image of your desired subject. Find a photo that has the subject angled that way you want.
Perhaps you have someone — like a friend, spouse, or significant other — who is willing to pose for you! Place the photo on your canvas and resize it as needed (use Edit > Free Transform). Don’t be afraid to scale it up and lose resolution because we’re only using the shape of the subject as a reference image for tracing out the silhouette.
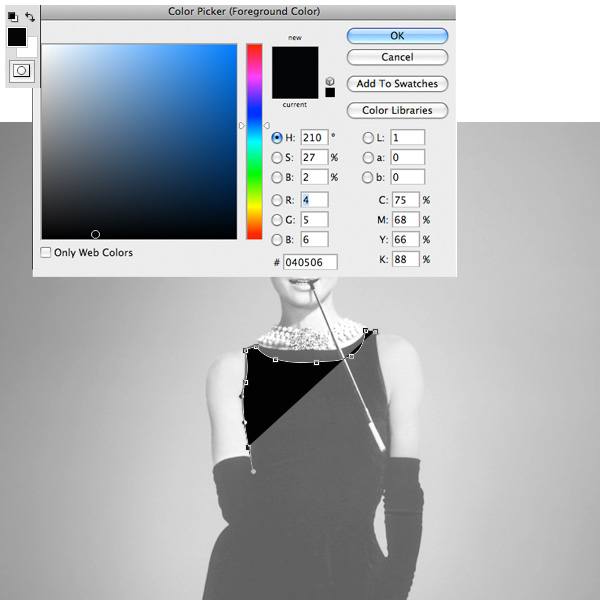
Time to start drawing! Choose the Pen Tool (P) and set it to Shape layers in the Options Bar. 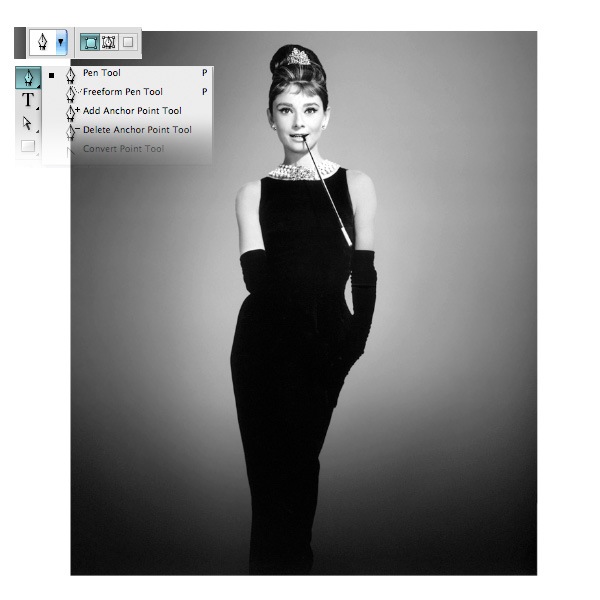 Select a Foreground Color (I used a dark gray, #040506) for the fills of your Pen Tool’s shapes.
I am going to begin with a full-color piece with separate shape layers for major portions of the subject (such as her dress, hair, etc.). Drawing modularly keeps my options open if I decide to do something different later on. It also makes the piece easier to tweak because it’s separated into smaller parts.
 I like to drag my mouse and hold down the left button of the mouse to create my curves. You can also use the Convert Point Tool (click-and-hold on the Pen Tool’s icon in the Tools Panel to the Covert Point Tool) to select the anchor points you want to make curvy. The Convert Point Tool is handy for correcting your work and making detailed adjustments to anchor points.
This is what I ended up with using the Pen Tool to create each shape layer. 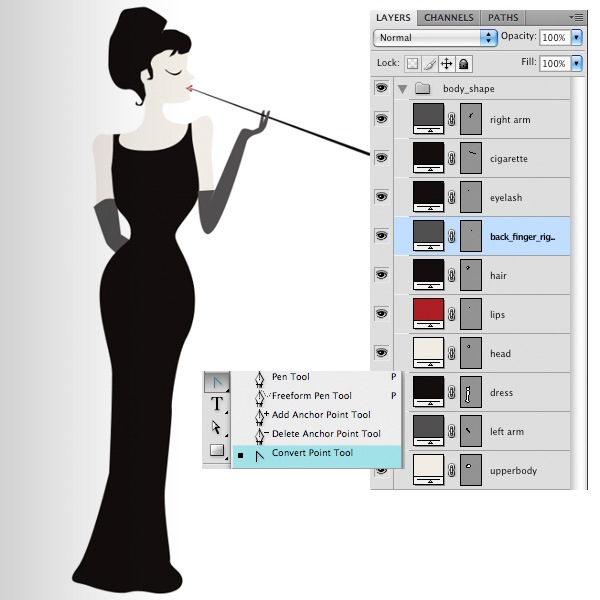
Step 3: Convert the Silhouette into a Smart Object
I like to convert my layer groups into smart objects when they are finalized so I can resize them easily and still keep the integrity of the original layers within them. I would like to underscore the importance of a non-destructive workflow so that you can always undo what you have done and prevent yourself from redoing the hours of work you have spent on your artwork.
In this case, I converted the layer group containing the shape layers of the silhouette into a smart object by right-clicking on it in the Layers Panel and choosing Convert to Smart Object in the contextual menu that appears. 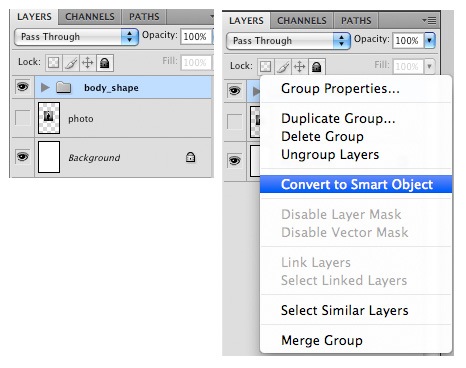
Step 4: Resize the Silhouette
Now that our silhouette is a smart object, we don’t have to worry about destroying the quality of our original shape layers. Select the smart object layer by clicking on it in the Layers Panel, then press Cmd/Ctrl + T (or go to Edit > Free Transform) and resize the image as desired.

Step 5: Create a Texture for the Silhouette
Download and unzip the Elemental Grunge Texture Pack. Open up image 5.jpg from the pack in Photoshop; we are going to use this image to add some texture to our composition. Alternatively, check out Design Instruct’s Freebies section for other texture packs (such as this one and this one).
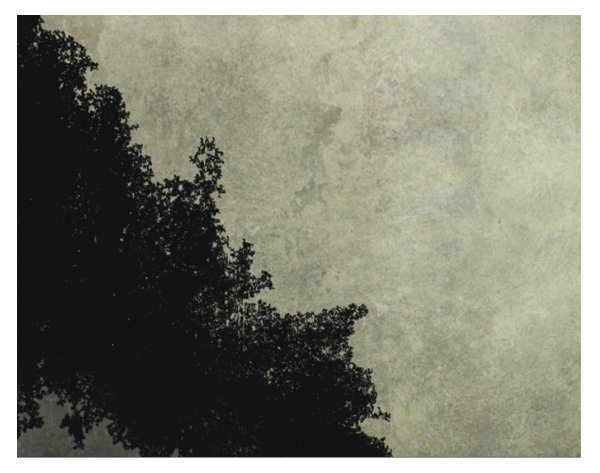
First, we need to adjust the brightness and contrast of the texture image; let’s do that by going to Image > Adjustments > Brightness/Contrast. 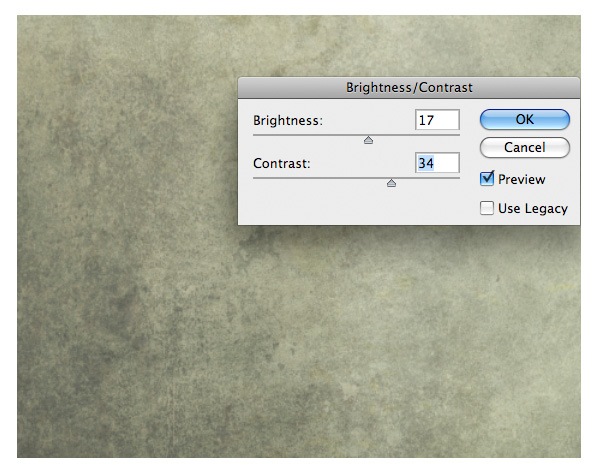 Pick black as your Foreground Color, switch to the Brush Tool (B), set it to a rough brush tip, and use it to paint on sections of the texture. This will give us some additional textures.
 Go to Image > Adjustments > Brightness/Contrast and adjust the settings to remove the original background color. You may have to repeat this adjustment several times until you get a rich, black contrast.
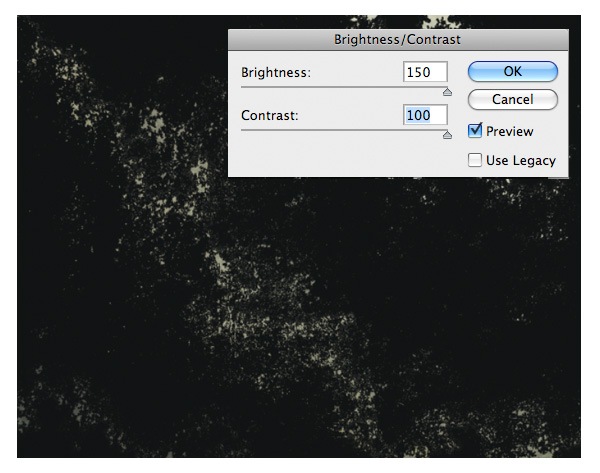
Step 6: Apply the Texture to the Silhouette
Place the texture image into our main document.
Resize the texture image using Free Transform (Cmd/Ctrl + T) so that it covers the figure. 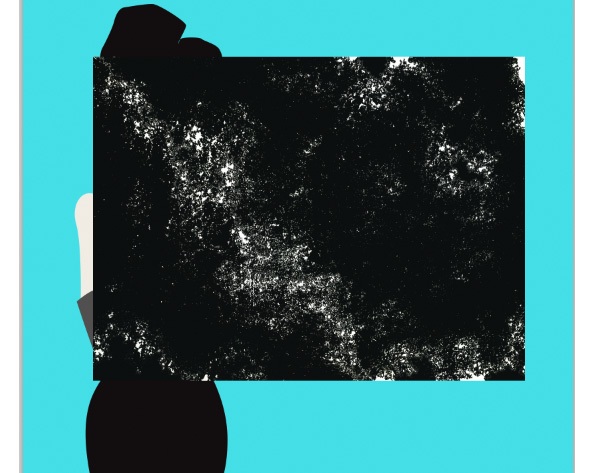 Next, load a selection around the body shape by first clicking on the smart object in the Layers Panel to make it the active layer, and then going to Select > Load Selection (or hold down Cmd/Ctrl and left-click on the smart object’s thumbnail).
 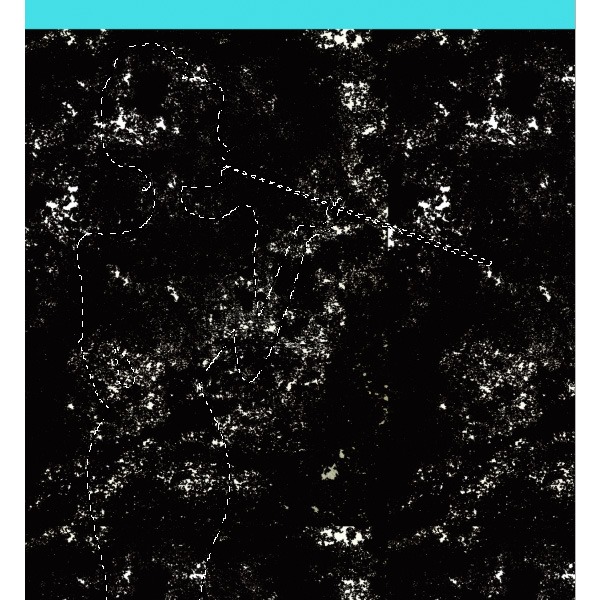 Click on the texture layer in the Layers Panel to make it the active layer.
Copy (Cmd/Ctrl + C) and paste (Cmd/Ctrl + V) from the texture layer, which will result in a new layer above it with just the shape of the body of our subject. You can toggle off the visibility of the texture layer temporarily to see the result. 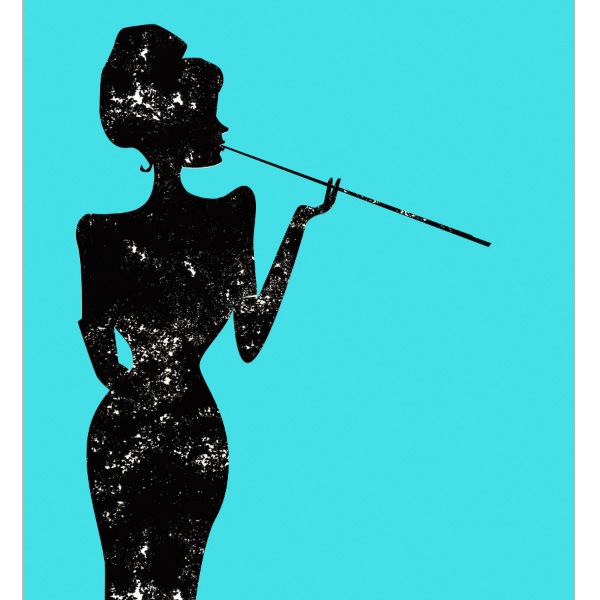
Step 7: Creating a Background Texture Effect
Duplicate your texture layer from the previous step.
On the duplicate layer, go to Image > Adjustments > Hue/Saturation (Cmd/Ctrl + U). Bring up the Lightness to +36 so the texture is more gray. Next, go to Image > Adjustments > Selective Color.
Sample a white color in your canvas. Move the Cyan, Magenta and Yellow option sliders to -20 and move the Black to +96. This will result in sort of a two-tone gray. I find it easier to manipulate hues over gray colors later on as my composition progresses. Tip: If you have Adobe Photoshop CS3 or above, just go to the bottom of your Layers Panel and click on Create new fill layer or adjustment layer and add a Hue/Saturation adjustment layer and Selective Color adjustment layer.
This will give you more control over your options, and has the added advantage of you being able to easily remove and tweak the adjustment layers later on. 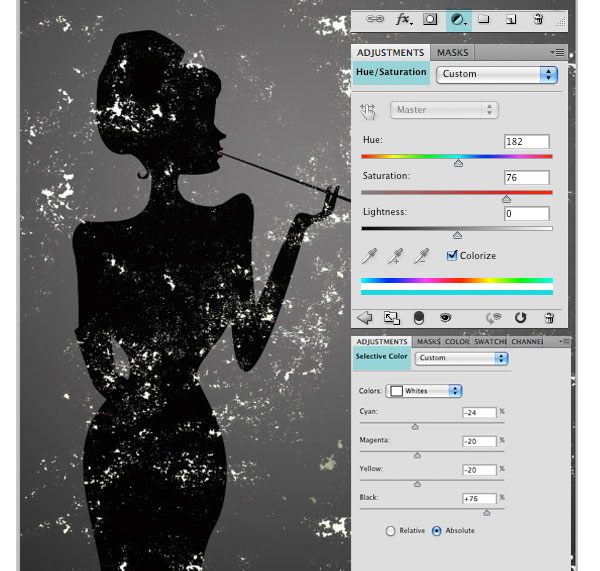 To add the blue color to the background, first go to Image > Adjustments > Hue/Saturation. In the dialog window, check the Colorize option, then set the Hue to about 182 and the Saturation to 76. Adjust the gray texture layer’s Opacity to 80%.
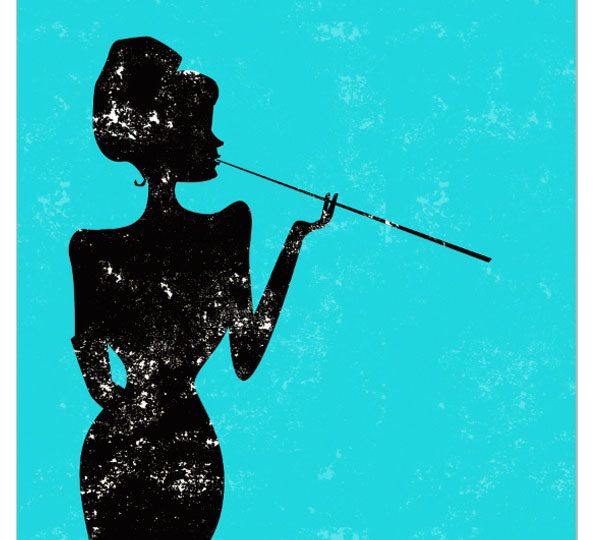
Step 8: Add a Radial Glow to the Background
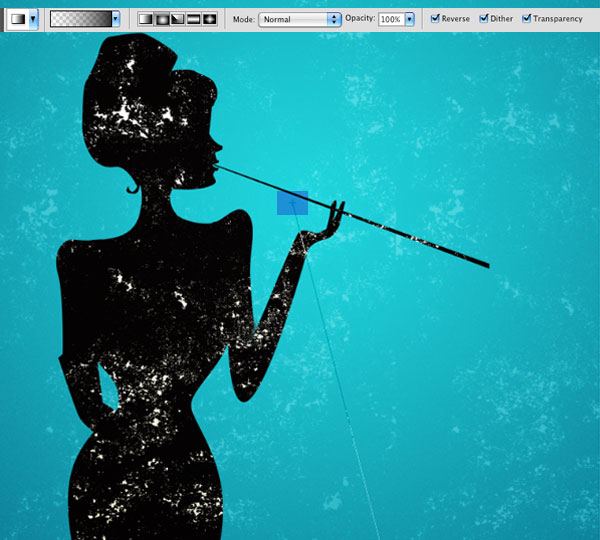
Pick a gray color for your Foreground Color, switch to the Gradient Tool (G) and, in the Options Bar, pick the Radial Gradient option, check the Reverse option, and choose the Foreground to Transparent gradient preset (which will mean gray to transparent, in this instance) for the gradient. Start in the center of the canvas and drag out your gradient to make the radial glow in a new layer, then set the layer’s Blend Mode to Color Burn and the Opacity to 80%.
Step 9: Creating Jewelry
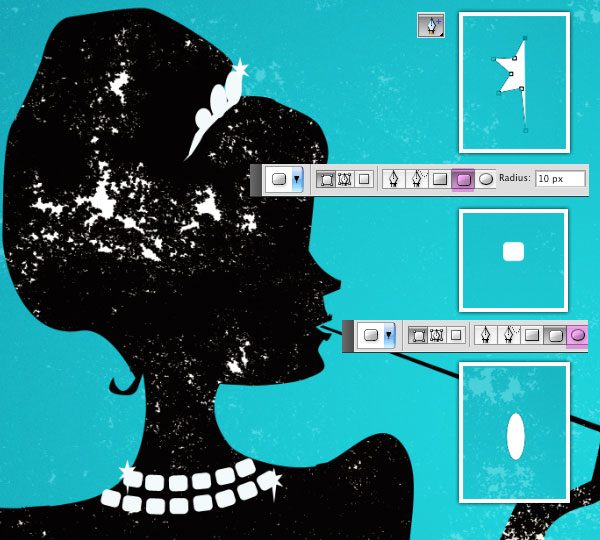
Let’s make some jewelry. First, set your Foreground Color to white. For the necklace: Choose the Rounded Rectangle Tool, and in the Options Bar, make sure it’s set to Shape layer and that its Radius is at 10px.
Draw a small rounded rectangle by her neck. Duplicate, move, and transform the duplicate shape layers to make the necklace. For the crown: Use the Ellipse Tool to draw small vertical ellipses that represent the points sticking up on a crown.
For the stars that make it appear as though her jewelry is sparkling: Use the Pen Tool (P) to make the left half of the star, duplicate it, and go to Edit > Transform > Flip Horizontal. Merge the two layers to form a complete star. Duplicate the star layer as many times as you need, resize the duplicates, and move them in appropriate places.
Step 10: Create a Vertical Line Pattern Layer
As a final step, to add another dimension to our piece, we will create a pattern layer. To start, we’ll need to create a custom Photoshop pattern. First, create a new Photoshop document (Cmd/Ctrl + N) that has a 5x10px canvas.
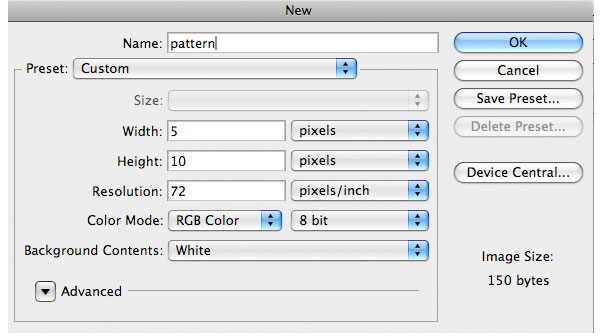 In the new document, make a 1px black line in the center. Go to Edit > Define Pattern, name your pattern something you’ll remember, and press OK to save the pattern.
 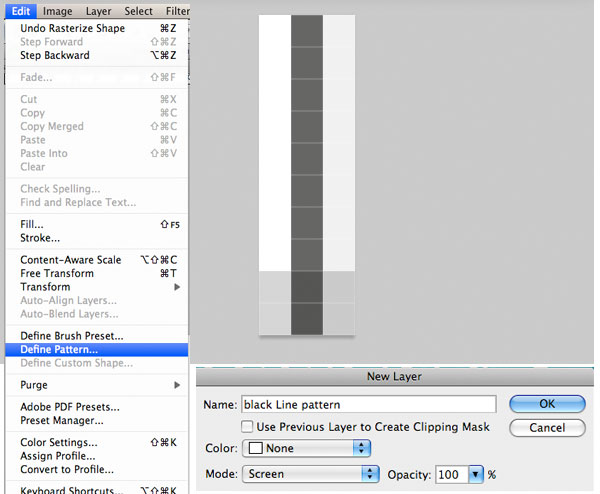 Now switch back to our main document and then go to Layer > New Fill Layer > Pattern.
In the Pattern Fill dialog window, select your pattern from the Pattern picker dropdown menu, and just click OK to apply our vertical line pattern. 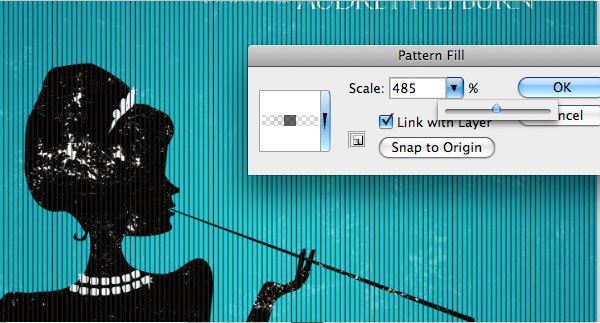 Change the pattern fill layer’s Bend Mode to Screen, and then use Free Transform (Cmd/Ctrl + T) to scale up or down as desired.
Tutorial Summary
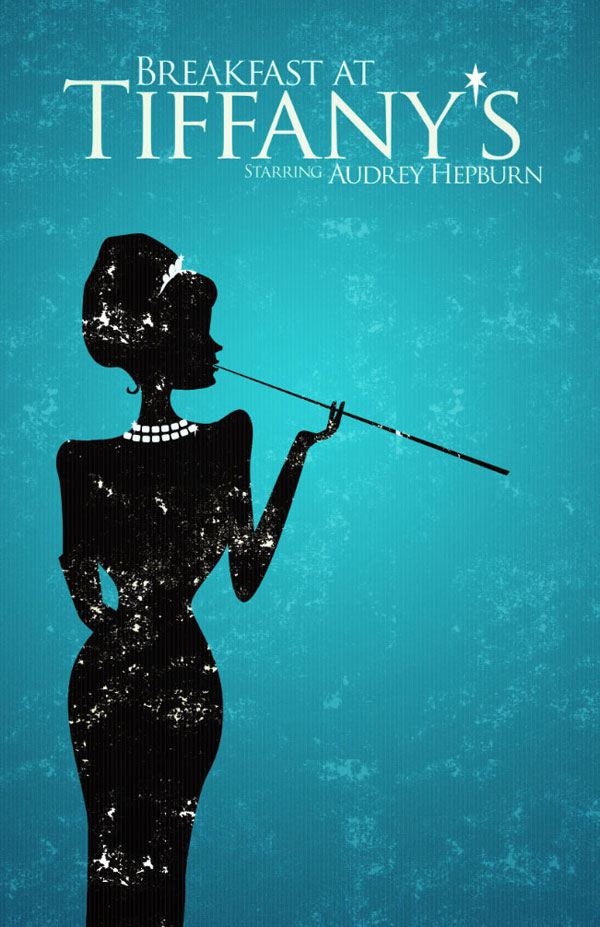
We are done!
We actually have two options for our final product, and we can achieve different looks just by toggling the visibility of certain layers. Here are the two results I came up with.
Texture Layers Off (Minimalist Look)

Texture Layers On (Textured Look)
Download Source Files
- vintage_movie_poster (ZIP, 140.00 MB)
-
 Trevin serves as the VP of Marketing at WebFX. He has worked on over 450 marketing campaigns and has been building websites for over 25 years. His work has been featured by Search Engine Land, USA Today, Fast Company and Inc.
 -

WebFX is a full-service marketing agency with 1,100+ client reviews and a 4.9-star rating on Clutch! Find out how our expert team and revenue-accelerating tech can drive results for you! Learn more
Make estimating web design costs easy
Website design costs can be tricky to nail down. Get an instant estimate for a custom web design with our free website design cost calculator!
Try Our Free Web Design Cost Calculator
Table of Contents
- Preview
- Tutorial Resources
- Step 1: Document Setup
- Step 2: Creating the Silhouette
- Step 3: Convert the Silhouette into a Smart Object
- Step 4: Resize the Silhouette
- Step 5: Create a Texture for the Silhouette
- Step 6: Apply the Texture to the Silhouette
- Step 7: Creating a Background Texture Effect
- Step 8: Add a Radial Glow to the Background
- Step 9: Creating Jewelry
- Step 10: Create a Vertical Line Pattern Layer
- Tutorial Summary
- Download Source Files
Share this article


Web Design Calculator
Use our free tool to get a free, instant quote in under 60 seconds.
View Web Design CalculatorMake estimating web design costs easy
Website design costs can be tricky to nail down. Get an instant estimate for a custom web design with our free website design cost calculator!
Try Our Free Web Design Cost Calculator


